
I finally did it. I’ve been promising to do it for years and I have, at long last, made good.
Years ago, I made a six part video slipcover series on how to make a slipcover. I tried to write posts about it and I always fumbled over the wording and the posts were confusing and long. Imagine paragraph after paragraph of “with right-sides together, insert piping between pieces of fabric and pin into place along edge of the chair blah-blah-blah-blah…” It was just way too much to try to explain in words and pictures alone, so I decided to make videos.
They were filmed in my crowded craft room, poorly lit and I know it was sometimes hard to see what I was doing. You can also hear my kiddos in the background. While those videos have their charm and I will keep the live on my YouTube channel, I wanted to make a series that was a little easier to watch and, hopefully, more concise.
In this first video, I introduce slipcovers, talk a bit about fabric, and include a tutorial on making custom piping, which is useful for many home decor sewing projects, like pillows, valances, table skirts, etc.

If you want to watch, here you go…
And, if you like to read (or want more detail than I share on the video), here you go…
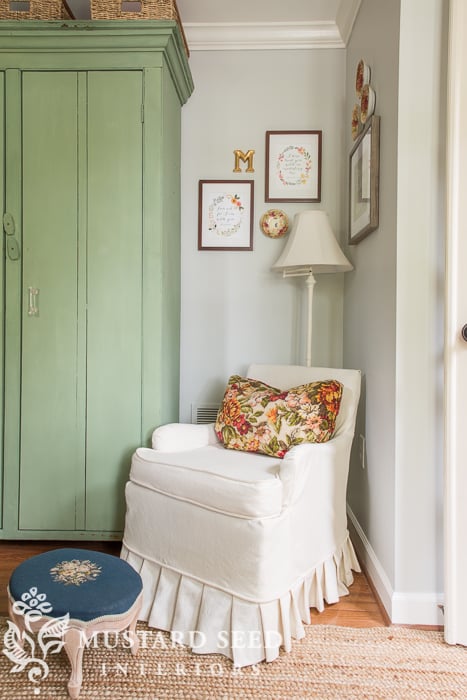
For pillows, I like using piping as a way to outline the shape of the pillow and to coordinate two fabrics I’m using. Notice how I’m tying together the checked fabric and the floral in the pillow above?
For slipcovers, you can use a matching fabric for the piping or a contrasting one. I prefer using a matching one, so my mistakes aren’t as obvious. If you’re a super-precise sewer (unlike me), maybe a quilter or seamstress, you can get away with a high-contrast piping, which can look really sharp. (Think about white piping on a navy slipcover.)

The point of the piping is to highlight the lines of the furniture and to give the slipcover a bit more structure. It also just looks good.
AND, the best part, it’s super easy to make. I mean, really easy. If you can sew a semi-straight line, you can make custom piping. The key thing is that you need a zipper foot for your sewing machine, so you can sew a nice, tight stitch against the piping.
In the video, I also share my thoughts on good fabrics to use for slipcovers. As you know, I love using antique hemp sheets (there are a few more for sale right now in my online shop), but they can be cost prohibitive. I totally understand that. I’ve loved the look for a long time, but had to use a cheaper alternative that gave me a similar look until I could afford the real deal. (It was a sweet day when I splurged on my first hemp grain sack!)
You can use any decorator weight fabric that is graded for curtains, pillows and some that is for upholstery. Some fabric graded for upholstery is going to be too thick and stiff. You want something similar to the weight of a pair of jeans. Real denim. Not the stretchy kind we ladies like to wear.
So, denim is a good option, sanded twill, cotton duck, lightweight canvas, heavy-weight linen…something in that family. I would look for a weight around 10 ounces. That’s thick enough to hold some shape and will cover most patterns, but it’s not too thick for an average sewing machine.
If it’s your first time making a slipcover, I would stick with solids or an all-over pattern like a large scale floral or paisley. I would suggest staying away from geometrics, stripes, plaids and checks, since those will obviously show if things are a little wonky.
So, let’s talk drop cloths.
(A hemp sheet slipcover is on the left and drop cloth slipcover is on the right.)

I used to use drop cloths a lot, because they are economical and, honestly, it was sort of the thing to do in the DIY blog world a few years ago. They were the “pallet wood” of sewing. The upside is that they are economical (or they can be.) The downside is that they do fray easily and it’s not a fabric that is made for sewing projects, so it’s pretty common to find irregularities, awkward seams, marks, etc.
If you need/want an economical option, I suggest cotton twill or canvas, which runs about $6 – 7.50/yard. That would be about $48 – 60 for a wing chair, which is a pretty good deal.
Think outside of the box, too. There might be some shower curtains, old bedspreads, tablecloths, curtains, etc. that can be turned into slipcovers. We made both of the slipcovers in Megan’s office out of repurposed curtain panels…
I’ve even bought great linen fabric at the Raleigh Flea Market for $5.00/yard. There are lots of budget-friendly fabric options if you’re flexible and a smart shopper.
part three | pinning & sewing the fabric
part four | sewing the wings & arms
part five | skirts, ties & cushion cover
If you would like to watch the original six part series, you can find it HERE.


27 Responses
Marian, I’ve watched you’re original series and it made me think I could make a slip cover. However, I have recliner wingbacks. And well, I have no idea how to do these. We use them as recliners so…Any advice would be helpful. Thanks!
You would use the same method, but you’ll have to make pieces, so the recliner can still function. It’s a bit trickier, but definitely doable. So, for the foot rest, for example. That’s usually 2-3 upholstered parts. I would make a little slipcover that ties or velcros onto each part. I hope that makes sense!
Love it! Thanks for showing us again, Marian. 🙂
Do you ever pre-wash your piping cord or sewing fabric? Just wondering if the cotton cord could shrink?
Thanks again!
I don’t wash the cording, but I do wash the fabric if I’m using it for a slipcover. If I’m using it for upholstery, I don’t.
Hi Marion,
Love your site — visit every day. I start my day with you! Just wanted to share some terminology with you –> piping is for clothing, welting is the term for upholstery!! Keep the good stuff coming!!
Oh, interesting. I’ve heard it called both for home decor. I do call it “double welting” when I’m making a double welt for upholstery.
Thank you, thank you, thank you…… I am so happy that you are tackling this project again. For those of us that are visual learners, it’s a miracle. I have bought six books on how to slipcover a chair, read them numerous times and still didn’t “get it”. NOW I get it. (BTW, I am a seamstress.)
Thank you, again, for generously sharing your knowledge and skills.
Annie B
Well, if you’re a seamstress, you’re going to make amazing slipcovers!
Another suggestion…you can buy packages of “bias tape” in many colors at your local sewing or craft store. I do this on most projects…I just buy a color that compliments the fabric I am working with….whether reupholstering or making pillows. Your tutorial is great for making welting that is of the same fabric as your project! And yes, absolutely cut ON THE BIAS….doing otherwise will cause you great headaches and in my book, sewing is a big enough pain…LOL!
I bought a double welting foot for my sewing machine ( I think off Amazon). It was super affordable and because the foot has channels that the cord fits in, it practically makes itself. The double welting foot also makes single welting. I actually use it throughout the whole project for all piecing where the welt cord is involved because it hold it in place so well. (btw: I reupholstered a pair of vintage bergere chairs in drop cloths last year using your bleaching and prep method and it is one of my favorite DIY projects to date! And made a ton of double welt cord for the project. http://pluschere.blogspot.com/2015/04/finished.html)
Thanks so much for taking the time to do this for all of us. I will definitely be attempting to make one now for sure. : )
If you are spending a lot of time and effort making a slipcover, it doesn’t make sense to use old tablecloths or bedspreads. Your time is valuable so use the best materials you can afford that will give you the longest life. I know this from almost 60 years of sewing. I am a very good sewer, but even I would hesitate about making a slipcover.
I followed your original directions and covered my horrible old green chair and it came out very well. The directions and the videos were very clear! I am a complete novice in this area and I even made the cording as you showed us and it really wasn’t so hard. I used drop cloths which I washed and prepared as you suggested. Keep up the good work and thank you for all your help. Happy Thanksgiving!
You tutorials gave me the courage to tackle 3 sofas at my beach house. One is a sleeper/sofa with lovely rattan arms that I wanted to leave exposed. After, multiple viewings of your videos and some others on basic upholstering, I finally jumped in with 50 yards of indoor/outdoor fabric (sun is brutal and the newer indoor outdoor fabrics have a great feel to them). I amazed even myself with the final results. I wasn’t quite an upright mammal for about a week, but yoga finally took care of that. Sewing is not the most ergonomic of crafts. Thanks again for giving me that first sense of ‘gee, I can do this”.
Well done!! I have to say, even now, I get impressed with myself after I sew a slipcover. I’ll walk around saying things like, “That was just a flat piece of fabric and now look at it!” 🙂 I agree about the sore back. I have to sew in doses, because it is rough on my lower back. I think I hunch a lot when I’m working.
Is your sewing machine set down into a table or desk? If not that could make a big difference on your back.
I’d never thought about sewing machine placement. Which one is best, Laurie? I’d like to set my sewing up so that harm is reduced. That’s three of us who get Sewing Sore Back Syndrome, so tiring. Others may also like to know the best way to avoid injury.
I would love to use the hemp sheets. But I have a couple of destructive cats so drop cloths it is!
Thank you for this. I have an upholstered headboard that is has wing back style. I’ve been wanting to recover it for sometime. I might try this. I love the piping idea… not sure I’m brave enough to tackle that but it does make the finished piece look great.
I made a slip cover with your other six part tutorial. It was so helpful and I can’t tell you how many times I ran back and forth to the computer to get it right and it worked. I only made one mistake with the direction of the print but I don’t think anyone would notice if they weren’t looking for it.
Just the other day I was talking with a friend about a winged back slip cover and I think your solution is brilliant. Maybe you could do a little tutorial about just doing the wings……….Thanks.
Enjoy your Thanksgiving with your little family. These are the best years of your life. Enjoy.
I am sure you know that! Mary in New Hampshire.
Marian, Sorry I should have looked at the video first……………You answered my prayers about winged back slipcovers. Thank you. Mary
Thank you! I have made 2 wingback Slipcovers using your original tutorial videos. pRiceless! Like so many of us, I did use the drop cloths from Lowes and am very pleased with them. I think part of the point of using economical fabric is for those of us inexperienced but willing to take the plunge and try, we don’t run the risk of ruining several yards of fabric that are more expensive than the drop cloths. I agree, especially with great discounts available at fabric stores, a good denim type weight fabric can be purchased quite economically as well. I am not a seamstress, and I played, paused, replayed (iPad sat right next to the project wingback and a heap of drop cloths) your original series countless times while doing my first project-and it was a success. It is kind of a thrill when you are done and see how great it looks. I encourage anyone thinking about trying-to just jump in-keep going even when you feel like it’s a mess-because it will come together and you will be proud you did it. happy Thanksgiving! Now I have the slipcover bug again and need to find a project 🙂
Marian, you might want to consider buying a piping foot, rather than using a zipper foot. Very fast to make the piping, but even better, piping doesn’t move as you sew it so it is consistently even thickess all the way down. I recommend someplace like Cutex, as they have many different sizes of piping feet. Also, you can buy new hemp fabric on etsy.
Your original 6 part series is great, no matter what you say!
Marian,
I watched your original series and loved it. I made a dropcloth slipcover for an old loveseat in my basement rec room, along with piping and zippers, which I just kind of winged. I impressed myself with how well it turned out. Sure, there are things that aren’t perfect but anythings was better than the original. My motto became “WWMMSD”-What Would Miss Mustard Seed Do! Got me through the entire project! Thanks !
Hi Marian,
I love your blog! I especially liked your out-take about dropping your pins. I’m so glad I’m not the only one. Apparently, neither was my mom; she kept a magnet with her sewing machine for just this purpose. Consequently, so do I! I cannot imagine being without it. Yup, those pins can still be picked up with a magnet. Thanks for your consistent, valuable, and entertaining advice!!!
I have a great tip on sewing the cording material and cutting it on the bias! One step of sewing the one seem and then cut. Very simple and a huge time saver. Contact me if you’d like to hear it.
Love your videos!! I use to upholster all the time. But haven’t in many years. Upholstery is easier then slip covers, not as much sewing! But I have these brand new club chairs and I want to protect them from my hounds. So, I’m covering them with painter drop cloths. I am watching your videos and learning how all over again! Thank you!
Let me know if you’d like to know my tip on one step piping!
Becky