
Hello, all! I hope you had a great holiday weekend. We just got back from visiting Jeff’s family in Raleigh, which is always a fun trip. I had the chance to meet up with some readers for a day of flea-ing and antiquing and I’ll share all about that in another post.
Today, I am continuing the new slipcover series. You can see part one, the introduction and a tutorial on making custom piping, HERE. This series is a remake of one I did a few years ago, but my equipment, filming & editing skills and sewing know-how have improved a lot since then, so it was time for an update.
In this segment, I show how I cut and lay out the fabric for the slipcover. I have found it’s helpful to do this all at the same time, so I don’t run out of fabric mid-project, which has happened to me before, and I can go from pin-fitting and sewing one section right to the next. It just feels quicker.

You know those diagrams showing the pieces for a slipcover cut out of a length of fabric? Well, I don’t do one of those. It’s just too much thinking and math. I want to get going on the project, not relive my mediocrity in geometry.
So, I am generous with the amount of yardage I get (I can always use excess for pillows or small sewing projects) and I cut and place the fabric on the chair before I start sewing. While I stink at precise geometry, I’m a champ at estimating and flying by the seat of my pants (I’ll have to add that to my resume) and this method has always worked out.
Since I’ve made a lot of slipcovers for chairs, I know I need 2-3 hemp sheets for a wing chair or about 6-8 yards of 54″ wide fabric. Most people suggest 6, so I get 7-8 for a little wiggle room and insurance. You’d also be surprised how much fabric you need for custom piping and a pleated or ruffled skirt.
If you’re using a drop cloth or a textile that already has finished edges, use those to your advantage! Make your cuts to use those finished edges and save yourself some hemming.
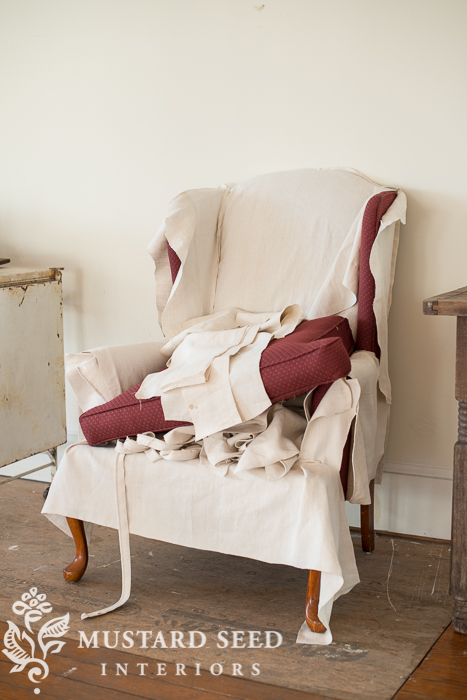
Since it’s easier to show & tell you than it is to type it all out, here’s how I cut and piece my fabric…
It gets exciting as you’re laying the fabric out, because you can start to see the slipcover take shape before any stitches have been made.
Next up, I’m going to show how to use the chair as a “dress form” to make a perfectly fitting slipcover. We’ll start pin-fitting the back and wings of the chair…
part one | making custom piping
part three | pinning & sewing the fabric


22 Responses
It is very nice of you to do the video. However, the most confusing part to me has always been how to cut the pieces for the arms. This video does not show me how to do this. The large pieces are common sense; the multiple small pieces are not. Sorry, but I am very disappointed in the video.
Oh, I’m sorry to hear that! I’m trying to show what I’m doing in detail, but some things that I think are simple might not be to those who have never done it before, so I’m sorry about that! I can make a quick video showing how those pieces are cut, but it does depend on the chair style. For this specific chair, the piece of fabric for the arm starts where the seat meets the arm and goes all the way over to the bottom of the side of the chair. In many cases, I just take it over the arm until just under the “roll”. That’s where the arm piece will meet the side piece. I decided to make it all one piece, in this case. You’ll get to see a better look at the pieces when I show how to pin them.
Thank you, Marian. You are a sweetheart! I look forward to seeing the other videos.
Love the new video-I’ve watched it a few times now & think I’ve figured out where I went off track with my last attempt to cover this same chair. So fingers crossed that with you “holding my hand” in virtual land I can finally get it right! Off to cut out my fabric so I will be ready for the next step.
Thank you!
Love this video series but like Sylvia, I hope you can make a video tutorial on how to cut the arm pieces. Will there be a final video showing how to sew all the pieces together and how to add the piping? I’ve always wanted to try to make slip covers. After watching all of your videos, I may attempt to cover a love seat, chair and ottoman with drop cloth. I think it will look much better than my current look of draping throws over the furniture. Will you be doing a video of how to slip cover an ottoman? Love these videos!
Yes, there are still a few more videos in this series and I’ll show how to pin and sew the entire chair until it’s finished. 🙂
Marian…..love the video….while watching, I couldn’t help but chuckle, I THINK YOU NEED NEW BOOTS!!!! Maybe on the Christmas list. You are such a sweetie I hope Santa brings you new boots!!!! LOL. Merry Christmas!
Thank you for that video! So helpful as I have two chairs that need slipcovering and I had no idea where to start. Until now.
Such a useful video! I’ve done this before (once) in a similar way but I’m avidly watching for any good tips I might be able to use in the future!
Love this video Marian . . . I may get brave enough to try this! Any word on the Christmas kits yet?
Thanks for taking the time to do this, it was SOOO helpful! Thanks for always sharing so much of what you know with us!
And what’s wrong with the boots?! They look great!
mmmm interesting!!!! You make it look so easy. My concern is: what about fabric nap/ grain. Also, wrong side /right side…or does it not matter with the kind of fabric you are using? The “grain” direction is very important with all sewing. It seems you are flipping the fabric all-which -way to make it fit. People who don’t know about sewing won’t have the same results if ‘grain’ is a problem….warp and woof….(W&W sounds like something my mom would say!!!!)
Thanks for sharing….love all you do!!!!
Ha! I think I’ve made so many of these that I just do it without thinking about it. Yes, I place the fabric, so the grain is running in a way that makes sense, so it’s straight and not running at a diagonal or anything. The fabric I’m using doesn’t have a right or wrong side, but I would probably cut the pieces and lay them out, so the right side is showing and I could see how the pattern is working as I place each piece. I would then turn it inside out once I start pin-fitting.
This is perfect timing! I have two upholstered chairs at our dining room table – and my original plan was to re-upholster them myself in this gorgeous fabric. But I still like the original upholstery… Duh, slipcover instead for two different looks.
Thanks for sharing! 🙂
This is a helpful video, Marian, but I have one area of confusion. The seams. How do you know where to stitch the seams? I know you cut the pieces with excess fabric to allow for the seams, but it doesn’t look to me like all the seam allowances are the same. Does that make sense? Maybe you answer this question when you explain the pinning/fitting of the fabric to the chair. I will watch the next videos and see if they clear up my understanding of this.
Yep, I’ll show that in the next video. Since we’re using the chair as our dress form, we’re going to pin it to fit perfectly and will cut ogg the excess fabric.
WOW! I have seen many videos on how to slipcover, and although I do upholstery, the two are so different that I have never been able to finish one! But you manage to make it seem so easy that I’m going to try again. Maybe this time around I will get it… just maybe! Thank you! 🙂
Marian, Many thanks! Can’t wait to get started on this project as I am tired of looking at my wing back chair covered with a tired old quilt. Now I have a clue. My first chair per your instructions turned out great but I hesitated about a wing back chair. It is all in the knowing!
Your first slipcover tutorial gave me the courage to forge ahead and slipcover two wingback chairs a few years ago! It will be fun to check out your new version. Thanks for all the info you share!
Hi Marion – I too was inspired by your first videos and slip covered two pink, velour chairs using drop cloths. Since I sew quite a bit, I actually made a paper pattern using brown craft paper for each section of the chair. The slip covers were not perfect by any means but a huge improvement on the original look and look so great in my living room. Thanks so much for all of the great tips and information. You truly are inspiring!
I have a wing back chair, a couch, and a love seat that I’d really like/need to slipcover. Of course, I’ll start with the chair, but what do you do if you CAN’T remove the cushions (like on my couch and loveseat)?
I just sent you a ‘Help, what happened to…’ and further browsing your posts has me very happy! I found your new version of the slipcovering series. Now I have not excuse to further procrastinate. Thanks so much.