


I’ve always said, “I have no interest in owning a home with a two-story foyer. It’s such a waste of space and they are so hard to decorate.” Well, look at what we have here! It’s a two-story foyer. And, it’s actually growing on me. I love the light that streams in and how the staircase is a real feature right when you walk in the door.

Here’s the view from the front door when the stairs were all decked out for Christmas the first year we were here…

…and the view from the home office…

The stairs are one of my favorite things about the house because they are split stairs! There is a “back staircase” that goes directly to the kitchen, which is handy.
In December 2018 – January of 2019, we had the foyer painted in Stonington Gray (mixed at 50%) and the trim a custom white (you can find the formula HERE.) We also had hardwood installed on the stairs and the beige ceramic tile replaced with Montauk Blue Slate.


Here are some posts with more detail about the stairs and foyer including links to the tile, the grout we selected, ripping up the carpet, etc…
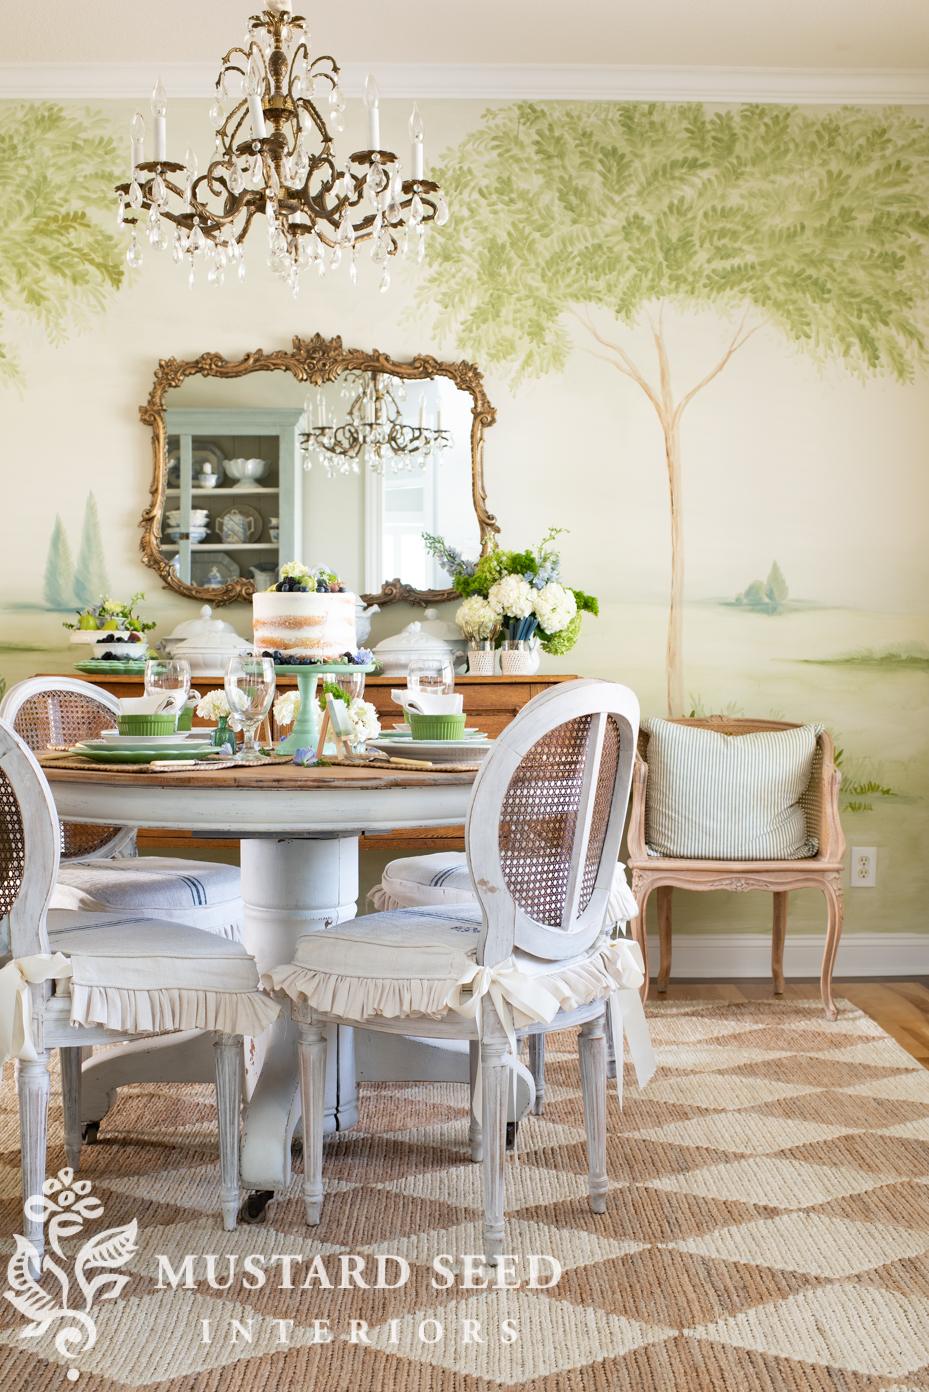
The dining room is off the left side of the foyer (from the front door.) It’s a square-ish shaped room, so it’s a bit of a head-scratcher when it comes to furniture arranging.

Within the first few months of living here, we swapped out the modern-style fixture for one of my antique chandeliers, painted the walls and trim, and had hardwood floors installed to match the existing birch floors in the kitchen and eating area.

After living with the room for a time, I decided it needed a “wow moment” and a full-scale landscape wall mural was what I envisioned.


Here is how the dining room looked before we moved. The biggest addition was the diamond rug, which felt like a perfect complement to the hand-painted mural.
Here are some more posts about the dining room…
This room is to the right of the front door and it is a great space for an office! I needed one of those, since I run my business out of the house.
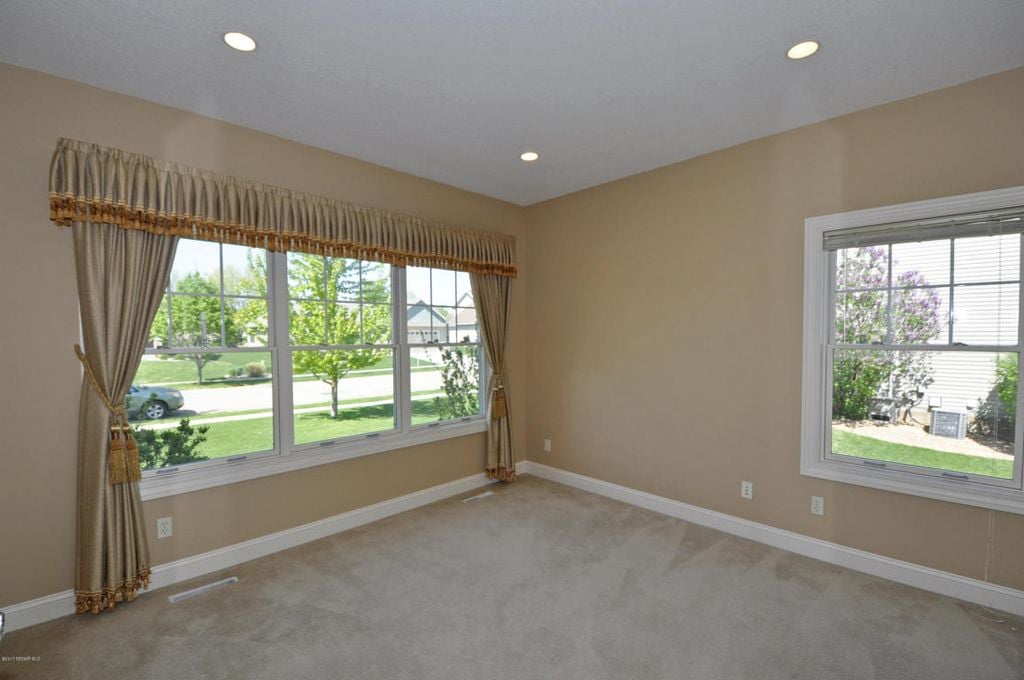
As we did with the dining room, we took down the curtains, painted the walls, and had the carpeting replaced with birch floors.
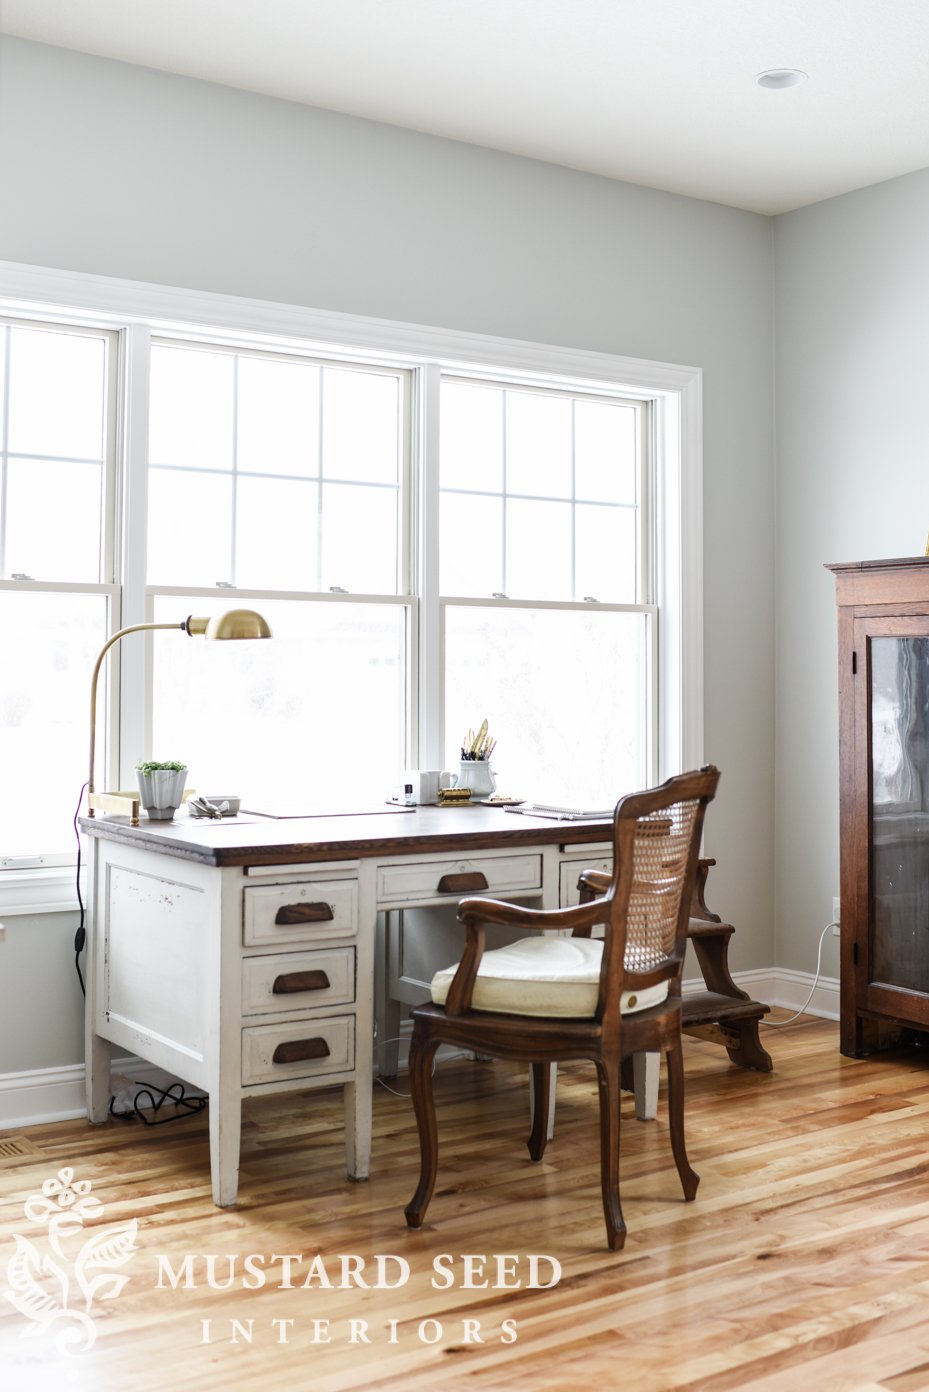

This room is still a bit of a work in progress, but here is what’s done so far…
In January 0f 2019, I did a huge furniture shuffle between my office and studio in order to meet my storage needs and address some issues that arose as I worked in both spaces. I also got proper office furniture, so I had the work surface and hidden storage I was missing with the hodgepodge of furniture.
It has made a huge difference! This room is so functional now…


Here are the sources for the home office…
Soho Swivel Office Chair – Birch Lane

Here are some posts on the office…
Hanging Art on a Bookcase & Styling Tips
In the summer of 2020, I added 3/4 height paneling and wallpaper to give the office walls even more character. You can read about those updates here…
Hanging the blue & white wallpaper
Makeover in a Month – Home Office Makeover Reveal


The studio transformation is perhaps one of the most dramatic in my house. When we first moved in, it was a 3-season porch, which means you can use it about 4 months of the year in Minnesota! Other than painting it, the first thing that needed to be done was insulation and climate control. Here is how it looked before we moved in…


We went right to priming and painting within the first week!

And here is how it looks now…


Here are posts with the details about the studio makeover…
The Bookcase & the Hardware Cabinet
Green Art Cabinet Makeover | Part 1
Green Art Cabinet Makeover | Part 2
In early 2020, I painted a checkerboard pattern on the floor and did a bit more rearranging over the next couple of years. Here is how the studio looked after those projects…


Like the rest of the house, the kitchen has great bones, but it needed a lot of paint to make it fit my design aesthetic!


We replaced the modern pendants with some small spot/task lighting to accommodate the pot rack. We also painted the cabinets, walls, and trim, replaced the faucet and updated the appliances.


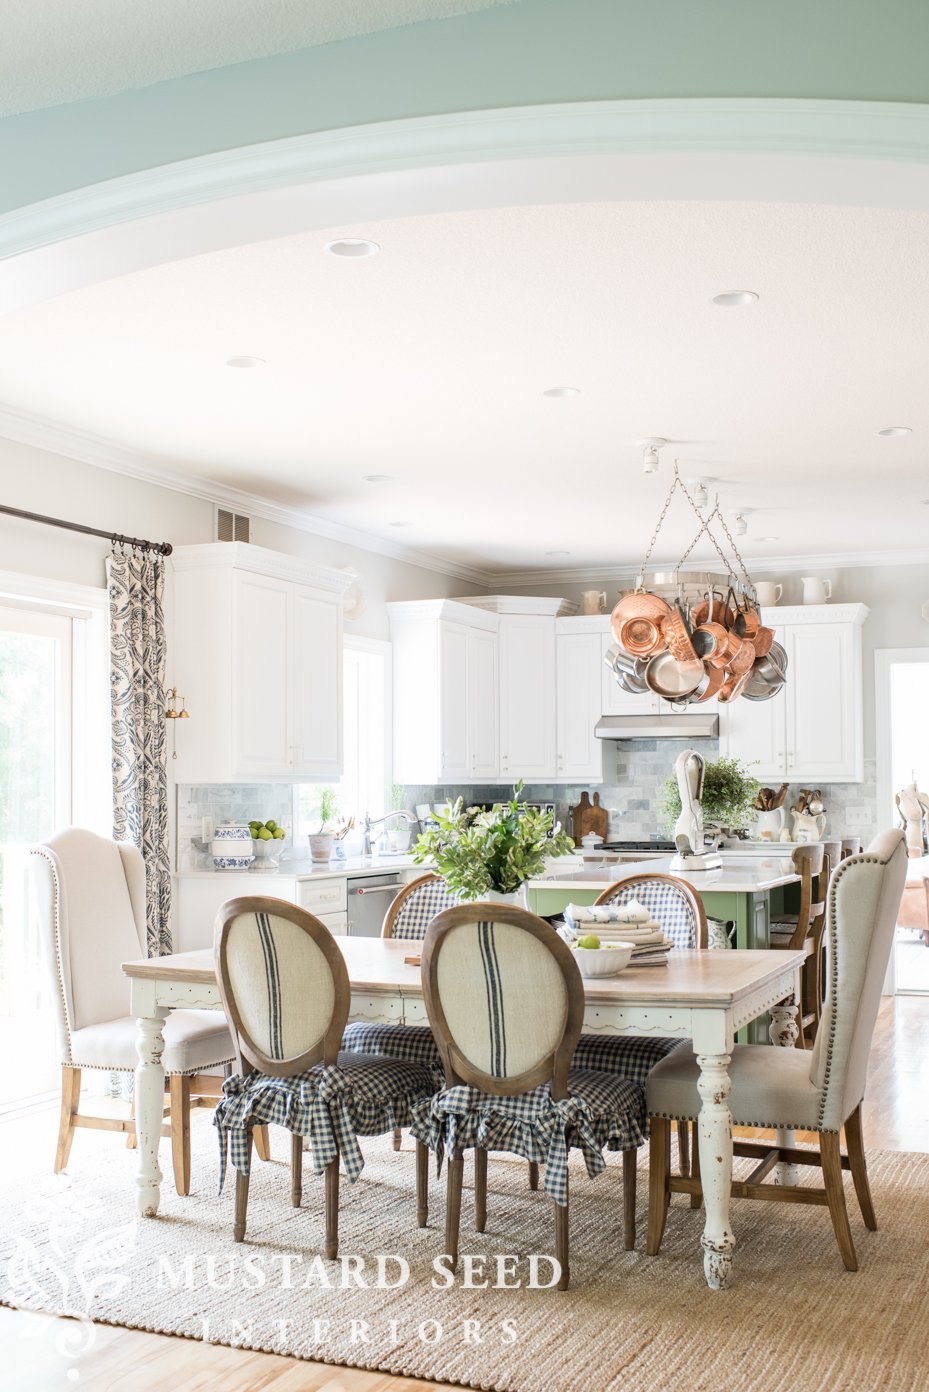
…and we built some simple open shelves in the awkward recess.

I wasn’t planning on tackling this space for a while, but I kept coming back to the idea that it just needed some texture on the walls (beadboard) and a lot of paint! It would be a fairly simple and inexpensive makeover but would have a huge impact.
Here is how it looked before…
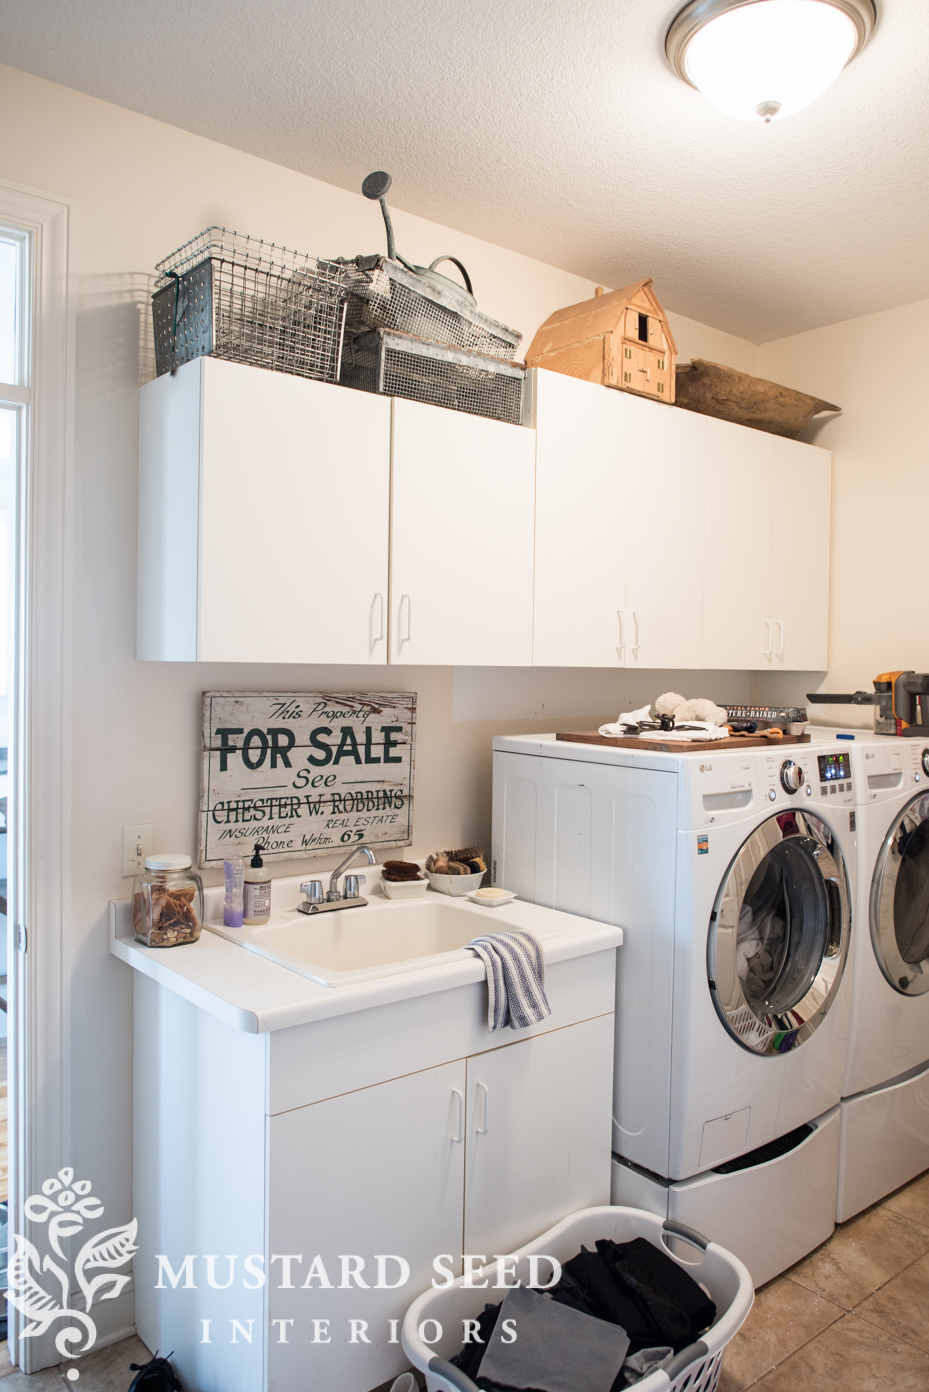
…and now…

Before…

…and now…


 You can read all about the makeover in this series…
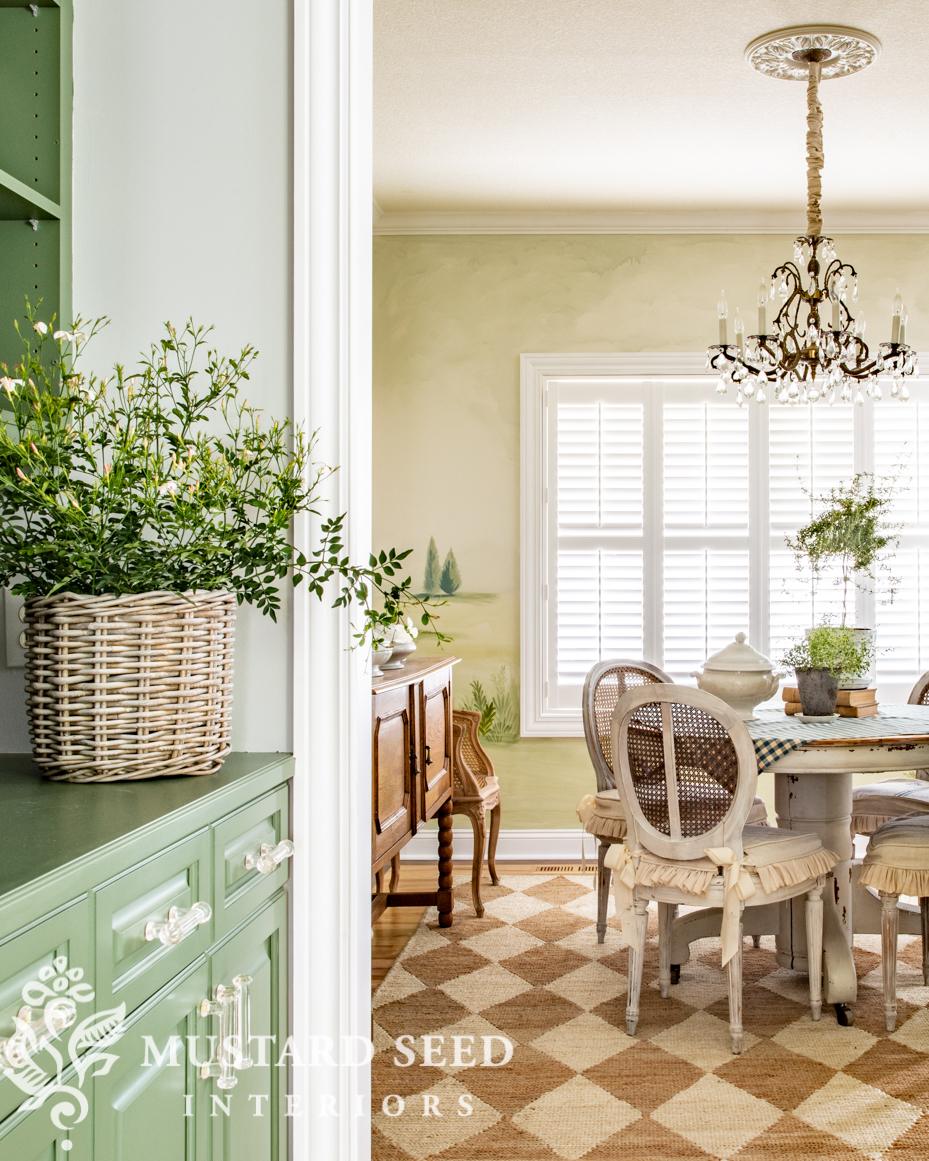
From the moment I first saw this built-in cabinet, I knew I wanted to make it look like one cohesive piece and paint it a bold color. The cabinets were in great condition, but the glass doors and hardware made it look a bit more modern than I wanted and the color of the wood was too yellow for my taste.

I added bead board to the backs of the shelves and the backsplash area, and wooden corbels under the upper cabinets. I removed the doors and replaced the glass shelves with ones cut from 3/4″ MDF.

I primed and painted it all in my custom “Boxwood” green and I couldn’t be more thrilled with how it turned out…


And I love the way it looks when viewed from the dining room. It provides a nice bridge from the dining room into the kitchen.

You can read about the whole makeover process here –
Butler’s Pantry Makeover Reveal
And I loved decorating the butler’s pantry for Christmas!
You can find more Christmas and winter decorating ideas, crafts, and recipes HERE.
The sewing room makeover was another project I worked on specifically to share in my book – . For that reason, I haven’t shared the full reveal on the blog yet, even though this room makeover was finished in 2020. A few photos of the room are shared in the book, but it’s nice to share more detail about the makeover here on the blog so that I can share links to tutorials, projects, and sources. It just tells more of the story for those who are interested!
So, let’s start this room makeover by looking at what the room looked like when we moved in almost five years ago.

It’s a pretty basic room with cream walls and trim and beige carpet. We added the chandelier, swapping it out for a typical builder-grade fixture. I knew I wanted to make this room feminine and like a little jewel box, so a chandelier was a nice start.

I also brought an antique French daybed frame from my PA studio to use in this room. While it’s a sewing room, it’ll be nice to have an extra guest room if we need it. It was important to me that this room makeover could be versatile. I also found a beautiful European pine wardrobe on Craigslist when we first moved in and that was the perfect addition for storing fabric. You can read about that find HERE.

I painted the bed frame and ended up reupholstering it a couple of times…first in a cheery yellow fabric and then in the blue and cream toile to match the walls, which felt much better for style anyway. I like trying different things, but I’ve learned that when it comes to upholstery (stuff that is a pain to do and redo), I should just stick with the tried and true.

To give the walls some detail and make this little room special, I added a chair rail and picture frame molding. You can find a tutorial for that HERE.
The real statement of this room, though, is the starched fabric wall treatment. Yep, that is not wallpaper but fabric. It is held to the walls with regular liquid starch used for laundry and ironing. The beautiful thing about this treatment is that it doesn’t use a paste that has to be stripped later. It just stays in place until you peel it off. You can even wash and reuse the fabric. If ever I want to change it, it will literally take minutes to pull it off without any damage to the walls.

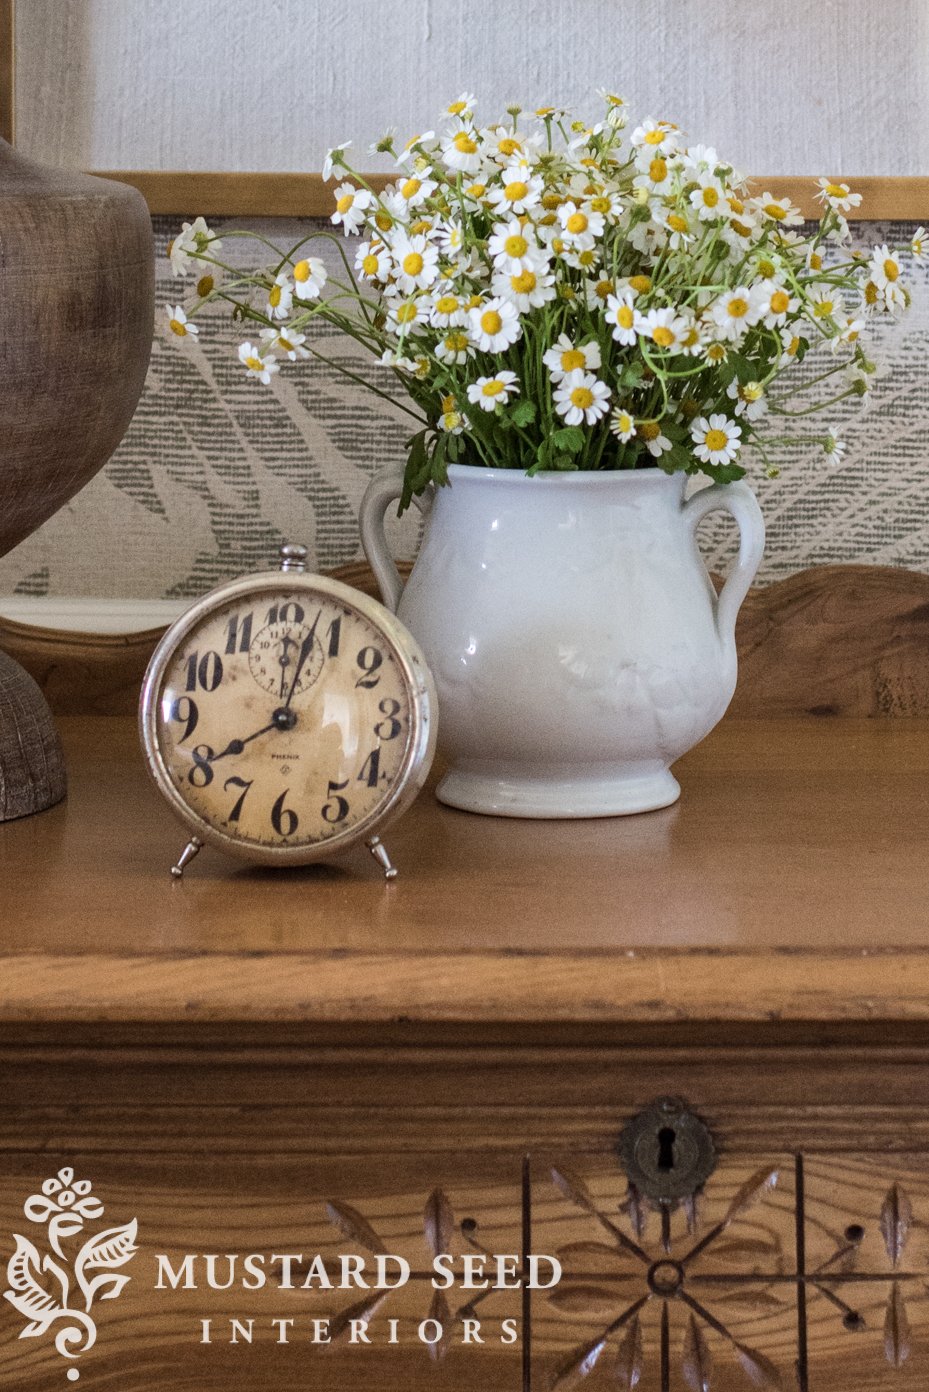
I stripped and waxed a little antique pine chest to use as a bedside table in this room (you can read about that makeover HERE.)

And I also bought and painted an old wooden kitchen chair in Farmhouse White milk paint so there would be a pretty chair sitting in front of my sewing machine.

To maximize storage in this room makeover, I also hung an antique medicine cabinet above the sewing desk to store spools of thread…

…and added a shelf to the closet to provide better storage for bins, bulky items, a scrap basket, and upholstery supplies. You can read more about the sewing room organization and tips HERE.

And here is the finished sewing room makeover…

I love how this room turned out. It just makes me smile when I’m working in there. It’s become the sewing/cat room since we keep the cat food and litter box in there. It’s an out-of-the-way room that is an ideal place to keep the cat accouterments. It is a bit of a dog room as well since Sebastian likes nappy on the daybed. I usually keep an old quilt over it to keep his hair off of the white bedding and pillows.

My mom and I made the bed crown when she was visiting in the summer of 2020 to help me with projects for this book. She’s a great helper on big sewing projects because I’ll pin and sew and she’ll iron and trim threads. We can get a lot done quickly when we work together. The toile fabric is Festin Bleu by STOF and I was able to buy all of the fabric I needed for the walls and bed crown on sale for around $300. It was a huge bang for the buck! The inside of the bed crown is lined in dark blue linen that I bought on sale. All of the bedding and furniture is secondhand.

The little pine side table now stores my knitting needles and crochet hooks. The cabinet is filled with spools of ribbon.


Project pouches and scissors are tucked in the drawer.

Bolts of fabric are kept in an old basket next to an antique child’s rocker that belonged to my Oma when she was a girl.


The wardrobe holds fabric and yarn inside and on top. It is a workhorse!

You can see how we added shelves to the antique wardrobe in THIS POST.

I just love everything about this antique wardrobe. It’s one of those pieces that I can see using in a variety of ways for as long as I have a place for it.

Here are a few other shots of the sewing room makeover…


You can find lots of sewing tutorials and projects HERE.
I went out on a limb with this room in a few different ways. One of them was the color palette. I strayed from my typical blues, greens, grays, and whites, and went with beige, cream, and yellow with a touch of blue. The other decision that stretched me was wallpapering an entire room. I’ve done a small bathroom before, but tackling an entire bedroom was a new challenge for me. A guest room is a great place to experiment, though, and this was a successful experiment in my opinion!

Here is how the room looked before…

It had a good foundation and bones, but it was just a boring box.
My mom, who was visiting when we worked on the guest room, and I started by installing chair rail and picture frame molding around the entire room. This added some architectural interest to the room along with a touch of classic elegance. I couldn’t believe how easy and inexpensive it was and now I want to do it in almost every room! You can find a tutorial on how to install it HERE.
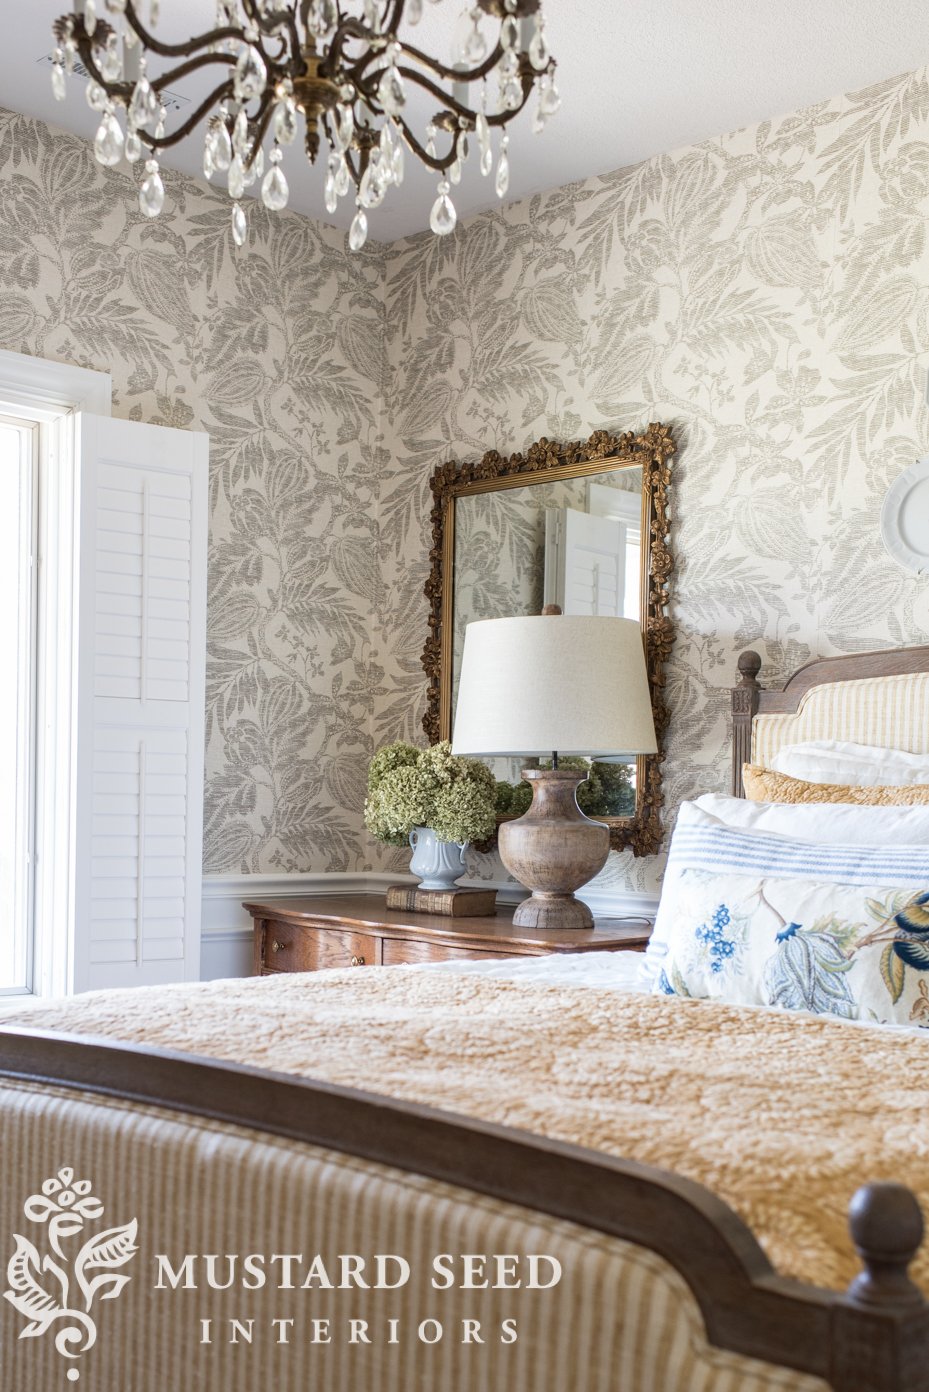
We then installed the Antigua Oak wallpaper above the chair rail. It’s an unpasted wallpaper and I was a little nervous about that, but I found I preferred it to pre-pasted paper. You can read my tips on selecting wallpaper HERE, my tutorial for hanging it HERE, and my wallpaper paste comparison post HERE.
This one-two combination on the walls definitely made the biggest difference in the space and fixed the boring box issue.

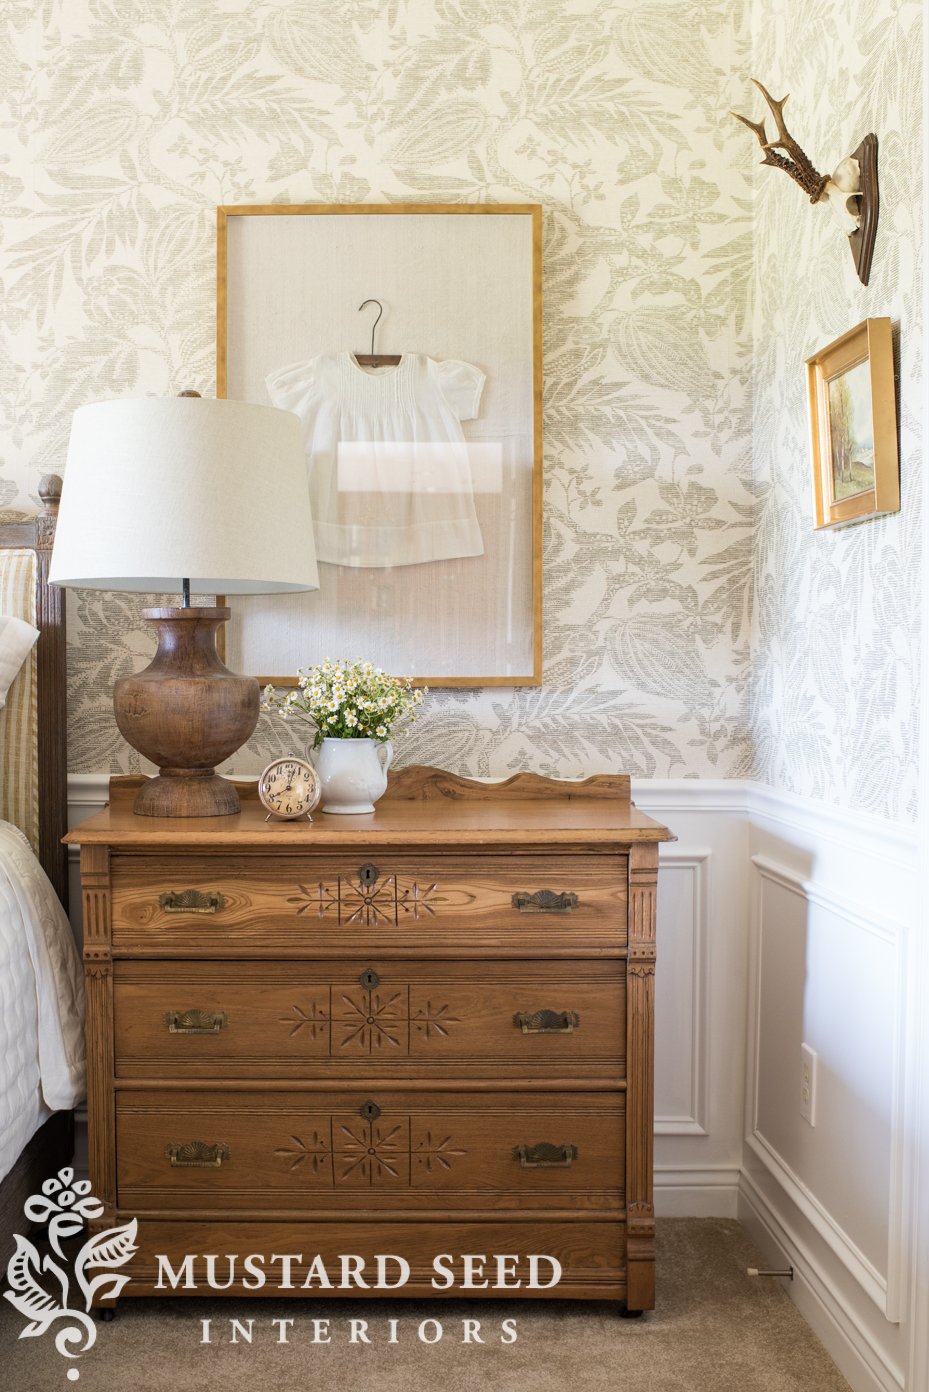
For the decor, I wanted an eclectic, European feel. I didn’t want everything to match perfectly, but to have a sense of history and that it was all collected over time.
The antique dresser is a much better scale to use as a side table in this room. I bought it for $150 at a local antique mall. The dresser may end up painted at some point, but I’m leaving it as is for now.
The antique baby dress is a family piece and I mounted and framed it myself in a frame I already had. You can see the tutorial for framing a baby dress HERE.
I painted the doors Coventry Gray by Benjamin Moore, which is the color I’ve used on all of the interior doors in the house. I like how it makes a typical six-panel door look a bit more custom and it makes the trim pop.
I found the German doe antlers at Junk Bonanza and bought the vintage German oil paintings off of a few years ago.

I ended up using sheer curtains behind the closet doors. They block the view of the stored stuff (which isn’t particularly pretty) and look fitting with the style of the room.

The chandelier is an antique and was purchased at Junk Bonanza last year for $125.
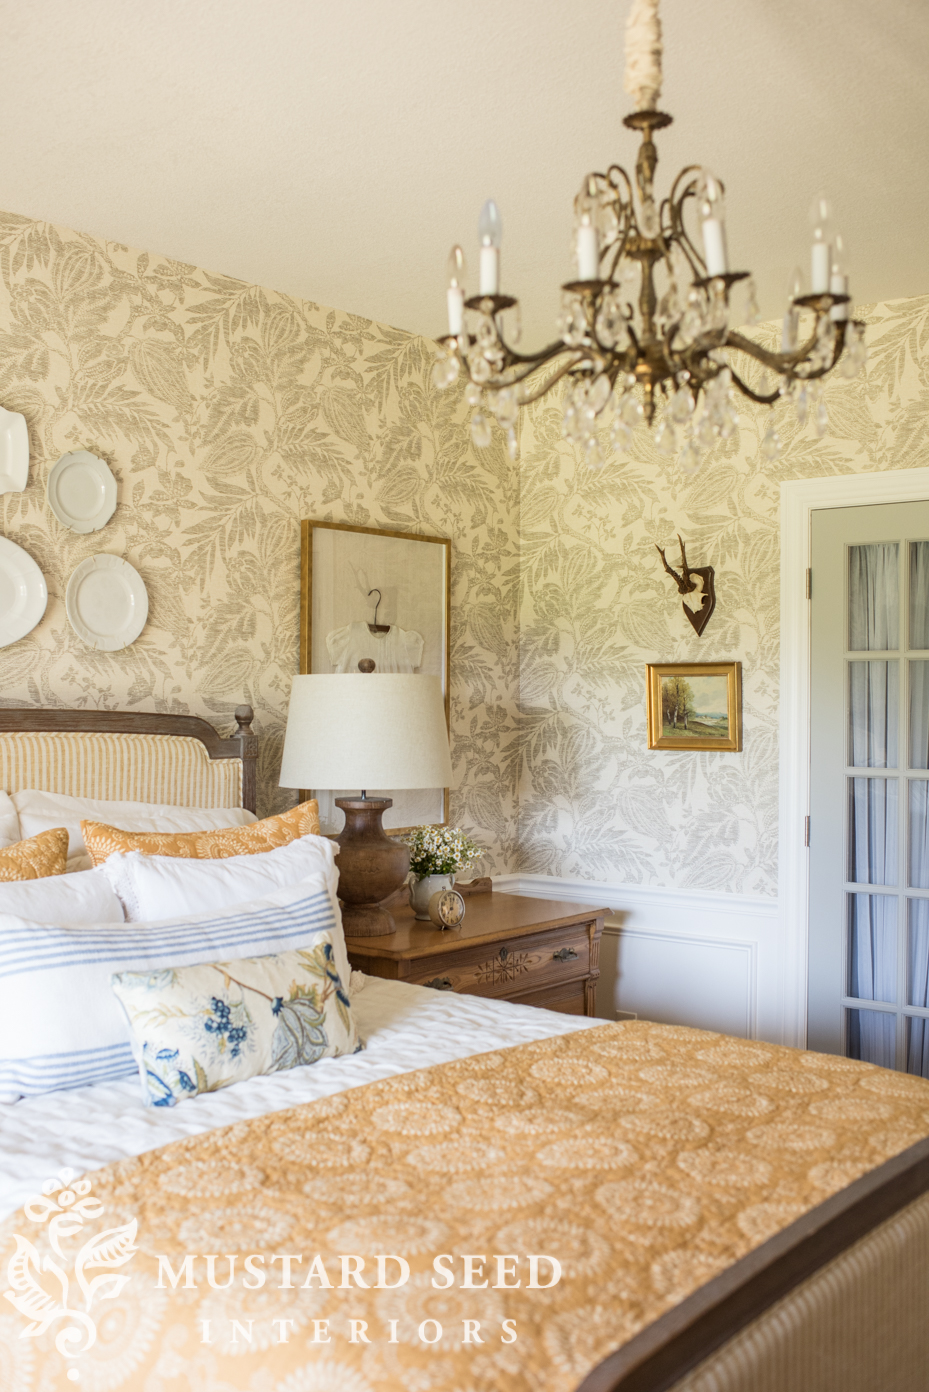
I hung a collection of ironstone platters and plates over the bed. It adds some height and texture without detracting from or competing with the wallpaper pattern. (For those worried about platters falling off the wall, I’ve hung them on the walls over beds for years and have never had one fall.)
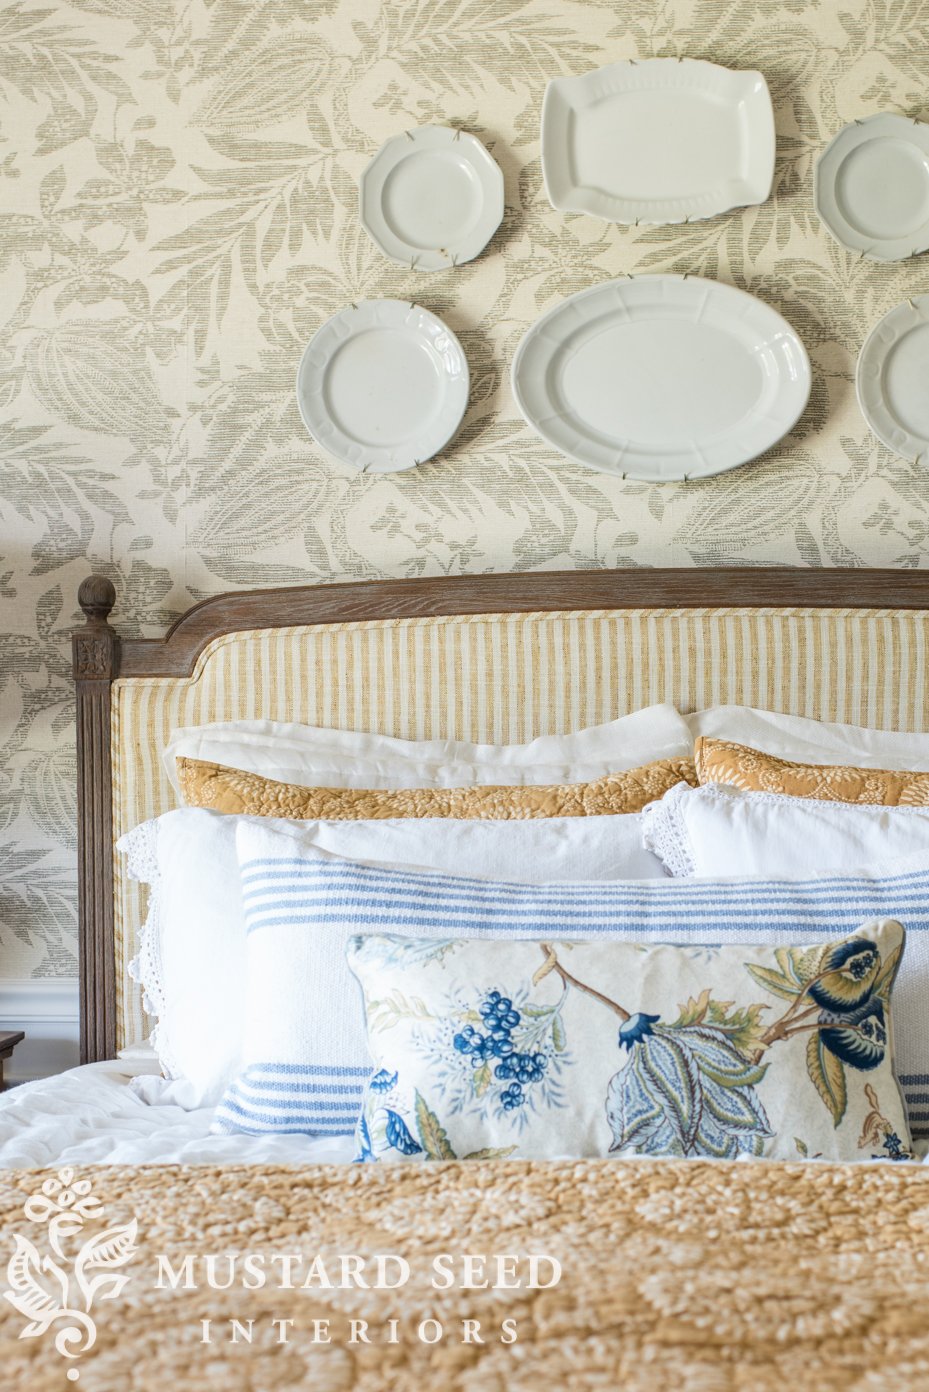
I reupholstered the bed in Adams Ticking Gold Indoor/Outdoor fabric. You can see the tutorial on how I did that HERE.

The gold bedding is from Pine Cone Hill, but it was retired a few years ago. I purchased the white pillowcases with the crochet trim at an antique market in Lucca, Italy last fall. The cream bolster pillow with blue stripes is the Ibiza Decorative Pillow I got a few years ago.
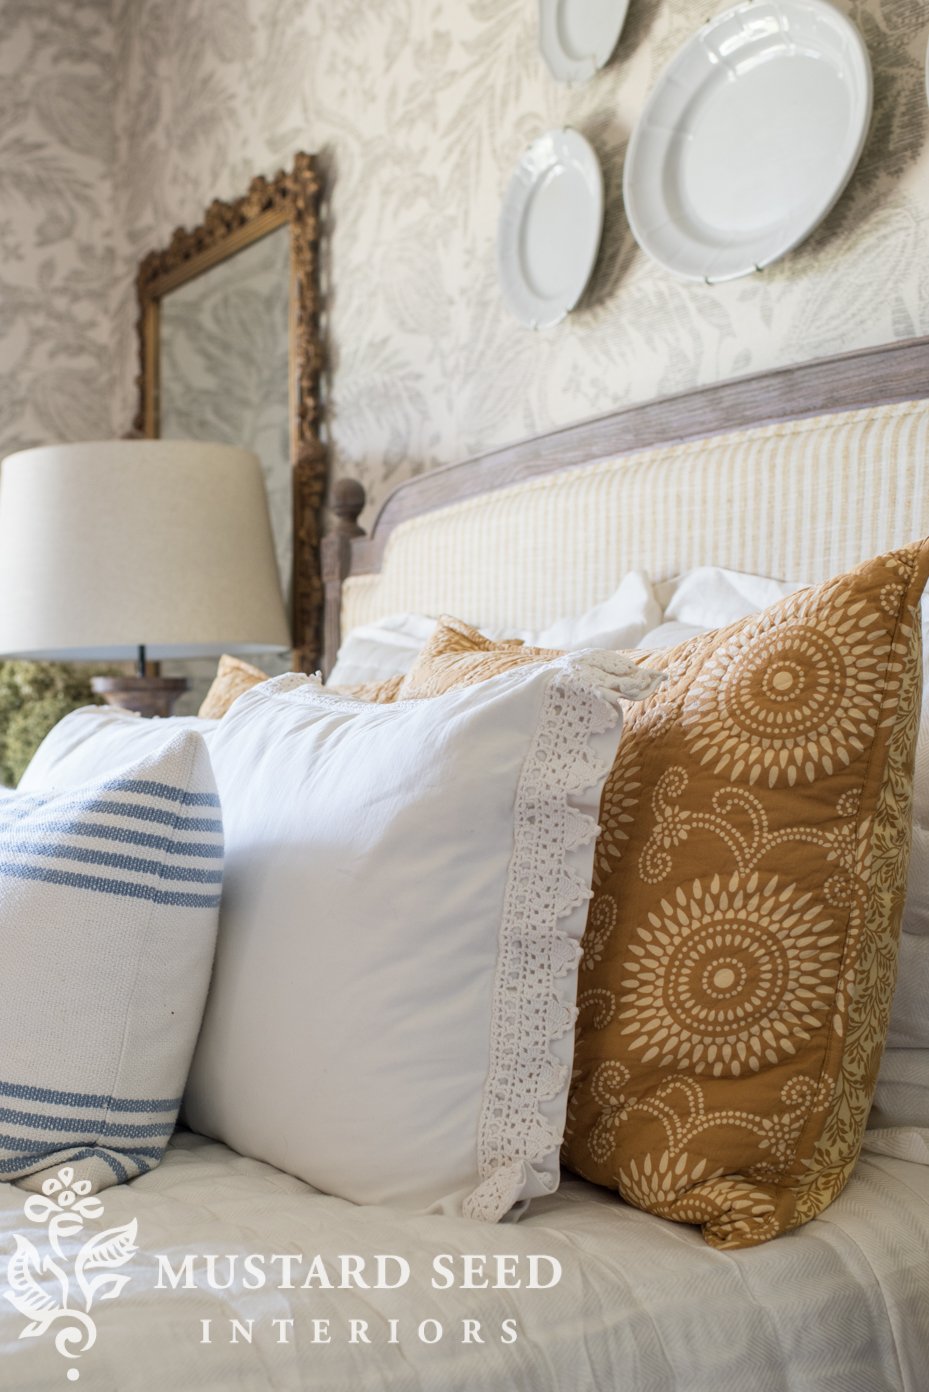
The quilt on the bed is the Brussels Quilt in Ivory. The guest room is in the basement, so it can get very cold down there and we need lots of blankets. This is a nice, thick quilt that provides lots of warmth. And the texture is just yummy!
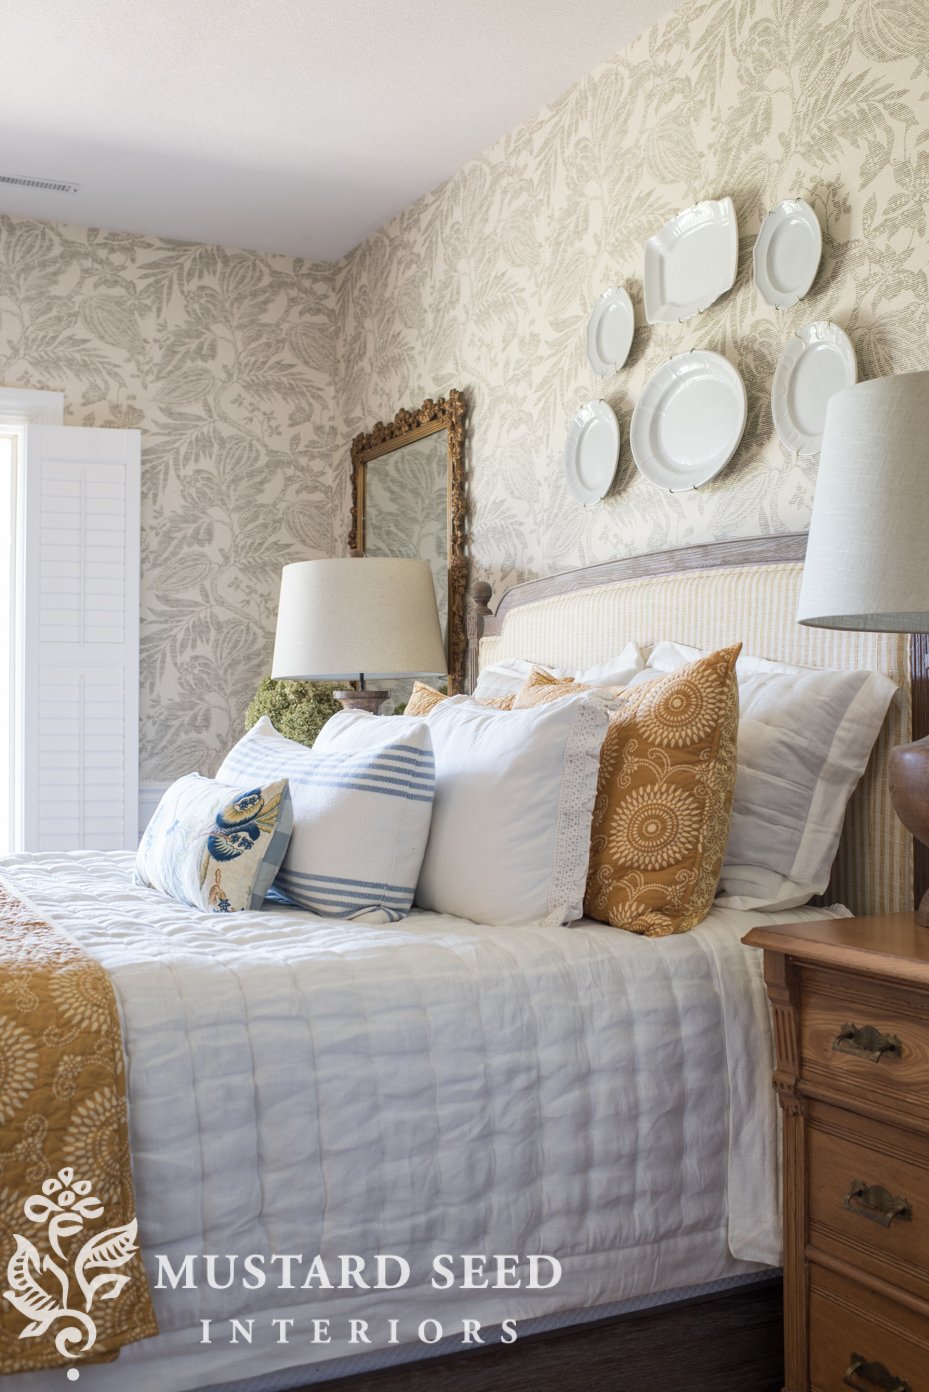
I found the mirror at a local consignment shop for $60 as well as the dresser on the left side of the bed for $130.
This one might get painted as well, but I’m waiting until I am 100% sure I want to paint them. For now, I like the warmth of the wood.

The plantation shutters also add some architectural interest to the room and, of course, provide privacy and light control. They are from Select Blinds.

The wing chair was free and I have had it and it’s twin for over 10 years. I slipcovered it in antique hemp sheets a few years ago. You can find the tutorial series on how to make a slipcover HERE. I bought the portrait print of Jenny Lind at an antique store for $60. I think I’m going to paint over it in clear gesso and then try to paint the same portrait in oils. It’ll be a fun project to try!

An antique quilt is draped across the back of the chair to bring some blue to that corner of the room and the Bauble Chenille Ivory Throw is an extra blanket at the ready.

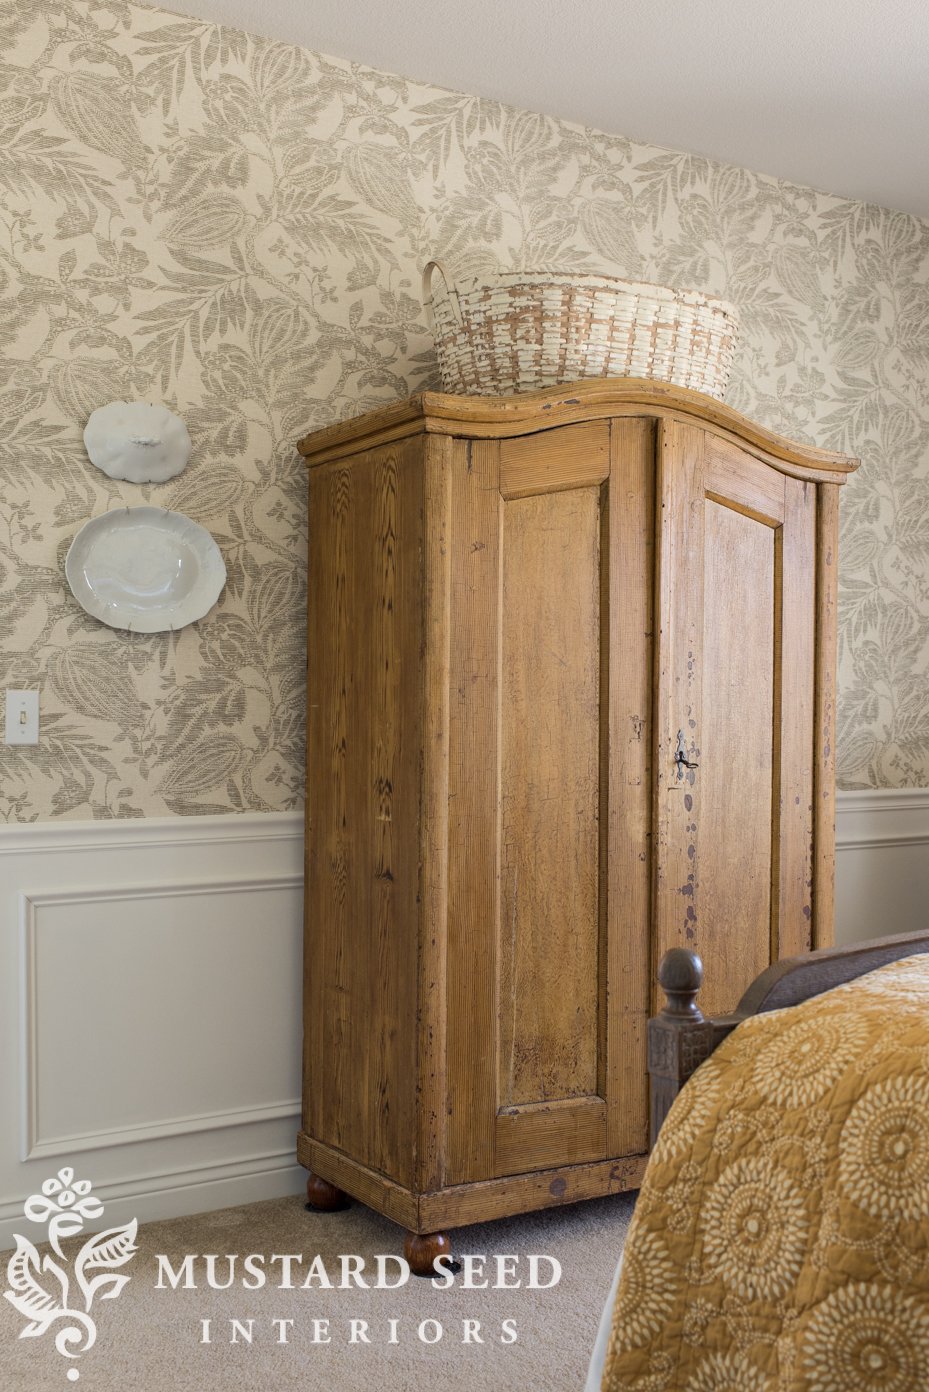
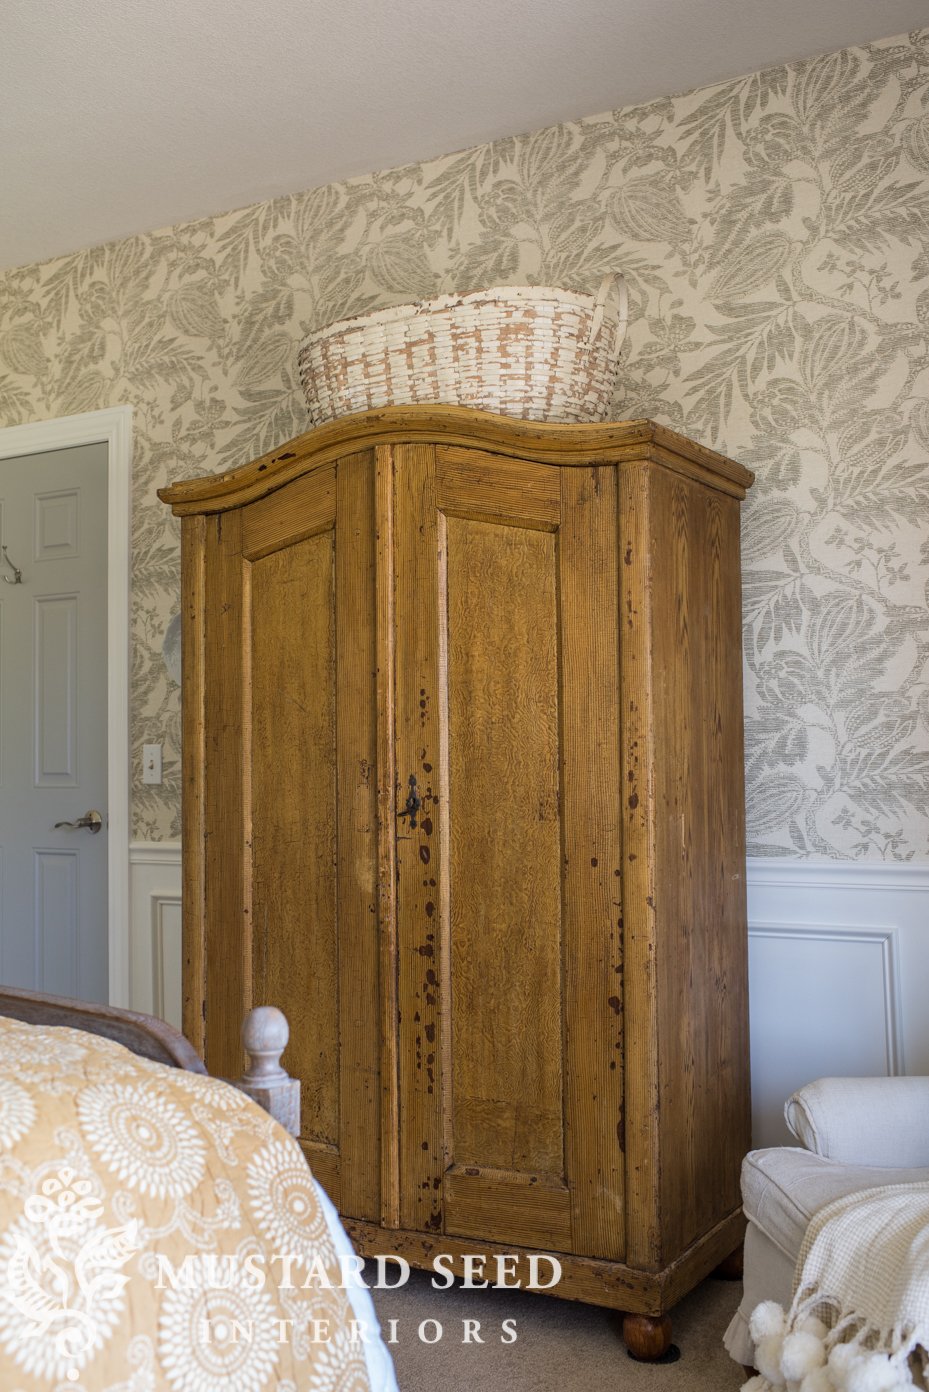
The 1800’s German wardrobe with the original mustard paint was the jumping off point for using yellow in this room. I bought it last fall from a vendor I met at Gold Rush. It wasn’t at the event, but the vendor had an antique Swedish desk that caught my attention, so I asked them if they had any European wardrobes. They had this one in their stash and it was absolutely perfect. I purchased it from them and they delivered it to me the next time they were coming through my area. I use it to hold my shipping supplies for the oil paintings I sell online.
The antique splint basket was purchased a few years ago from one of my favorite antique stores in Carlisle, PA.
To me, this room is a good example of pairing high-end pieces with bargains to create a beautiful, liveable space. I hope you enjoyed the tour!
Here is the final result of the bedroom makeover! The intention for this room was for it to feel timeless and restful and I think I accomplished both.

mirrors | bed crown frame | Aviary Toile Fabric | Similar pillow shams
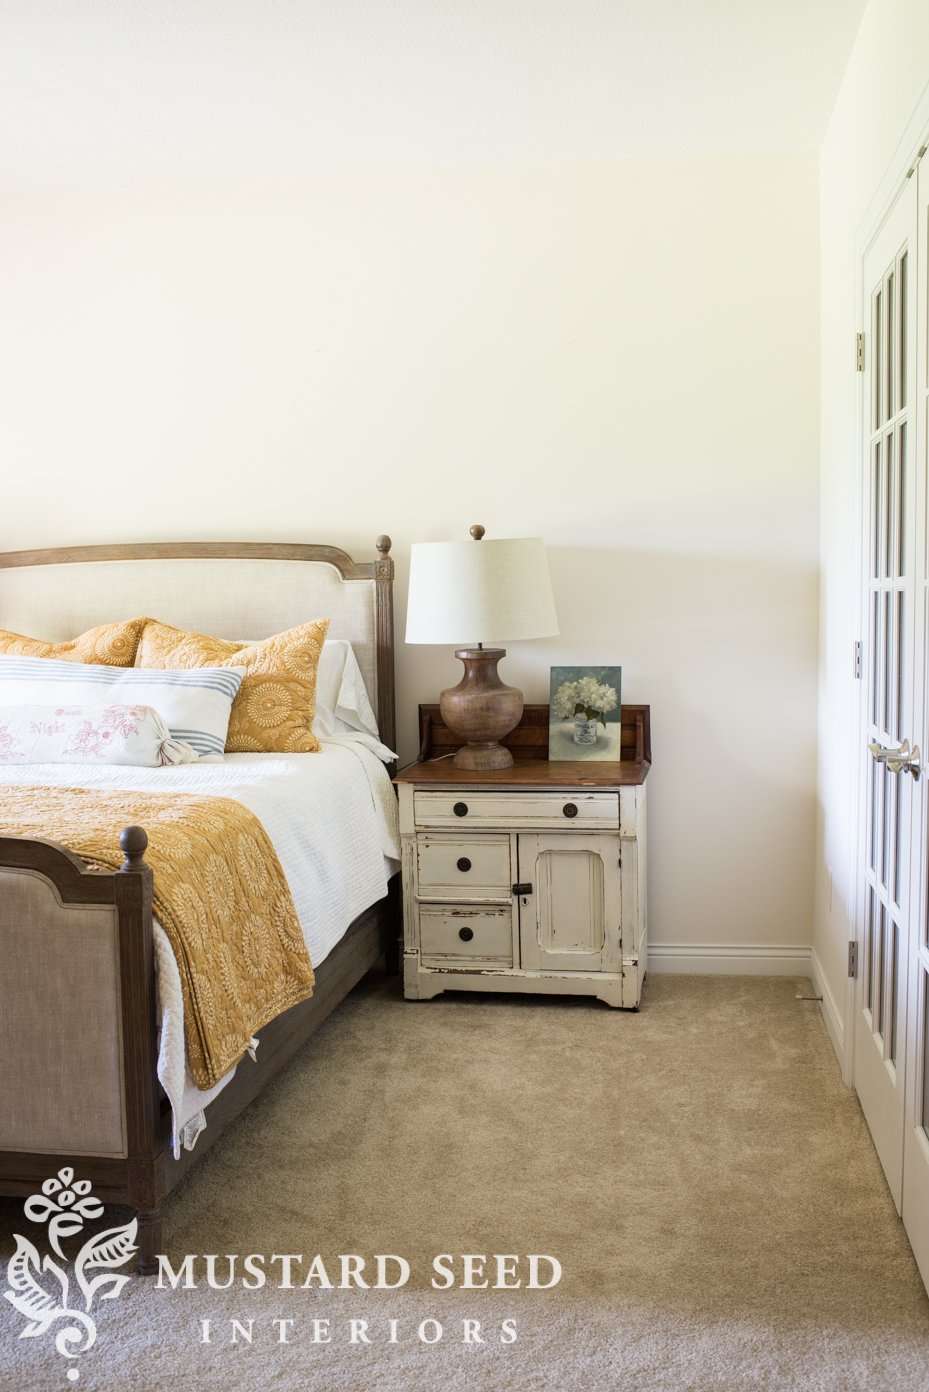
Here is how this room looked shortly after we moved in. We replaced the ceiling fan with a chandelier and moved the furniture in from our last bedroom. This room was enormous compared to our room in our PA house, so the scale of our furniture wasn’t really working. This room was clearly designed for a king-sized bed our pieces looked small and weren’t filling the space. I was used to decorating cozy and snug rooms, so this was very new and I struggled with it for a while.

The first big change we made was to upsize to a king bed and paint the walls in Stonington Gray, which was the start of my affection for that color.
Sadly, the bed frame is no longer available. I bought it on final clearance at Arhaus, which meant I got a fantastic deal, but it sold out quickly and is no longer available. Because of the high footboard, the bed is a little hard to photograph, but it feels just right for the size and shape of the room. For practical reasons, I love having a substantial footboard because it prevents covers from sliding off the end.
I sold the washstand that was an ideal size to use as a side table in our last bedroom and purchased and painted a consignment store dresser for Jeff to use as a new side table. The scale was much better for the room and it provided a little more storage. You can read about that dresser makeover HERE.

painted dresser tutorial | MMS Milk Paint in Grain Sack | mirror
The fabric bed crown above the bed fills up the space between the tall headboard and the ceiling. That was a tricky part of this master bedroom makeover. The space above the bed is a long, narrow space and nothing I tried above the headboard seemed to work. Rectangle items seemed to fight with the curve of the headboard and a collection of smaller items seemed off in relation to the visual weight of the bed. The fabric bed crown gives a European look that I just love and fills that odd space nicely. The blue check keeps it from looking overly frilly.


Antique-style mirrors and chunky oversized lamps fill the visual space on either side of the bed. Our lights are on remotes, so we don’t have to have them right next to the bed to be able to turn them on and off.


The wall opposite the bed has stayed mostly the same since we moved in. I made a linen slipcover for the chaise and added an antique side table and lamp to make this corner an inviting area to sit and read. We also installed picture frame molding to add some architectural detail to the walls, which helped this room look less like a large box.

linen slipcover tutorial | chaise | lamp | picture frame molding tutorial | craigslist French wardrobe

I hunted for just the right piece to put under the window and I honestly wasn’t really sure what that would be. I imagined it might be a bench, settee, or daybed, but I knew I would know it when I spotted it. I was browsing on Facebook Marketplace one day and saw an antique Jenny Lind day bed and that was it. I knew it was the right piece and, best of all, it was only $100.

Facebook Marketplace find antique Jenny Lind daybed | custom daybed cushion | curtain tutorial |
It fills out the window area perfectly and it’s a great place to put pillows from the bed, folded clothes, laundry baskets, etc. Of course, it’s a nice sunny spot for the kitties to nap, too. And, as a bonus, I picked up the daybed from a beautiful local home that I ended up photographing for Feels Like Home.

On the awkward wall between the closet and bathroom, I hung a pair of antique shutters and placed a Melodeon case that was a $40 yard sale find. I needed a piece that wouldn’t cover the air vent, so this unique find was a good fit.

painted rocking horse | ottoman slipcover tutorial

Our master bedroom makeover was a meandering process. There were times when I was certain of a direction and other times when I felt a little lost. I have learned over the years that when I am floundering, I can just wait. As long as we have a comfortable place to sleep and a place to store our stuff, it’ll be just fine. All of the pretty stuff can come when it comes.

As far as the details of the room, I made and customized a lot of things as I normally do. I made almost all of the pillow shams, the curtains, the bed crown, and the slipcovers. I painted, fixed, and/or refinished most of the furnishings. Making custom pieces is the best way I can get the look I envision while staying within a set budget. While sometimes I dislike sewing and grow impatient with things that are undone, I mostly enjoy the process. I find it fulfilling to see a room come together piece by piece. A thousand little decisions accumulate to become a room that is specifically ours.


If you’re working on a bedroom makeover, I hope you find some nuggets of inspiration you can use in your own home. If you’d like more ideas, instruction, inspiration, and encouragement for customizing all of the rooms in your house, you’d enjoy my book Feels Like Home.
This room is straight ahead through an archway that runs under the stairs. It’s our main hangout and I love that we made the decision to have it electronic-free (that’s all in the basement.) This room is flooded with light and we have enjoy the fireplace almost daily in the winter.

One of the first things we did after moving in was put some paint on these walls and built-ins! I recently made and hung curtains for the space as well, to control the light and add some warmth and visual texture.


In 2020, we built box beams for the living room (You can find the full tutorial for that in my book, ), had hardwood floors installed, and I painted the granite fireplace surround. You can see the tutorial for that HERE.


This ensuite bathroom makeover was a hybrid of DIY and work that was hired out to pros. And, I did the project management in order to save costs, but I had a great tiler (Matt Grant of Grant Tile in Rochester, MN) who really helped me with coordinating what needed to happen in what order. He also went above and beyond a helped me hang the bathroom mirrors so we didn’t accidentally crack the tile.
The bathroom took a couple of months to complete, which meant having a toilet and bathtub sitting in our bedroom for a few weeks, but it was all definitely worth it in the end.

We had great bones to work within the bathroom and it really didn’t need a complete remodel. We just wanted to give some cosmetic updates and customization, so it felt more like a luxurious ensuite master bathroom. It currently felt like a big bathroom with cheap builder-grade finishes. (with the exception of the vanity cabinets, which were quite nice.)

The big splurge on this bathroom was the tile. The tile was what we had to wait and save for because once you started removing tile in one area, it set off a series of dominoes and it all needed to be done. I also wanted to make the tile a real feature by bringing it around the window behind the tub and on the entire wall behind the vanity. We kept the existing tub because it’s in nice condition, it’s deep, and I love a jetted tub!

A couple of years ago, we replaced the curtains and faux wood blinds with plantation shutters, which gave a much cleaner look.

We replaced the plastic “phone booth shower insert with a custom tile shower a glass door. We were able to gain about 6” of depth and width without having to move any walls. The shower occupies the same space, but it’s much bigger.

Even just bringing the tile all the way to the ceiling made it look and feel larger.

I painted and hung a consignment store shelf (that used to be a little secretary desk) to hang in the niche. I considered tiling and installing marble or glass shelves in that space, but that was going to put me over budget. This was a $30 solution that still looks nice and provides a little storage and display. You can read about that shelf makeover HERE.


Speaking of budget, I took a splurge-and-save approach. I splurged on things like the counters and faucets, but save on things like the sinks, repainting the vanity myself, and going with 6 x 12 marble tiles, which were half the cost of traditional marble subway tiles.


While I love how everything turned out, the tile wall behind the vanity is my favorite. It really makes a feature out of that wall and it looks so fresh and classic. It did require hiring an electrician to move the light boxes, which were too low and not centered on the faucets, but it was important to have those right before the tile went up.


I think bathrooms are my least favorite rooms to work on! They are just so utilitarian and the costs of tiles and fixtures can add up much faster. But, I love how this room turned out. It now matches the house better and feels like the finishes make sense for an ensuite bathroom.
Here are a few other posts about the ensuite bathroom makeover…
Ensuite Bathroom Makeover Plan & Resources
Ensuite Bathroom Makeover Progress
And a few detail shots from around the space…


Believe it or not, there are rooms in this house that have been furnished, but are otherwise untouched. I haven’t painted the trim or walls or intentionally decorated them. One of those rooms was the boys’ bathroom. And, it was probably the worst room in the house. The paint had been slopped on the walls, getting it on all the tub, floor, and all of the fixtures. The faucets were crusted from 13 years of running without a water softener and the light fixtures were rusted.
With some paint, repurposing, new fixtures, and a few new accessories, this bathroom feels like a completely new space. The best compliment I received was when Marshall looked over my shoulder while I was editing the photos and asked who that bathroom belonged to. (He hadn’t seen it finished, yet.) “It’s yours!”

Here’s how the bathroom started…

It had the same peachy off-white walls and trim as the rest of the house.
The shower curtain rod was crusted with hard water residue and the sticker was permanently affixed to it, so I decided to replace it. I also wanted to install the rod higher.
You can’s see it in the photo, but the tub had splatters and drips of the wall paint all around the edge and the top, so I took some time to get those cleaned up.


And here is a closer look at the rusted light fixtures…

So, now that you’ve seen how the room started, let’s back up and break down the refresh.
I knew going into this makeover that I didn’t want to spend a ton of money on a bathroom for two pre-teen boys. So I ended up combing Walmart Home for things that were nice but would be inexpensive. The light fixtures, faucets, and accessories all elevated the room without busting the budget.
First of all, I painted the walls and trim the same colors as the hallway. I looked at all sorts of paint and wallpaper swatches and thought about different techniques I could try, but in the end, I decided to use paint I already had and keep it simple. That was partly to keep the budget down and partly because I’m still having issues with my shoulder and I didn’t want to get too ambitious. Plus, a mid-tone color is great for a bathroom. It’ll hide splashes and splatters.
It also looks cohesive given that the room is at the end of the hall, so you can see it from anywhere in the hall and from the bottom of the steps.

HERE’s a link to the lined laundry basket. (I need to throw that rug in the dryer to try to get the creases out!)

I removed the towel bar and replaced it with THIS towel ring. I find towel bars to be messy and prefer hooks for bath towels and rings or hooks for hand towels. I rehung my original lighthouse watercolor, but I added an octopus print and some shell art I made. A tutorial is coming soon.


Jeff helped me replace the crusty faucets and the rusted light fixtures. (I also put on new white plastic switch plates.)

The light fixtures ended up hanging over the mirror a bit, but I really don’t mind the look. If I could redesign it, I would move them up, but that’s a bit more involved than a refresh! The fixtures have a clean, nautical feel that works well with everything else. THESE are the ones I bought.

The biggest splurge in the room is the Cassidy faucets from Delta.

They make such a difference, though! I love the handles and the spout that gives a little more room for washing hands and getting a drink after brushing teeth. And the faucets needed to be replaced for the sake of function, not just looks.

I also picked up an inexpensive soap pump. I couldn’t find it online to provide a link, but I purchased it at my local Walmart.

On the other side of the sink, I hung another piece of shell art (THESE are the frames I used) and a framed Child’s Prayer that I was given when Marshall was born.

It’s a beautiful reminder for our boys (and us) and I try to always have it hanging in a visible place.

On the floor in front of the sink, I added a runner with a rubber back, so it won’t slip around and will catch drips. It’s also thin enough to fit under the door as it opens and closes.
I found this sweet antique stool at Gold Rush a couple of weeks ago and it’s perfect for this room. The boys are tall enough that they don’t need a stool, but I’ll put it under the window.


On the other side of the room, we hung two coastal wall art prints (they came in a set with the octopus.)

I used the TP holder we already had, but I cleaned it all up (it was splattered with paint) and it looks like new! I’ll share how I did it in another post.

We removed the old shower curtain rod and replaced it with THIS ONE. The trick to raising a shower curtain is to use a shower stall liner. They are longer but not as wide as a traditional shower curtain. The reduced width means they will fit a hemmed piece of decorator fabric, too! A longer curtain visually fills the space better.
I modified a curtain I made for Calvin’s room in our PA house by adding buttonholes at the top for the shower curtain rings. I will share a tutorial on how to make a custom shower curtain.
Since this isn’t as wide as a typical shower curtain, I will make a second one (I already have the fabric). When open, we can have a curtain on either side or push them both to one side.

I like THESE RINGS, because they slide across the rod easily, they don’t pop open, they don’t rust, and they look nice and clean.

So, that’s it! Quite a dramatic difference!
At some point, we’ll replace the floor tile with leftover slate from the foyer project. I’m also planning to replace the cabinet hardware, so it matches the chrome fixtures (or I might go with glass), but I haven’t found something I really love, yet. I also might paint the cabinets eventually, but we’ll tackle the floors first before I decide.
I asked Calvin if he liked his new bathroom and he said, “Oh yeah. It’s awesome!”
That’s a big win from an 11-year-0ld.

You can find a tutorial on making the custom shell art HERE.


