
A few weeks ago, I dragged this old cabinet outside to sand it down. It had been in Marshall’s room for a few years in this house and our PA house. It had some water damage on top as well as sticker residue on the sides. I mean, it has been living in a kind-turned-teen’s room for a few years and they aren’t the best at furniture care! It was getting to the point that stripping and waxing this antique pine piece was going to be the best way to bring it back to life.
Striping Antique Pine
This cabinet had a very thin, yellowing finish on it that was easy to sand off with an orbital palm sander equipped with 100 grit sandpaper. I opted to go that route instead of using a chemical stripper, which is usually my preference. It would be faster and a little less mess in this case. THIS is the sander I use.

Once the existing finish was removed (it only took about an hour), I made a few passes with finer sandpaper (180 and 220) until the surface felt smooth to the touch. To get all of the dust off, I wiped it down with a damp cloth.

Before waxing this antique pine piece, I tried on some different knobs to replace the simple pine knobs. I sanded them as well in case I wanted to use them again, but I felt like different hardware would be a little more interesting. I had a few old glass knobs that are from the same era that looked fitting for the little cabinet. They add a bit of sparkle, too.
Waxing Antique Pine
I knew I wanted to apply a wax finish. The soft finish that brings out the luster in old wood just seems to suit antique pine. It’ll help the piece coordinate a little better with the antique pine wardrobe that holds my fabric stash. It is wearing an old waxed finish that still looks beautiful.

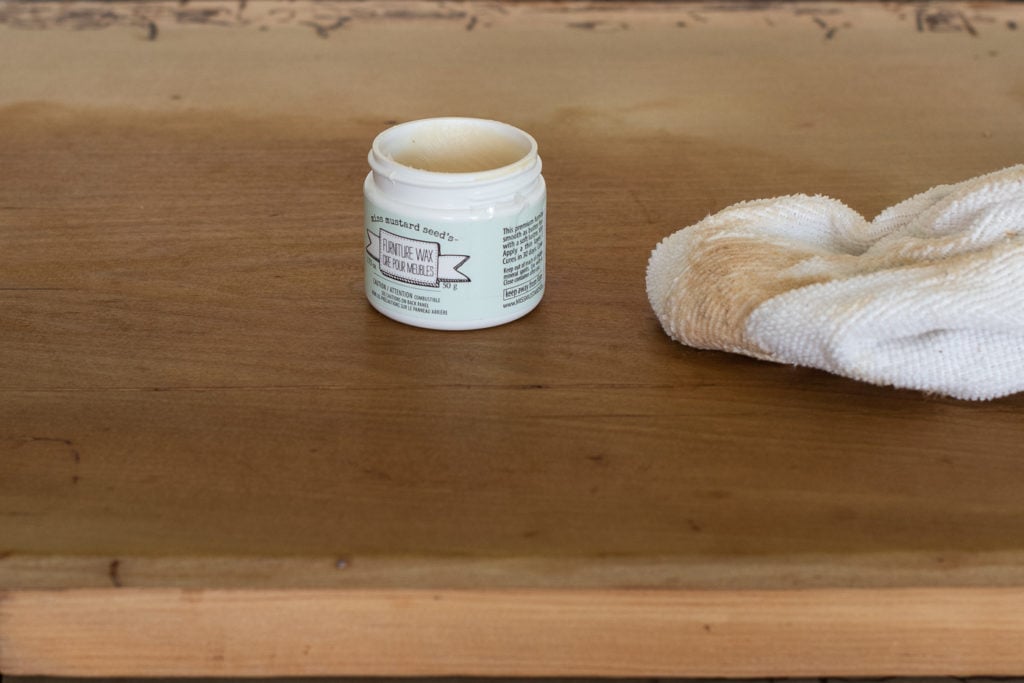
I sometimes apply wax with a brush, but if the area I’m waxing isn’t too intricate, I’ll use a microfiber cloth. It’s easier to apply the wax in moderation, in a nice, thin coat. That really is the key to applying wax – rub it into the surface like lotion into your skin. You only need as much as it can absorb and it works best in a light, thin layer. When wax is applied too thick, it ends up being sticky, tacky, and smudgy.
I only used about half of the for the entire cabinet. A little goes a long way.
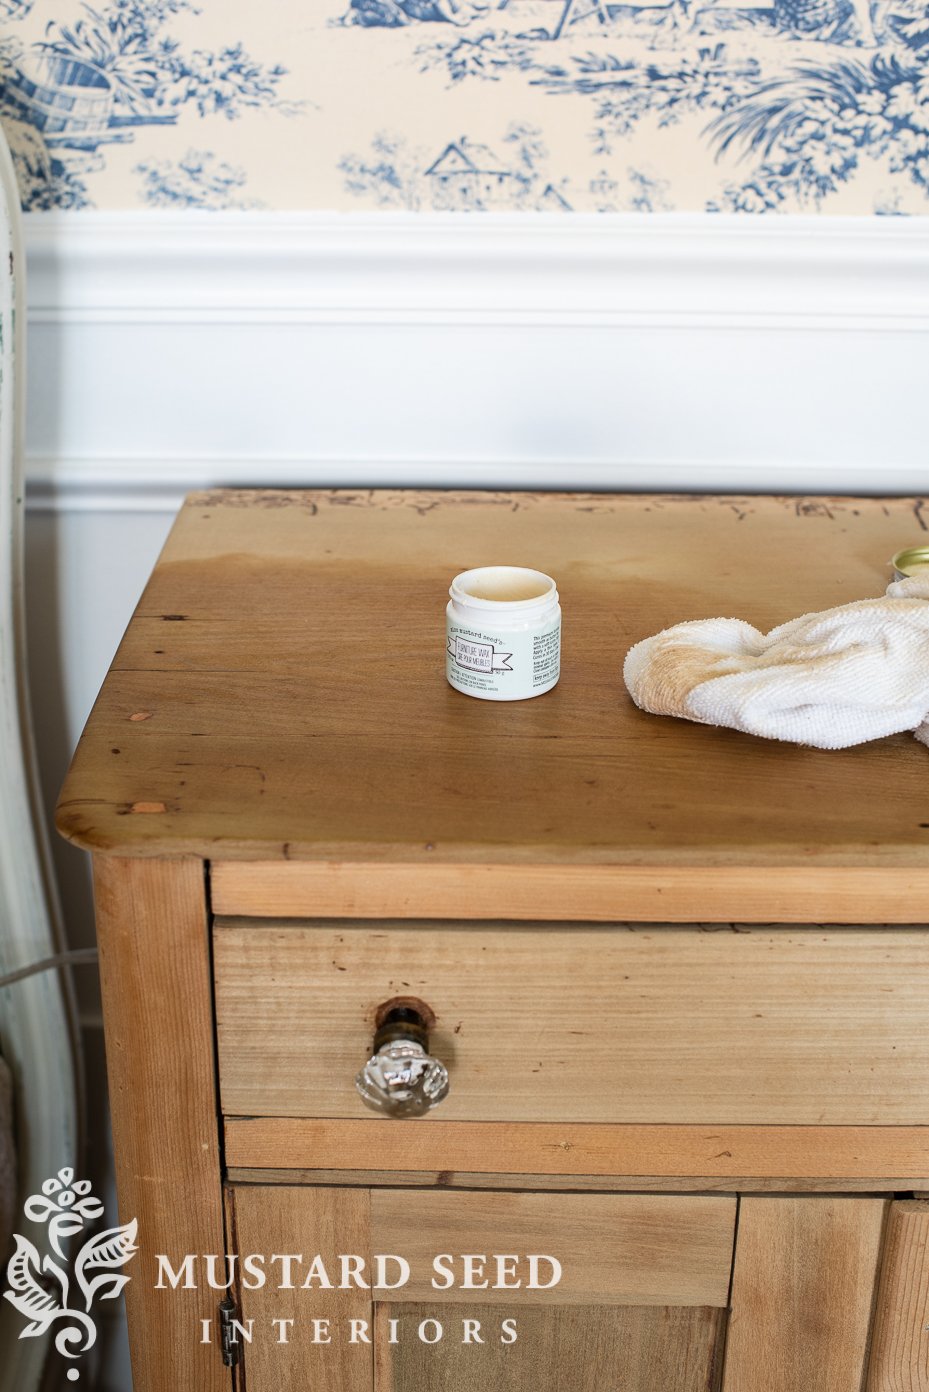
The wax will darken the wood at first, but it’ll lighten as it dries. The result is a buttery smooth finish that allows the antique pine to breathe and develop a patina over time.

I was working on this piece while I had a million other things going on, so I didn’t take step-by-step pictures, but you can see a little video waxing tutorial I made for Pinterest’s new Story Pins HERE.
I know I have a lot of wood-loving readers out there, so I hope this one makes you happy!
You may also enjoy these furniture refinishing posts and tutorials…


25 Responses
You really brought that lovely piece back to life. Do you have to reapply the wax often?
That is beautiful! I love the little sneak peak of the room.
The waxed pine cabinet looks great! I love the MMS wax….so nice to work with a product that is non-toxic and smells good!
Thanks for the peek at this pretty room!
Beautiful! I can’t wait to see the whole room!
beautiful – I have so much pine furniture I need to sand and re-wax. I also have a pine dresser that needs new knobs (it has the exact pine knobs in your original piece above) – May I ask where you go the new knobs you put on this piece? Thanks!
Finished product looks beautiful!
This piece looks beautiful! I would want to hide away in this room all of the time!
Ooh so nice. It looks lovely. Did you apply more than one coat of wax? I usually wait a few days to a couple weeks and apply second coat to the top at least. Twas a good idea to keep that piece!
Even prettier than at first. That is a wow, and you did it proud….Nice to see such this just showing it’s beautiful natural self.
not sure about the fancy glass knobs….usually see the plain wooden ones it came with..I guess they are better than novelty ones…soooooo glad you didn’t paint this piece!!! looks great against your wallpaper!!! love love love!!!!!
Another wow.
Every time I visit MMS blog I am floored with the wow factor in danged near everything you do, Marian.
I did not realize you could get the “yellow” from a pine piece. I have an armoire that I painted and have wanted to change it. I am going to try your method. Thank you so much for this timely post!!
The glass knobs are pretty amazing, and make that piece very unique.
Love, love this. Antique pine is my favorite. I just love the patina on this piece!
In the first picture with, I think that’s Esme, it almost looks like the drawer and door fronts have a slight green tinge which I thought was very pretty. But then the other picture looks like there’s no green tinge. Maybe I’m crazy!
Either way it’s a stunning piece and your a true artistic genius!
The picture with Esmé in it was taken with my iPhone and is unedited, so that’s why it looks different. The last one is taken with my nice camera and edited, so the color is much truer.
Beautiful! love the whole look, natural antique pine cabinet with those barrel hinges and a little bit of sparkle against the Toile walls and Toile head board! And let’s add a side note of modern with the nightstand lamp. And if that wasn’t enough some hand made pillows and your art, your are a woman after my own heart!! Congrats Marian lovely just lovely!
The whole cabinet looks so pretty but the top is gorgeous!!!!
So beautiful! I love old pine. Question-and it may be a dumb one-how do you sand the inside door panels with your orbital sander? Or any tricky areas for that matter. Do you get as far in as you can and hand sand the inside corners? Or does your sander have special attachments? I’m clueless!
Not a dumb question at all! I used a Dremmel sander that has a triangle-shaped head to get into the corners. The corners don’t look as well sanded in some areas because the wood is discolored, not because I couldn’t or didn’t sand them.
Love the natural wood to coordinate with the armoire!! Charming!
Looks very nice.
Love the look of your ‘new’ dresser! I am wondering if you considered using Hemp Oil on the top instead of wax. I have some Hemp Oil which I haven’t opened yet so I’m looking for best uses. What would the result have been on the dresser top with the oil?
This tutorial makes me sooooo happy! I have an antique , high top, pine side table that needs some love!
Turned out amazing! Would this technique work on Ethan Allen’s Antique Pine? I have a lot of it and after so many years the pieces need refreshing.