
Back in April, I worked on the boys’ bathroom to give it a little refresh until it reaches the top of the renovation project priority list and we can completely gut and redo it. I actually liked the wallpaper and vintage blue accents in the bathroom, but after over 50 years of use, they really are tired. The ceiling paint was peeling and stained, the wallpaper was peeling, grout was missing, and the original fan sounded like it was churning marbles when you turned it on. It needed some addressing to make the room feel fresh until it could be renovated. Instead of fighting the existing blue finishes and vintage feel, I decided to lean in and embrace it by hanging some fun peel-and-stick wallpaper that ties the beige and blue together.

Here is a before picture of the bathroom…

You can read about the makeover process in these posts –
- The beginning of the boys’ bathroom renovation | removing the wallpaper, priming & painting the walls & ceiling
- 1970 bathroom refresh | sources and before & after
I had already spent a lot of time and effort removing the old wallpaper and glue, sanding down peeling paint, priming, and painting, so I didn’t want to put more paste on the walls to have to remove again when we did the full renovation. Peel-and-stick wallpaper seemed like a great solution to hide some of the texture left from the wallpaper glue as well as imperfections in the plaster walls. It would make the bathroom look nice until we can knock it all out and will work with the blue and beige fixtures and tile better than paint alone.
I have done lots of wallpapering over the years and have even starched fabric on walls, so I’m no stranger to hanging wall coverings, but I have never used peel-and-stick wallpaper on more than small projects. Since it was the best option for my specific situation, I decided to give it a try. I can’t speak to how easily it removes (which is a big advantage over traditional wallpaper), but I wanted to share the process of hanging it along with some things I learned that will help other first-time peel-and-stick wallpaper users.
hanging peel-and-stick wallpaper | materials needed
-
-
- peel & stick wallpaper (THIS is the pattern I used)
- straight edge (I like to use a clear quilting ruler like THIS ONE)
- wallpaper smoothing tool
- scissors (THIS is my favorite pair)
- utility knife
- Roman EZ Hang (if needed)
- step ladder
- level
- pencil
-
While hanging wallpaper can be a solo job, it’s much easier if you have an extra set of hands. My mom is usually my wallpaper-hanging-assistant and she helps me control the strips of paper as I’m getting them in place and hands me tools as I need them.
hanging peel-and-stick wallpaper | steps & tips
Step 1 | Preparation
Before you even start hanging the wallpaper, measure the room to calculate how much paper you will need. Always order extra to account for lining up the patterns and waste. Make sure walls are clean, smooth, and either painted or primed. Also, if the room is freshly painting, allow the paint to cure for 30 days prior to installing peel-and-stick paper.
Step 2 | Mark a level line
Start the first section of paper in the least-visible corner of the room. That is usually behind the entrance door to the room. Use a level to draw a plumb line to use as a guide when hanging the first piece. All other sections of paper will be lined up with the first one, so it’s important it’s level. You cannot trust that the ceilings or walls are level in your home, so it’s always best to use a level and work off of that.
Step 3 | Hang the first section of paper
Cut the first section of paper to length with scissors, leaving several inches excess at the top. (The extra paper at the top is important because ceilings are rarely level. It will be cut off with a utility blade and straight edge so it fits tight against the ceiling.) Remove the top few inches of adhesive backing and stick paper to the wall, following the level line. once you’re satisfied with the placement of the paper, continue to peel off the backing, smoothing the paper down with a smoothing tool.

Peel-and-stick wallpaper doesn’t “float” like traditional wallpaper with glue. You have to stick it in place and commit to it. If it’s not in the right place, you can peel it off and try again. The adhesive on the paper I used is pretty forgiving and allowed some room to reposition pieces. You do want to limit how many times you do that because, as with other adhesives, it can become less effective if it’s fiddled with too much. If you’re having trouble getting the peel-and-stick wallpaper to stick to certain sections of wall, apply Roman EZ Hanger spray to the wall. This will allow the paper to “float” and it will help with adhesion if pieces are peeling off.
Smooth out bubbles and wrinkles with a smoothing tool.

Step 4 | Remove excess paper
Press a straight edge tightly against the ceiling, trim, or where you are cutting the paper. Use a sharp, clean utility knife to cut off excess paper in a straight line. In some tricky spots, I used scissors, but you get a much nicer cut with a straight edge and utility knife.

Step 5 | Repeat steps 3 & 4
Line up the pattern for the next piece of paper to hang and cut it to size as you did the first piece. Follow steps three and four, repeating the process until the room is finished.


What if your peel-and-stick wallpaper isn’t sticking to your wall?
After about 24 hours, it was clear which wall was the problem area in this bathroom The paper was adhering fine everywhere but in one spot that affected three panels. One just refused to stay up! The nice thing is, the paper can be smoothed out, even if it crinkles over on itself as this panel did.

I applied Roman E-Z Hang to those sections of wall, smoothed the paper back in place, and haven’t had a problem since. I only had to use the spray adhesive on a few places on that wall, so it was clearly an issue with the wall and not a failure of the peel-and-stick wallpaper. My guess is it’s some of the texture left from the old wallpaper glue. Even through I cleaned it off, some of it remained and was lifted when I primed the walls. In other areas, the paper adheres great even with the humidity in the room and around tricky spots like where we wrapped it around the wall between the sink and tub.

So, if your walls are smooth and clean, you might not need to use E-Z Hang at all or just use it in a few stubborn areas as we did. I probably used a total of about 10 squirts and will keep the bottle on hand in case any other areas need a touch-up down the road.
I bought the bottle after the fact, but I do wish I had it when we were hanging the paper. It would’ve been nice to use it in the tight corners around the mirror to help the paper slide around a little easier. It kept sticking to the wall as I was trying to smooth it into the corners. I got it done, but a little spray would’ve made it easier.

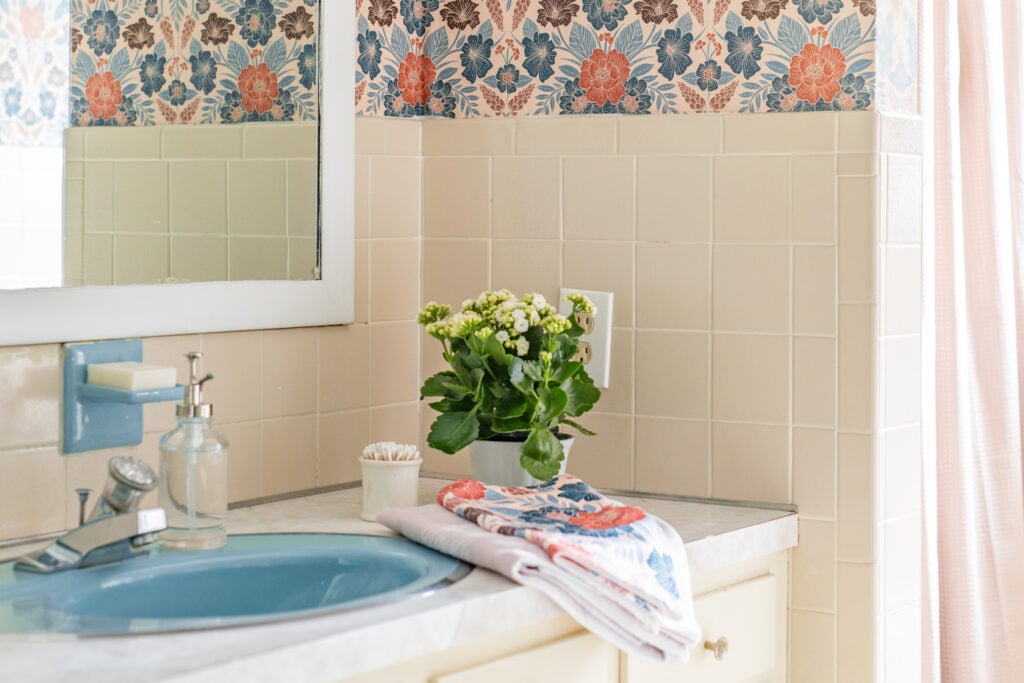
So far, the new ceiling paint isn’t cracking or peeling, which is a huge victory! The paper looks cute and cheery and our contractor replaced the tile I accidentally knocked out and filled in some missing grout on the tile and floor to make it look nice and add water protection until we renovate. It’s still a retro bathroom, no doubt, and it has issues that are deeper than cosmetic, but it looks so much nicer and allows us time to plan and save for the full overhaul.
Overall, I’m very happy with how quick the peel-and-stick wallpaper was to hang and how easily it transformed a room. Another nice option for those who want pattern on the walls without the glue, starching fabric to walls is an old Army wives trick that works like a charm and is easy to remove.
If you’re opting to hang traditional wallpaper, HERE is a post comparing pasted vs. unpasted. If you just can’t fall asleep one night, HERE is a post comparing wallpaper paste brands. And, if you’re trying to remove wallpaper in your home, HERE is a post on removing that pesky wallpaper glue.


14 Responses
Marion, I found that using a piece of painter’s tape as a “tab” on each side of the wallpaper and pulling it apart makes getting the backing off the paper very easy. Not sure if you ever tried that.
Marian, I’m reading this on a PC. Is some copy missing?? You reference in bold a Step 4 and a Step 5, but don’t see a Step 1, 2 or 3.
Thanks for mentioning the Roman EZ Hang. I’ve wanted to do peel/stick wallpaper in an old power room and feared everything would fall down!! This sounds like a life saver.
They are there. Under the list of materials.
And yes, the Roman EZ hang really helped. When that one piece fell down, I was worried it would all just peel off, but it was just that one piece and the corners next to it, so there was something about that stretch of wall. It has adhered really well everywhere else and I love knowing I can just peel it off when we’re ready to renovate. Let me know if you’re still not seeing the steps!
Actually, you were right! I could see those steps on the back end, but there was something funky in the code that was preventing them from being visible on the front end. I fixed it so all of the steps are present.
Yup – I see them now!! 🙂
Thanks for the review–I’ve been curious about peel and stick paper but a little wary. Also, that bathroom looks fantastic! I love how the paper complements the tile colors.
This looks great! I spent the morning prepping our entryway for peel and stick wallpaper, so this post is perfect timing for me! How smooth do you think the walls need to be? Ours have a little texture and I’m using a faux grass cloth paper. I’d like to avoid the dust of sanding the walls and am a little worried about the possibility of under layers of paint containing lead. Do you have insight on that?
I would get a bottle of EZ Hang and use it if you have any problems with adhesion. I had already cleaned, sanded (we had them tested and they were lead-free), and primed my walls and they were still rough in places and I think that’s why the paper didn’t stick as well. The EZ hang, just a small amount, was enough to overcome those issues.
Used it in my old and now in my new house. Love it, easy peezy!
I may try peel and stick wallpaper on a half bath. You have given me courage. In your photos I noticed a bath mat and towels that matched the wallpaper. Did you have those made or just a lucky find?
I believe I read once that she got it all at Spoonflower.com. Check her links above for previous –first or second in series.
At any rate Spoonflower can make virtually any pattern they offer into all kinds of things. Fabric of all weights and fibers. Wallpaper. Napkins. Pillow coverings. Table clothes. Curtains. Etc. Etc.
And a zillion and 1 choices of patterns. Designed by artists around the world. They have monthly themes and have open design contests based on that month’s theme. Can you tell I’m addicted?
I mostly scroll and favorite things when I’m killing time.
I suggest you search by topic or theme and color to start with. Birds + midcentury + blue, for instance. Cats + planets + ufos will bring up some really cute ones for kid things. Lol.
It’s all from Society6 and I share resources in the initial post about the bathroom refresh.
Hi! I have texture on every single wall in the house. Do I have to fully sand it down before placing wallpaper? Is there another type of wall treatment that doesn’t require sanding off the texture? Thanks!
It depends on the kind of texture. Is it an orange peel texture? One option for you might be starched fabric. That is pretty forgiving with textured and irregular walls since you’re using starch to hold the fabric in place, so contact with all of the wall surface is less important.