
When you do an internet search for “how to remove wallpaper glue from walls”, you end up finding all sorts of articles that suggest all manner of mixtures to rewet glue and remove it from a wall. I read a lot of those articles as I needed to wash wallpaper glue off of the walls of our primary bedroom and was hoping to get it done before having new hardwood floors installed. I learned, though, that most of these articles aren’t written by people who have or are in the process of washing wallpaper glue off of their walls. It’s missing the angst that comes along with doing this unenjoyable and discouraging DIY project. It’s also missing the combination of products, materials, tools, and techniques that actually work to remove the glue and prepare the walls for painting.
Since I just spent the better part of last week doing this very project, let me answer the question, “how to remove wallpaper glue from the walls” with a bit more depth, sincerity, encouragement, and detail.
We need to start this wallpaper-removal story where it began, though, and that was on the day after we closed on the house. My mom and I wanted to “check” some of the wallpaper panels to see how easily they came off the wall. I have already bought a steamer (THIS ONE) and was prepared to do battle, but the paper in Calvin’s room peeled right off. I mean, it was almost comical how easily it came off. We were giddy and decided to try other rooms. The wallpaper easily came off the walls in all but two of the rooms.

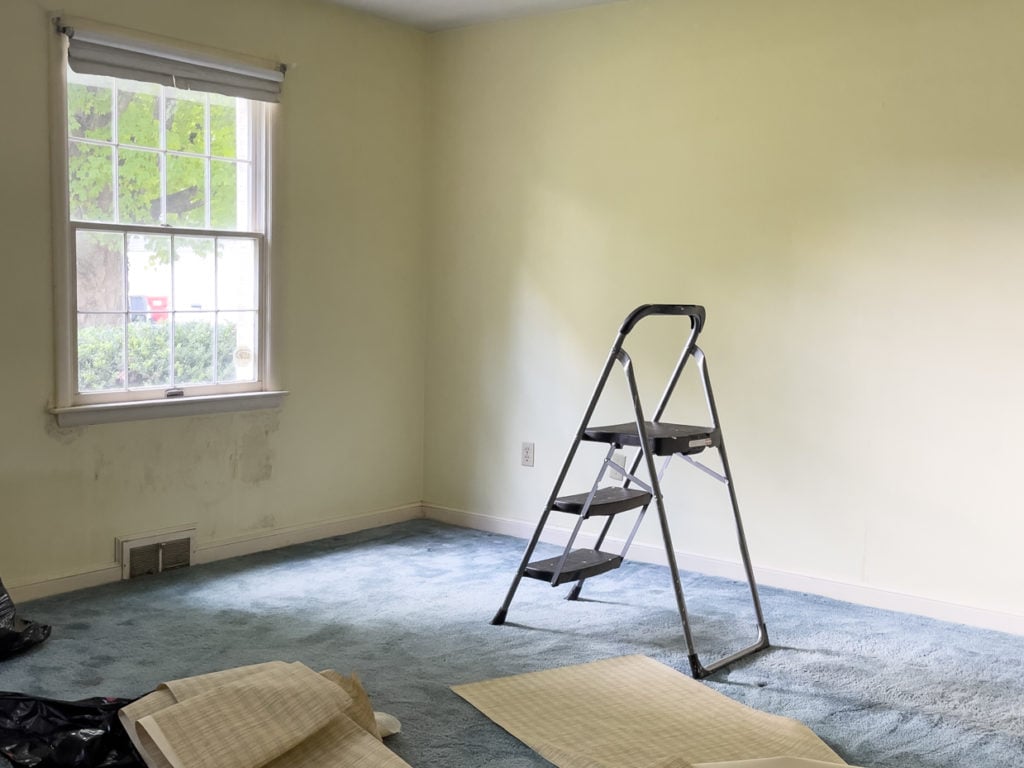
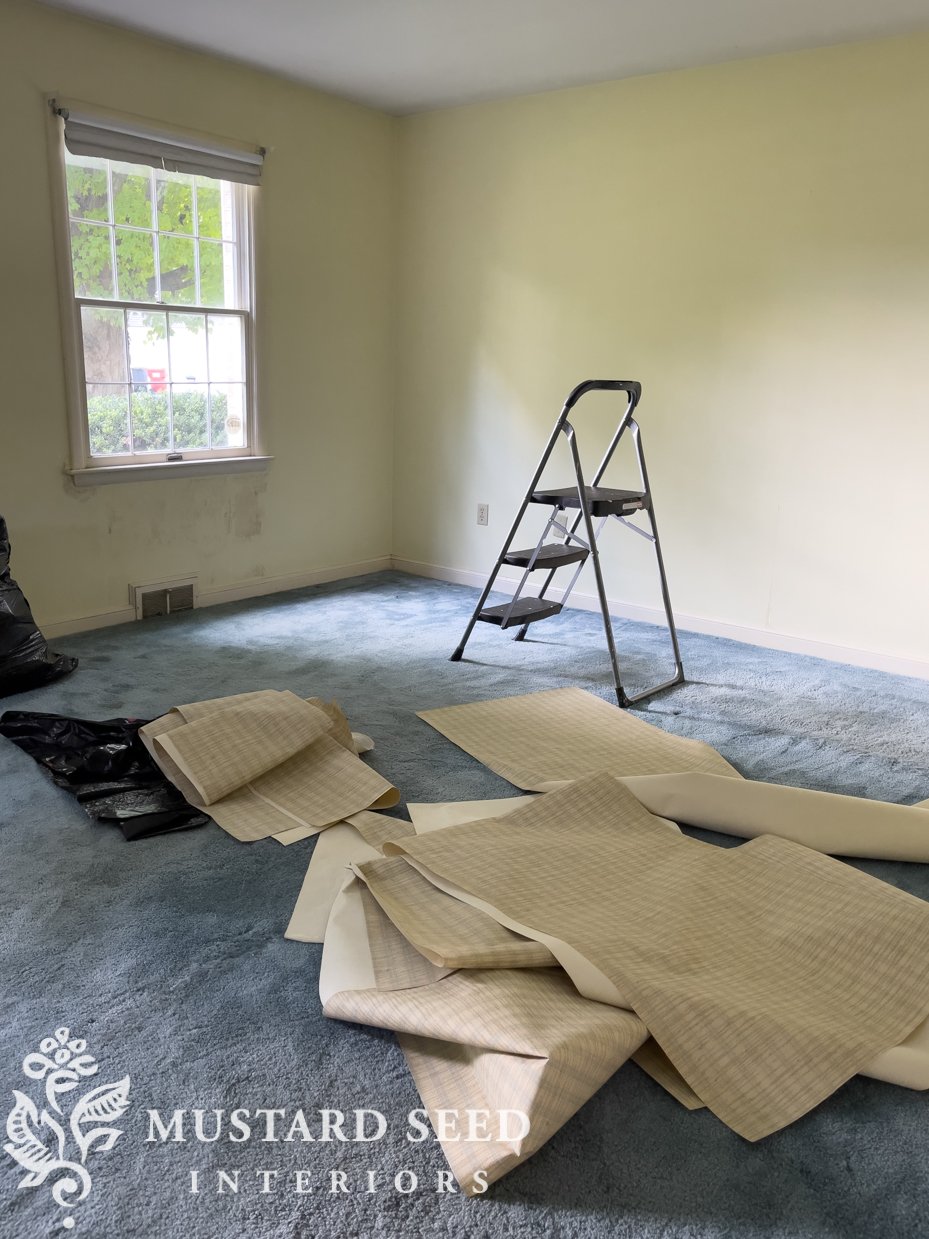
(primary bedroom before)
Even though it wasn’t planned, we could hardly resist pulling off the wallpaper in the primary bedroom, and we were able to get it all down in about 30 minutes. Well, that was easy! We really dodged a bullet with this wallpaper and would be able to have these rooms painted in no time!
It was one of those rare DIY moments when a project was going to take a fraction of the time and effort expected. We were celebrating already and, as it turns out, celebrating too soon. I knew that the walls weren’t clean. They felt rough to the touch and, in my heart, I knew it was leftover wallpaper paste that needed to be dealt with. This is when the internet searches started. “How to remove wallpaper glue from walls.” “How to prep walls to paint after removing wallpaper.” “Best primers after wallpaper removal.” “How to easily remove wallpaper glue from walls.”
As I said, I found a lot of sanitized articles that mostly focused on the liquid used to rewet the glue, which we learned isn’t really an issue since everything we tried worked to some degree. Concoctions that contained vinegar, dish soap, and warm water were the front-runners, but fabric softener and baking soda were other common ingredients. Wetting the glue was no problem. It was getting the glue off the walls that was the problem.
Just imagine spilling wallpaper paste on the floor. Cleaning it up isn’t simply a matter of wiping it up because glue does what glue does, and it sticks. It gums up whatever you wipe it with and needs to be scraped and scrubbed repeatedly to get it off of even a smooth surface. In short, it’s a gooey mess, and just rewetting it isn’t enough.
You might be wondering, “Why does the glue need to be removed? Can’t I just paint over it?” When you touch the walls and feel the rough texture of the dry glue, it seems like it wouldn’t be a big deal to simply paint over it. The problem is that almost all paints contain some amount of water, which will rehydrate the glue, which will make a gooey mess that won’t stick to the wall. The paint will bubble, pucker, and peel. There is no way around it. The glue has to come off one way or another.
So, if you have to remove it, how do you do it? There are actually a couple of approaches you can take. Dry or wet. For dry removal, you can sand the glue off the walls. Since it is dry, it can come off in a fine powder. The upside to that is no gooey mess. The downside is that it kicks up a lot of dust, and I was hesitant to do that with decades-old wallpaper paste. I don’t know the contents of the paste and kicking it into the air is more hazardous than wetting it down. For this reason, we took the wet-removal approach.
how to remove wallpaper glue from walls | a note about lead
As a side note, we did have the entire house tested for lead as a part of the inspection process. I thought that was a no-brainer since the house was built prior to 1978 when lead paint was completely phased out. I figured there was likely to be some lead paint and we needed to know where it was and to what extent. If the house was riddled with lead, we might’ve considered passing on it especially since we were planning some renovations. But, the report came back clean. There was only one bit of lead on a small area of trim on the exterior of the home. I’m not sure why it was just in that one spot, but that was good news. We would be able to strip, sand, and demo without lead being a concern. Interestingly enough, out of both the selling and buying realtors with dozens of years of experience between them, I am the only buyer who has ever had a lead test as a part of an inspection. I was floored to hear that, but I think I’m a bit more aware of lead and the dangers since I’ve worked with paint so much.
If you’re stripping wallpaper in a pre-1978 house, it’s a good idea to have the walls tested for lead prior to removal. In the specific lead test we purchased, they tested all layers of paint and paper, so they could “see” what was in the older layers under the modern finishes. It’s important to know if your paper is over old lead paint so that you can take precautions when scrubbing, sanding, and otherwise disturbing a layer that contains lead. You can read more about lead HERE.

how to remove wallpaper glue from walls | the products, tools & materials
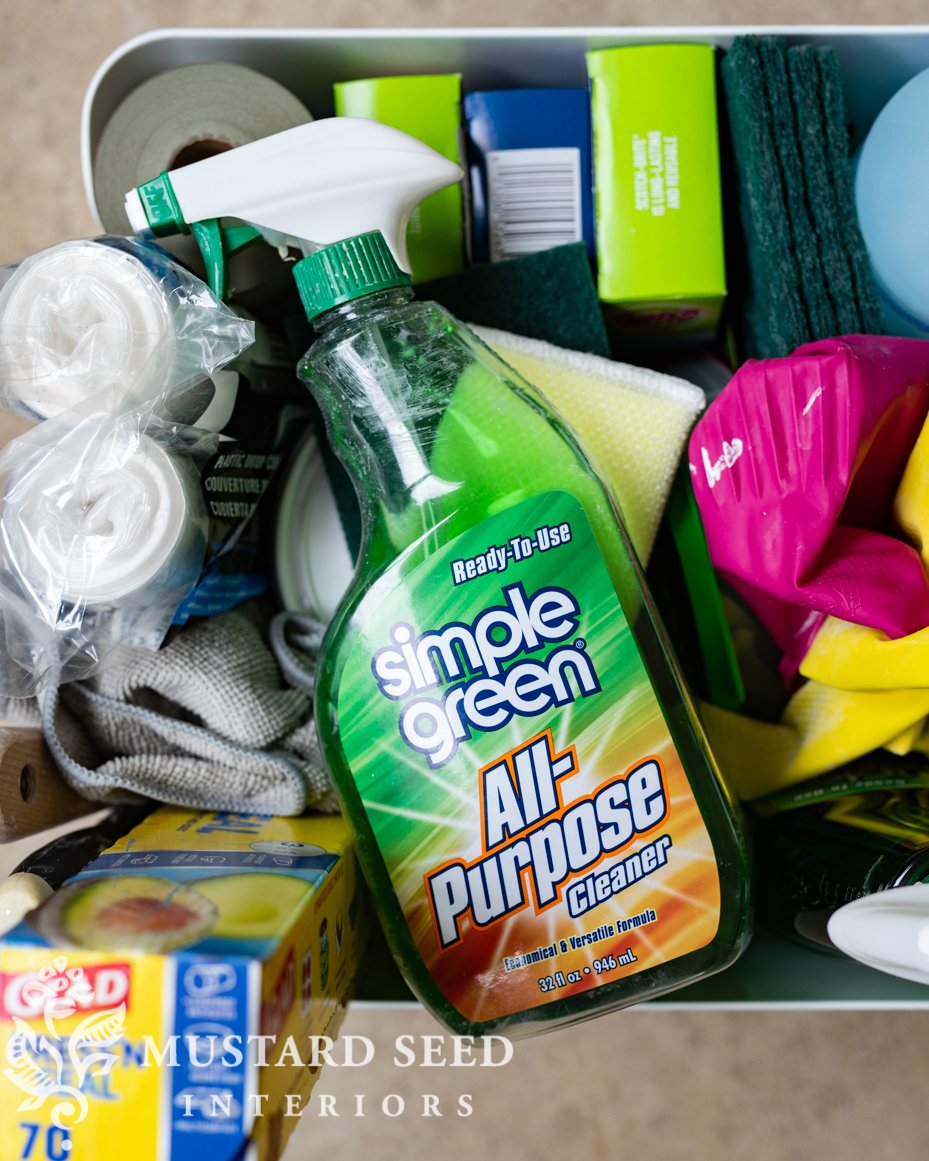
To rehydrate the glue, we used two different sprays. One was (in an industrial spray bottle like THIS) hot water + 1 tablespoon Dawn dish soap + 1 cup white vinegar. The other was Simple Green cleaner. Both solutions worked well, but we thought the cleaner edged out the homemade mixture and left the wall cleaner. We have a lot more walls to do, we plan to use the cleaner for those. The homemade mixture worked, though, so you can certainly use that if it’s what you have on hand or you run out of the cleaner.
The sponges ended up being more important to the success of the project than the solution used to rewet the glue. Kitchen sponges, rags, and microfiber cloths all got gummed up with the glue quickly and then you were just smearing around the glue. We did end up using microfiber cloths as a part of our method, but we used them at the end once the glue was mostly removed. We liked using Dobie sponges, 100-grit sanding sponges, and scour pads. I’ll share how and when we used each in the instructions below.

Other materials we used were –
- A bucket of hot, soap water for rinsing sponges
- rubber gloves
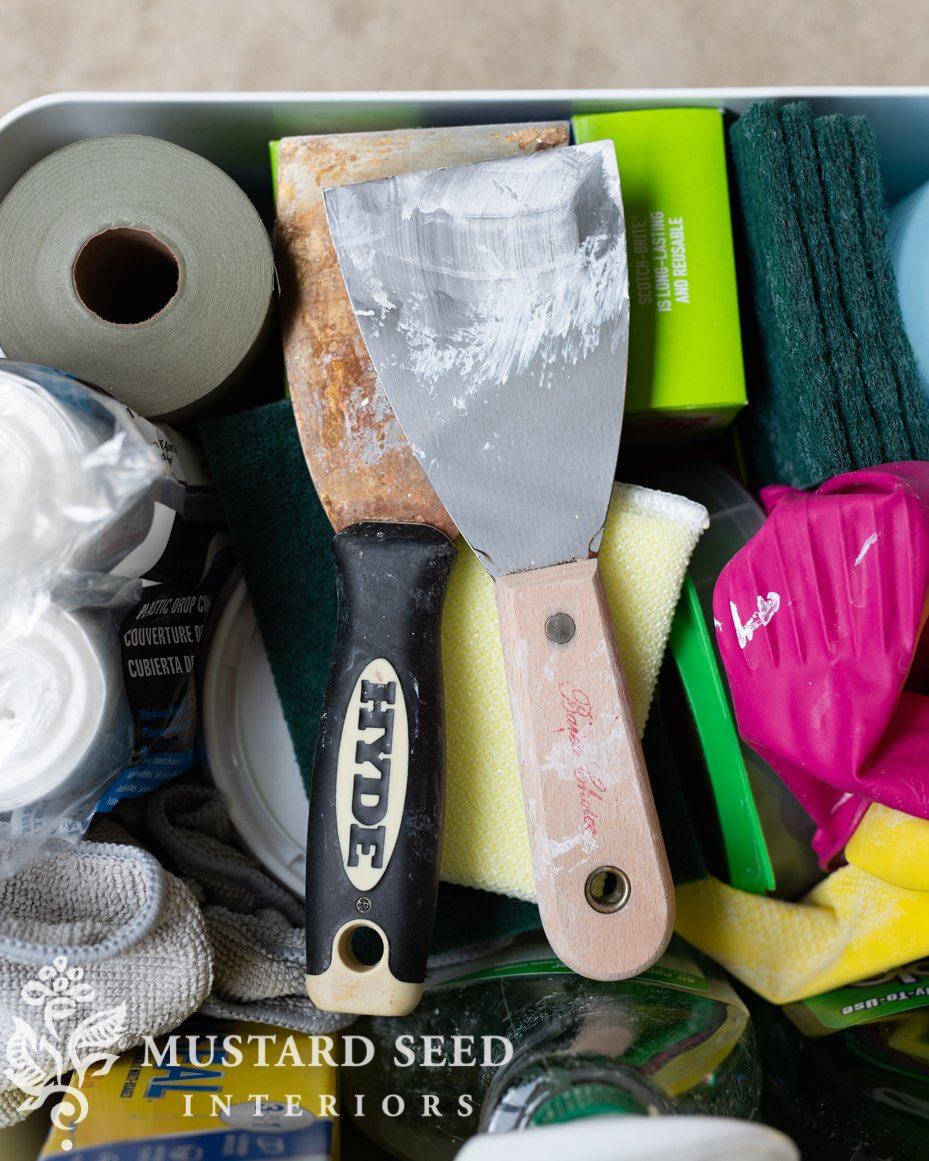
- Putty knife for scraping off clumps of glue
- Plastic drop cloths for covering the floors
- Press N’ Seal for sealing off outlets and switches
- Paper towels

how to remove wallpaper glue from walls | the method
Prior to spraying the walls, you want to either turn off the power to the room at the breaker box and/or cover the outlets with Press N’Seal to seal them off. In case you didn’t know, water and electricity don’t mix well, so this is an important safety precaution.
As far as the method of removal, it took us two full walls to learn the method that worked the best (and we tried a lot of different methods!) My mom and I used slightly different methods and they both worked, so I will share both of them.
Mom’s Method
- Spray a small section of wall with Simple Green (or the homemade glue remover) and wipe with a Dobie scrubby sponge.
- Follow up with the sanding sponge to remove even more glue. The sanding sponge really digs into the wall and we both felt like it did an excellent job at getting the glue off of the wall, even in stubborn places.
- Wipe with a microfiber cloth and check the wall for any remaining glue.
- If any stubborn glue spots remain, spray again and scrub with the Scour Pad.
My Method
- Spray a section of the wall with Simple Green (or the homemade glue remover) and scrape the glue off with a putty knife. I liked this option to get large amounts of glue off the wall before I started scrubbing. I did try the Dobie first and thought that worked well, but I felt like the sponges didn’t get gummed up as much if I scraped first.
- Spray the section of the wall again and scrub with the Dobie sponge.
- Follow up with the sanding sponge.
- Wipe with a paper towel to dry and wipe off any excess glue. (I preferred using a paper towel because I could use a clean one each time.)
So, you can see that our methods were very similar and both worked well to remove the bulk of glue from the walls. The bummer of this job is it has to be done properly and thoroughly. That means cleaning every inch of wall that is covered with glue.
One of the struggles we had was knowing when the glue was completely removed. We could see the areas of wall that still clearly had glue on them (they look a little fuzzy and hazy when viewed from the right angle), but even when the walls looked and felt clean, they would still feel a little sticky when we wet them again. Oh, it was frustrating! All we could do was our best and then we had to hope it was good enough to paint.
how to remove wallpaper glue from walls | prepping the walls for painting
To make one last ditch effort at getting off any remaining glue, I sanded the walls with a 100-grit drywall sanding pad on a stick. (I used THIS.) This also helped smooth out the wall and places I had patched to get a nice, fresh surface.

(Of course, wear always wear a super-stylish respirator and goggles when doing fine sanding work. Another important safety note, you might also need to have the glue tested for Asbestos if it was installed before the 1990s. THIS is the one I’ve used for samples in our house.)
I tried priming a wall with Zinsser 1-2-3 and had several places where the primer bubbled. I scraped off those areas with a putty knife (which also removed any glue causing the issue) and then put on more primer. I wanted to share this to let you know you can try priming when you’re unsure if there is still glue on the walls. You can deal with it and move forward. I was actually loving how the primer would take all of the glue off with it! Someone needs to create a product you roll onto the wallpaper glue, which bonds to it, and then you scrap it off. Just like stripping a piece of furniture. Oh well. The primer “told” us, though, where we missed and that was helpful.

(You can see how the primer is drying unevenly and bubbling a bit in places.)
I wanted to test out a different primer, though, to see if it worked better. I bought Zinsser Cover Stain primer, which is made for good coverage and adhesion on slick surfaces and it’s oil-based. (It does still contain water and can be cleaned up with soap and water, so rehydrating any remaining glue might still be a problem.) The Cover Stain primer worked beautifully and so much better than Zinsser 1-2-3 for priming the walls after cleaning off wallpaper glue.
One of the application tips I learned when priming a wall that had glue on it was to lay down the paint and leave it alone. Let it dry before cutting in or rolling next to the wet paint. As with other tricky surfaces, it would just pull the paint back off.
So, I applied two coats of Cover Stain primer to make sure we ended up with a nice, fresh, glue-free wall to paint. I was never so happy to see a primed wall in my life. The next day, I applied one coat of matte acrylic paint in Benjamin Moore’s Decorator’s White, and the walls look so good! We finished just in time to have the hardwood floors installed. I was hoping I could get the closets painted, too, before that happened, but getting the ceiling and walls done was a triumph!

Look at those beautiful paper-free, glue-free, freshly painted walls. Those were some hard-earned white walls right there!
I surprised myself by choosing white for the walls, but I just didn’t know what color I wanted to paint this room, yet, and the white primer felt so good after all of the work we did. White paint is just what felt right for this room at this time. I’m sure it’ll change in the future, but for now, I have a clean slate.
Once the floors are done, I get the trim and closets painted.
Here are a couple more 1970s glue-removing adventures that might help if you’re removing wallpaper or carpet glue –
Tips from the pros on removing wallpaper
Removing carpet glue from concrete
[/et_pb_text][/et_pb_column][/et_pb_row][/et_pb_section]


37 Responses
The fact that the wallpaper came off so easily suggests to me the walls were sized before papering—-usually a thinned wallpaper paste. Maybe that’s why it was so hard to remove the glue, there was extra. I think nowadays, people don’t size the walls anymore, it’s more optional.
Easiest method I’ve found is to just paint over it with really cheap white emulsion. Let it dry and then sand with a da sander hooked up to a hoover.
If you fancy a messier option as you don’t have a da sander you can just use a scraper to take the wet paint and bubbled up paste off the wall. The paint binds to the glue and makes it easier.
Why not just put up lining paper and paint that?
Great info! We used professionals for wallpaper removal due to health issues. Unfortunately, glue residue from removing backer paper was left on wood finished kitchen cabinets. Any ideas on how to removed that light hazing/dullness without damaging the finish?
Excited about accompanying you on your journey to refresh this home.
Lit is so important to clean glue residue from your walls to avoid future problems. We removed wall paper from a room and the paint came off with it! It took a while to understand why but the previous owners what we think happened is the previous owners also removed long gone wall paper then immediately painted then wallpapers over the old wall paper glue. What am incredible mess. We had to scrap all that paint off the wall, with came off in millions of teeny tiny pieces., then clean the glue them prime and paint t.
We are Simple Green groupies in our house. We use it for everything! Several years ago we rented a house. The living and dining room floors were covered in old shag carpet that were disintegrating . We asked the owner if we could remove the carpet. She said yes since there were hardwood floors underneath. Upon removal we saw that someone had painted without laying drop cloths. What a mess. Someone suggested Simple Green and to our astonishment it worked. All the paint came off.
What concentration of Simple Green did you use for the job?
Simple Green saved me when a dog chewed a ballpoint pen in the middle of the family room and left a big black stain. Simple Green and my carpet steamer got the the ink out and then really cleaned the rest of carpet in the room.
I found Simple Green so useful for all kinds of cleaning jobs that I bought a gallon of concentrate and dilute it myself for the use at hand. If you like the product it is much mor economical and environmentally friendly than buying multiple spray bottles.
Chris, you are right. We have been buying the gallon container size for years. We have a mixture in spray bottles in the kitchen , laundry and bath areas of our home.
Wow. Great perseverance! This was A LOT of work! It’s making me think twice about buying a house with wallpaper in the future. Perhaps we could just redrywall that room or cover with beadboard.☺️
I’m surprised that using a steamer didn’t help, that sounds discouraging (I assume you tried it since you mentioned you had one ready and had tried lots of unmentioned methods.) I would’ve also been tempted to spray everything down and stick foil or plastic wrap to it to see if it might peel part of it off. At the very least, I suppose it would keep it wet long enough to hopefully soak through all the glue on the wall and leave less residue.
It’s so fun to know that your Mom is close enough now to help with these ‘new’ home tasks! I’m sure she’s delighted to have your family within reach. As a Mom myself of two forty somethings who love to re-do, I understand the thrill of working along side a daughter! Blessings to all!
I’ve always used one of those rotating hole puncher things all over the wallpaper, then sprayed with warm vinegar….let set, pull off. To remove the glue I’ve always used Washing Soda in a bucket of warm water and a rag, washes right off.
I love the look of wallpaper but the removal of wallpaper is NOT fun. As a decorator, I hire a company that is owned by a man and his two sons. All they do is remove paper. They come in with minimal supplies and do an amazing job. I don’t know what is in their big tank of very hot water but they do a superb job. They use these big plastic tank back pack sprayers with hot water. They spray and scrape and soon the room is wallpaper free.
I always enjoy hearing that you and your mom
are working on a project together.
I had to quit reading this because it was making me so frustrated. All I could think about was just installing new Sheetrock. High five Ann. You’re a better woman than I am.
I have a 1920’s home. The walls are plaster. Previous owner(s) have wallpapered and then painted the walls, maybe several times. I would like to paint but am terrified of how to get painted wallpaper off of plaster walls. There is a small chip in one of the walls and I can see layers probably 1/4 inch thick.
I’ve removed multiple layers (including down to 1950’s wallpaper) in the past. I used the hot vinegar solution, peeled it off, more hot vinegar, scraped off glue, warm water wipe down, Windex with ammonia wipe, and final warm water wipe down. Sounds like a lot but very little work on my part.
I found the key was leaving the vinegar on long enough for it to do it’s job.
What a lot of work that was! I don’t know how well this would work but I can just imagine some people might try replastering the walls instead!
Am so glad you and your mom neutralized that bedroom right away! You need at least one room that feels like home to work from.
I used to work for a local wallpaper retailer so I would spend my days teaching people how to install and remove all kinds of wall coverings. By and large most wallpaper manufacturers recommend using TSP liquid to remove paste. It breaks down the paste pretty quickly and you can scrape it off with a plastic putty knife and then wash the walls down with fresh TSP. One thing that I learned that will make the process a much bigger job is that sometimes professional paper installers will add wallpaper paste to the back of prepasted paper. Every time I strip paper I pray I don’t run into that mess.
The only problem with TSP is that it is extremely toxic.
Yes, I have used TSP some on furniture, but I really prefer to work with other products if I can. What we were using was much gentler and still worked.
You are correct, TSP is strong stuff. After checking my supplies I realized that I use TSP substitute. It works as well as TSP.
The horrors of wallpaper removal. After trying ALL of the above in my house and my in-laws house when we were preparing to rent it to friends, I resorted to calling a friend from another congregation who did construction work professionally. The bedroom had to be re-mudded, textured and then it could be painted.
Most of the walls in my house had wallpaper applied directly over drywall (note to everyone-do not EVER do this. )
Every wall needed repair and new texture.
The kitchen wallpaper was impossible and ended up being primed with a permanent sealer before repainting, the wall paper seams are still visible although only I am looking for them.
Marion, I admire your moxie, go get ‘em!!
Just rest up in between…
Yep, I had a house full of wallpaper-direct-on-drywall years ago and it was a HORRIBLE removal job to do!! I can still remember it took me one hour to chisel it off of a spot that was 2 inches square!
I have had my own horror story of removing wallpaper from a bedroom in my home…built in the 1940s! The wallpaper did NOT come off easily and the glue was harder yet. I understand totally how happy you were when you were done!! Good job Marian and Mom!
The room looks great!
I had a huge, old house that was wallpapered from top to bottom. I steamed off all of it. Ugh! I found that the steamer itself was extremely effective at softening the glue very well and then I just used a putty knife to scrape off the wet glue. The last thing I did was wash down the walls with TSP (Trisodium Phosphate) mixed in water and it did an excellent job of removing anything remaining on the walls, which wasn’t much, and just a plain sponge did the trick. There was no scrubbing needed. I think the heat from the steam made it exponentially easier!
Oh, I got that glue off all right….. Used all the above, got the glue off, but it took the paint of too. Then I had uneven spots on the walls and ended up sanding every square inch to get a clean surface. Never again! I don’t care if it’s cute, on-trend, easy peel, or what…I’ll never use wallpaper again. It aged me at least 2 or 3 years! Ha!
I spent weeks removing wallpaper from a house we bought 20 years ago. I have avoided houses with wall paper since then! I have no affiliation but there is a company called Franmar that makes soy based products that are safe to use. Their paint stripper is awesome. Amazing stuff. They might have something for wallpaper glue too. If you have question they are a call
away. You will always appreciate those beautiful walls after all of your tough work. Good job! Give your mama a hug for all of us missing our moms.
Yikes! What a mess! I got tired just reading about it. Just think how wonderful the house will look when you are finished.
We had a 1940’s colonial revival with painted over wallpaper in two rooms. It was a daunting task to remove it but we had plaster walls so the walls looked great when we were finished. In our 1829 house the walls in the library were in such bad shape I had to put up wallpaper liner and then wallpaper over that. It was an amazing product and solved the problem of sketchy walls.
I so admire your tenacity.
I had the same problem years ago and also when tile was removed. It damaged the Sheetrock.
I searched many hours and was told to use Zinnser Gardz. Oh my goodness it was a miracle product. No bubble paint etc.
Thank you for the mention of Zinsser Gardz. I have a small foyer that has paper residue and I was dreading the wetting and scraping. I just ordered this from Amazon. Fingers crossed!
Okay, you have reminded me how much I do NOT want to do that job ever again! And yet it seems that all the older houses that are affordable come with at least some wallpaper in them. As you have many wallpapered walls to deal with there, it is great that you have your favorite team of helpers living nearby! It sounds like it will be a grueling ordeal!
I do want to point out that there are such things as peel-and-stick wallpaper for those who do not want to create or leave a mess for others to have to deal with down the road.
I hate that job too. My entire first house was covered in wallpaper that came off in bits. After using the spray on method similar to the one you mentioned and scrubbing with a bath scrub, I used a large drywall trowel to scrape off the wet glue. Then I resprayed and scrubbed again.
I am in the middle of this wallpaper glue removal nightmare right now. I have been scrubbing for hours and hours and yes, just mostly moving the glue around and not getting it actually off the wall!
Here’s my question to you though about the wet method.
When you use your scraper to get the goop off the wall or even if you just use your mom’s method of the scrubby, after actually scraping the stuff off the wall, then what do you do? Do you have a bucket of hot water nearby to rinse out the scrubby or where are you putting the goop that you scraped off the wall.
I’m tempted to try the method but I’m so nervous about making a mess with the goopy glue! I just had new carpet installed this week…
Good question! With the scrubby method, my mom would use a bucket of warm, soapy water to rinse off the sponge as needed. With the scraping method, I would wipe the goop on a paper towel and then throw it away once it was spent. As a note, we did dump the dirty water out outside so we weren’t putting old wallpaper glue down the sink.
Almost forgot. While we were away last winter the mice took residence in the cozy parts of our Subaru’s sunroof eating away the lining. I hear that mothballs are another deterent. And something about a certain type of bar soap? Lavender too.
Downey mixed with a little less water in a spray bottle works great! Dissolves glue fast.