
We finished installing the second side of the fence yesterday and I took the time to take a few pictures to share how we did it for those who are curious or considering a similar project. You can read about our first day of “fencing” HERE.
The fence really needed to be replaced from the day we moved in. Pickets were falling off and it was only getting worse. In fact, the gate used most often fell off one day shortly after we moved in. I had a neighborhood dog wander to our front door a few months ago and I put her in the backyard to keep her safe while I notified her owners and waited for them to pick her up. Well, a fence that held Sebastian just fine was no match for this escape artist. The owner came to get her and she was gone. It was another indication that this fence was not functioning the way it should.
We kept patching the obvious weak points, but it was getting beyond patching.
When work was done on the pool and patio and large machinery was needed, our contractor removed a section of the fence for access. I warned him that if he took a section of fence down, it was doubtful that he would be able to get it back. That assessment was accurate and he had to build a section of fence and a new gate to replace the old section. His work gave us a head start on the fence and the portion we needed to replace would be a fairly simple project.
Before we considered doing this ourselves, we got a quote to have both sections of fence replaced with a 6′ vinyl privacy fence. The quote came in at $8,000! I knew a fence wouldn’t be cheap, but that was several times more than what I was expecting for two relatively small sections of fence. We take a splurge-and-save approach when it comes to home renovation and this would be a big splurge. Some splurges are definitely worth it, but given that this was a doable DIY project we decided to save on this project and do it ourselves.
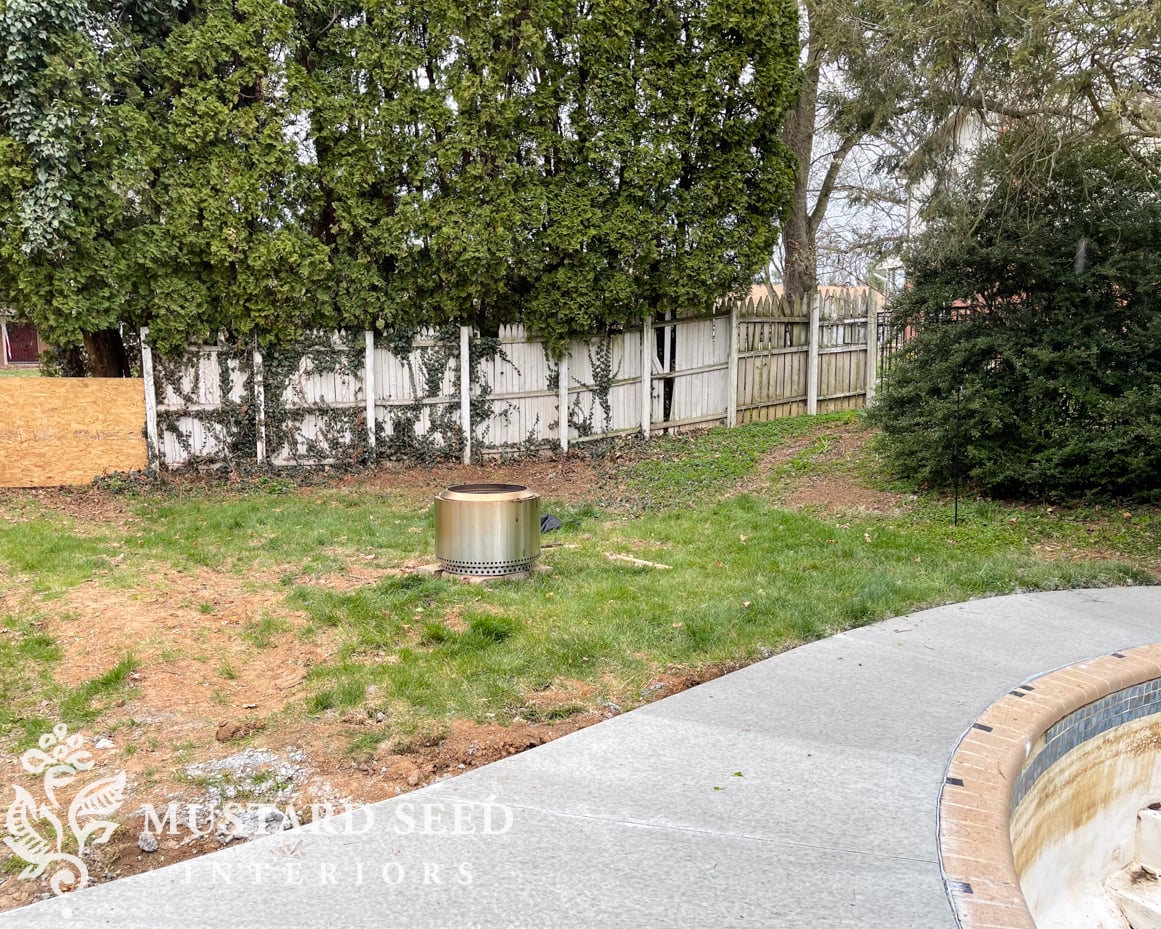
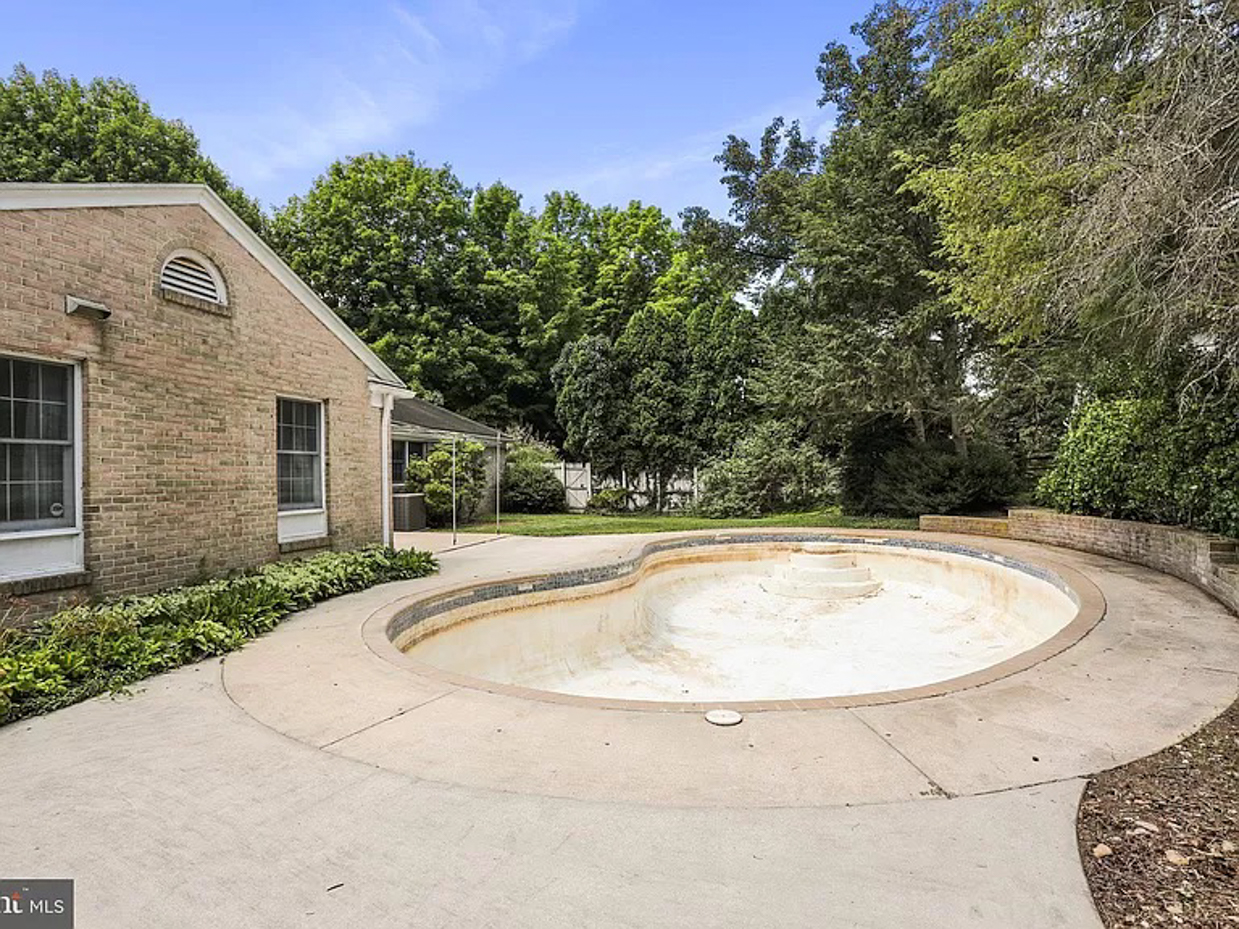
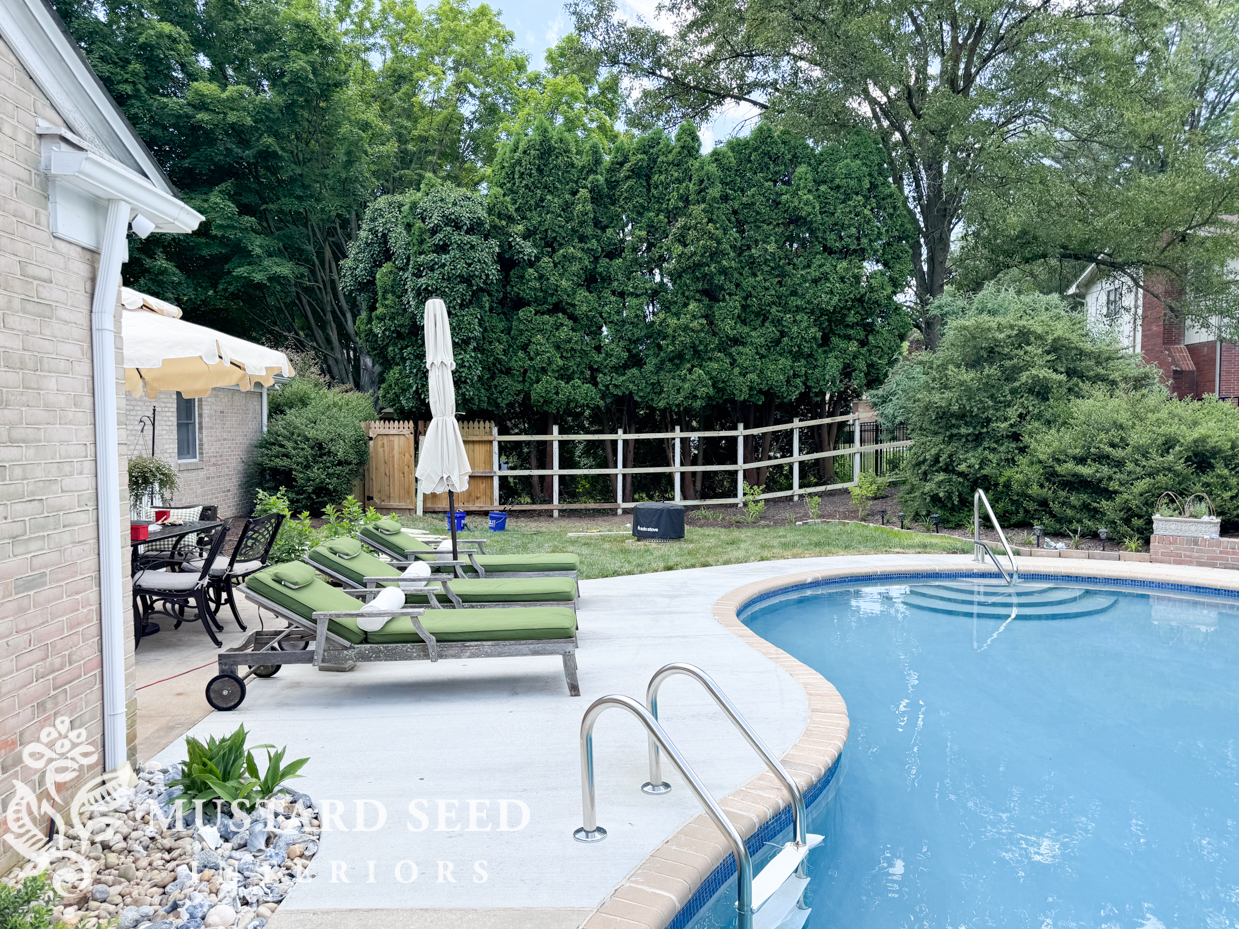
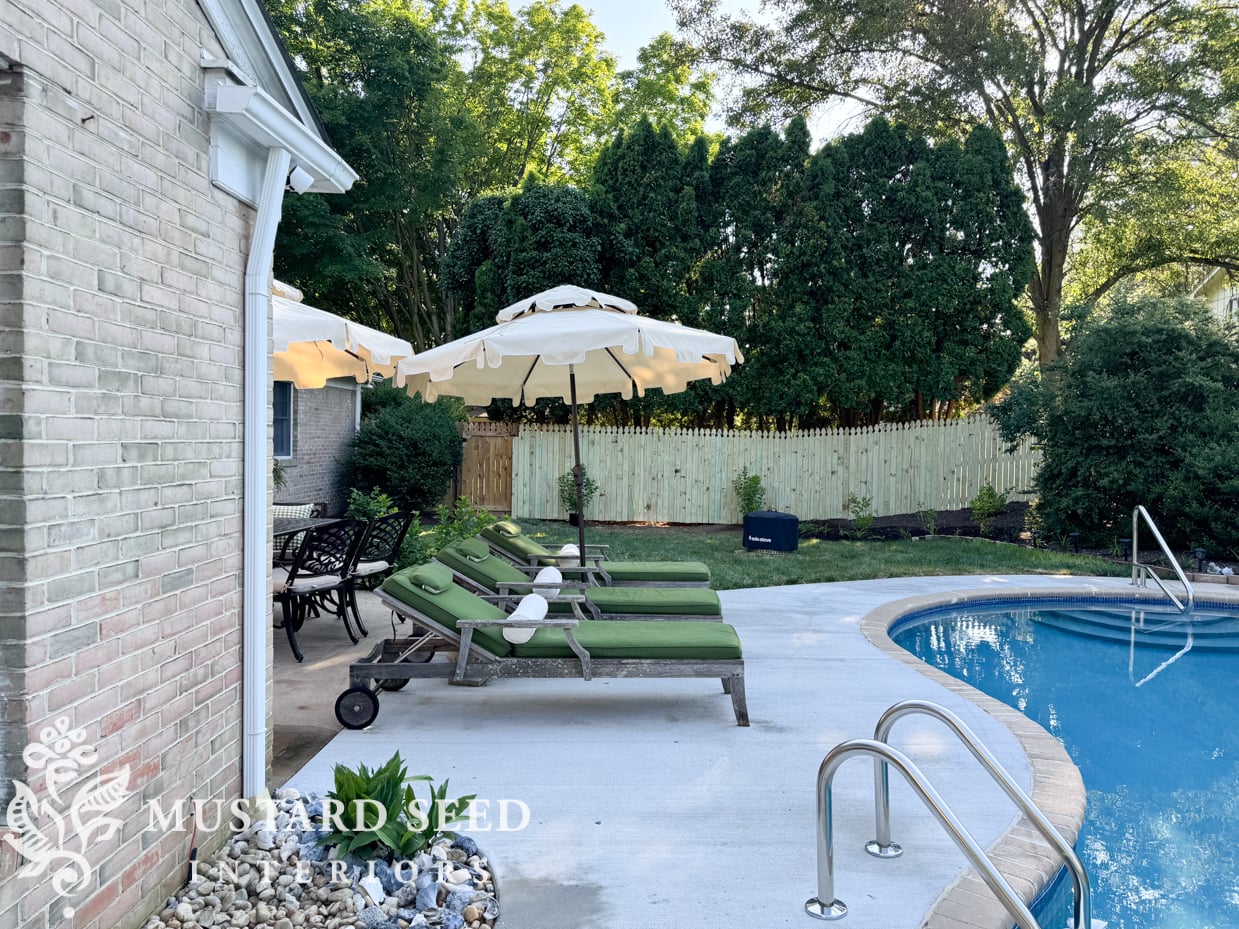
Here was the view before…
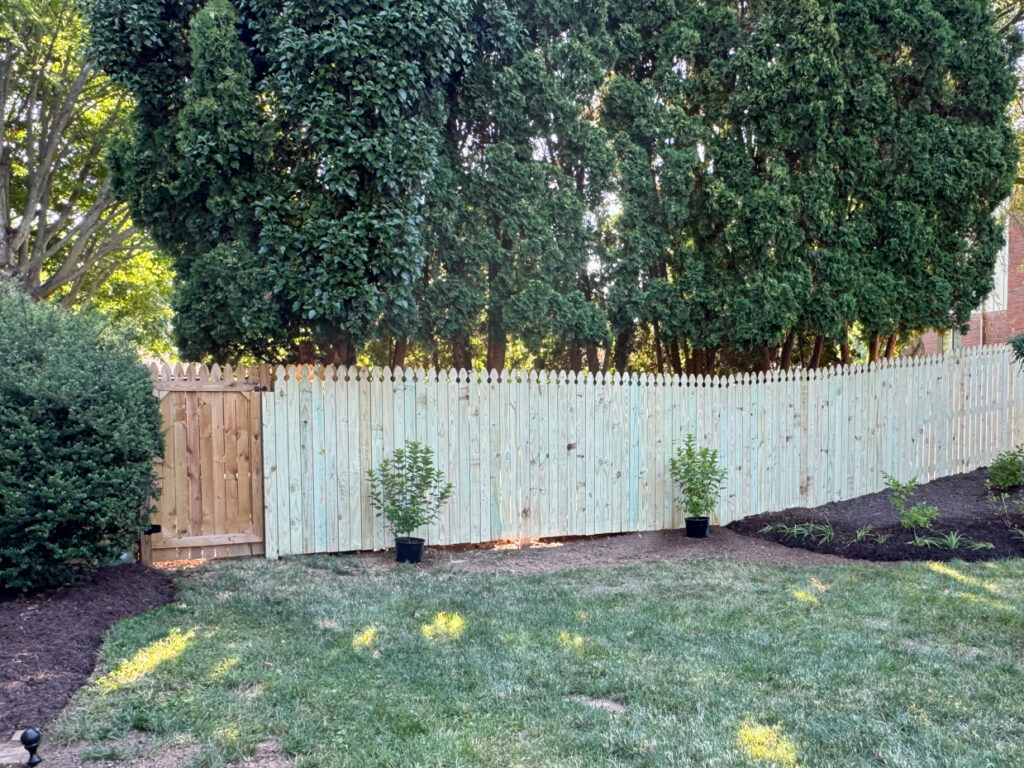
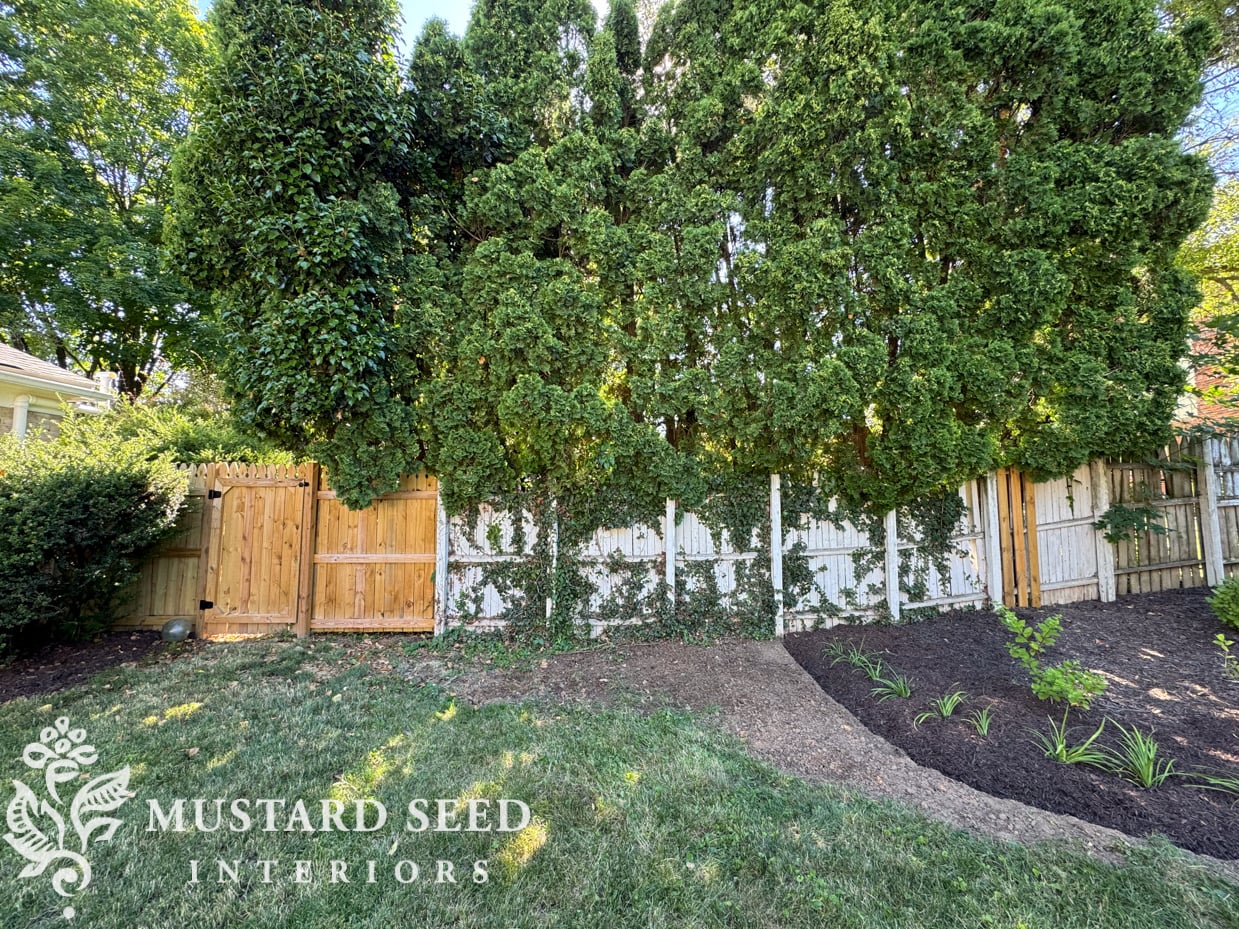
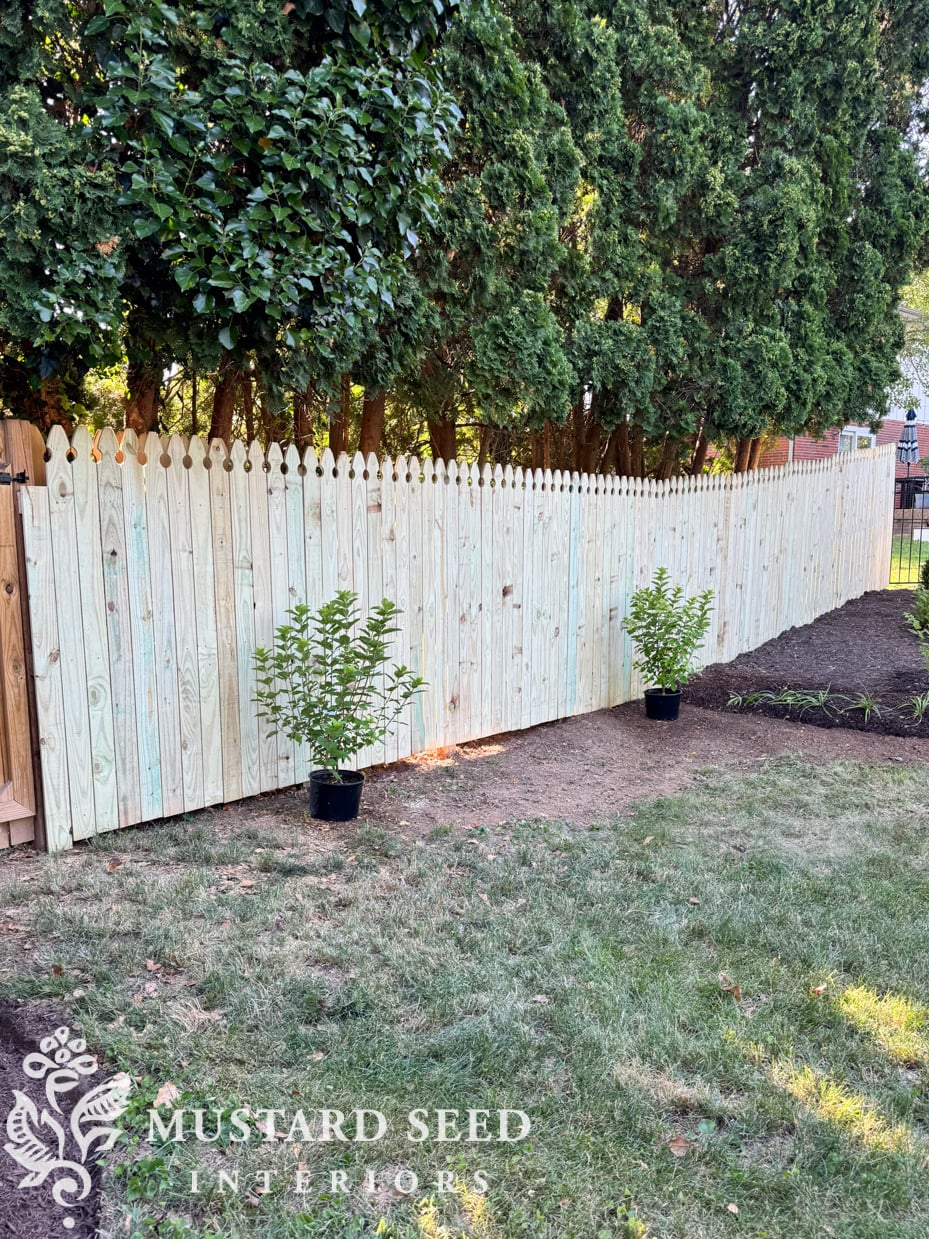
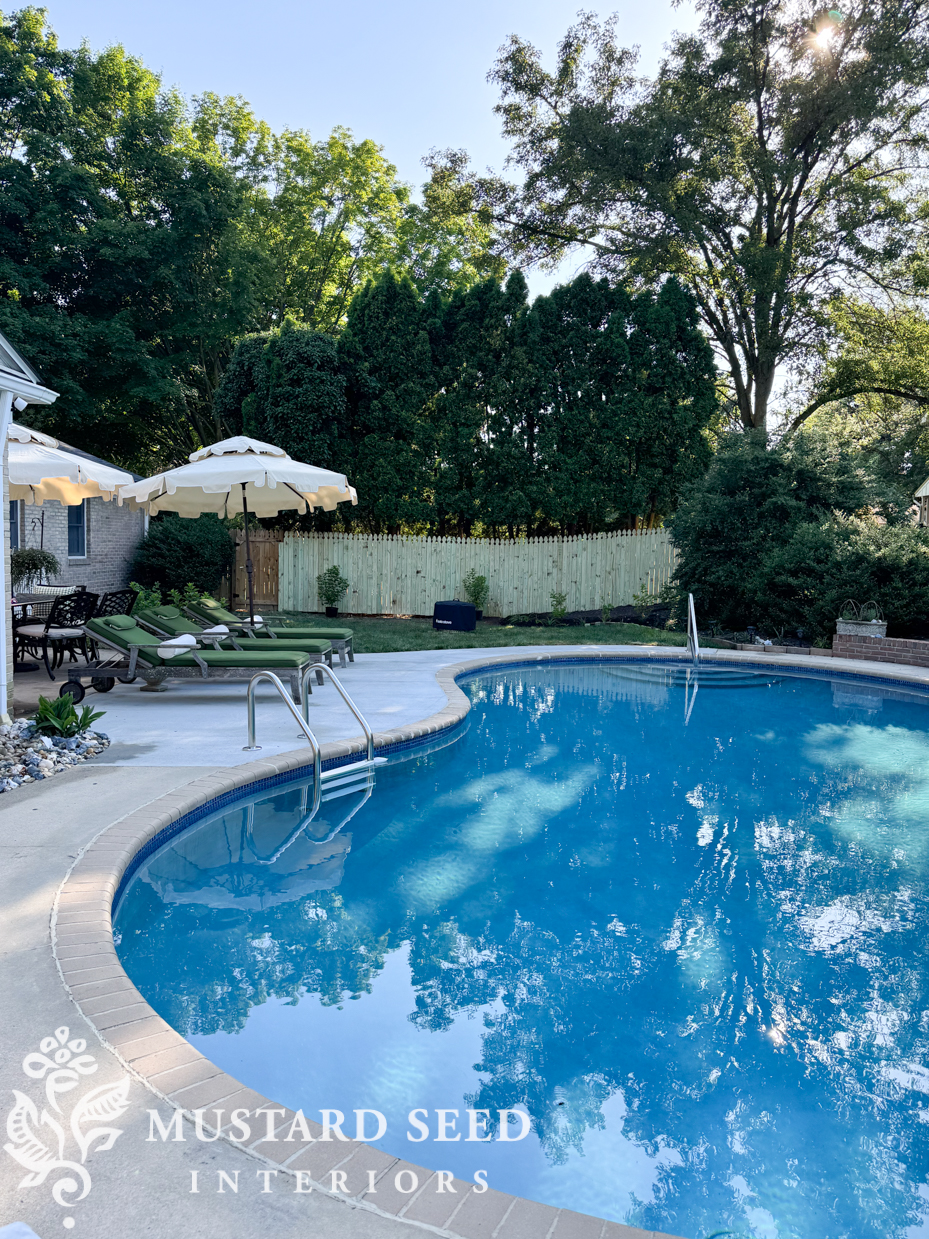
…and how it looks now…

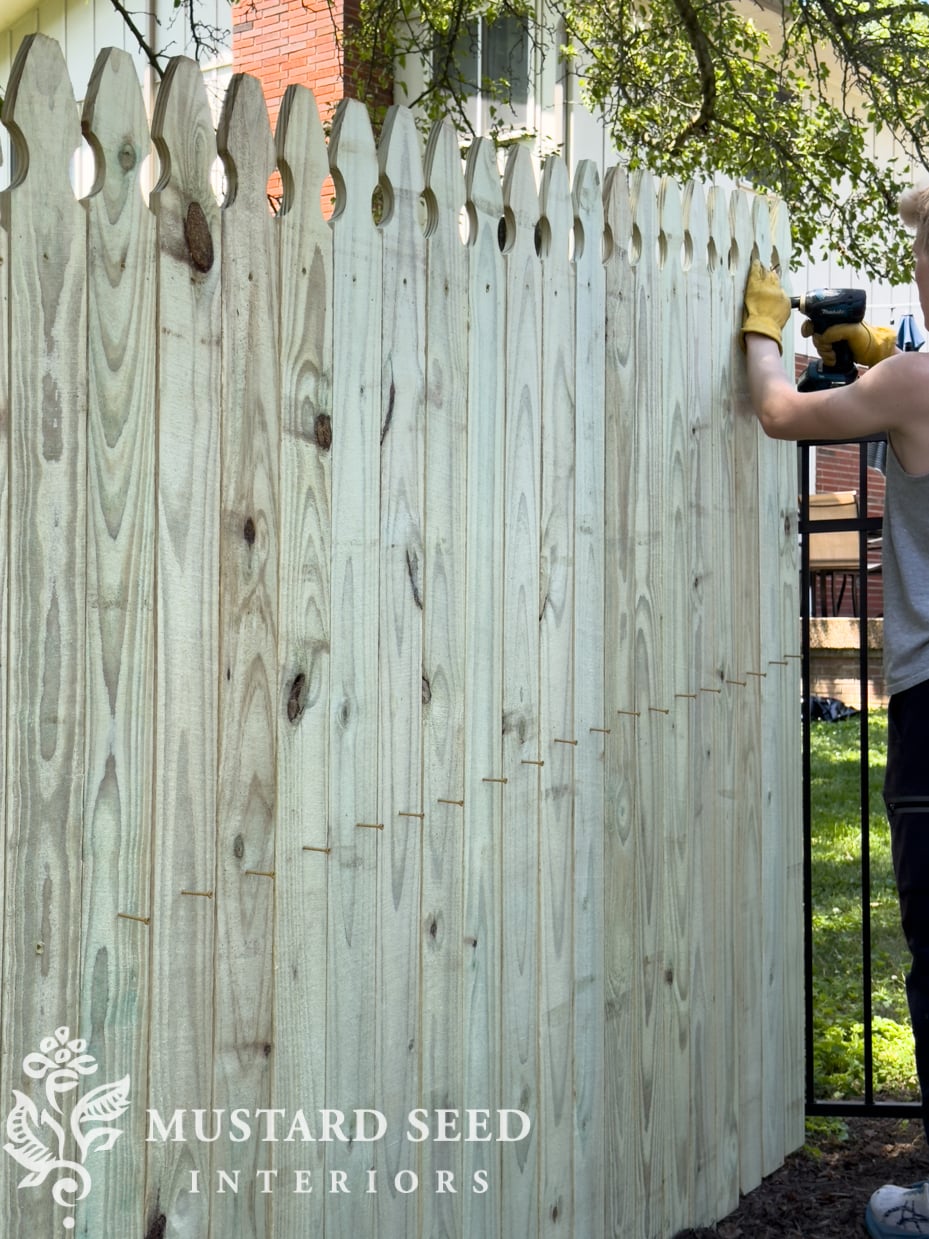
We used pressure-treated pine, “French Gothic” pickets, 6′ in length for our fence. We felt like they were the closest to the original fence pickets and liked their vintage style.
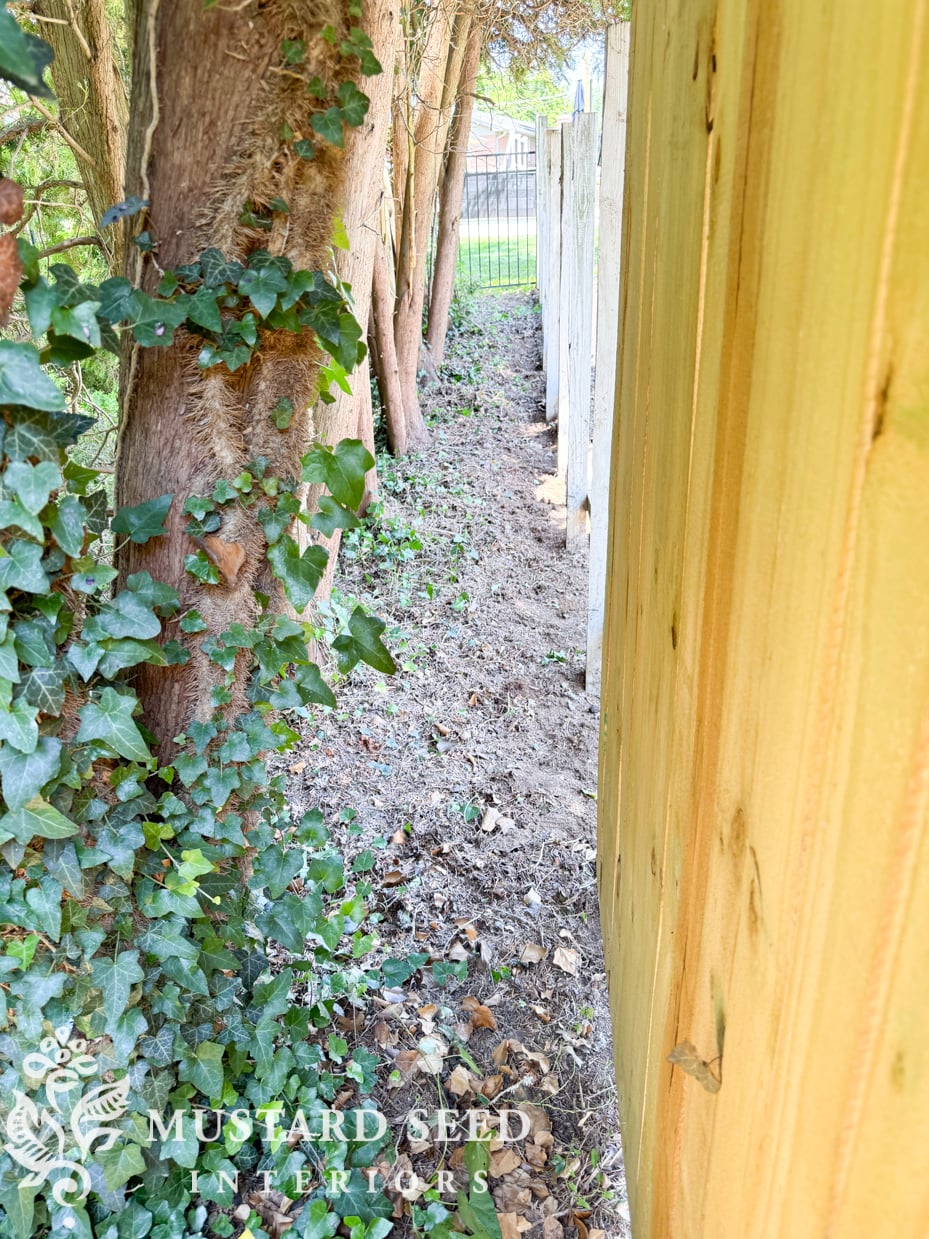
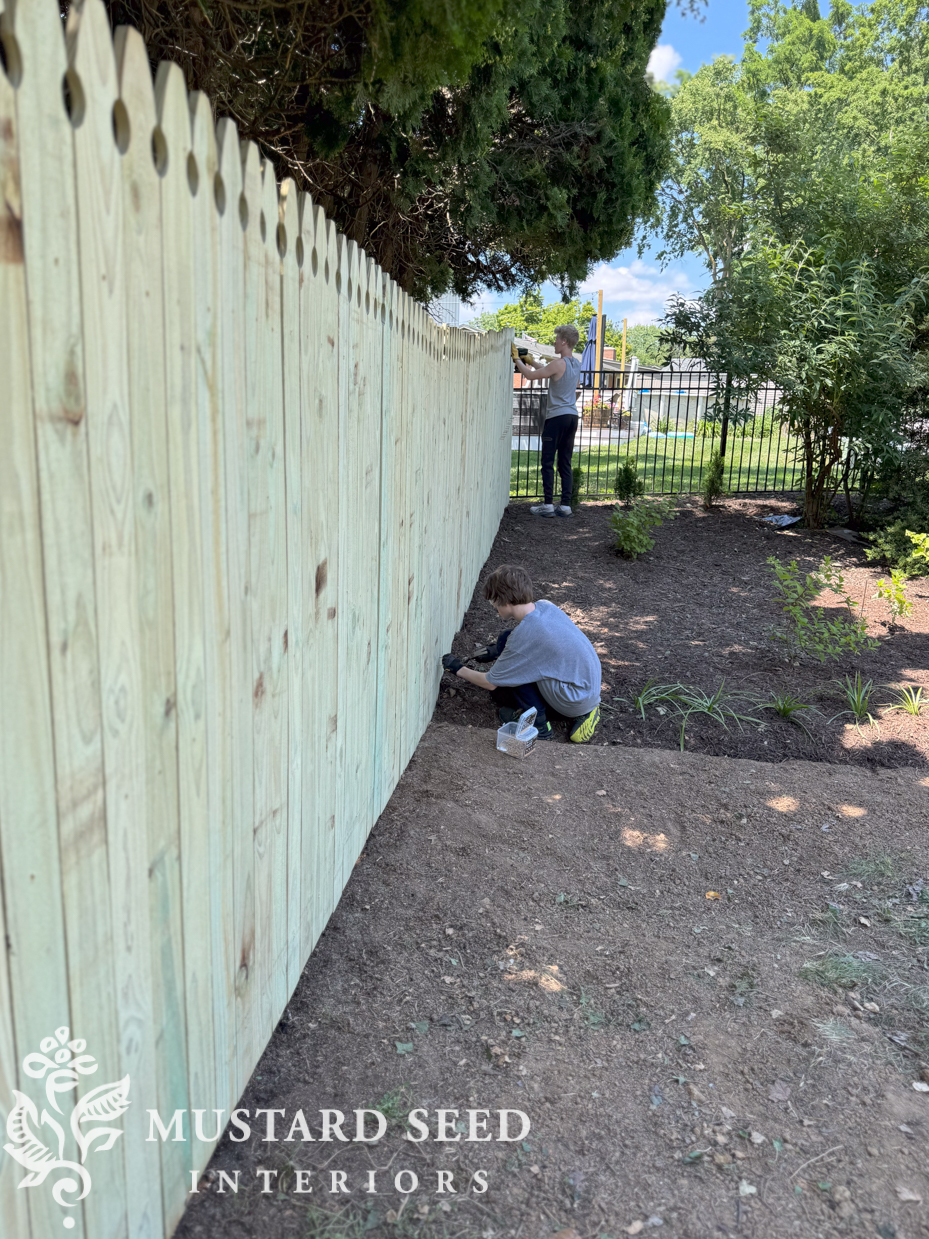
It took our family of four about four hours to get this side of the fence completed from start to finish. We started by removing the old fence. Jeff cut the rails with a reciprocating saw and then I came behind with pruning shears to cut the fence sections free from ivy. With the fence removed and better access to the space between the fence and arborvitae hedge, we took some time to trim, pull ivy, rake, and get things generally cleaned up. I have put a call into an arborist to come out and prune them to revitalize their growth. It is an old hedge but seems to still be healthy and growing. They provide great privacy, shade, and sound insulation, so we’d like to keep it as long as we can.
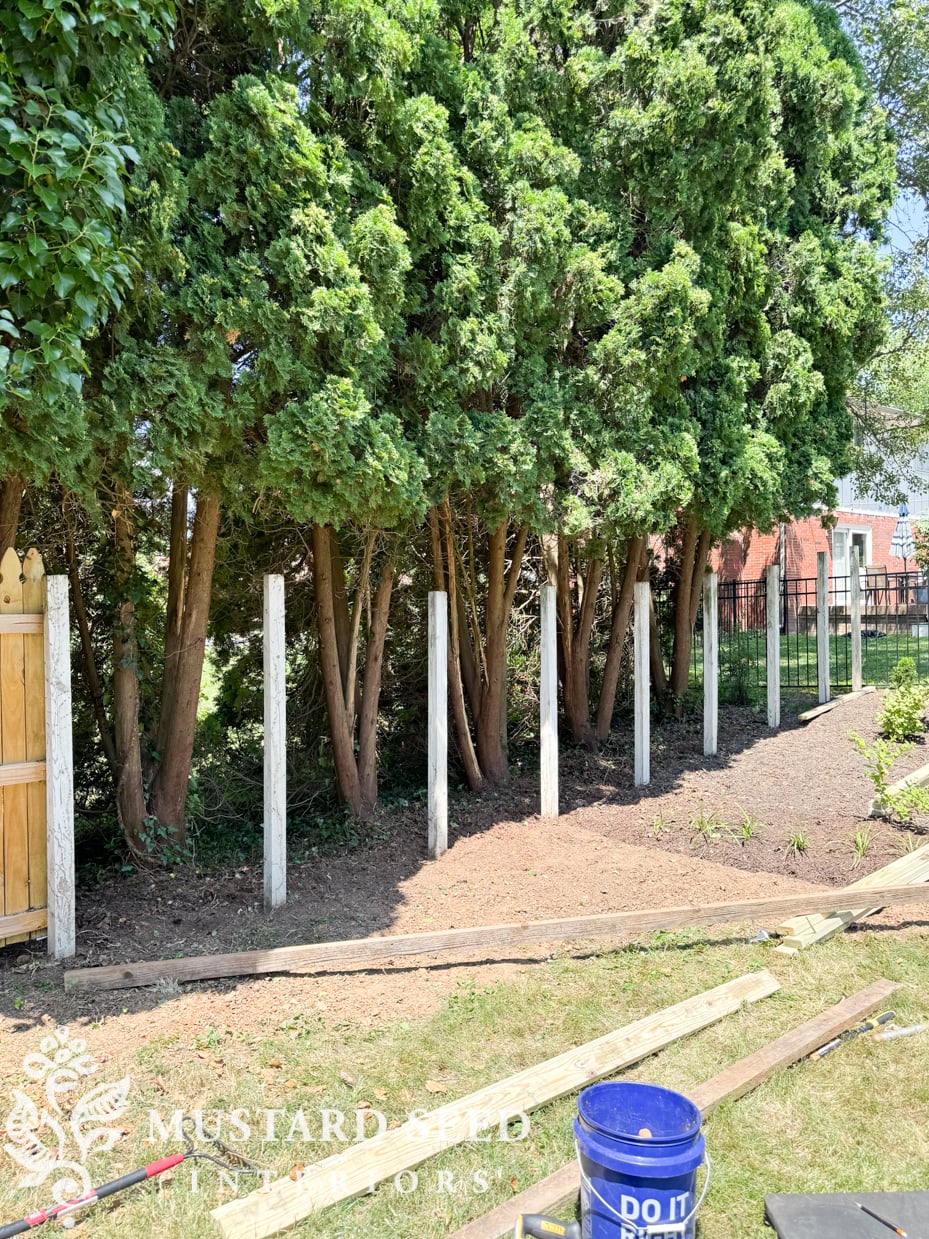
Given the tight squeeze between the arborvitae trunks and the fence posts, we decided to install the fence pickets on the side of the fence. A few people asked about our decision to face the finished side toward the street on the other section of fence, but we did that since it made the most sense to install from the outside given the way the posts were mounted in the concrete patio.
We looked at fences around our neighborhood and some pickets were facing in while others were facing out. If you’re in the city limits (which we’re not), there are regulations controlling which way the pickets face, so I would suggest looking into local regulations and/or your HOA if you’re doing a similar project. We also didn’t have to get a permit since we were replacing existing fence material in the same place. If we were adding a fence along the back or changing the height or location of the fence, we would’ve had to get a permit.
With the old material removed and the yard cleaned up, we installed pressure-treated two-by-fours, following the measurements our contractor used on the section of fence he rebuilt. Since he put the pickets on the outside and we were putting them on the inside, we decided to cover over that section of fence so it didn’t look strange. Some of the old posts were a little wonky, but we were able to make it work. We nailed the two-by-fours in place and then secured them with long screws.
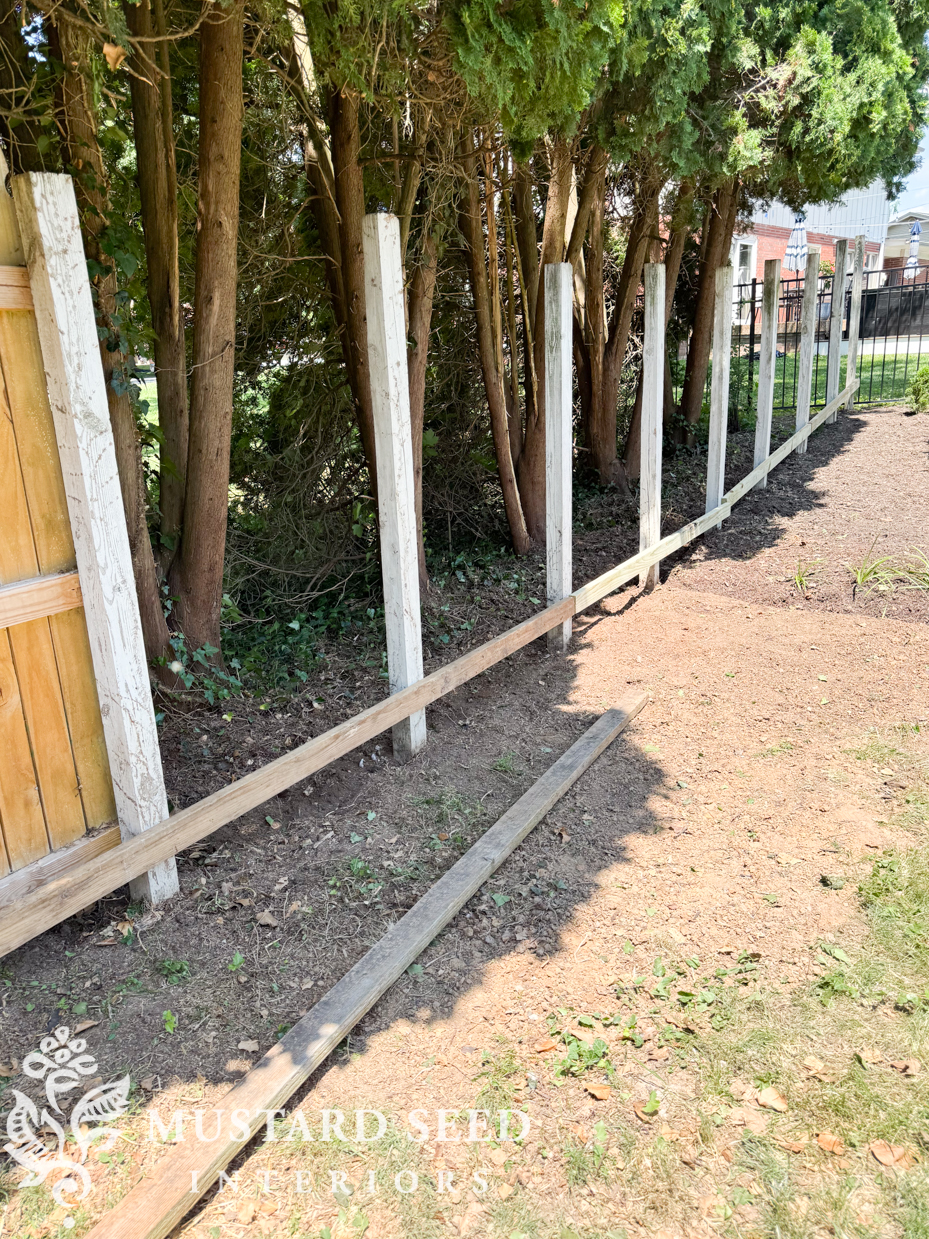
We repeated this process with the other two-by-four rails.
As a funny side note, we had Sebastian out in the yard with just the two-by-fours up, and, even though he could’ve easily jumped through them, he still saw it as a fence he couldn’t (or maybe shouldn’t cross.)
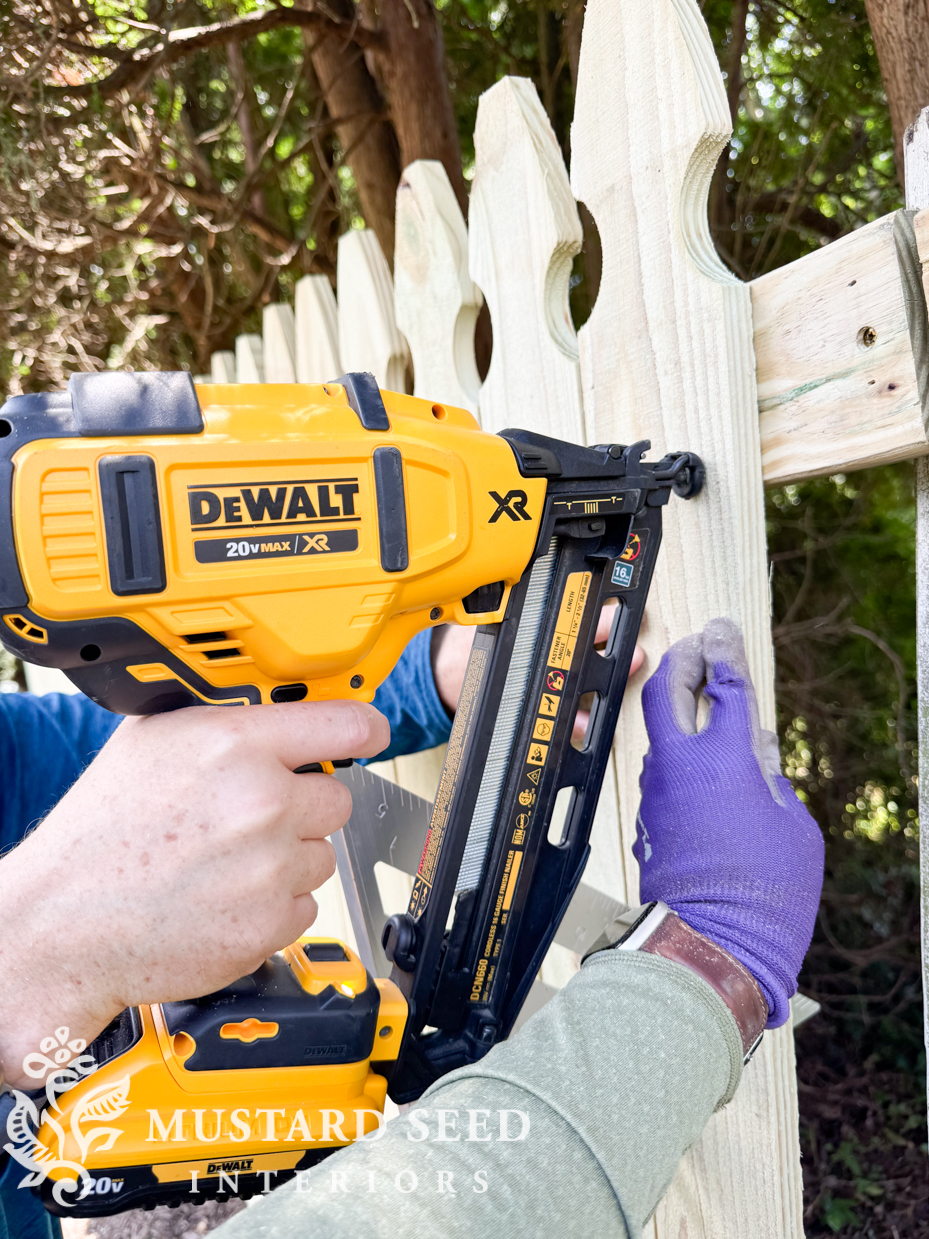
We used a level to make sure the first picket was plumb and then used a spacer to place the rest of the pickets off of that first one. We tested a few different objects in the section of fence our contractor installed and a metal square we had on hand was perfect. We would just wedge that in and nail the picket in place.

Fence pickets can be secured with either nails, staples, or screws. We used nails to hold them in place and then added screws for extra stability, and longevity, and to minimize warping as the pressure-treated lumber dries.
While Jeff and I installed the pickets, Calvin tapped in the screws behind us…
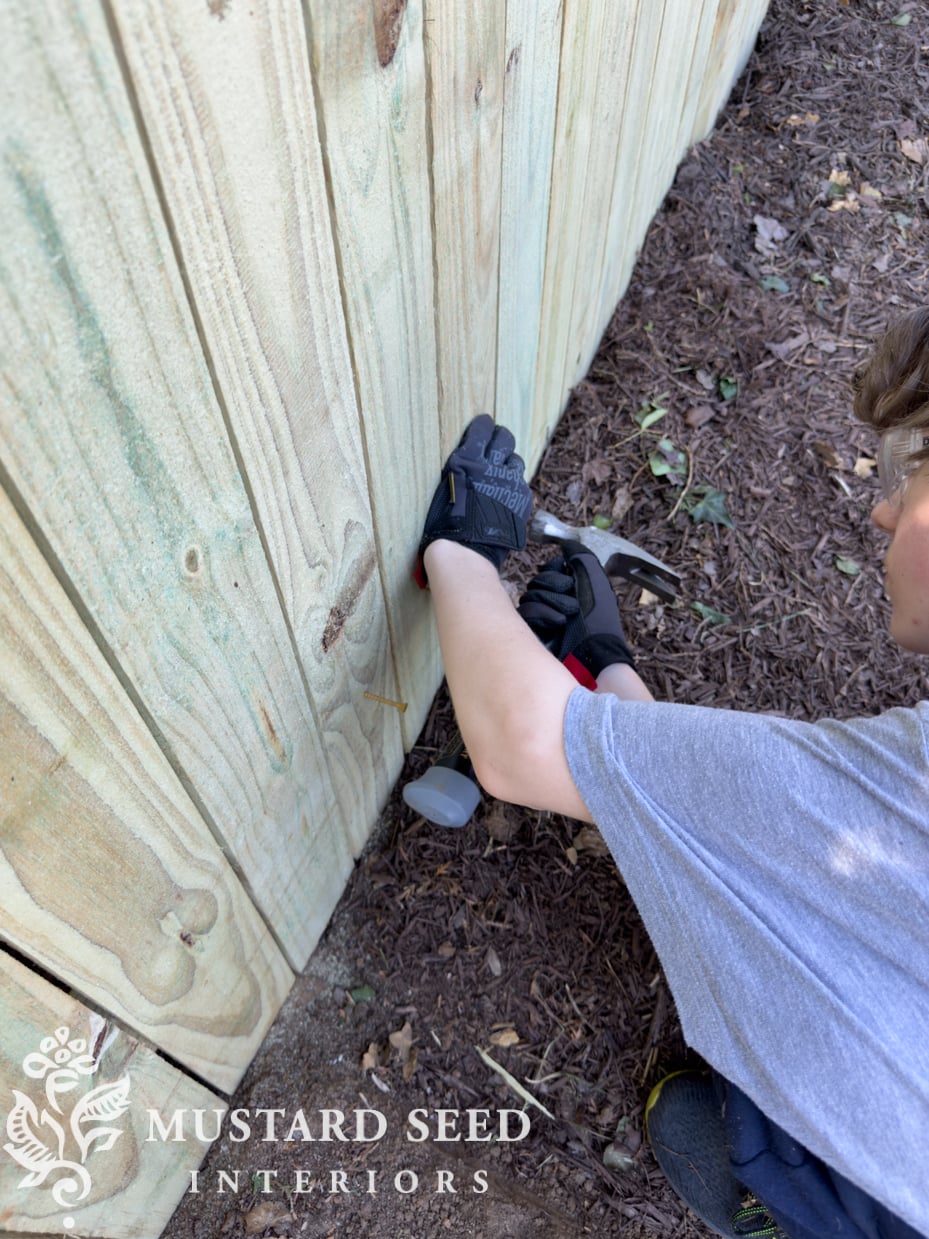

And Marshall drove the screws in. Again, the screws are an extra measure, but after living with a fence that was falling to pieces, we wanted everything to be extra sturdy and secure.
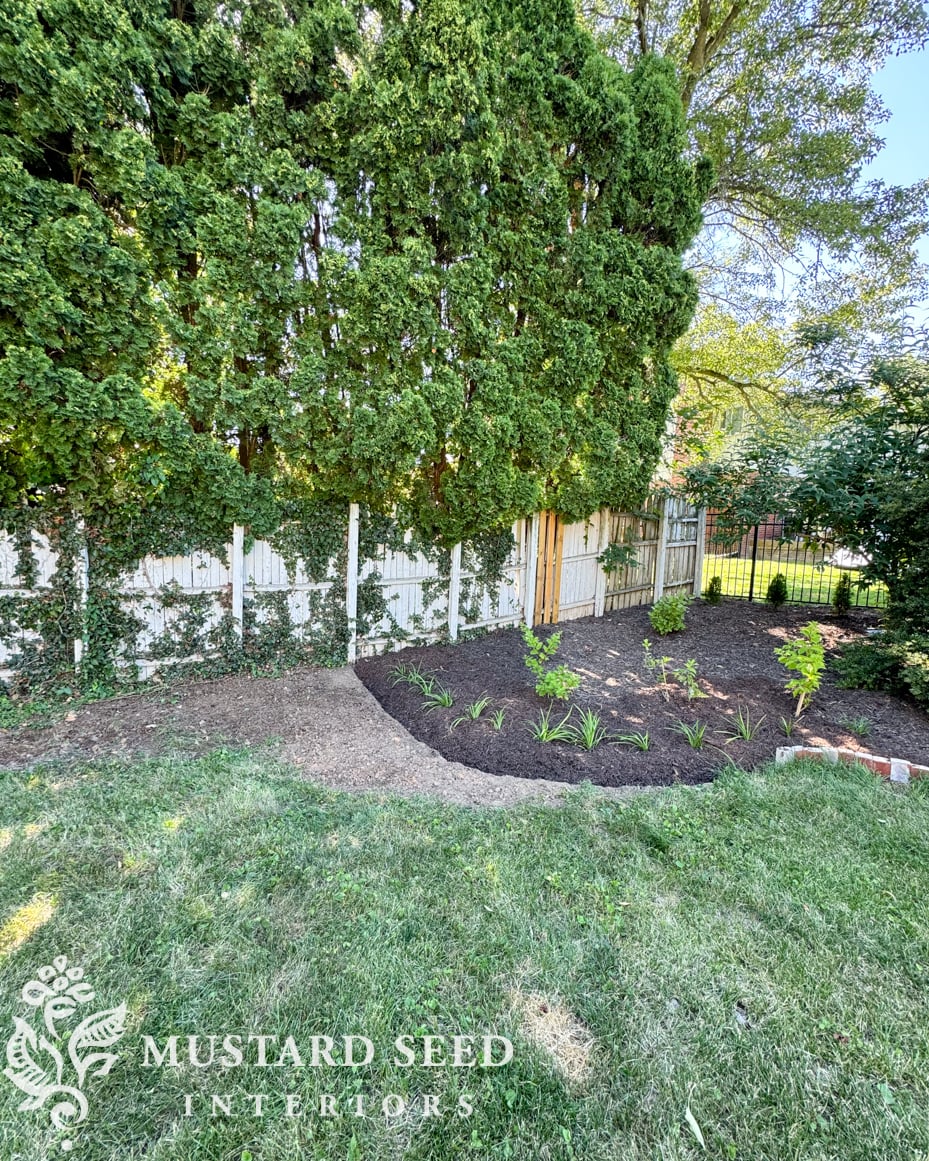
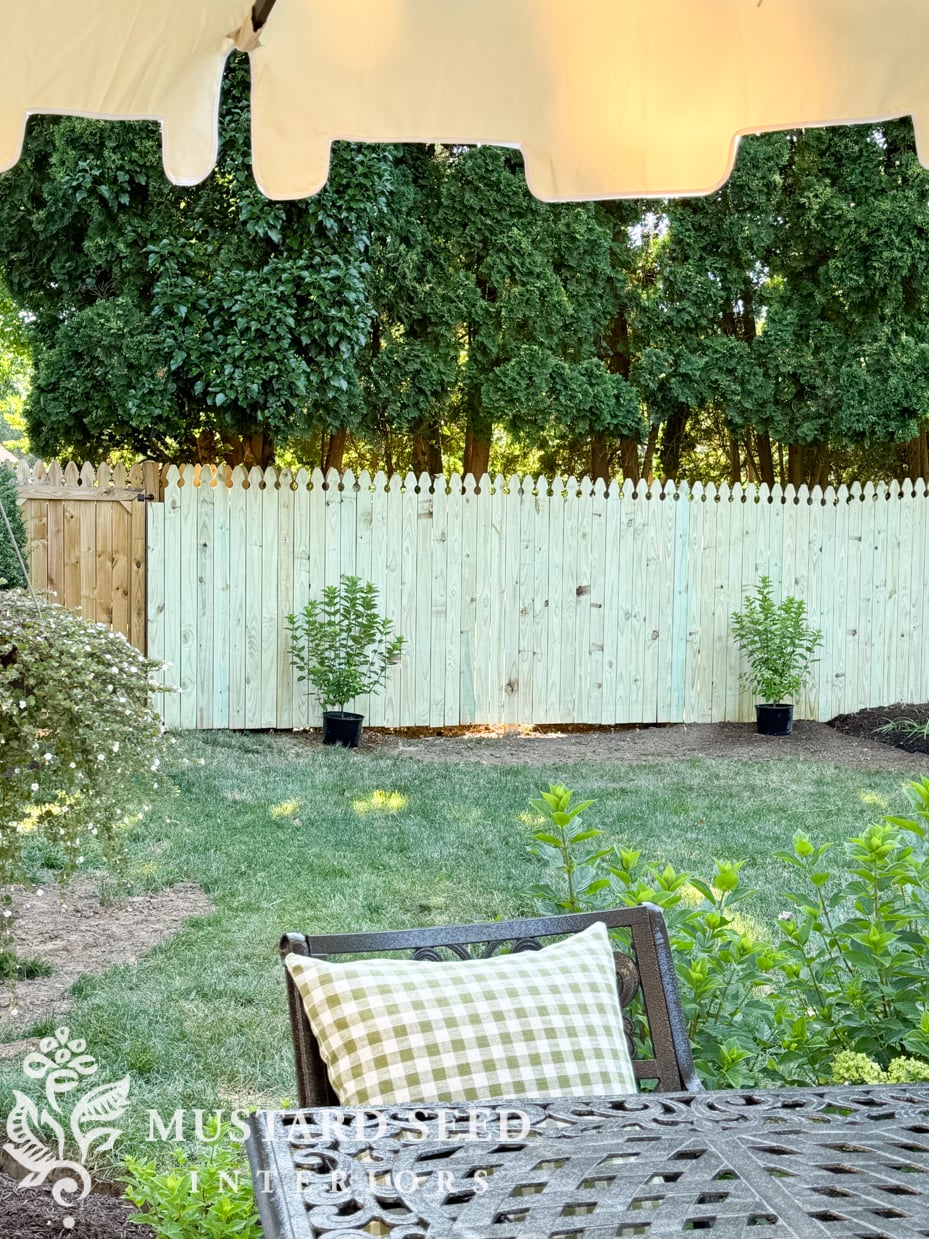
Now, I can finish gardening in this area! I already bought a couple of limelight to plant and I’m planning to put a bench and trellis in between them. It’s all going to look really nice once the ground is filled, seeded, and a bed is established.
Oh, when it came to placing the pickets in the section that goes uphill, we considered a few different options but, in the end, decided to follow the contours of the ground and let the fence gradually get higher. We could’ve taken a stair-step approach but decided we wanted the fence to be tight to the ground. We’ll build up the ground along the straight section of fence and place a couple of horizontal boards on the back side to fill in any gaps there.
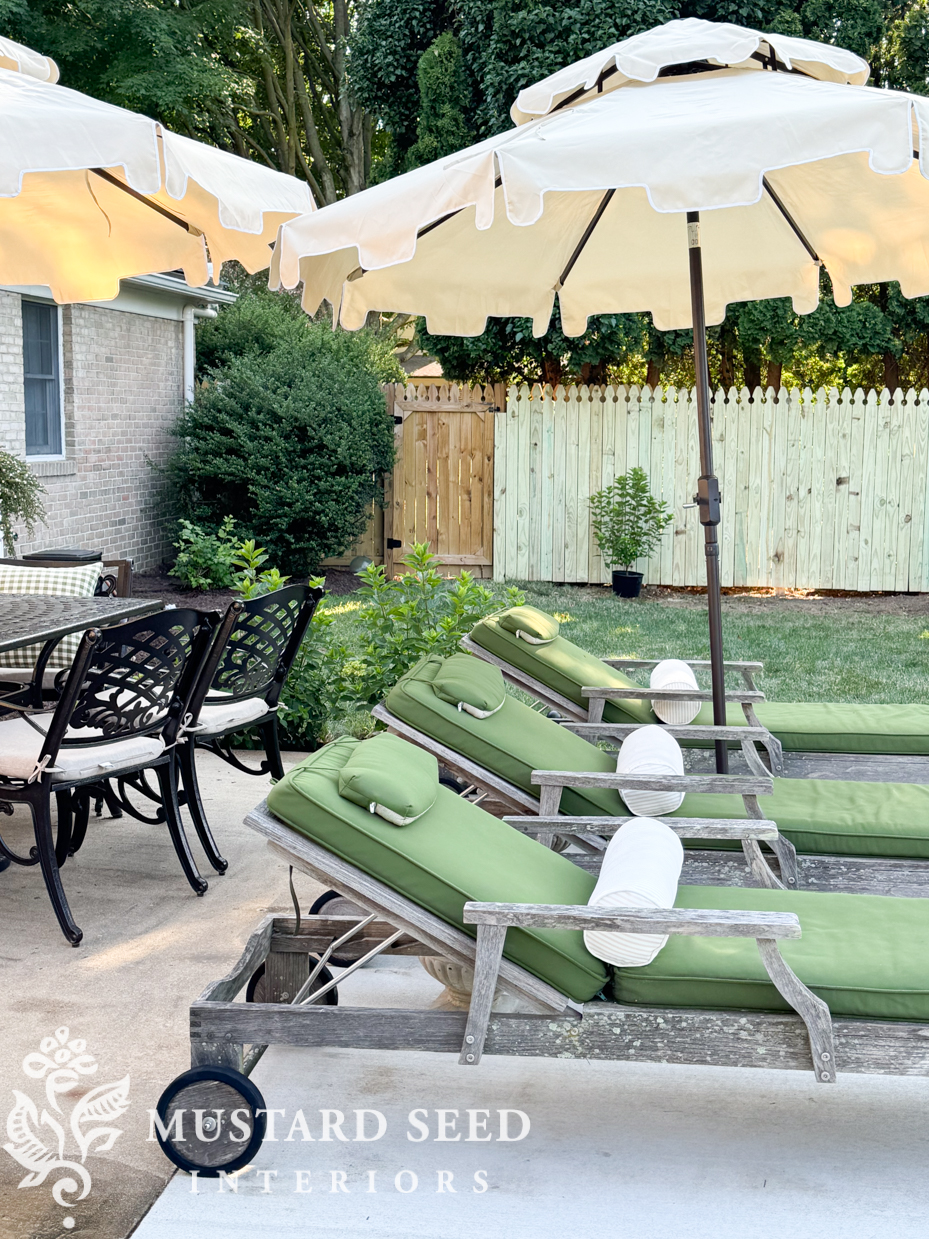
It’s a project that makes such a difference and is so nice to have behind us!
I feel like I keep saying it, but there is still more work to do! I am trying to celebrate each thing crossed off the to-do list and enjoy it before I focus on everything that still isn’t done. It’s easy to do that when you’re renovating a home, but it’s a long process and you have to take time to enjoy how far you’ve come.
Now that the pool is completely finished (we didn’t have a functioning skimmer line until the pool was opened this year), I’ll have to share an update! It’s been a little too cold for me to get in so far this season, but I have loved being by the water and sitting on the side to dangle my legs in after working in the yard. We’ve already had a pool party, though, and Marshall has had some friends over to swim. Their shrieks when they hit the water do not entice me to get in, yet, but it’s supposed to heat up the next few days so I’m sure I’ll take a dip.
So, before I wrap up the fence project, let me share the cost comparison. The quote was $8,000 to replace the fence with a 6′ vinyl privacy fence. This included the materials and labor, which would’ve involved digging new posts since the spacing would be different.
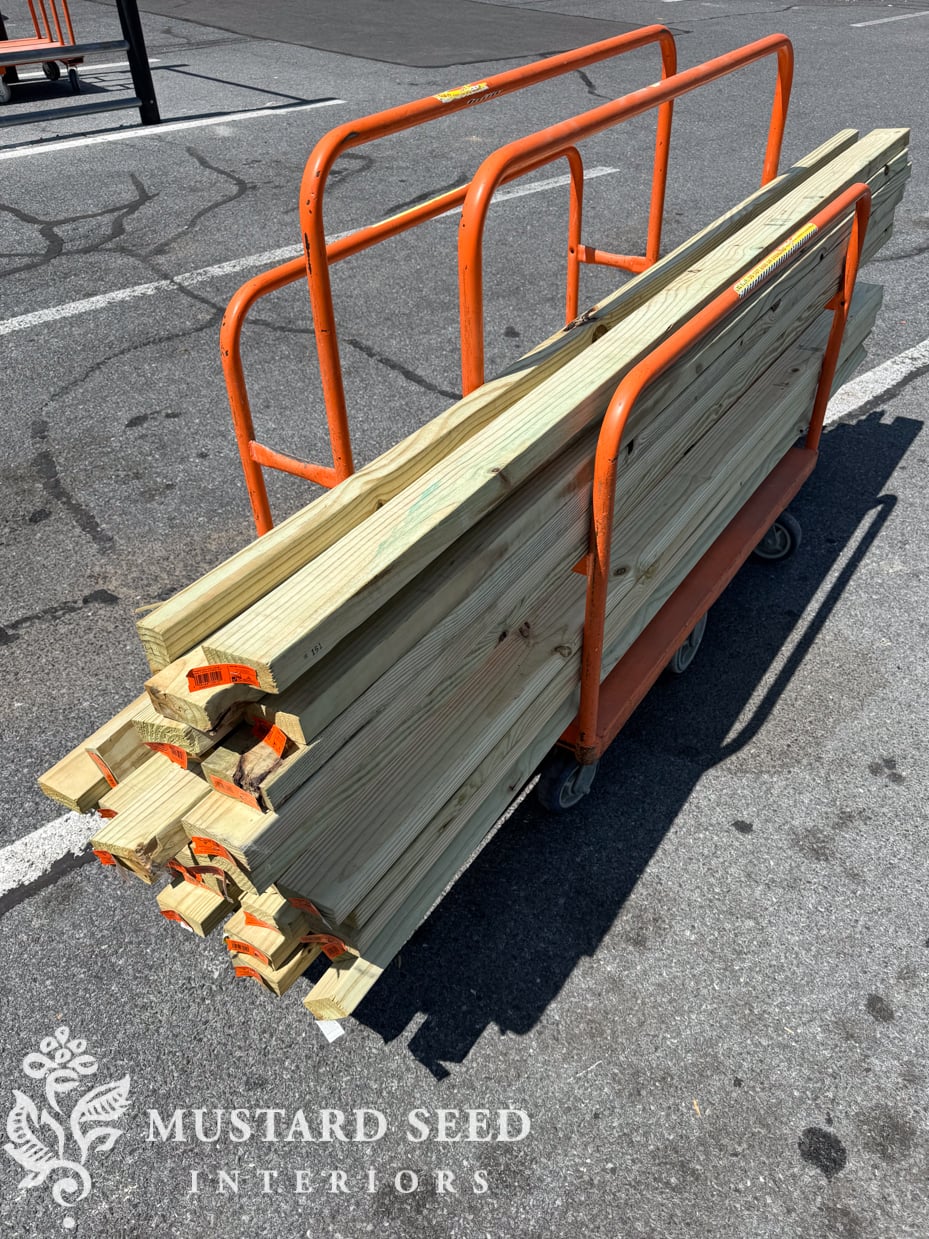
I ended up overbuying materials, so after returning the extra pickets and two-by-fours, we spent $750 on materials including delivery. We paid our boys for their help and will need to pay for the disposal of everything we put in the dumpster borrowed from our contractor, but we still saved around $7,000.
I ended up having to return the extra material in two trips since we had too much to fit in the van! Jeff looked at the stack of two-by-fours and asked what they were for. I sheepishly admitted that they were for the fence and I grossly misjudged what we would need. I figured it was better to have too much than not enough.
With the store credit from the return, I’m going to get a wheelbarrow to make some of my yard-hauling work a bit easier on the back.
I am pleased as punch this fence is done and I can’t wait to see how it looks in a few weeks when the wood dries and darkens.
You can find more posts about our 1970 home renovation HERE.


28 Responses
Beautiful and safe! With wood screws for the win! Thank you for continuing to DIY and regularly sharing with us with frequent posts.
While I am sure you saved a great deal of $$$. Vinyl fencing is of course a great deal more expensive than the pressure treated wood kind. So no real comparison. Sorry😊
Sharon,
That is the first thing that came to mind also.
I like the shape of the pickets, they have a nice old fashioned charm. What a score on the price!
Sharon, My goodness! They worked hard as a family on this project. How about some credit where it’s deserved.
Betsy,
It is a fact that vinyl fencing is quite a bit more costly and so it is not a true comparison . It is the first thing that came to my mind also. I don’t think Sharon was not crediting their work….just stating a fact. They did save a lot of money by doing it themselves….just not the compare with vinyl.
And, YES they did a great job.
Great job! I love when we finish something. I take before and afters just for me. 😀 It makes so happy to see the changes!
It looks so much better! Give yourselves a huge pat on the back!!!! I’m envious of your ability to do such things. Congratulations on a job well done!!!!
Lots of hard work, but great family time!
The wood is suited to your style and look so much better than the old fence.
My hats off to you and your family for taking on big projects.
Great job!!!! Done!!! I really like the vintage vibe that style of pickets give off.
I don’t think you needed to put in the spacer between the pickets. As wood dries it shrinks….sometimes a lot.
Everything is looking great!
Are those your boys helping out? I would love to see an updated picture of them and hear what they’re up to. Looks like they’ve grown so.
Yes! They have grown up so much. I don’t share much of them online for the sake of their privacy, but they are both doing well!
Much, much more charming than a vinyl fence and cheaper to boot. You and your guys have created your own backyard oasis. I still think those lounge chairs were one of your best finds:), a 10 for style and a 10+ for price. You will have a wonderful summer out by the pool.
to be honest I am surprised that people still buy vinyl products bearing in mind all the issues around plastics and the environment.
Whenever we would work together as a family on a difficult or labor intensive project we called it “Family Fun Day” with our tongues firmly pressed in our cheeks. Lots of good memories, and a job well done.
The yard is so inviting.
Looks great! I’m sure the boys learned a lot at the same time. Don’t get a wheelbarrow, they have really nice garden wagons that are so much easier to haul things in. I wish I had gotten one instead!
Yes, I actually got one with two wheels since I’m terrible at balancing a traditional wheelbarrow!
Marion, oh my goodness. Your backyard is beautiful. You do an excellent job with every project you pursue. FYI. After your post about Lucketts and the cement planters, I decided to look for some for my porch. The hunt was fun and we were quite surprised that they are not as easy to find as they used to be. And they were expensive. We finally found 2 of the same at a unique garden shop at $40 each and I love them You always have great ideas.
Job well done! My husband and I do A LOT of home projects and we know the amount of sweat equity that goes into them! It is so rewarding in the end to know the amount of savings accumulated! I love how you are including your sons! What important and invaluable skills you are teaching them. The fence looks great! I love the charming pickets. Well done on all levels. Enjoy your labor of love!
Beautiful!! And family time is the best; you have created memories to last a life time! Did you get new umbrellas? I thought you had blue umbrella’s last summer. White is lovely also!
Bravo Marian!
plastic or vinyl fence material doesn’t have the staying power that cedar or pine has. My daughter put in a small section with gate and she lived in Lake Elsinore, California and that vinyl warped in a few short years. So, not a durable choice. We ended up doing a slump stone wall. While the most expensive up front; the durability is forever! We hired a former bricklayer and acted as the general contractor. We also ended up painting her two story stucco house. Rented scaffolding and pressure washed the entire house. We caulked and smoothed all cracks. It took all three of us; daughter, son-in-law and Mom(me) around 10 days to complete. She saved herself around 23,000 thousand dollars. I have a Lowe’s Amex card and we bought Sherwin Williams paint on sale (40%) off plus another 10% because of the credit card. She put the house on the market and had 6 offers in two days! She built her current home in the foothills of La Cresta, a equestrian community with mostly family help. If you are willing to learn, anything is doable!
What a fabulous job you and your family have accomplished! And the savings being SEVEN THOUSAND less is incredible. I totally prefer the aesthetic of the real wood over that ugly plastic crap any day!
What a coordination of building you accomplished. Working together made for smooth, quality work.. I know that is a big sigh of relief.
It is amazing the projects y’all have accomplished in such a short time.
I think it is just common courtesy to put the ‘nice’ side, without the ‘mechanics’ toward the street, It just makes the neighborhood pretty. Having those boards on the inside also gives you a place to hang something pretty.
Wood is the only thing I would ever use. Vinyl just warps like crazy.
I love the design of your pickets….perfectly you.
Wrought Iron is pretty, but no privacy.
Thanks for sharing this fence project. Congrats on saving money and getting a great looking fence!
Marian,
I love the detailing on the fence, and it does make such a beautiful difference. It’s fun to see your young boys (not so young anymore😊) growing up to help with tasks like the fence. It’s so much fun to see the progress you’re making. Thanks for taking the time to take pictures and to share with us.
Karen B.
What a good looking fence. You all did a great job working together and your young men are learning a lot. I am in So. Ca. and have never seen a fence with 2 x 4 posts. Here they do 4 x 4’s in cedar or redwood. More and more they are even doing metal posts for a wood fence. We probably get a lot more wind than your area. We spent about 10K on a fence a few years. It was a lot but oh my the privacy has been worth every cent! Keep up the good work!
The posts are 4 x 4s. It’s the rails that are 2 x 4s. I’m not sure what material ours are made from since we reused the original posts.
Wow, great job! The style of the fence is so “Marian” and in keeping with the house style. Our fence is in major need of replacing/repairing, but other things have had to come first. Hoping to get it done this year and glad to see that it’s not as intimidating as I think it is.
I bought a Gorilla Dump Cart early 2020, before “supply chain issues”, and I am so glad that I didn’t get a traditional wheelbarrow! It’s rated for 600 lbs., but we’ve probably “only” hauled about 300 lbs at a time of rocks, garden soil, etc. We leave it outside year-round in PNW (no storage room in garage or shed), and it is not a problem. Best $99 I ever spent! Of course, the cost has gone up, but when there’s a sale on yard implements, buy it!