
We were planning on rebuilding our crumbling fence a few weeks ago when the weather was still reliably cool and before the vines took off, but just as I went to order the fence pickets, Home Depot didn’t have enough in stock. Someone else must’ve had the same idea because one day they were there and the next day, they were cleared out. We already had sections of fence rebuilt with this style of picket, so we couldn’t just go with another option that was in stock. We had to wait until we could source them.
I called Home Depot regularly to check in on their next shipment and it finally arrived Friday and was delivered to us on Monday. With the fence materials in our driveway and the weather cool and beautiful, we made the impromptu decision to start working on the fence right away. Both Jeff and I had meetings already scheduled, so the timing wasn’t ideal, but we didn’t want to wait until later in the week as planned when temperatures would be in the 90s. So, we would all four work together on the smaller side of the fence and get it done.
As you can see, the fence was falling apart. We have already lashed boards together in a couple of places and we had to start leaving the vines alone since they were holding the fence together. One tug on the wrong vine and a section of fence might come tumbling down. Several people have expressed interest in the wood for craft projects, but it is literally crumbling in our hands, so it all is going in the dumpster.

We have been working with an amazing contractor on our larger home renovation projects (as well as some small specialty ones) and he lent us his dumpster for our DIY fence job. (For those who are local, our contractor is Hometown Home Services out of Smithsburg, MD. They are a husband and wife team who pay attention to detail, price their projects fairly, and really care about the quality of their work and the satisfaction of their clients. I cannot recommend them highly enough.)
I was hoping to save the sweet autumn clematis to climb over the new fence, but I’m not sure it’s very happy with us at the moment. I’ve been digging up the Bishop’s weed that’s been shading its feet and we had to cut it way back to remove the fence, so we’ll see what happens with it.

Taking down the old fence was actually the hardest part of the job. It was just so crumbly and precarious to work with so we started carrying sections of it to the dumpster on a tarp to try to contain all of the mess. Once we got the old fence ripped out, the new fence went up pretty quickly. As I’ve shared before, we planned to use the old fence posts since they were still solid, sturdy, and in good condition. Removing and replacing them would add a lot of time and make it a more complicated project. Leaving them meant the old posts wouldn’t match the new wood pickets and rails, but I decided it wouldn’t bother me enough to replace all of them. I think it can even be a nice little detail as the fence ages. If it ever does bother me, I can paint all of it once the pressure-treated wood is dried and safe to paint.

We were working fast and hard, so I didn’t stop to take many pictures of the process. We were in a bit of a rush because of our meetings, but we also couldn’t leave gaps in the fence overnight because of the pool. We are legally required to have a fence around the pool for safety reasons, so once we took it down, we had to work until the job was finished.
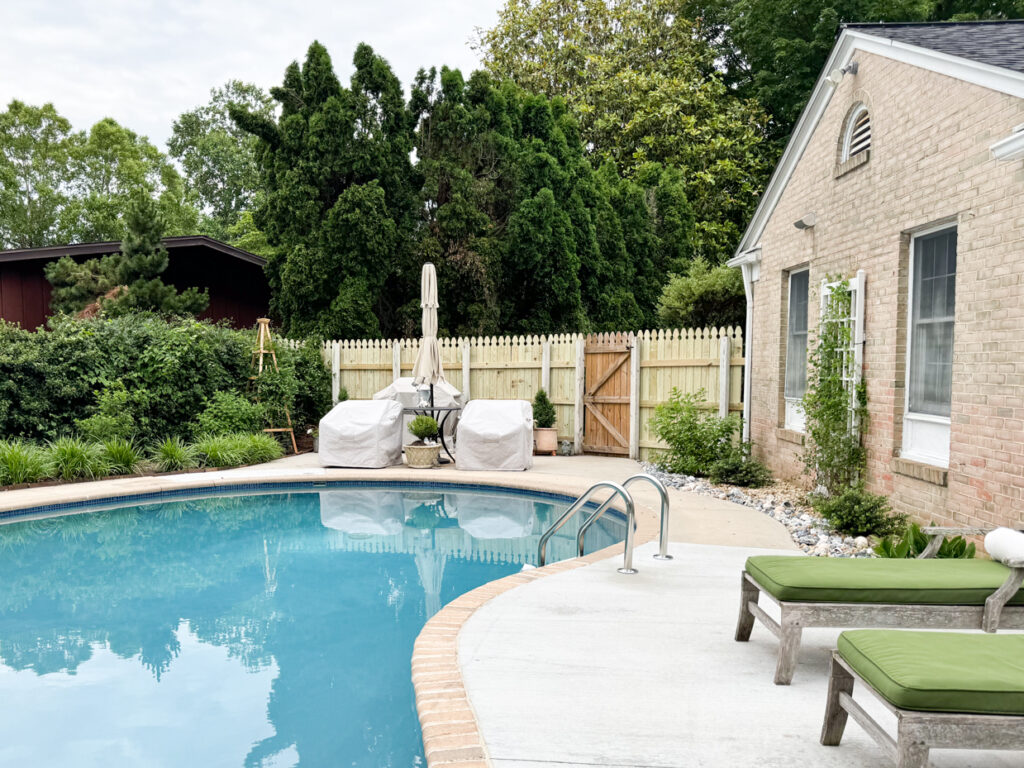
We are going to move the gate so it opens inside and add a few finishing details, but otherwise, this side is finished. As the pressure-treated lumber dries, it will turn the same color as the gate. We have several climbing plants in that corner, so I will probably build some trellises to encourage them to cover the fence.

Let’s take a look at a then-and-now comparison of this view when we moved in vs. how it looks today.
Then…

Now…

There is still a lot to do (shutters, painting the trim, and new windows, but it’s really coming along and looking beautiful. I am really enjoying our backyard this year and I’m excited about continuing the improvements.

Since we have another gorgeous day, we’ll replace the fence on the other side of the yard today. For reference, we only have two sections of fence because both of our neighbors have fences that run along the back side of our property.


15 Responses
What a transformation in this area in just a year! The new fencing looks beautiful and it’s always nice to have a young built-in labor force. LOL
The backyard is looking good! I’m glad your sons are helping and learning some skills from their very capable parents!
I’m sure your clematis will be fine, despite it being a little forlorn right now. We’ve chopped ours down to the ground while painting the area it climbs on and it’s come right back the next year. The fence looks great!
Sarajane, I agree! Every year in January, I cut our Sweet Autumn Clematis completely back … and before I know it, it’s overgrown our fence again! (Just yesterday, I was rearranging vines so the delphiniums under the vine could get some sun.)
Phew! You have accomplished so much in your back yard! It looks great!
Yep, that’s what I figured. I have cut my sweet autumn clematis back to about a foot off the ground in Minnesota, but I usually do that in winter or early spring. I’ve never cut it back that far in June, but I imagine it’ll look sad this year and then come roaring back next year. I’m going to make a trellis for it to climb on which will make it happier.
Gorgeous! Enjoy your progress. It is amazing.
Just an observation….Here in Houston, TX, the nice side of the pickets face into the property, so the preexisting posts would be on the outside. Is this because this how it was done by previous owners? Or is that just the way it’s done in your neighborhood?
Also, the picket style is very charming and definitely follows the English garden style you are embracing!
That’s how I’ve always seen it done too. Maybe it faces the street which would be the reason they did it that way
If you’re within the city limits in our area (which we aren’t) you’re required to put the pickets on the outside if the fence faces the street. We weren’t required to do it that way, but it was the best way with the way the existing posts were installed in the concrete patio. On the other side, the pickets face in since there is a large arborvitae hedge on the other side that hides the fence and also limits access.
I believe the reason the pickets or the “good side” faces the street and the framing is on the inside of the yard is so the fence can be climbed from inside. In the event of an emergency, such as a fire in the house, you might be trapped in the yard unable to open the gate. Also, the fence can not be climbed from the outside which is important with a pool. Also, Marian, I know you said you checked the code on the gate swing, but keep this in mind. If the gate swings outward and was left ajar, a child pushing on it would close it and it would latch. The latch should also be on the inside of the fence, at the top of the gate, so a child can not reach it to open it from the outside.
Your whole house, inside and out, looks really wonderful! Great job, and thank you for sharing your creativity with us. I really look forward to reading your blog.
Oh, good information! Yes, our gates have latches on the inside at the top so they can’t be opened from the outside. We also have “No Trespassing” signs on the gates and a camera on the pool to let us know if motion is detected.
Another very impressive project! Just a thought – you may want to check your local code with regard to a gate opening into a pool area. Here in California, gates must open outward – when we put in a pool, we had to switch the gate on our fence, and were told by the inspector it was because if someone collapsed just inside the gate, emergency personnel wouldn’t be able to open the gate inward to provide help. Enjoy your lovely pool and yard this summer!
There doesn’t seem to be a requirement in our area when it comes to the way the gate opens and our contractor installed the gate on the other side to swing in.
I have always thought it was simply a matter of ‘being polite’ to put the ‘good’ side of the fence facing out. It also makes the property look more polished and neat when the structure is facing the inside, and the public side is tidy. I’m always surprised and a bit disappointed to see it done the other way.
Your pool yard looks amazing! Good work!