

If you missed part one of this slipcover tutorial, you can find it HERE. In part one, I show how to make the “body” of the slipcover. This chair slipcover tutorial works for almost any armless chair, but is specifically for a parsons chair with small wings. You can also find the link to the linen I used for this project in that post.
So, in this post, I’m going to show how to make ties. This tutorial can be used for pretty much any homemade ties. They can be used on clothes, like aprons, accessories, slipcovers, etc. I like ties for slipcovers because they add a “dressmaker detail.” Since slipcovers are essentially dresses for furniture, it looks fitting to me. If you want a more modern look and cleaner lines, you can always use buttons or even velcro.
You can just cut the strips of fabric with scissors, but it’s much easier with a cutting mat, a clear ruler, and a rotary cutter.
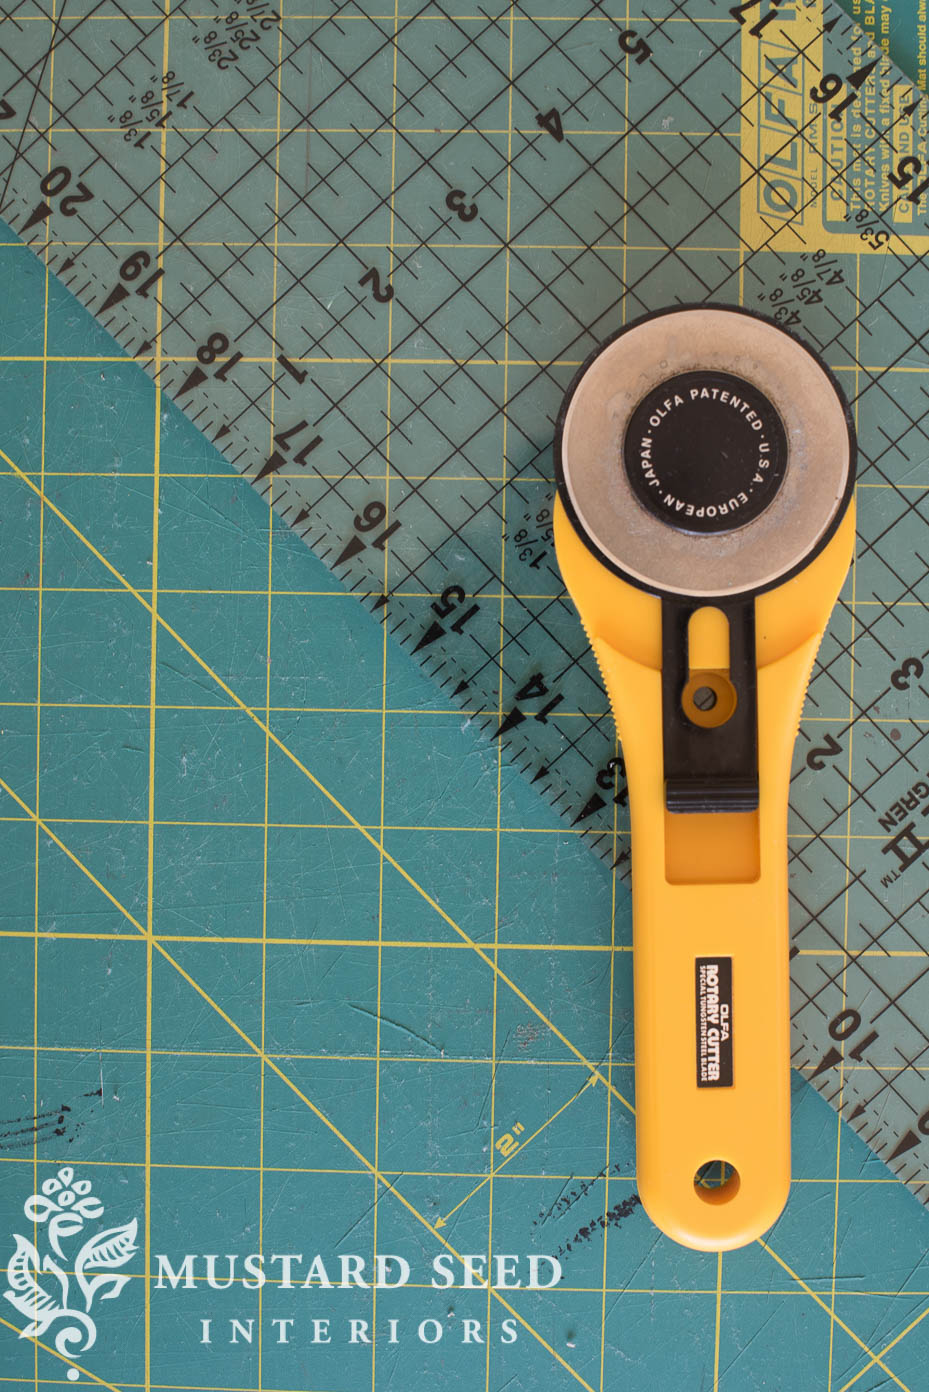
You can really cut the ties to any dimension, depending on how wide or thin you want them to be and how long. I wanted long, skinny ties, so I cut my pieces to 2″ x 24″. Since the chair has a pretty high back, I wanted the back to tie in four places. This meant making eight ties for each chair. This is the painful, tedious part of slipcovers!
If you don’t want to do all of the pressing and sewing, you can use twill tape or ribbon instead.
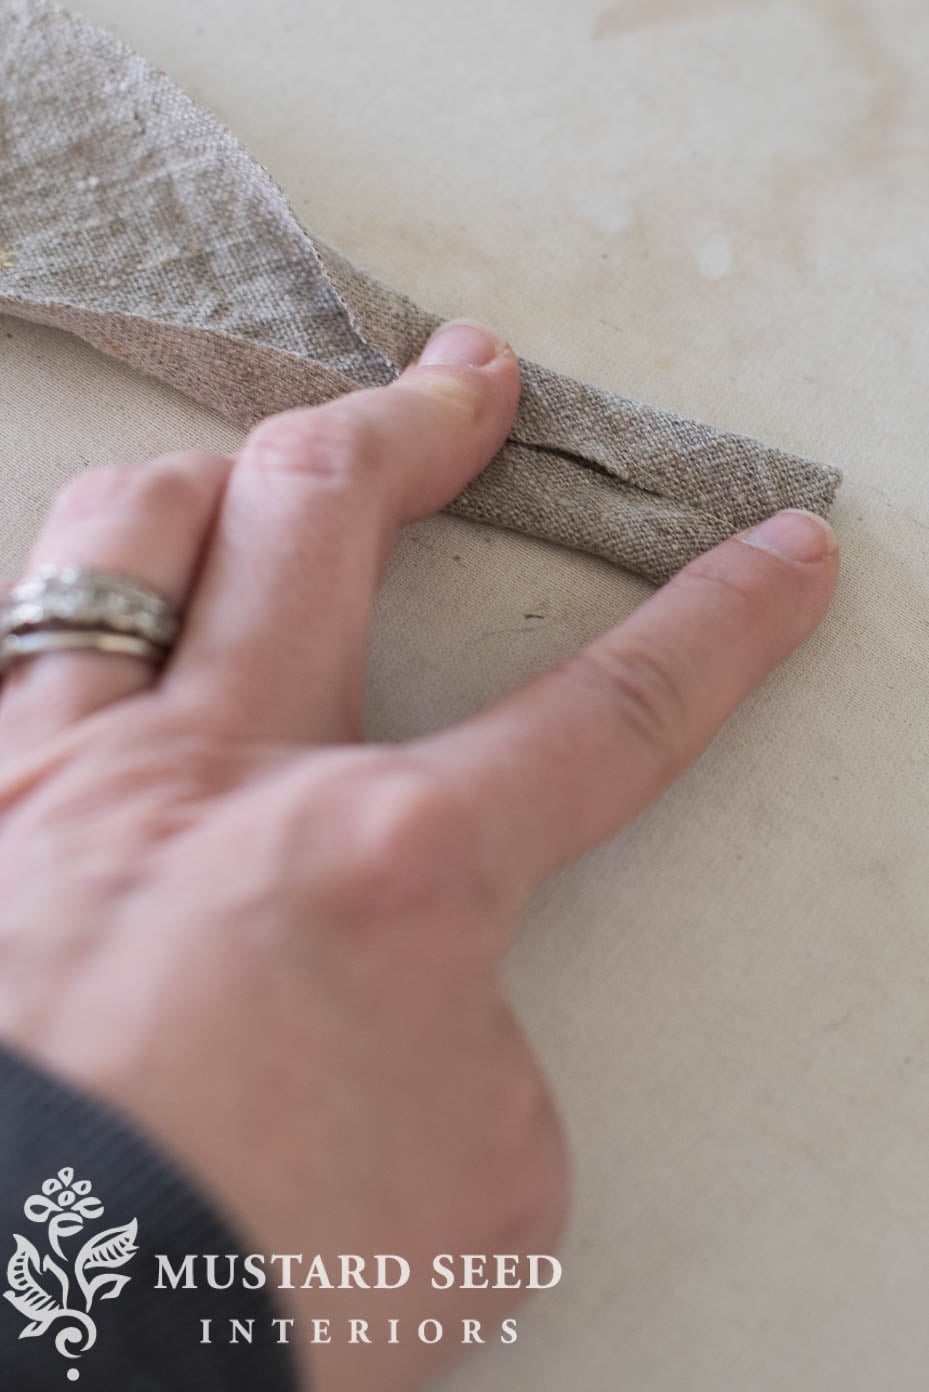
Once the strips of fabric are cut, fold one end over and press it. This will be the finished end of the tie.

Pressing is another tedious step, but it really does improve the finished result when sewing. If seams are pressed and laying flat, it’s going to be so much neater and easier to work with.

Fold both sides in width-wise to meet in the middle. You’re essentially making double-width, double-fold bias tape.
Fold and press…

It should look like this…

Then, fold in half once more and press again.
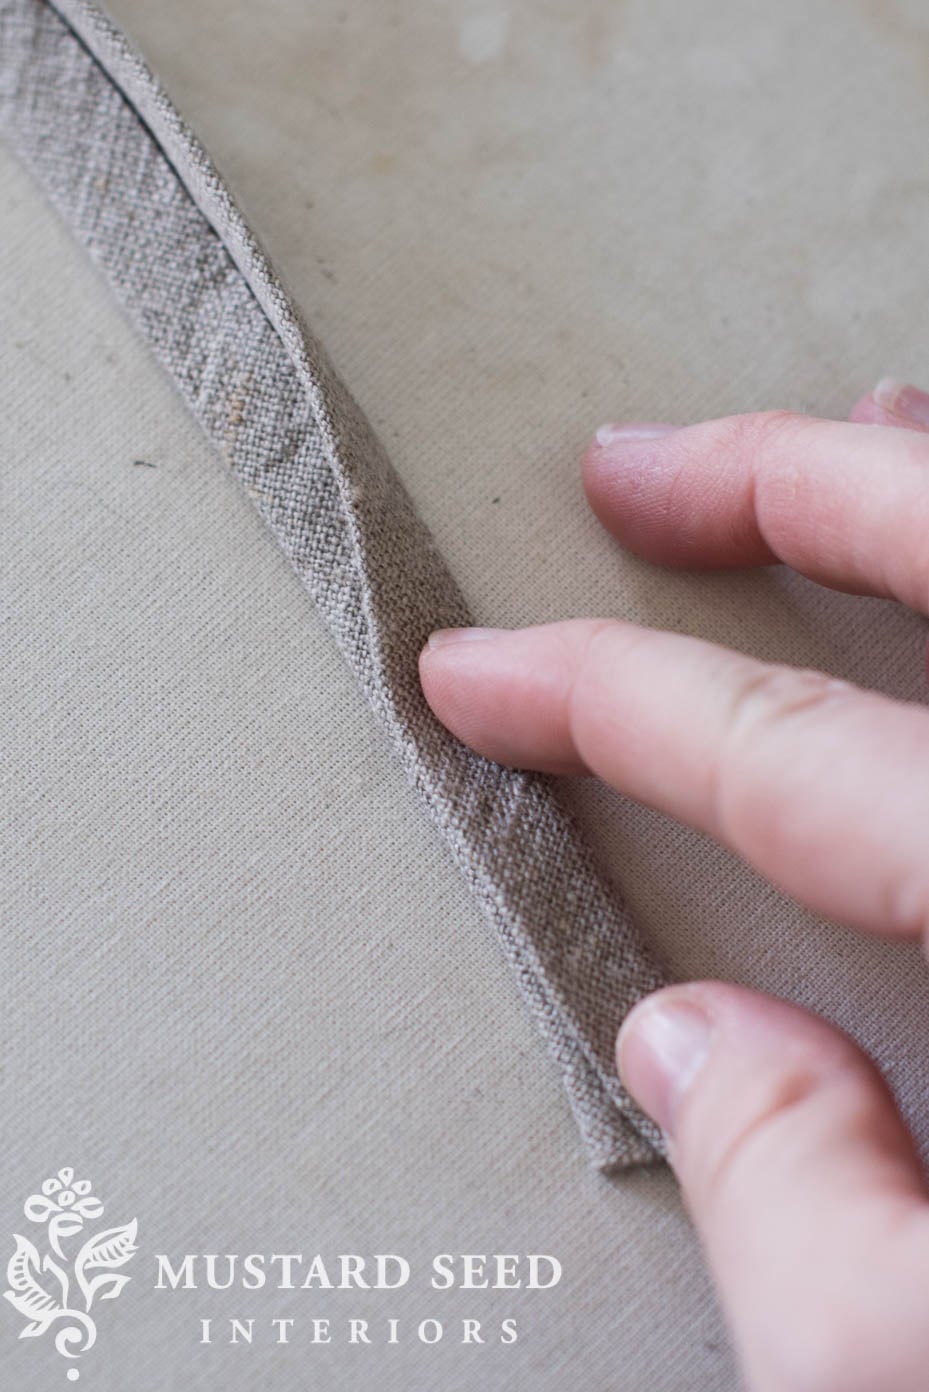
Pin in a few places, so it stays folded until you sew the tie.

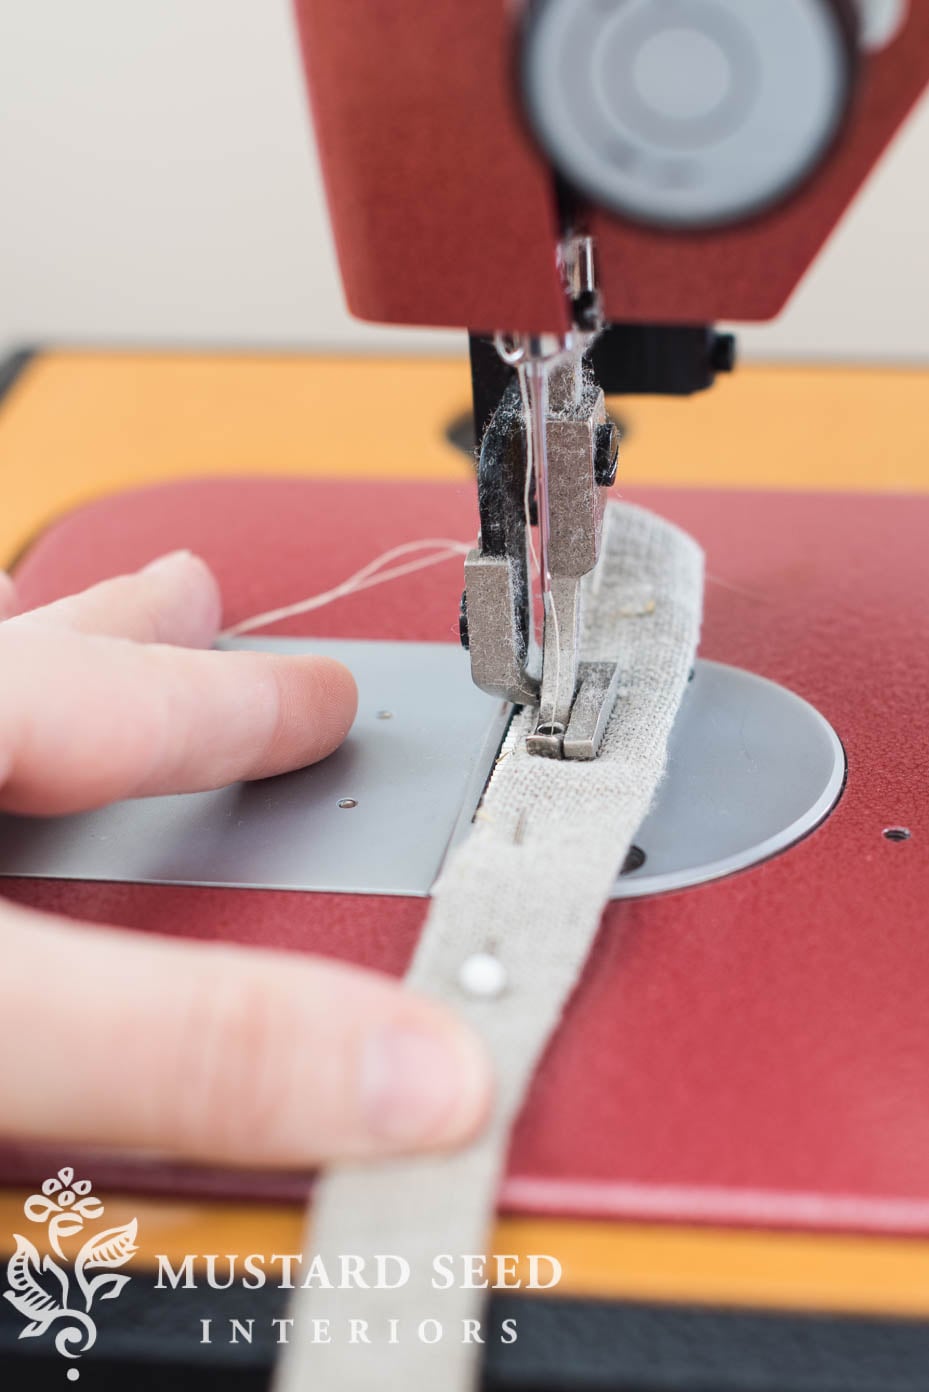
Sew down the side where the folded ends meet and along the folded (finished) end. You can leave the other end raw, since it will be either folded or on the inside of the slipcover.
In the video below, I show how to sew the ties onto the slipcover…

I also show how to finish the bottom of the slipcover with a piping edge and skirt. I chose a ruffled skirt for my slipcover, you can certainly do a box pleat, a kick pleat at each corner, or just finish with a piping edge. As with the ties, I like a little feminine detail to finish off my slips!
In the final installment of this series, I’ll show how the chairs turned out…
If you are looking for other slipcover and upholstery tutorials, you can find them HERE.

The winner of the Dreamy Whites giveaway is Paula Jolly! Congrats!


7 Responses
Thank you for the slipcover tutorial! I want to try slipcovering a pair of chairs but am nervous about ruining so much fabric if it doesn’t work out. Reminding myself that my fabric was not expensive and trying is the only way to learn! You are so encouraging and inspiring. All the best to you and your family!
I love the ties in the back and have a similar chair. I’m pinning this for when I need it. Thank you, Marian!
Love the natural textiles you lean toward. As with your milkpaint it feels authentic to me in a way that synthetics can’t.
I’ve made fitted slip covers with separate cushion covers for several pieces in the past, including a small couch. I always used a zipper vertically on a back corner for closure. It gives a very clean line. Piping on the seams and a box pleated or ruffled skirt add to the finished look although a piece with nice legs can just be hemmed at whatever length looks right, or turned up and pinned to the bottom of the chair. As with your parsons chairs, you can choose the details based on your piece and your personal style. It’s such a fun way to update any upholstered piece and not too difficult. I only have basic sewing skills and I learned how to do it from an old Simplicity book. If I can do it, anyone can!
Stay well…everyone….
you make it look so easy! I feel a little more confident, thanks!
The slipcovers are coming out beautifully. I do my my ties the same way except I picked up this tip from a sewing blog…instead of pins use alligator clips sold at hair places like Sally’s. they easily slide off will seaming and reduce bulk. I sew in the summertime because of the heat and humidity in Florida. most of the home dec stuff is finally finished after 3 yrs here and 20 window treatments in total! now I’m on to dresses, hooray.
Seriously Marian – is there nothing you cannot do well?
You never fail to impress me, ever.
I never would have thought of doing it that way. So simple and clever. Thank you for your guidance.