
You can read part one of laying a floating floor HERE. It shows how we stripped the carpet and installed the underlayment. Today, I’m going to talk through how we installed the actual floor. As I said in part one, we’re not professionals at this, so this isn’t meant to be a comprehensive tutorial, but more of a testimony of our experience.
")
I was a very good blogger and took lots of pictures as we ripped out the carpet and installed the underlayment and then I got tired and the sun set (so my natural lighting went away) and I just wanted to finish, so this was the last picture I took. When we lay the floors in the bedroom, I’ll take more.
As I said in part one, laying the floor was the easiest part of the project. Since it is a floating floor, there is no gluing, nailing or sticking…just locking each piece into place. We have nailed and glued floors before and this is definitely my favorite method of installation. That’s a big bonus for the interlocking floating floor. You will still need a table saw and a chop (mitre) saw. You can probably get away with a pull saw instead of the chop saw and a circular saw (along with clamps and a straight edge), but it will make your life easier and the job go faster if you have the proper tools.
")
The most important piece you’re going to put down is the first one. This should be in the most visible starting place in the room. In our case, it was the threshold that connects the family room to the kitchen. The reason for this is that your room (or my room) might not be perfectly square. Even if the floor is perfectly square where you started, it might end up looking crooked when you get to the other side of the room. If there is a crooked edge, you want it to be as hidden as possible. The first piece needs to be square, straight and firmly in place, since all of the other boards will go off of that one. If it’s crooked, your floor will be crooked, which will look especially bad if it runs the length of a room. I can’t stress enough to take your time with this piece and get it right. Once it’s in the right place, tack it down with a couple of nails to hold it in place. We hid our nails under the lip of the threshold (which we haven’t installed yet.)
Another thing to keep in mind is that you need to leave about 1/4″ perimeter around the entire floor. Wood expands and contracts as the humidity changes and you want to give it some space to do that. You can cover this gap with baseboards and/or shoe molding (quarter round.)
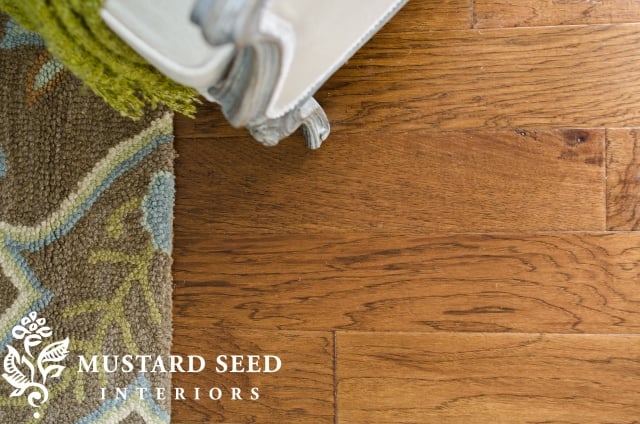
Once that first piece is installed, you can start clicking the floor into place…
")
")
You can see the layers of the engineered hardwood floor. Hickory on top, MDF in the middle and thin plywood on the bottom.
Here are some other tips…
- Have your chop saw in a place that’s easy to access. You don’t want to have to run to the basement every time you need to make a cut. (Well maybe you do, but I didn’t!)
- Save the waste you cut off of boards at the end of the one side of the room and use it to start the next row. This will give you irregular lengths to start your regular sized boards off of, staggering the joints.
- Lay the floors how you read. Top to bottom, left to right (as you’ll looking at the board, not the room.)
- Stagger the joints. It makes the floor stronger and it looks better when they are staggered. The pattern should be intentionally random. I know that’s an oxymoron, but if it’s totally random, you might have seams line up.
- Know that some areas are going to be time consuming. The area around our bar took forever, because we had to rip (cut lengthwise) the boards and make some angled cuts around the peninsula. Don’t get frustrated when you’re stuck on a section. Once you hit open flooring, you’ll fly.
- Use a scrap piece of flooring or wood and a hammer to tap the boards tightly into place. Don’t ever hit the floor directly or you could accidentally mar the finish or dent the wood.
- The nice thing about a floating floor is it’s very forgiving. If you mess something up, you can pull up the boards and redo it. It should be a low-stress project and this type of flooring is a good option for a beginning DIYer.
I hope that helps!
You can see the full room reveal HERE
.
![]()
Right now, I’m in my hotel in Houston! I’m getting a bit of rest before a milk paint demo and book signing tonight at Altar’d. Can’t wait!


38 Responses
Your new floor looks great! You never cease to amaze me with what you can do.
Love your Joss and Main sale… so many wonderful items!
I am looking forward to seeing you this weekend!
We are about to install flooring in an area we just made into living space, however we are istalling a high end laminate from Lowes Allen Roth. Thank you for your tips, look forward to reading about the actual application or instalation of your wood floor.
Bevery
Wow! I love it! Great job! We’ve done this in several rooms of our house. I think it’s a deal of a project.
Bless you for taking on this project, but the results will be so work it!
Loved seeing your boys in the post!
Looks Great! You are quite talented!!! Makes me think I could possibly handled a bedroom upstairs. Thank you for sharing! Wanda
Thanks Marian, I love your tutorials. I’ve thought about laying our own floors…I just don’t know…I will probably have to hire it out but I know one thing…I can’t wait to get them!
This is going to be beautiful. And it’s very interesting what must happen before you put the flooring down.
But as the grandmother of (only) little boys, I had to laugh at the picture of your boys flinging themselves off the furniture. Wonder what makes them do things like that? The minute something is out of place or different, their energy level goes into overdrive. Simply amazing. But universal. And I loved your disclaimer that your child dressed himself. I get that too.
Wow – what a job! Have you ever stripped carpet off a staircase? I want to take the old berber off my stairs and put down wood treads for cleaner look. The boys were a hoot…
Good that you and your husband have complementary characters. I’m more the perfectionist type, and my husband tends to plow ahead with projects. He gets more stuff done without fear of failure.
Well,I just had a ” Duh!” moment! Picture a short woman wrestling a large roll of carpet through a doorway! Thats what utility knives are for, cutting things. But seriously, thanks for the reminder to look for problems with the subfloor. The tutorial helps alot! Your boys are cute! My grandsons would have been swinging from the chandeliers or the ceiling fans yelling “AARGH!”! They like pirate movies.
Thanks for your post on this project. My husband and I are about to tackle laying down new floors in the kitchen and dining room. The previous owner laid cheap laminate hard wood over the tile in the kitchen and it has buckled. so we have to remove the flooring and chip off the tile. That does not sound fun to me. Thanks for the info. Can’t wait for you next post.
One other tip you may want to note…once the carpet padding is out and the staples are removed, it is a great opportunity to do some soundproofing and squeak fixing. Alot of times if there is a squeak in the floor, it is because the subfloor isn’t secured to the floor joist well. You can easily fix alot of squeaks by using your cordless drill and some drywall screws to screw down the subfloor to the joists and the two layers of subfloor together…as most homes have two layers of plywood as a subfloor. When installing tile flooring, particularly large tile, it is very important to screw everything together really tight so that there isn’t as much movement in the floor. Movement + tile = cracks. These are just a couple of tips that I’ve learned while working in construction…just thought I’d share.
God must have sent you a personal message.. Help those who are considering doing this! I love you are not a professional.. cause they don’t always give you the practical or real side of do it yourself! Or how to really pull up staples.. I have a puller tool too!
I have been looking into laying either a laminate or a wood floor in my kitchen. I have the ugliest orange 1975 kitchen floor that came with the house, for last 20 years. Good quality though..wears like iron, believe me, I tried to ruin it! When I had family to help, one a tile setter, tile might have been an option, but now.. I am not going to do that alone! I have some hardwood floors, beautiful dark oak, everything in the house is dark oak, but the wood floors are the bedrooms only! When I have the money.. and decide if I will paint the cabinet, this will sure help me! Do the painting before the floors! Thank you MMS!
looks so nice!
Thanks so much for the great tutorial! I’m about to tackle an upstairs hallway when my husband leaves town. Was going to do solid hardwood but may do engineered after seeing your wonderful instructions. The floor looks gorgeous!
i’ve never really cared for that type of flooring..with all the boards being the same length..but i really like your choice here..the dark is what i’m drawn to as well..and it looks FANTASTIC…nice job you diy’ers did…
Great info! We had a floating engineered bamboo installed just over a year ago and although we loved the look of it, it hasn’t held up worth a darned. In hindsight, we should have bought higher end vs middle-of-the-road, and NOT made our purchase at Lumber Liquidators. Had a terrible experience with them not standing behind their very low quality product. Definitely an expensive lesson learned by us (about $10k w/labor costs – we did about 1300 sq ft).
I’m sure you will be pleased when it is finished…. LOVED the pics of the boys jumping off the chesterfield .. and your note as to who dressed him 🙂 sooo funny.
Thanks for sharing this! My carpeted floors are getting the evil, i’m gonna rip you out, eye… as we speak! It just all sounds really hard right now… but this totally helps with perspective about redoing floors. I’ll be eagerly watching for the next post about it all.
I joined Joss and Main, and it’s a cool site! I love your choices of products. Those sofas are all so wonderful too!
Cindy
What a job! Are you installing this in most of your home or just the entry/family room?They look amazing already!
xx
Anne
Just in the family room and master bedroom, which are actually at the back of the house. The other rooms already have hardwood flooring (or tile in the kitchen)
We are in the process of doing the same thing. We also pulled up the linoleum in the kitchen and the staples are way worse under that. I put our old carpet on the free section of Craigslist and had dozens of emails about it in just a couple hours. They came and hauled it off and it didn’t end up in a landfill.
I am in the process of ripping out carpet very soon . Not sure what I want to replace with , yet. Thank you for all the tips. Have to think about carpet disposal, etc…. The flooring at your house is amazing.
Brings back (bad) memories of laying the floor in my daughter’s room-by myself! Never again !
What a great tip about leaving the flooring to acclimate to your home…you must be so thrilled with your beautiful new floors!….and I love the pic of the boys doing what boys do…have fun!
Absolutely love all the the things you do! Is there a place to buy the furniture you refinish?
I will be selling pieces at the May antiques fair in Lucketts, VA, but I am also going to start selling some pieces online to ship around the US.
Sooo glad you found those missing Legos! hee hee
I am eagerly waiting to find out what you used! We are in the process of pricing laminate now.
Did you do this – installed solid hardwood floors over concrete – before you blogged? We want to but are unsure how to. Is it much different than using the engineered? Thanks,
PLEASE Post Part 2. We’re about to lay our floor in the kitchen and I’d love to hear more.
thanks
Love the tutorial! We are contemplating installing new hardwood floors, too. But, since we want to do the whole house, we are torn on which product to use. We’d like traditional hardwood upstairs and we were undecided on the downstairs (we’d like it all to match). Did you really install traditional hardwood floors on concrete? HOW? Did it turn out well and would you recommend doing it? Please do tell!
I did! This was in my pre-blog days when we lived in a little town house. We put down a moisture barrier, then installed a layer of plywood subflooring. We had to rent a special nailer that would drive the nails through the plywood into concrete. From there, we glued down the hardwood to the subfloor. The only think to think about is how much the floor is raised. Ours ended up increases by 1 1/4″, which caused some trouble with the dishwasher.
Your family room floor looks great! We’re are in the process of doing the same with our bedrooms. I’ve been waiting ten long years for this to happen. Two rooms have been done and I’m sooooooo happy!
I’m sitting here laughing at your post (not really THE post) but I had decided that I was going to do this in out bathroom when my husband went out of town for the weekend…I ripped up the old linoleum, then the next layer of linoleum (to make sure that there wasn’t water damage. I found the floor was rotted and my husband would be home the next day. Oh, did I mention that it was going to be a surprise! Needless to say….he didn’t like the bathroom makeover 🙁 My 2 day project DID turn out to be a disaster. I’m not brave enough to replace the subfloor because it is our only bathroom for 5, and I don’t need that 1 day project turning into 2 weeks. Oh, and I also forgot to tell you….this was over thankgiving weekend. I need a husband like yours!
Yours looks great!
You can observe the latest weather updates simply by taking a look into your phone’s home screen, where it automatically posts weather info, and all sorts of without having to launch the application. With anywhere near this much controversy clinging on to its name, it should come as not surprising that several of the world’s police officers authorities
happen to be looking for ways to shut it down for good. There are a few significant improvements made over Vista, as
well as the most part, it’s just a version of Vista which is both stable plus much more user-friendly.