
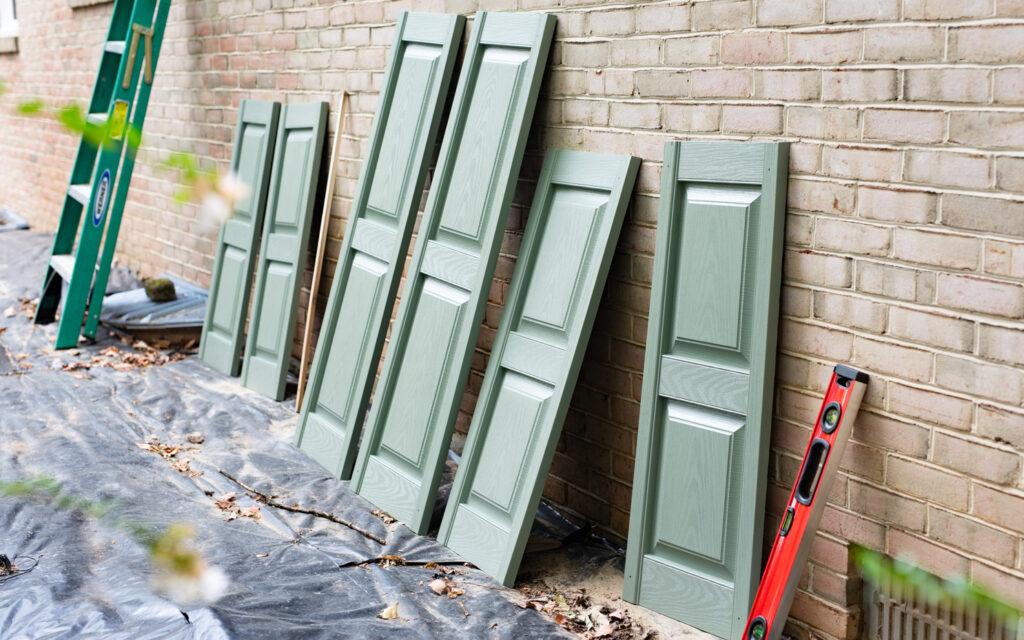
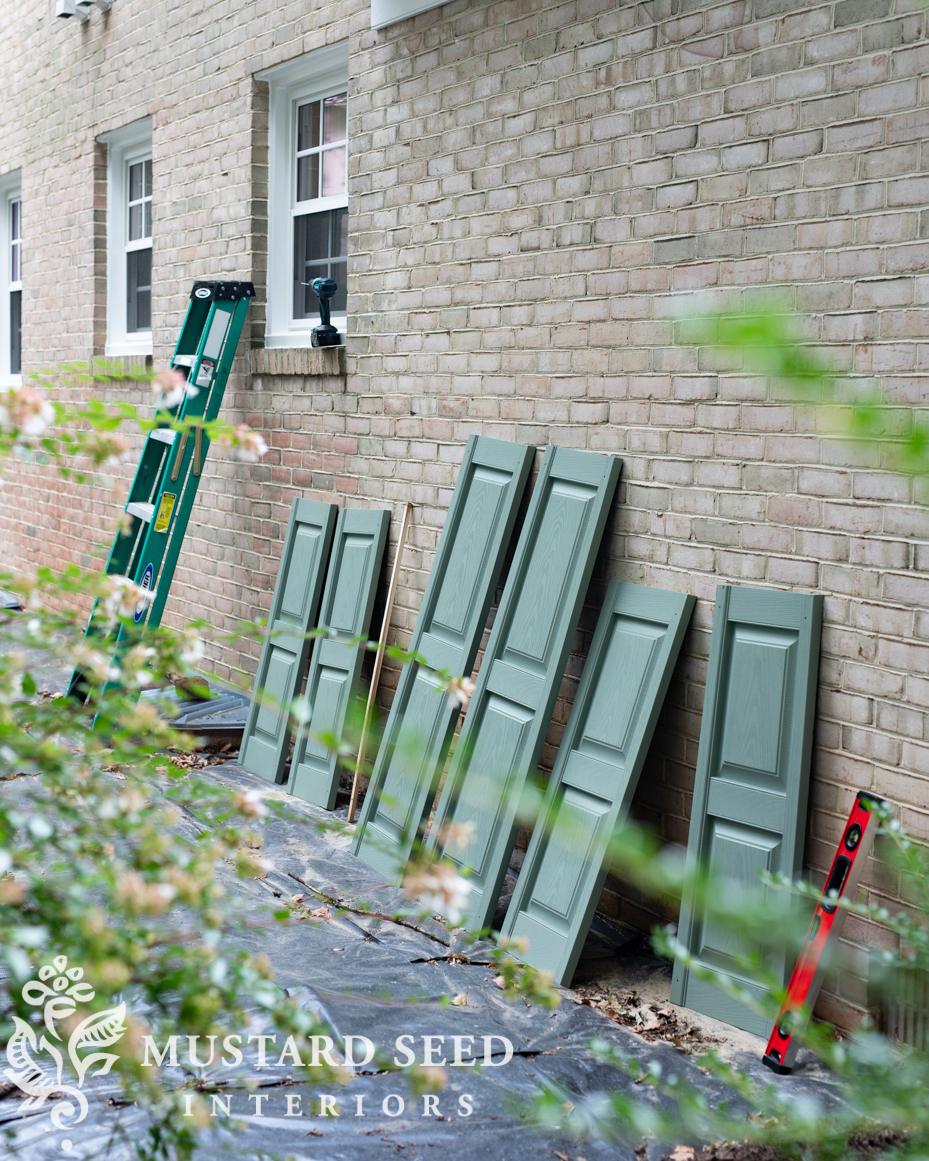
Over the weekend, we installed shutters on the left side of the house. That was the last side of the house that needed shutters, so I can finally check that project off the list! This home had wood shutters on all the windows originally, but they had rotted and were removed. Before we bought the house, vinyl shutters had been installed on the front and right side of the house, but the windows along the back and left sides were left without shutters. We wanted to bring that architectural element back in, so we ordered, painted, and installed shutters this summer. You can find a tutorial on how to prime and paint vinyl shutters HERE. In this post, I’m sharing a tutorial showing how to install new shutters on brick.
Let me start by saying we built this project up in our minds as one that was going to be challenging! In the end, it went against most DIY wisdom that projects will be more complex, take longer, and end up costing more. It was much easier and quicker than we expected, and, with standard-sized vinyl shutters, it was also cheaper than we initially thought. We were winning all around on this one!
The key to installing something permanently onto brick is to have the right drill bit, drill, and hardware.
Installing Shutters on Brick | Tools & Materials
- shutters (We used THESE. You can find the tutorial for painting vinyl shutters HERE.)
- cardboard template
- level
- spacer
- Sharpie Marker
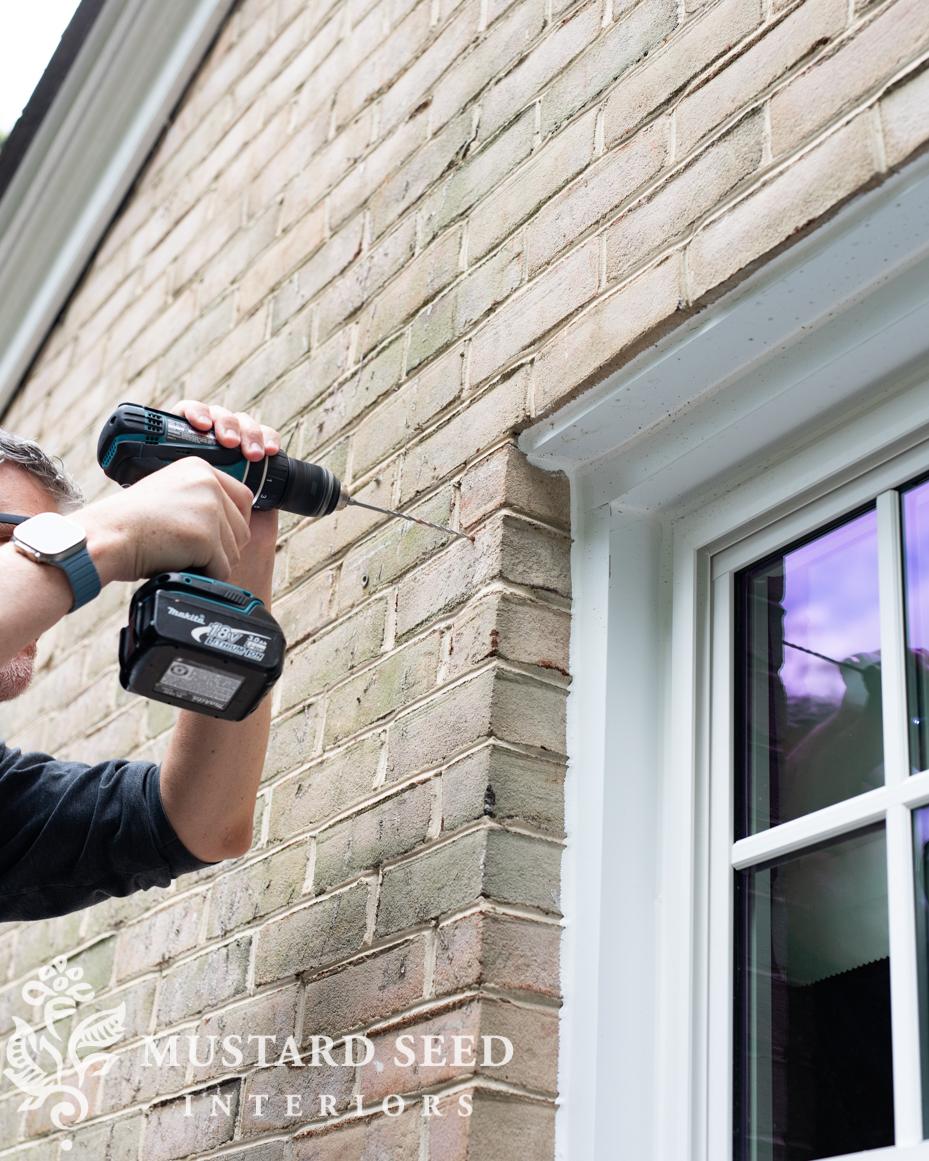
- drill (We were able to successfully use a cordless drill, but this project is much easier and faster with a corded drill or hammer drill.)
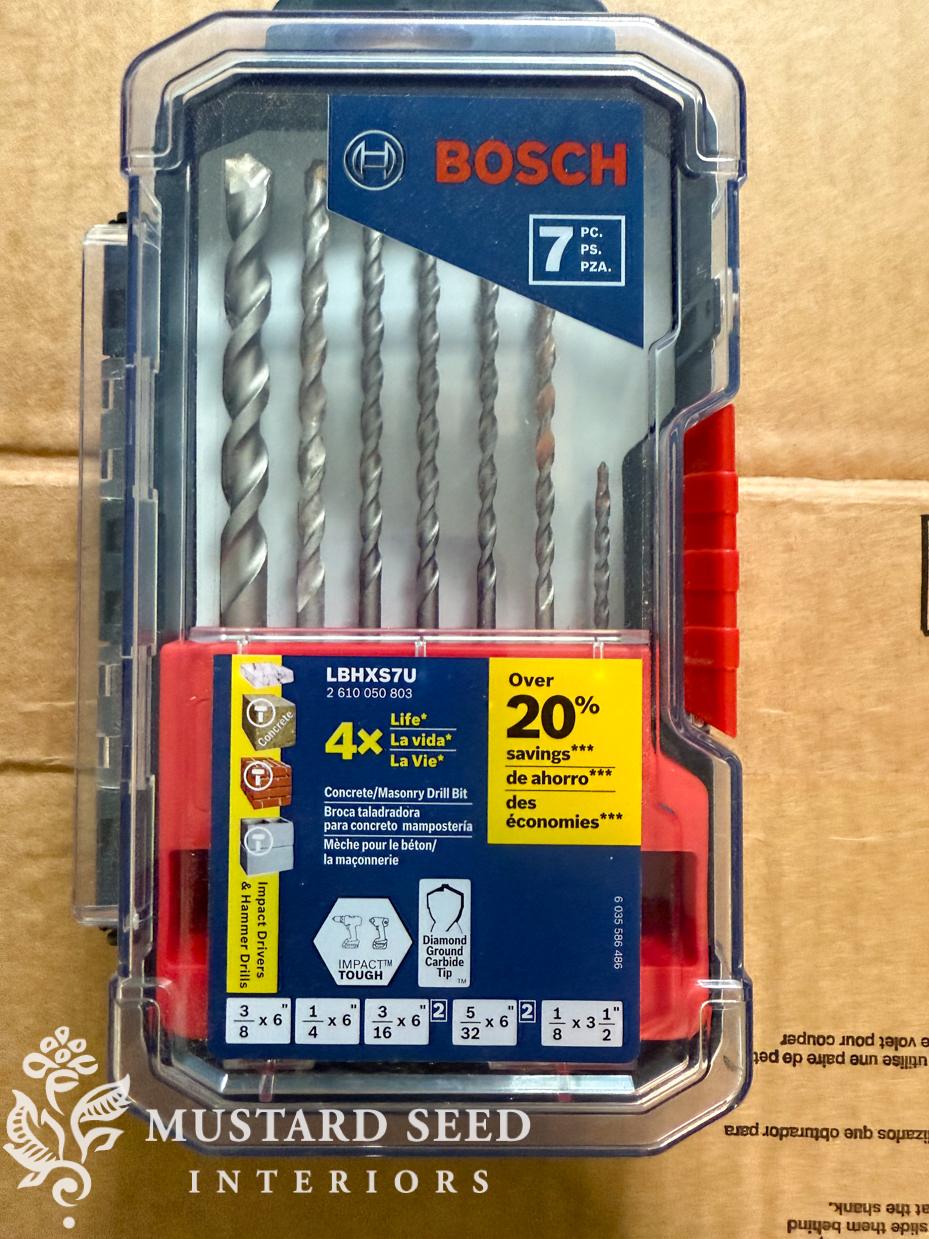
- masonry drill bits
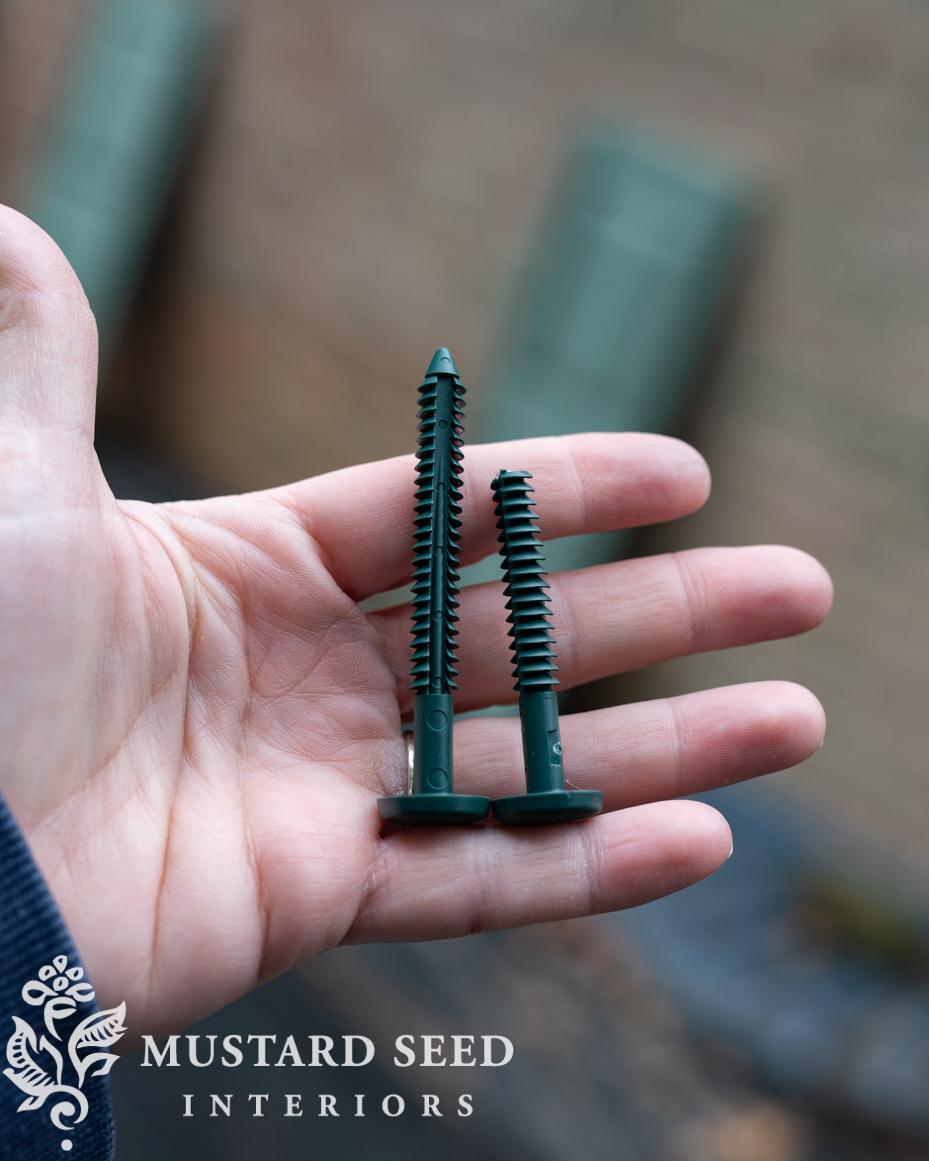
- anchors (brick anchors came with our shutters)
- ladder
Since we had eight pairs of shutters to hang, I created a template out of a piece of cardboard to ensure that all the holes were drilled in the same location on all the shutters. We selected a visually appealing spot, marked it on the template, and then used the template to mark the placement on the drill hole at each corner of the shutters.
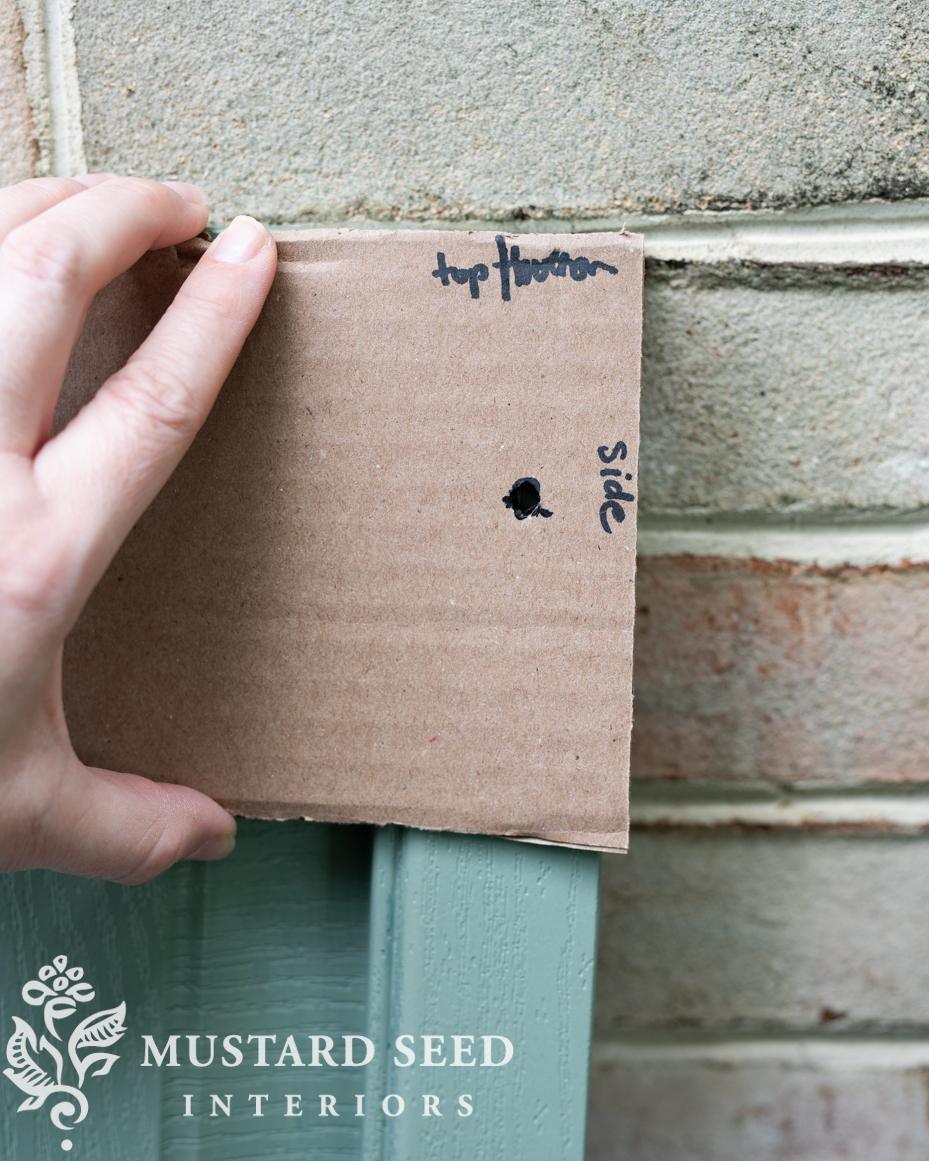
Here is how they look, marked and ready to be drilled. Since the shutters are lightweight and not very big, we decided to insert four anchors instead of six. We can always add those later if needed.

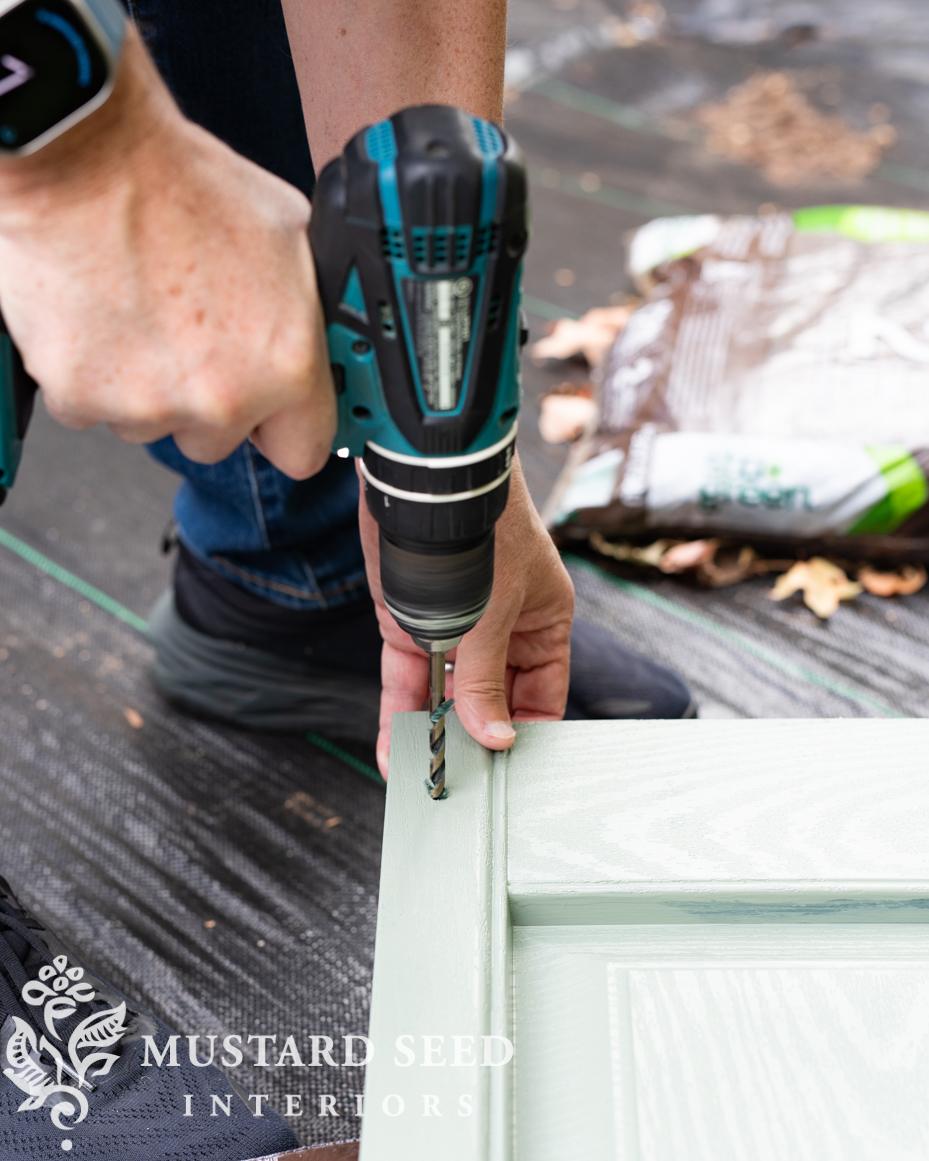
We drilled each hole with a 1/4 wood/all-purpose drill bit.
We used a small piece of wood, about 3/4″ wide, to act as a spacer when determining the placement of each shutter. We wanted to make sure they were the same distance from the window, and a spacer is the easiest, most accurate way to do that. Once the shutter was spaced properly, we used a level to check for plumb.
The finished side of the shutter faces the wall during this step, making it easier to mark the exact drilling locations with a Sharpie.
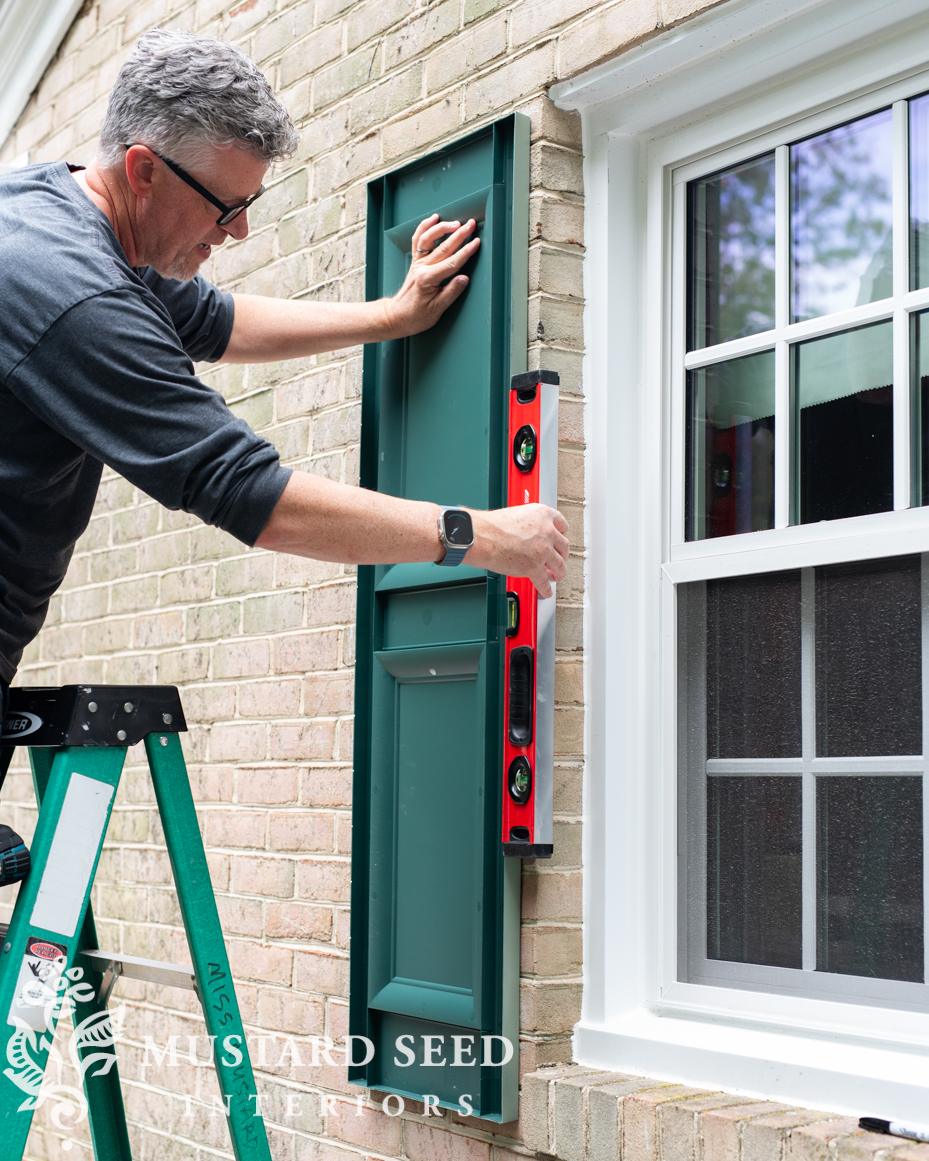
We used a Sharpie marker to mark through each drill hole made in the shutter, corresponding to the locations for drilling the pilot holes for the brick anchors.
THESE are the drill bits we’ve used for drilling into brick, and they made all the difference. In our experience, the drill bit started to dull after about six sets of shutters, so it is a good idea to have 2-3 on hand if you’re installing multiple sets of shutters.
Jeff was able to drill pilot holes in the brick with a cordless drill (we tested that out since we knew that is what most people have), but this job is easier with a corded drill or hammer drill. Both offer more power and torque, requiring less effort to drill a deep hole into the brick.
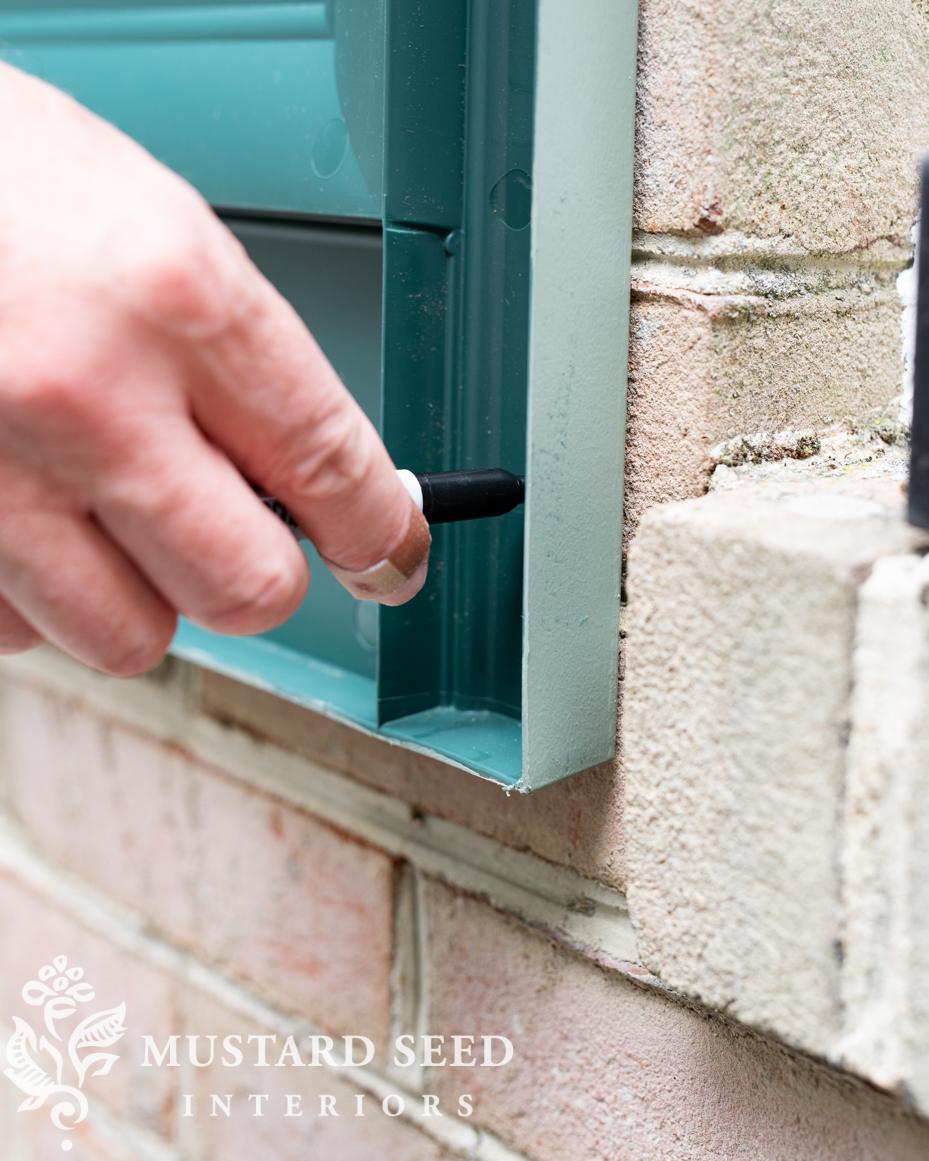
The anchors that came with the shutters were very long, so we clipped off a bit with scissors to avoid drilling deeper holes. This is a minor change, and it is obviously optional.
Once the holes were drilled, we held each shutter in place, lined up the anchors, and pushed them into the holes drilled in the brick. We were able to push them in with our hands, but you could use a rubber mallet or gently tap them in with a hammer.
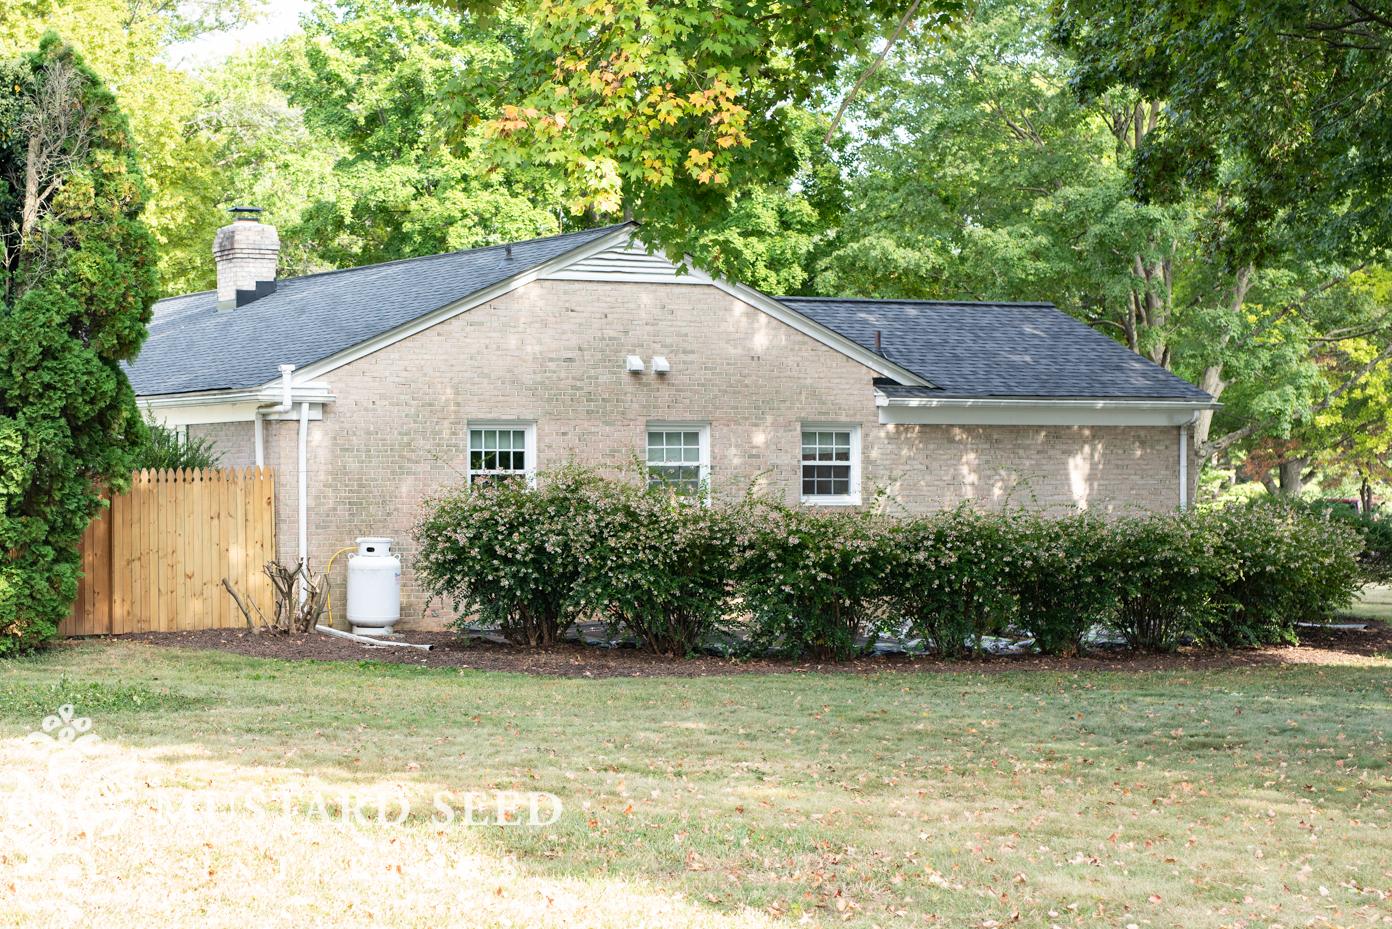
Here is how that side of the house looked without shutters…
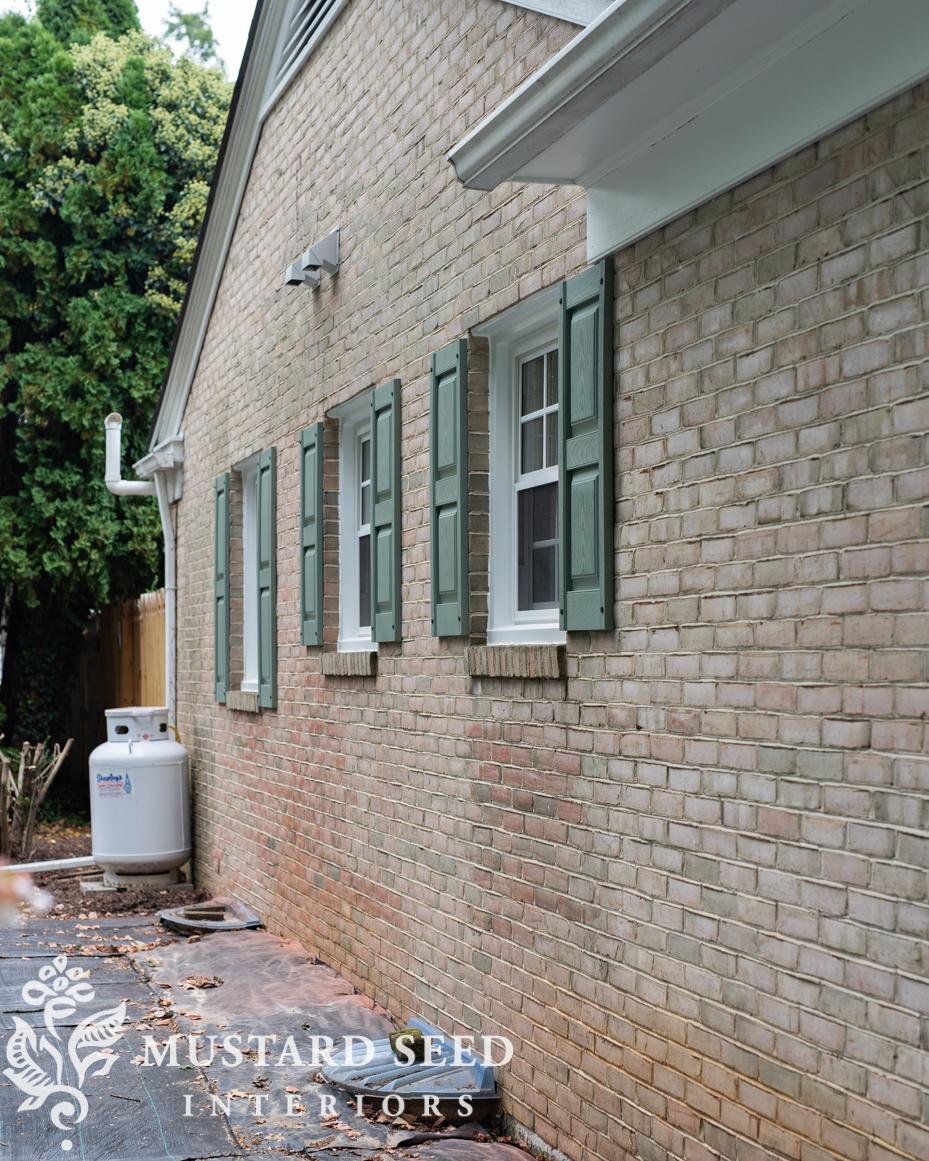
And now with new shutters installed!
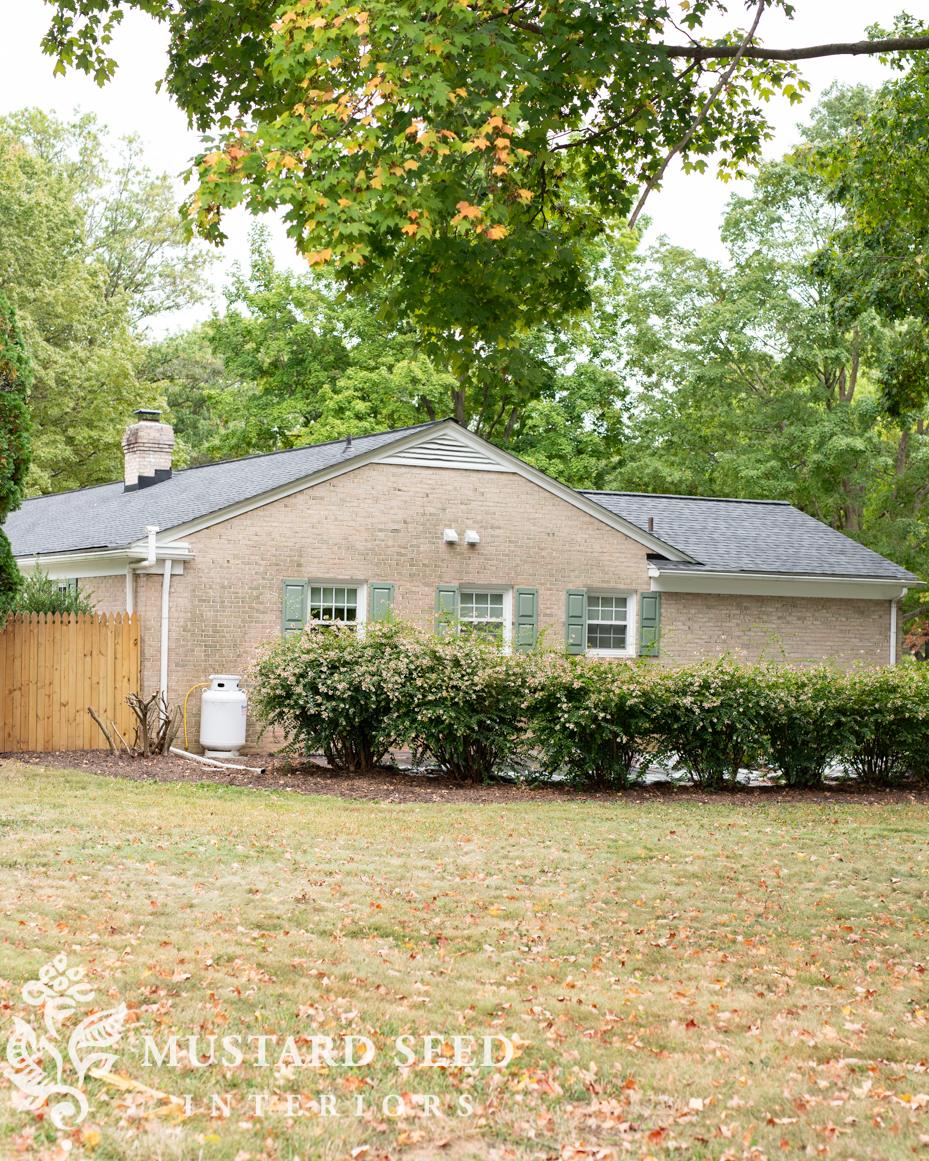
It adds so much to this side of the house that has been neglected for so long! I like that the shutters bring some color and break up the texture of the brick. They are a welcome addition, adding a bit more curb appeal to this side of the house.
Next, we’re building and installing a screen to conceal the propane tank…
You can find more projects we’ve done on the exterior of our house HERE.


8 Responses
Dear Marian,
The shutter installation instructions create possibilities for anyone who loves a budget friendly project. How considerate to demonstrate with a cordless drill, include the exact instructions for painting vinyl, and the inspiration with the transformation of the “neglected” side of your home.
Have a marvelous European adventure. Enjoy the anticipation of returning to the loveliness of your restorations both in and outside.
With admiration,
Diney on Mercer Island
Marian thank you so much for this post. It will make it so much easy for me when I try hanging them on my brick rancher. Thank you for sharing the drill bit link too!
Hope you have a fabulous trip.
Gratefully yours,
Michelle A
You are welcome!
Oh, Marian, THANK YOU for this tutorial! It is something that we need to do this fall!
This will help us get motivated to GET ‘ER DONE!
Have a safe and fun TRIP!
Teresa C.
I love my SDS drill. It’s a very heavy drill to use but it gets through pretty much anything. I couldn’t believe how quickly I was able to hang curtain poles etc where previously I couldn’t even get my normal hammer drill through the lintel.
Your windows and side looked bigger with the shutters. Talking about an optical illusion.
Yes, it gave that side of the house much more presence. It looked like it wanted to be hidden before!
They look real good. Nice to have the materials and steps info. You make it look easy. And bless Jeff for being competent and easy himself.