
The only problem with cutting back the abelia hedge on the left side of the house earlier this year was that it exposed all of the work that needed to be done to this side of the house. You could see the staining on the brick from ivy, the trim that was long overdue for a fresh coat, and all of the weeds and refuse that needed to be removed. We’ve been working on it bit by bit, and we finally wanted to address the other thing that was previously hidden by the hedge – the propane tank.
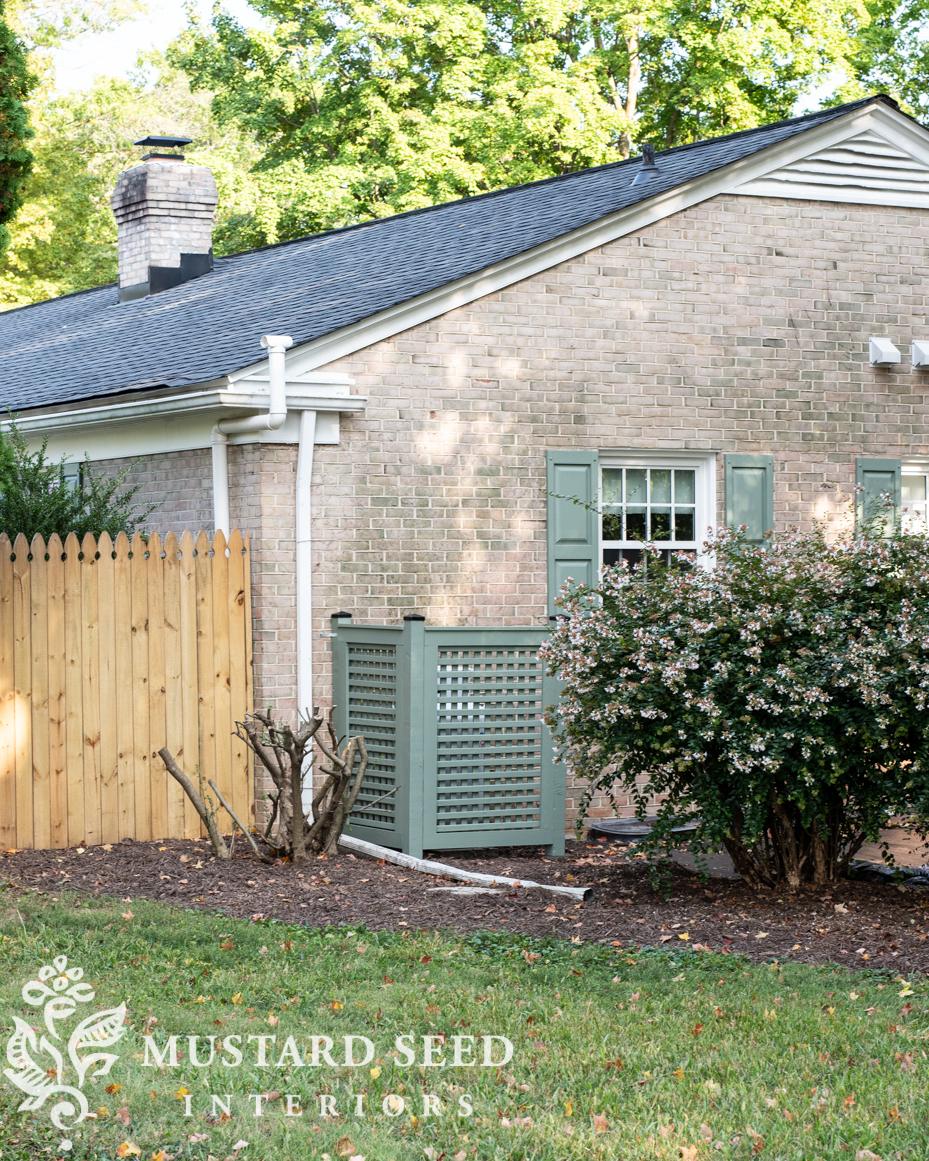
While this is the least visible side of the house, it is still pretty visible. Our house is situated on a suburban peninsula where two pokey neighborhood streets meet at a Y. That means we have curbs on three sides of the house, allowing you to see every side from the road except for the back. As an aside, I had no idea how much curb weeding I was getting into when we bought this house. It’s a lot.
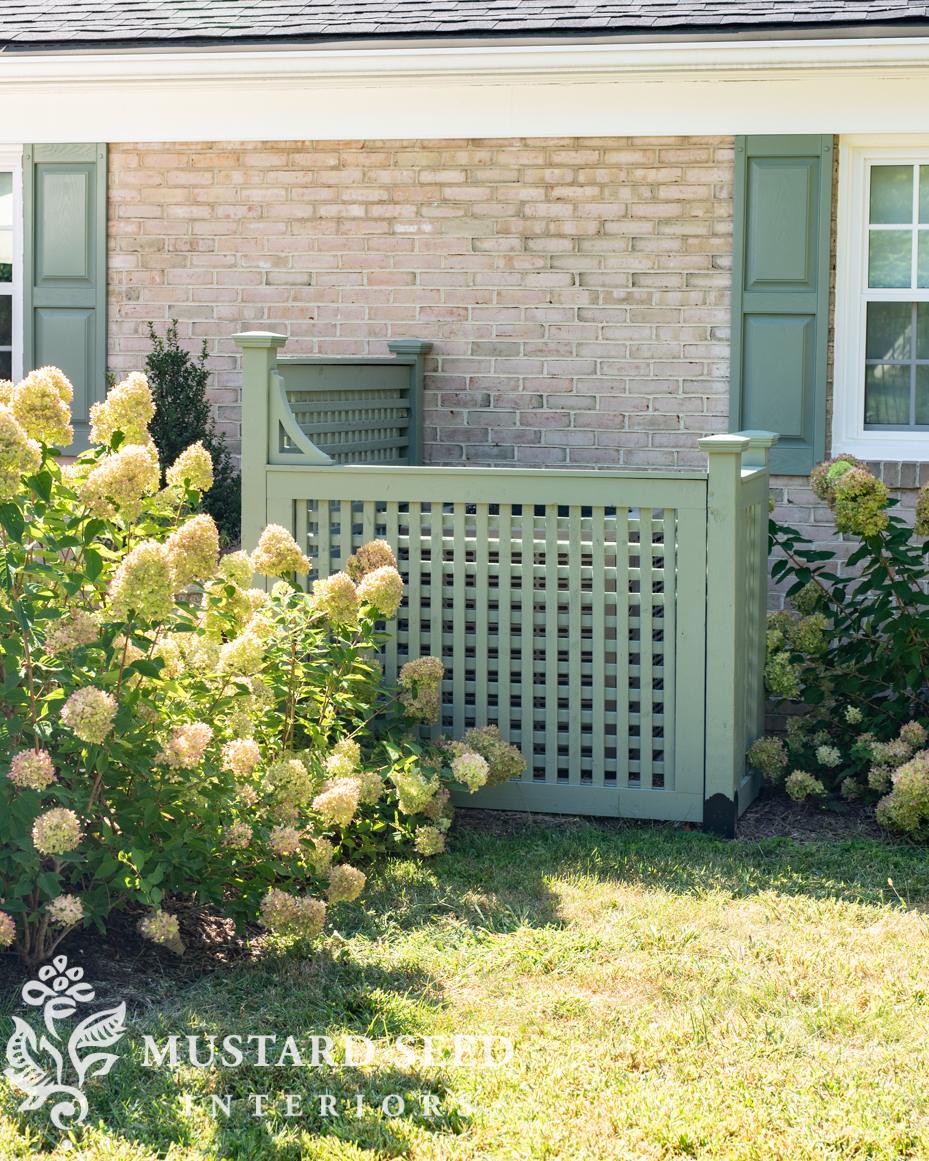
So, this propane tank was sort of hanging out there for all to see. When someone says curb appeal, propane tank isn’t the first thing to come to mind. I knew immediately I wanted to build a screen for it, similar to the one we designed and built for the A/C unit. (You can read about that HERE.)
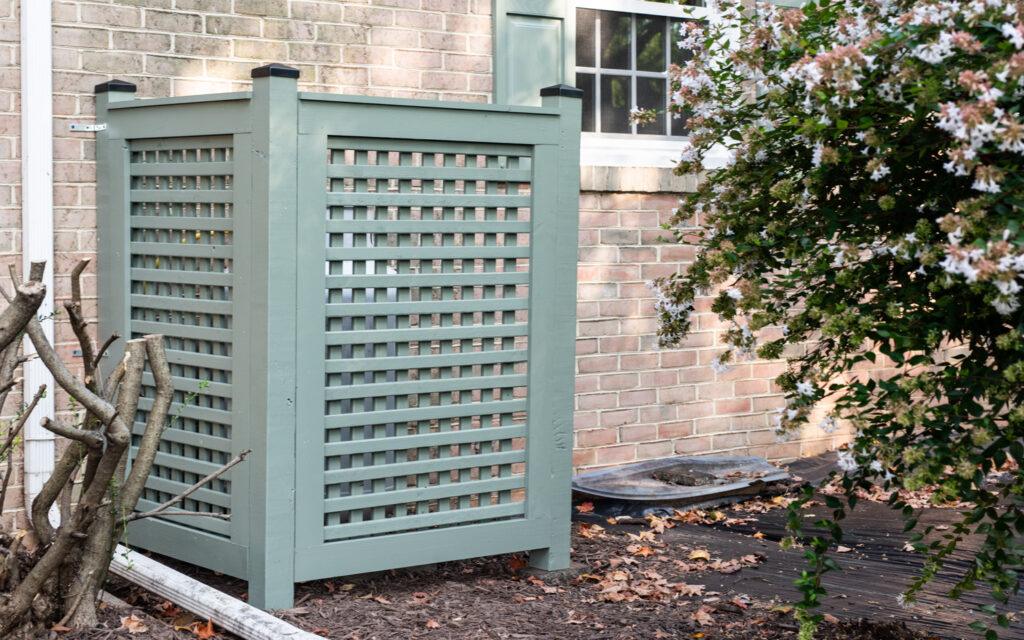
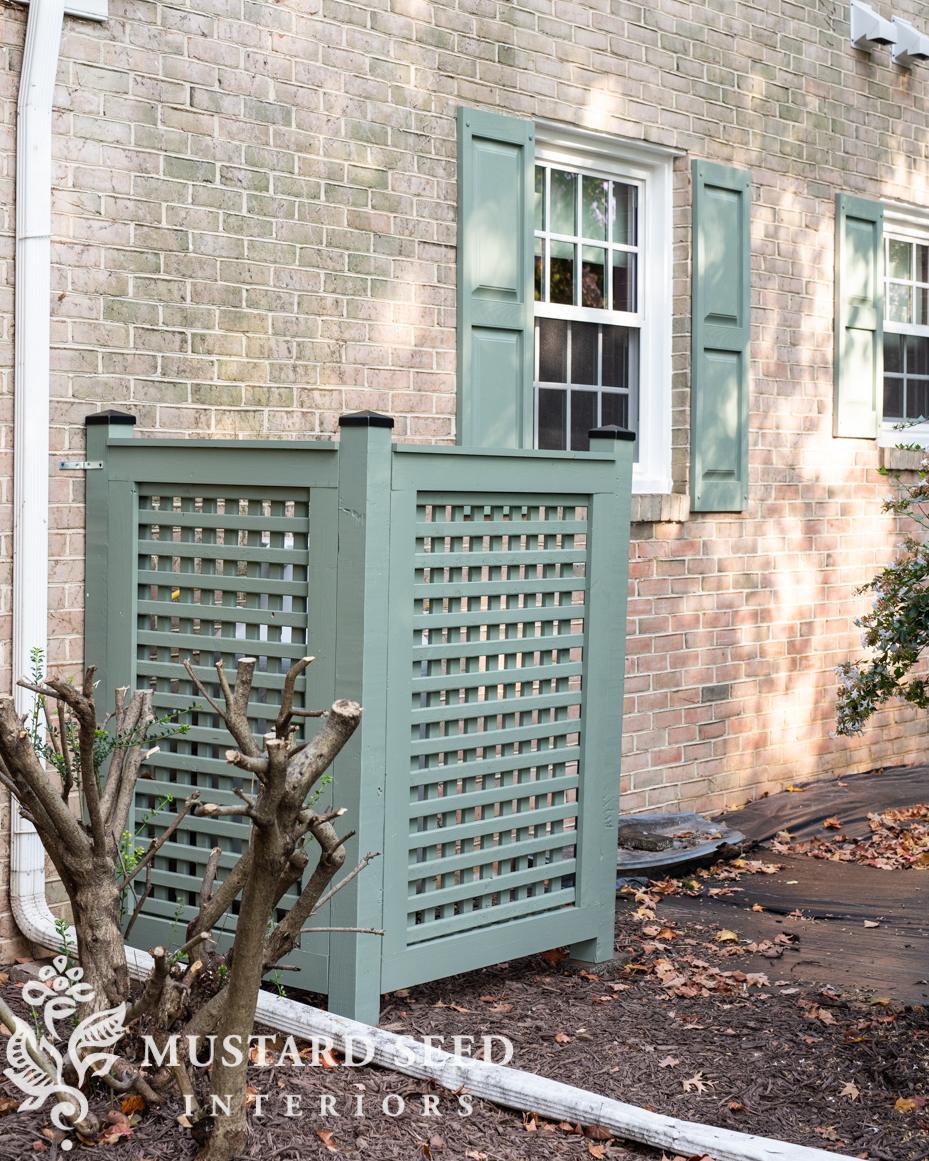
Here is how the finished propane tank screen looks…

We learned a lot when we built the A/C surround, so we made a few adjustments. Instead of attaching the frame to the 4 x 4 posts using L-brackets, we joined them with screws using a Kreg jig. We were able to assemble the entire screen in one piece this way because it was smaller than the A/C surround.

Once the frame and posts were joined, we added the 1 x 2 pieces to make a custom lattice. It looks so good! I am thrilled that the propane tank is now hidden but accessible when it needs to be refilled. Speaking of, we only use propane for our range top, so they only refill it about once a year.
We attached the screen to the house using L-brackets and put bricks under the posts to make it level. Since it’s not as large as the A/C surround, we didn’t put the corner post on a spike for added stability. We decided to keep it simple and easy to remove. We do have a 16″ spike for a 4 x 4 post, though, so we can add it if needed.
I’m looking forward to the day when I can post about this side of the house without asterisks about what still needs to be done, but today is not that day. We still need to replace the gutter extenders (because they’ve been stepped on multiple times over the years) and finish cleaning the brick. We also need to spread the rest of the mulch, which still won’t cover the entire area. We mulch the leaves from our six large maple trees, so we’re going to use those to fill in what our store-bought mulch doesn’t cover. We’ll then put a nice thick layer of mulch on this area in the Spring when we mulch the rest of the garden beds. I really wanted to order another palette of mulch to finish off this side of the yard, but everything is about to be covered with leaves, so it’s better to wait.
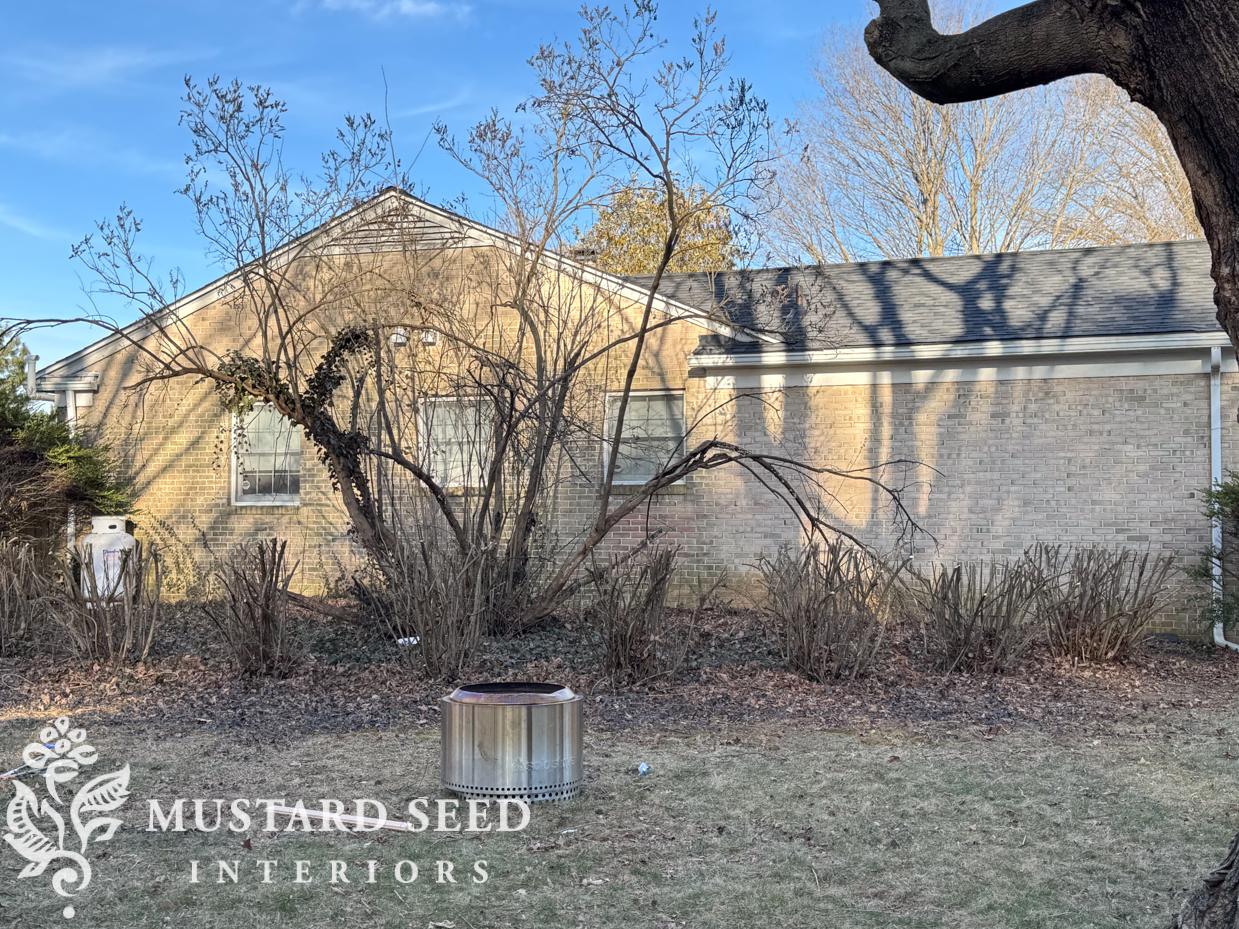
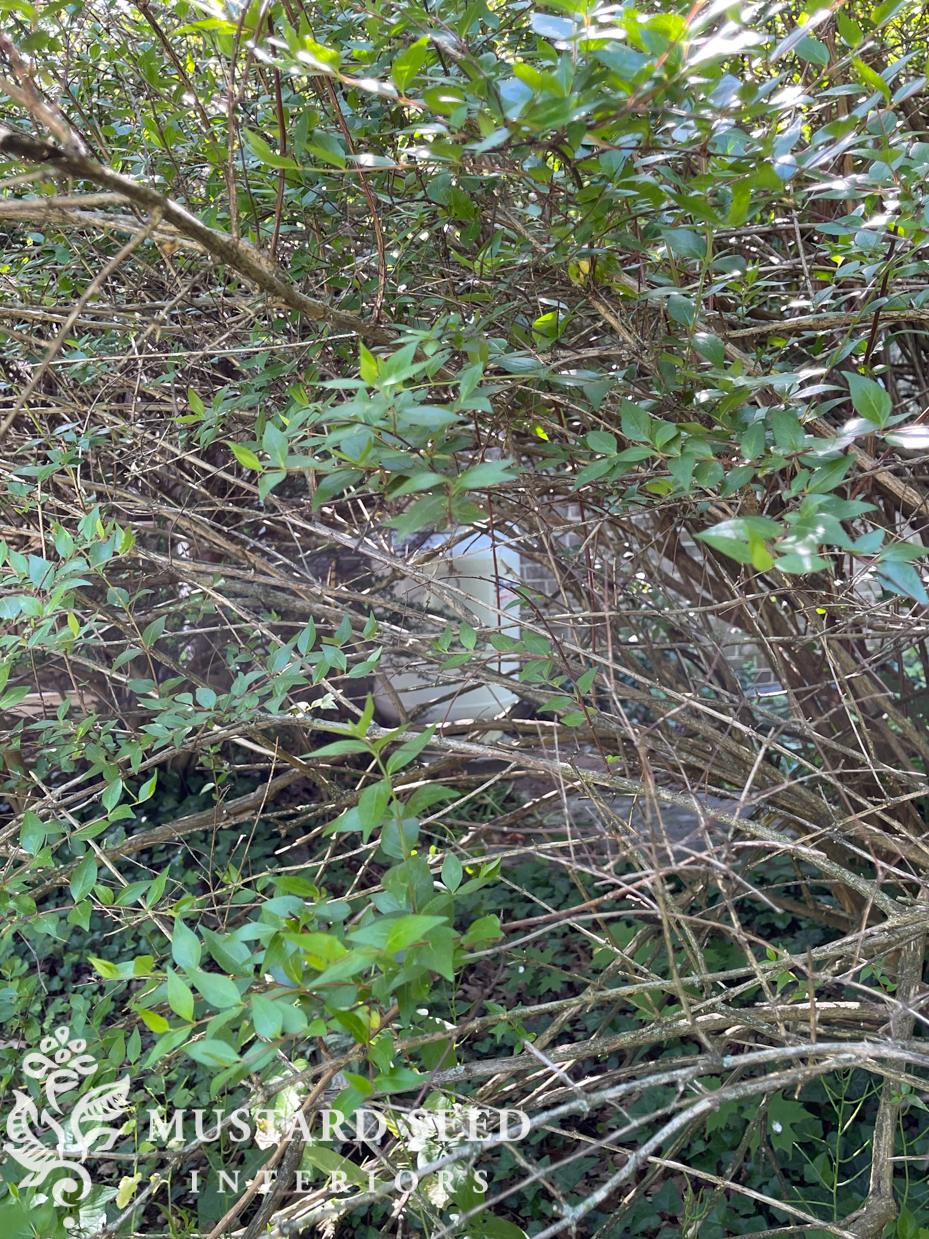
I had to show this before and after picture because it’s pretty funny. Here is what the propane tank looked like shortly after we had it installed. You can barely see the propane tank through the tangle of branches. I felt bad for the people who had to install it! We knew it was ridiculous.
And here is how it looks now from that same view! Pretty impressive, right?

The bush that had a run-in with Jeff’s chainsaw is a Japanese holly. It’s going to bounce back, though, and it’ll look great once it starts filling in next year. Once the weeds have been suppressed for a few years, I might even try planting some perennials back here.
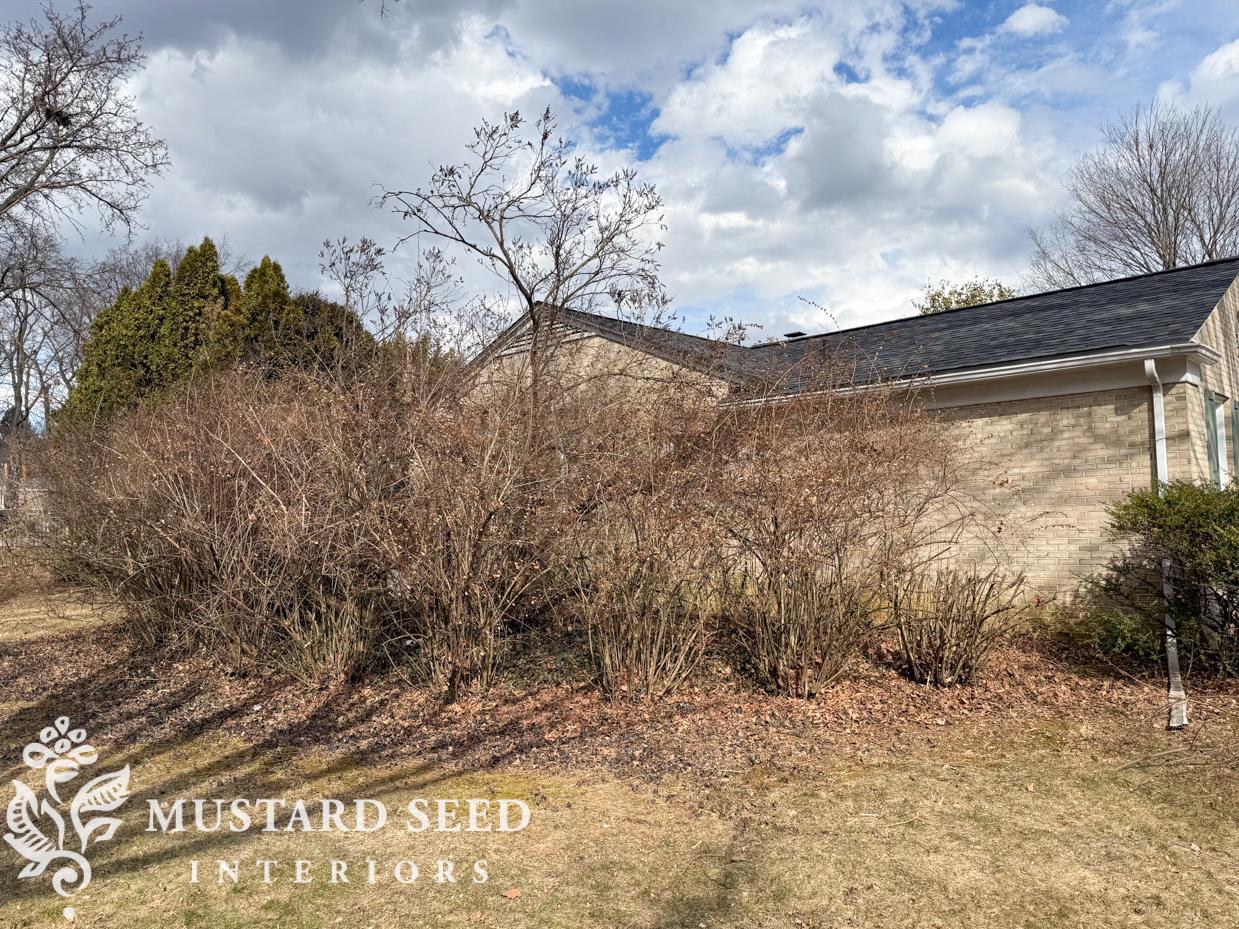
And here is an overall before and after from March 2025…
To September 2025…

You can find all of the work we’ve done to the exterior of the house HERE.


8 Responses
Everything you’ve done to your house seems to be top notch! You take the time to research & then you just “git ‘er done”! Thanks for taking your bloggers along as you make improvements. It’s refreshing to see someone actually doing a lot of the work themselves & you certainly aren’t afraid of work.
Wow, that looks so good! I love how you and Jeff get things done. I’m sure you are having an amazing time in Europe.
As I look out at my backyard, I see a lot of bushes that need to be trimmed back. And I look at your backyard, wowsa! The shrubs are beautiful, but do you need that many?
I can’t wait for your stories from Italy & England. Have a wonderful time!
Been really enjoying your before and afters. It is remarkable how much you guys have accomplished!
I’d love a detailed how to for the screening! Need one to hide trash cans. Thanks!!!!
As usual all is perfect and so inspiring. I’m sure you have already thought of this but we painted our extenders so they blended in with our mulch. Would be easy since you mentioned you are going to replace them anyway. Hope you are having a great trip. Thanks for keeping us intertained while you are gone.
What an improvement! Looks great! Have you looked into whether your yard is a candidate for French drains to replace those gutter extensions? We had them installed in our house and has turned out to be well worth the cost of installation.
What color is the green please? Looks amazing, @antebellumacres_