
I purchased this piece of furniture a few weeks ago off of an antique store porch (you know, the junk section.) It was $39, which was a bit more than I wanted to spend, but I loved this table and it was coming home with me! The table was fine as it was, but the faux finish made it look dirty and it was not living up to it’s potential. So, here was my plan…strip the top, finish it in a dark walnut, paint the legs white, and then add some painted details. Here’s the problem with my plan…I hate stripping furniture. I tried it years ago (a few times) and every time I ended up throwing the thing I was stripping into the trash. It’s a messy, smelly, time consuming process. But, I think this table deserves it..so, let’s give it a go. Maybe it’s not as bad as I remember it. (Famous last words…)


13 Responses
This table is gorgeous and, I agree, worth the time and effort to strip. I think I stripped something a long time ago {so long I can't remember what it was}. This is going to look fabulous once it's done!
One of the things I hate in this world is furniture stripping. I, too, learned a loooong time ago that the piece sure better be worth all the trouble, mess, and tears!! :O) Thanks goodness that one of the things I LOVE in this world is painted furniture!! Love it!!
Your little table is precious!! Now, MY eyes can just see it painted in the Mackenzie-Childs style. Ummmmm baby!! 🙂
xo bj
What a lovely little table. When your done it will be well worth the time you put into the project. I hate stripping furniture, I usually use that orange stuff but will try what you used. Thanks for the tips. Look forward to the finished table.
adorable table and so worth the hours of labor!
Great tutorial. That table has gorgeous detail, and was seriously covered in some funky paint.
There is a new citrus based stripper that is 100% non-toxic, smells great and would be safe to have around kiddos. They have it at the Mart too. Check it out, my Dad swears by it and he is the wood – guru. You just spray it on and it comes right off……
Hope you are having a good weekend, all things considered.
Alyshia
Wow that wood is gorgeous! I have a small table of my great aunt's that I've been contemplating stripping. Currently it is painted the most hideous yellow green ever – I don't know what she was thinking.
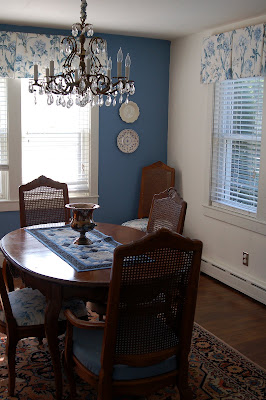
And is that photo of your dining room? Oh my is it gorgeous!
Wow…why did they paint over that pretty wood? I just purchased a spray bottle of stripper which is supposed to be eco-friendly..and less stinky. I have tons of stripping to do. waha. My kitchen island..and a french door to start. I bought some plastic scraping knives for my project. I've heard they are more kind to wood than metal. I'll let you know how it goes. Also..do you use a treatment before staining..I can't remember what it's called.
I'm looking forward to seeing your finished table!
Julie M.
You are such a tease! I have a soft place in my heart for little tables like this so I was anxiously waiting to see the results at the end of the post. I guess I'll just have to keep coming back so I can see the big reveal! 🙂
Thanks so much for your great tutorial! Were you pleased with the water-based stripper or will you go back to something else? Just wondering for future projects…
Amber
I thought the waterbased product worked just as well as more toxic products I've used in the past. I would used it again, but I may try the spray Orange Stripper that "Let it Shine" mentioned.
Wow – love the wood! Wonder why anyone would ever paint that? (Though I'm going to be painting something that has an inlay pretty soon – someday someone will probably wonder the same thing about me!) =) It's not near as pretty as yours though!
Thank you for the tutorial. I am also skeptical about using some of the strippers out there – this one is going on my list. The table is beautiful. I love all of the details!
Chelsea
I linked to your blog from another blog and was wondering if you could post a link to the "after" on this project! I'd love to see it!