
I had the palette selected for the dining room mural. I’ve painted murals before including a landscape mural in my previous dining room. I had inspiration pictures, sketches, and a vision. Now that the ceiling has a fresh coat, and the wainscoting is installed, primed, and painted, nothing is preventing me from starting the mural except me and I have honestly been a bit of an impediment. This might be counter to what you’d expect from someone who has painted a lot of things, but I’m not going into this project with a massive amount of confidence. I’m going into it knowing that if it doesn’t work out, it’s okay. I can put a coat of primer over it and go in a new direction.
But, I want to do this mural, so I need to start. Aside from dragging my own feet, two things were holding me up. One – I have an idea of where I want to put each color, but it’s all just living in my head. Two – To play around with these colors and even apply them to the walls, I have to open a bunch of sample paint cans. I don’t know why that’s been such a big deal, but I look at those cans and see them as an annoying extra step and something tricky to juggle. I’ve gotten used to paint tubes and small piles of pigment on a palette.
With these little details working against me, I decided I needed to dive in. I needed to get some color on the wall, start sketching and putting down colors, and then create solutions to my hang-ups.
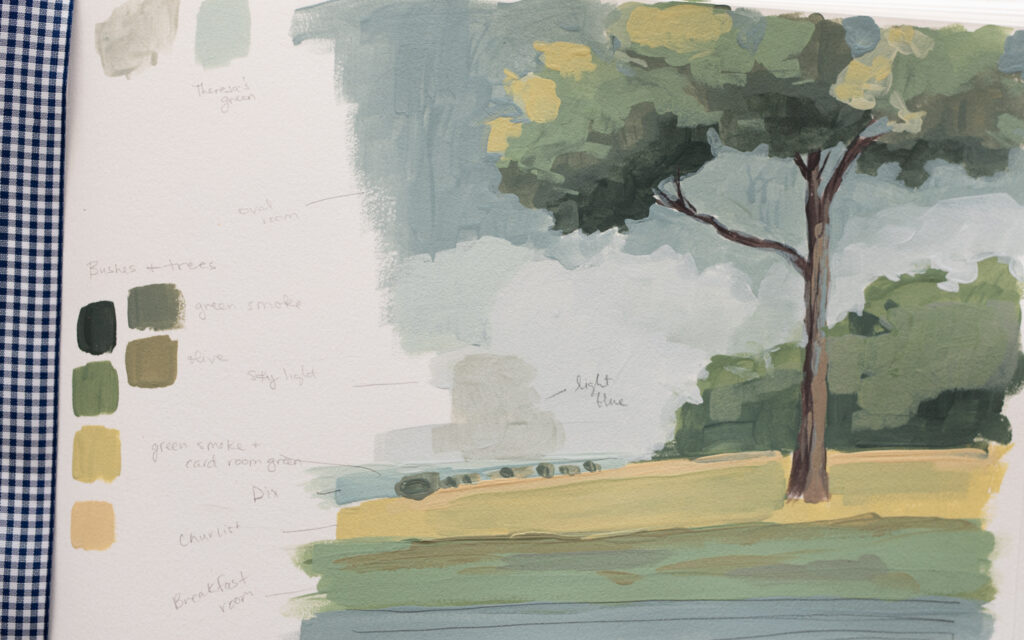
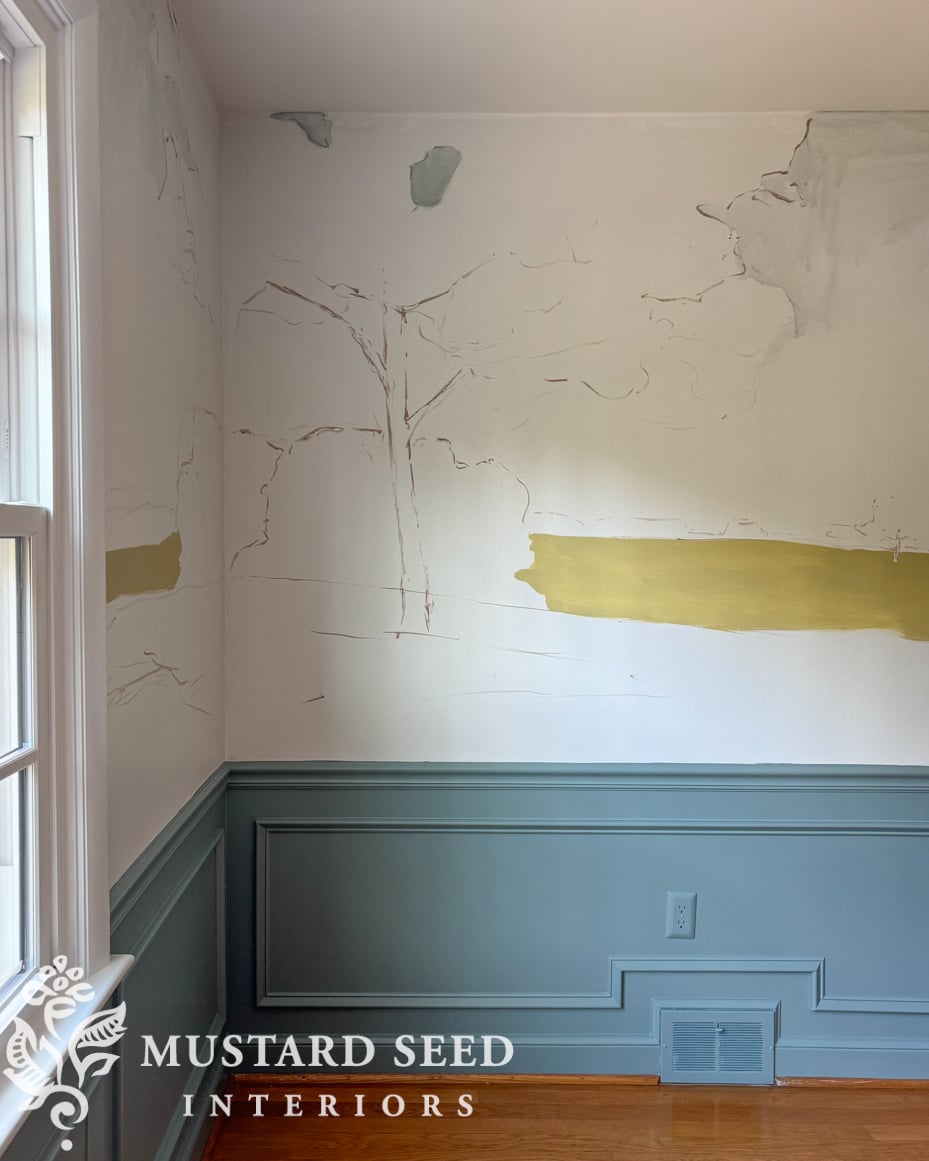
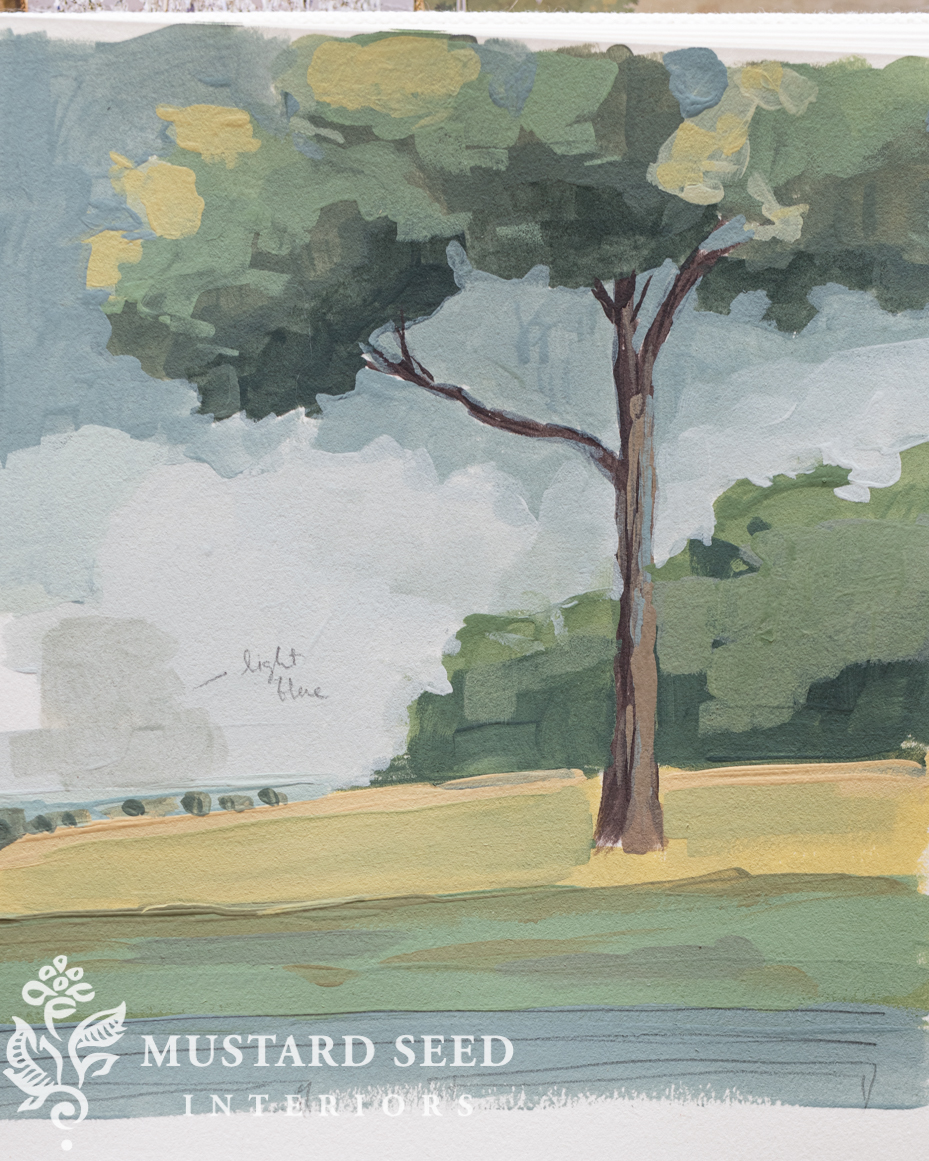
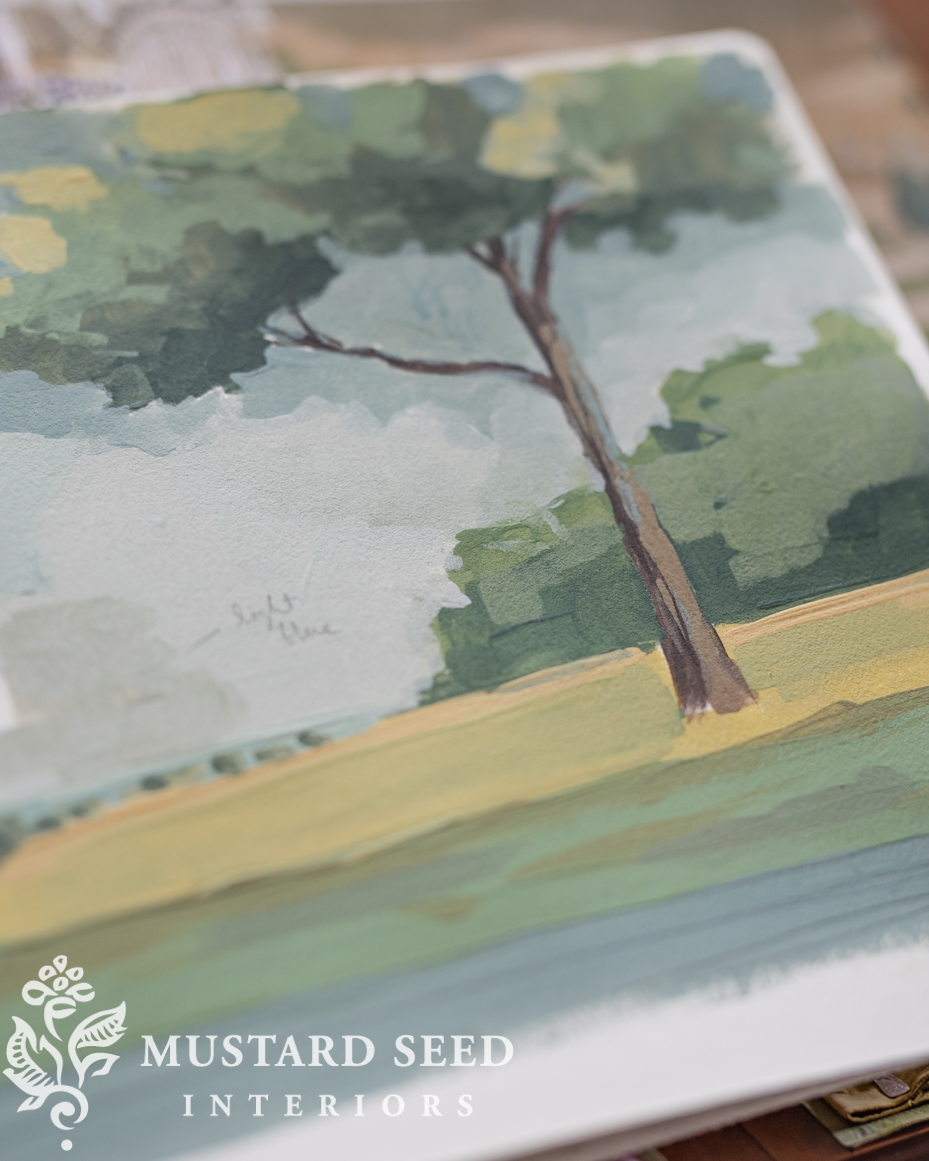
So, on Monday, that’s what I did. I mixed up a little pool of acrylic paint in a neutral brown (Burnt Sienna mixed with Ultramarine Blue) and plenty of water to make it thin and inky, and I started sketching. I kept it really loose knowing I would refine the shapes when I added color. I just needed to get started. I also started experimenting with color.
I
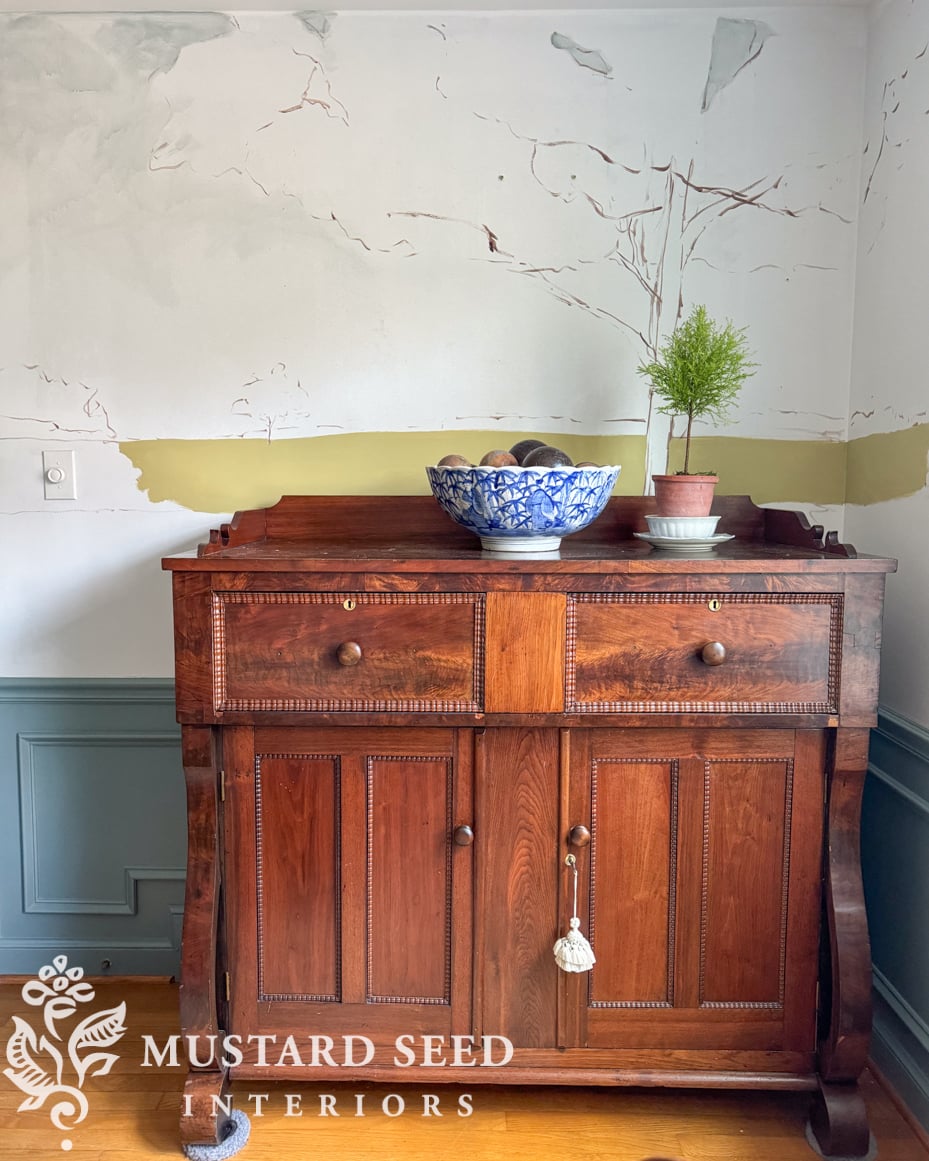
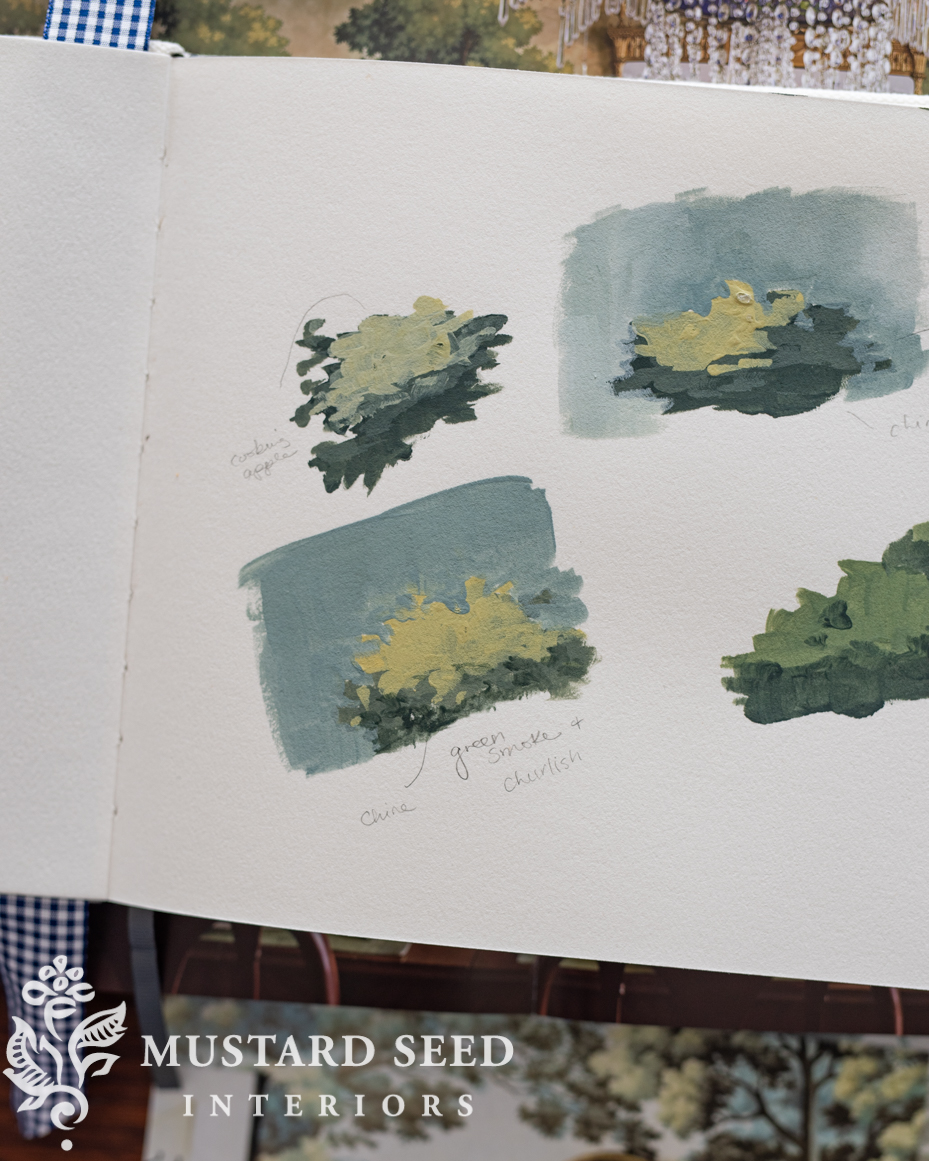
I experimented with painting a wash on the sky so the color wouldn’t be too dark and I painted solid swatches of greens to see how it sat together. After staring at it for a day, I made some decisions. First of all, the washing isn’t working for the look I want. I just need to put the color down full strength and maybe do a little wet-on-wet blending for the clouds. This also meant I would need more quarts of paint instead of sample sizes. So, I ordered some quarts from Dreamy Whites in order to have enough paint.
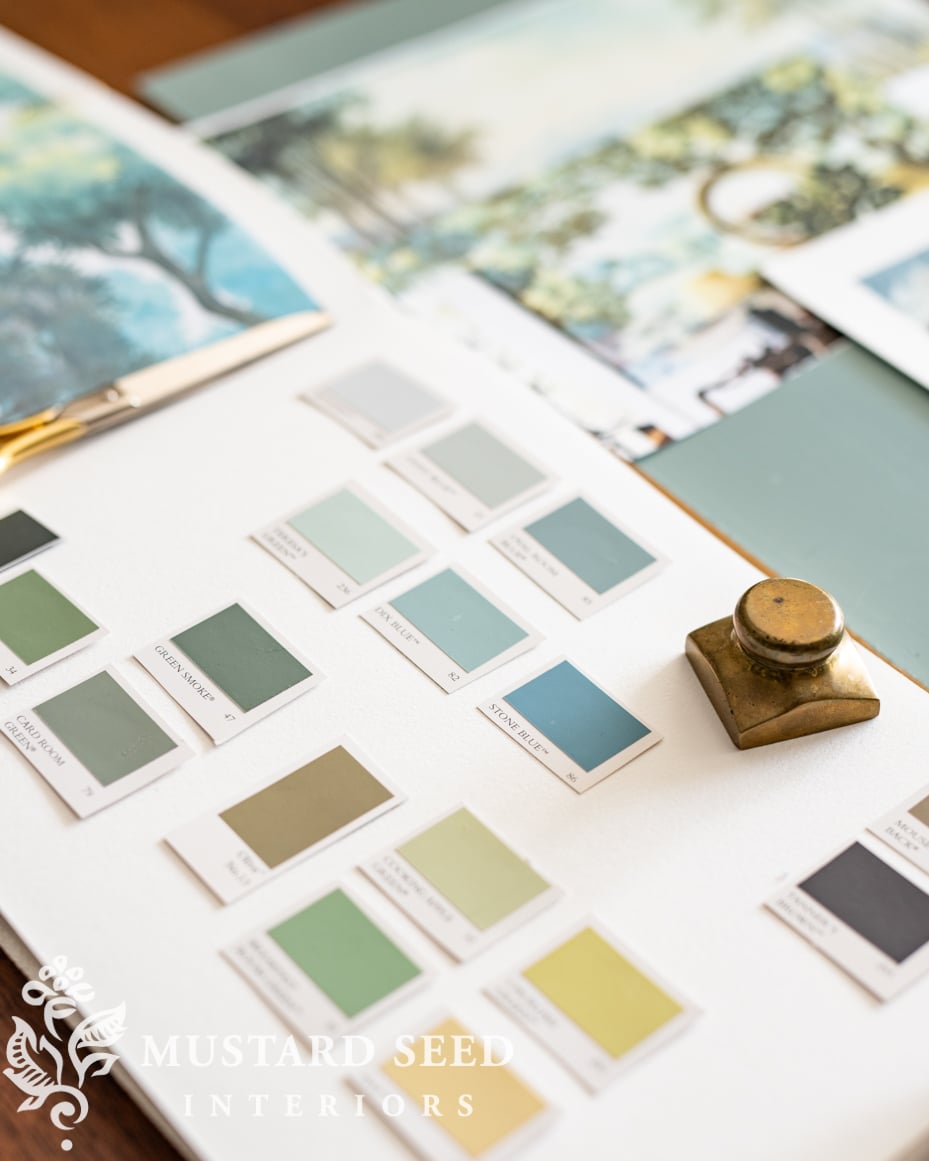
I also took the time to open each can and play with where I wanted to use each color. I did some very simple, sketches to block in colors and see what worked. This was so helpful and I should done it weeks ago. (I just didn’t want to open all of those cans!)
So, I solved that last problem. I asked my friend, artist Stephanie Lee, who I knew would have a tip for an easy-open way to store liquid paint for a few weeks. She suggested Ziplock containers with screw-on lids. Perfect. I ordered those yesterday and once the containers and paint arrive, I will be good to go.
Now, I feel ready to get this mural done.
I share all of this for a few reasons. First of all, I always think it’s important to share the process. It’s honestly a part of my creative process to share about it here. I make things, take pictures, and write about it. Knowing I’m sharing the process as well as the end result helps me think through my decisions with more clarity. Second, I don’t want you to think this comes easily to me. This mural is going to be hard-won. Lastly, ideas take time to implement and it’s okay to work through it slowly. While I want it done by Thanksgiving, that’s a self-imposed deadline and everything will be okay if it’s not done.
Of course, I will try to share as much detail about the mural as possible for those who want to replicate it. (Are any of you out there?!) I’m even thinking of ways I can do some sketches that you might be able to enlarge to trace onto your wall. I’m not really sure about the logistics, but I’m thinking about it!


24 Responses
In my long, long, ago past painting sets for children’s musical theater, I found that an overhead projector is your best friend for large scale projects.
Definitely helps to be able to stand back and see if the scale and layout is correct for the space. Muralists who paint on the sides of buildings do this.
A basic line drawing or a simple sketch is all you need, and you have those already.
Sometimes you can borrow one from a school or business. They are sold online or at teacher stores, art supply stores too. There are two kinds if I remember correctly, one uses clear sheets so that the light shines thru and the other projects regular white paper.
I cannot wait to see what happens with your mural!!
Yes! I actually started my business doing decorative paintings and murals, so I have an opaque projector. I’ve used it in the past, but my dining room isn’t big enough to get enough distance between the projector and the wall. If your room is large enough, though, it’s great!
Marion , I can’t wait to see this mural. Over the years, your colors have intensified… these colors are magnificent !!!
The link to Dreamy Whites, goes to a book on amazon.
I fixed it, sorry!
Marion, while I have painted numerous oil paintings over the years, I have been totally intimidated by murals. I love the idea of having sketches to start with. How very generous of you to think of that.
Yours will be absolutely gorgeous regardless of when you finish it! I can’t wait to see it.
Your mural is going to be magnificent. I am so excited to see it come to life. Thank you for sharing your process with us.
You’re on your creative way… you’ve got this, Marian! Have fun!
Your mural in Minnesota was wonderful, Iam sure this one will be just as good or better. Miss having you in Minnesota and referencing different places in Rochester you visited while living here.
Excited with you to see it started, the middle of it and the completion of it. So fun to see you niggle it out of your head and on to the wall.
I have been planning a small mural in my living room. I have done multiple for children’s rooms and one in my bedroom I’m not very happy about so I have just been in the planning stage. So I am happy to follow along with you. So yes there are some of us out here.
I am so excited to see your mural. I have done a few murals in the past and am wanting to paint one like you are working on, please give us as much detail as you can. I am looking forward to seeing what you come up with.
Yes!!!….it would be hard to get started staring at those white walls. You WILL nail it to perfection.
And yes, I would love that on my dining room walls too!!!….but I would need you to come over and do it for me!
Can’t wait to see the finished project. Curious if you know if the buyers of your MN home kept the mural or painted over it. I am guessing ( and hoping) they would keep it.
Thank you for the progress posts. Especially for making space for all of us to admit that, projects and dreams can be intimidating, and that little tasks can seem big somehow. I appreciate you.
Yes there are some of us out here!!!!!!
All my artistic talent lies in music or design. I couldn’t paint something realistic to save my soul. So to read your processes is so interesting to me. I think you leaped a big hurdle on this incredibly hopeful project, Marian. We are all so excited to see where you go with this. You have such a true talent and I am so happy you’ve begun. YAY!! Loving the colors you are sharing already, btw!
It’s going to be great! I can’t wait to see it! I wish I had the nerve to do one myself!
Marian,
When I was in HomeGoods today, I happened to see something that caught my eye near the Christmas ribbon and cards, and it reminded me of you. It was artist sketchbook with nice thick paper. I was really impressed at the quality especially for the price. Just thought I would mention it to you if you are in a HomeGoods.
Marian,
Your detailed descriptions are always inspiring. It started me on a painting project at my 60-year-old tract house cottage. It’s not nearly as complicated as your mural (which looks like it’s going to be beautiful) but it makes me happy to have started. I’ll hopefully finish by Thanksgiving.
Thank you for sharing.
Karen B.
I am wanting to do a mural on the wall going up the stairs, but that is even more intimidating with the angles. Hoping to get some inspiration as your project comes together. Thank you for sharing this!
I’m very excited to see your mural come to life. The anticipation is part of the fun! I know it will be so lovely in the end, and you (and we) will learn so much along the way. Go for it!
Thank you for continuing to share your process including the challenges. It’s so helpful to see as a new artist. Also, thank you for always providing details in your steps (down to the paint consistency, brands and storage methods). I know this must come from years you’ve spent learning from others as well — it’s so helpful!
I’m very excited to see this mural come together. Thanks for being a huge artistic inspiration to so many!
I think it’s beautiful. You are incredibly talented. Years ago I painted a mural in my kids’ playroom and a few moms saw it and I ended up doing more including a garden mural at the nursery at our church. I was intimidated to start but once I put paint on the wall, it took off. It’s still there. Bunnies, butterflies and all.
I agree with Vikki—please share details! I’m not a painter, but I’m fascinated with murals. Seems so difficult to me to paint on a large scale area. Do you have to keep standing back to get perspective? I’m looking forward to seeing your process and the finished wall. I’ve always loved a color palette of blues and greens, just like yours.