
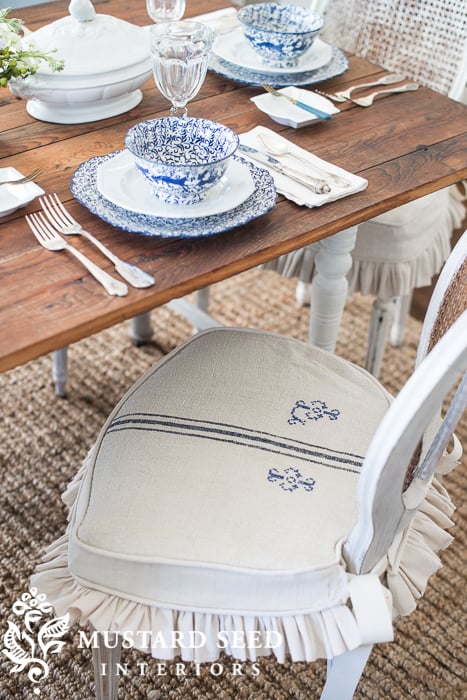
I wrote a tutorial on making dining room chair slipcovers years (and several dining sets) ago when I was a contributor to Cottages & Bungalows magazine. It’s so neat to see how far I’ve come in my sewing, photography, writing, styling. I’ve really grown a lot. Anyway, since I’ve improved in a few departments, I thought it was time to make a new tutorial as I worked on my last dining room chair slipcover. The one I made for the tutorial looks like this…
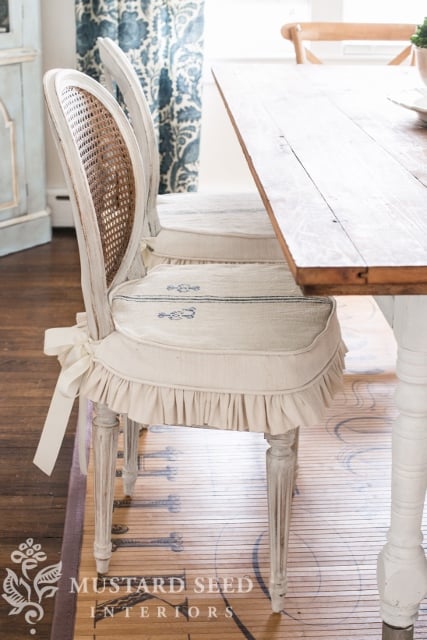
But you can also adapt this tutorial for a chair like this…

The idea is the same. Just create an extra slit for each arm and double the amount of ties. You can also adjust the kind of skirt you have on the slipcover. I like the ruffles, but you can do knife pleats, box pleats, no pleats…whatever floats your boat.
I always use the pin fitting method when I made slipcovers. Basically, the piece of furniture is my dress form and I pin the cover on inside out, section by section until it’s finished. So, all of the pinning and sewing happens as the slipcover is inside out. (If you’re brand new to slipcovers, check out my slipcover tips, which I need to update, and the six part video slipcover series, which I also need to re-shoot now that my husband has a nice video camera.)
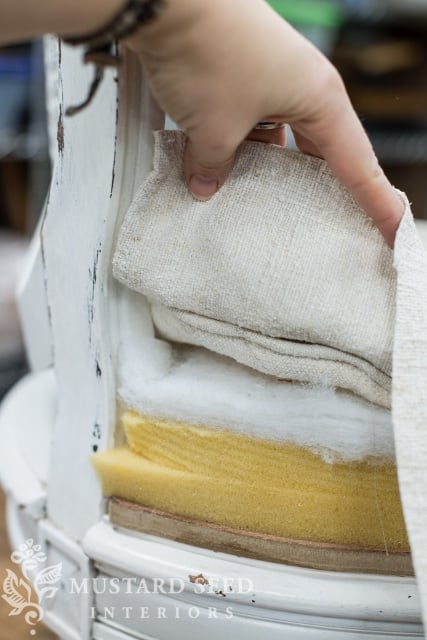
Anyway, to start, cut the pieces you need for the slipcover. It’s nice to have them all ready, including the seat, edge of the seat, back of seat, skirt, piping and fabric to cover piping and ribbons. I started with the seat, since it’s out of an antique piece of fabric and has a stripe that needs to be lined up. (You can check out how to make piping HERE.)

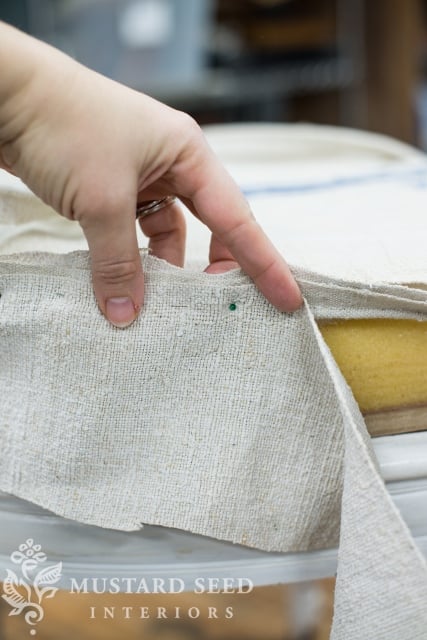
Position it on the seat upside down (remember we’re working inside out.) Then pinch the piping along the perimeter of the seat…

…and sandwich it in the fabric that makes the sides of the seat. Pin it all together. Sometimes I start from the front middle of the seat and work my way out. Other times I work from one side and work to the other.
Especially when you get into more complicated slipcovers, it’s easy to get things turned around and your piping ends up facing inside. Just remember that all raw edges should always face the same way. I’ll occasionally turn things over to make sure it’s looking good.
Once you get to the end, where you have to stop because of the back of the seat, fold over the end and trim it, so there isn’t an exposed raw edge.

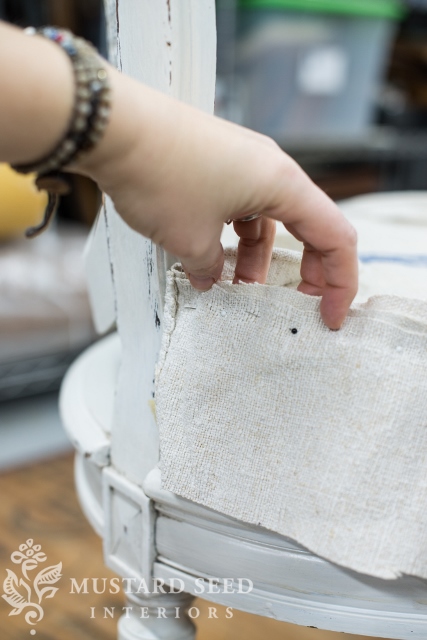
Now, the piping is hanging out and needs to continue around the back and meet up with a new piece of fabric to cover the space between the back pieces. So, I pin it around the back, making sure it’s tight against the frame.

Add a piece of fabric to cover the back in the same manner

Where the piping edges meet, I just cross them and allow the ends to disappear into the seam.
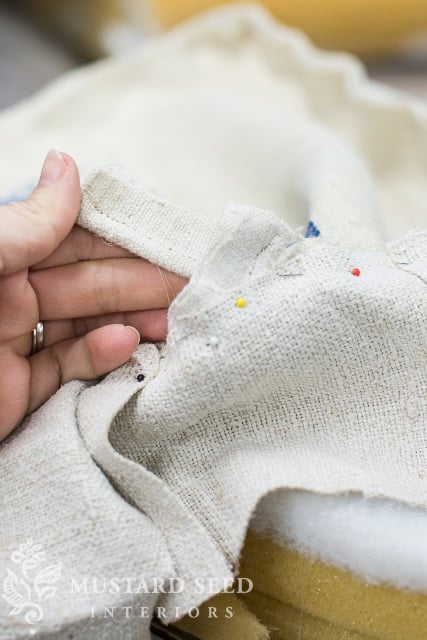
Trim the excess fabric to tidy things up a bit…
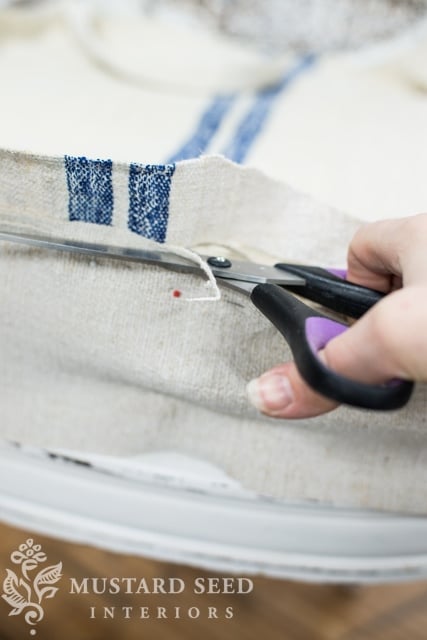
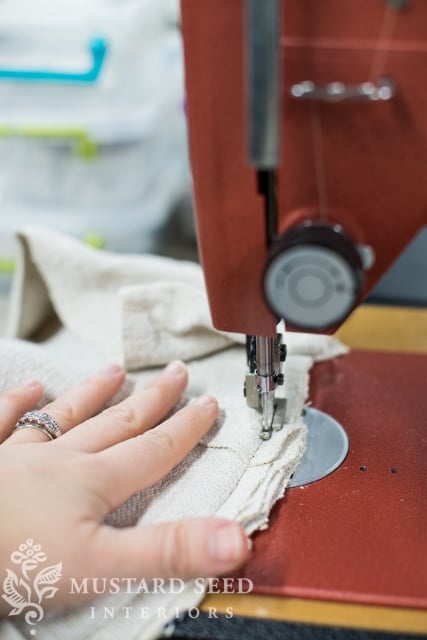
Sew along the pin lines and remove the pins.
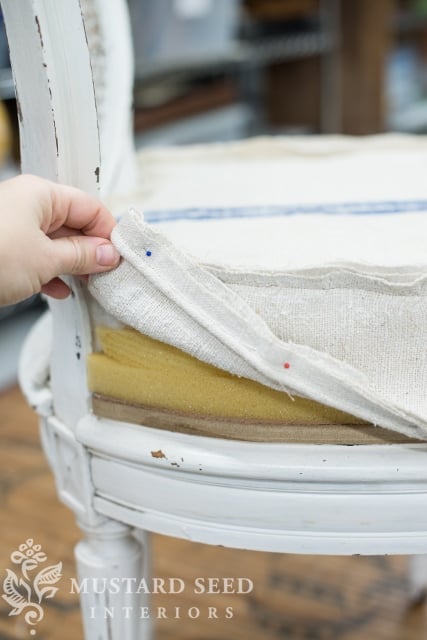
Test the slipcover on your chair to make sure the fit is good.

There’s a shot of how the back looks…

The ties will pull those two flaps of fabric together around the back, so don’t worry if things don’t look tight right now.
Next, add the piping that runs where the edge of the seat meets the skirt. For the ends, I wrap the piping around the back and pin it in place.
Then, pin the piping around the edge of the seat. Again, make sure the raw edges are facing the same way.
Sew the piping in place.

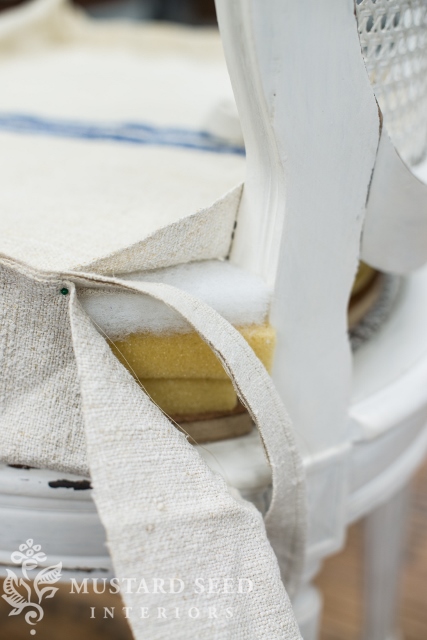
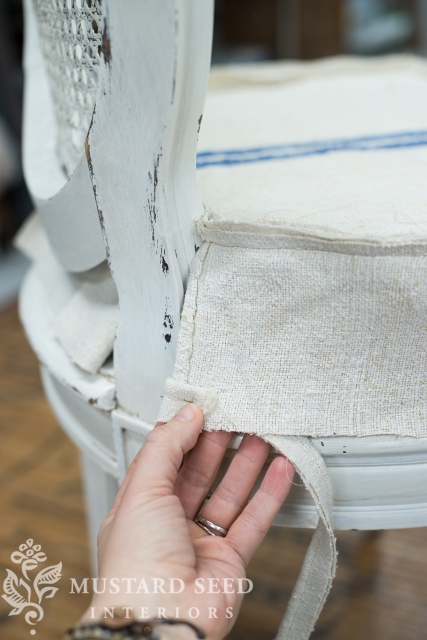
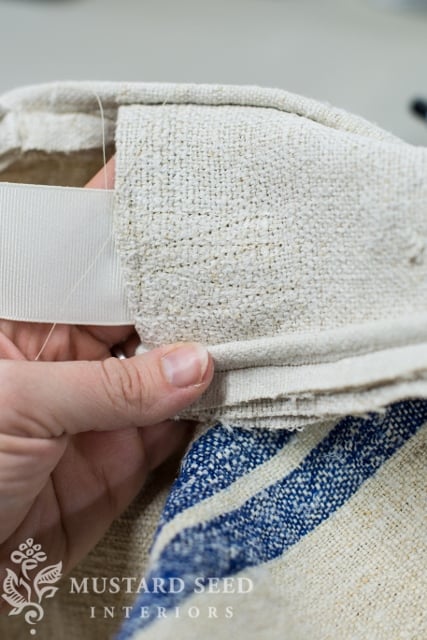
I like to add the ribbons before the skirt, so I don’t have to work around the bulk of the ruffles. I used grosgrain ribbons cut to about 20″ long. Tuck the ribbon into one of the hems made where the slipcover meets the chair back.

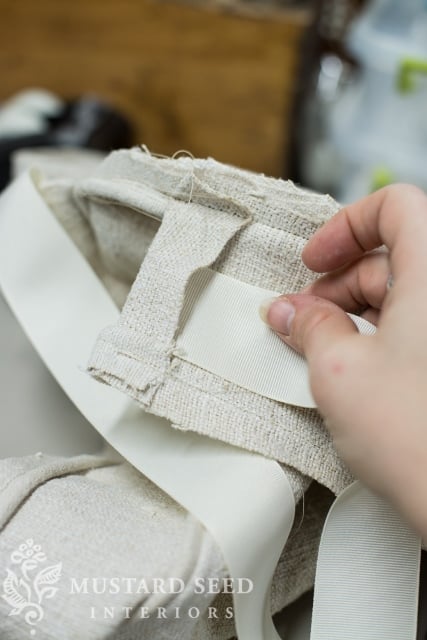
Fold it over…

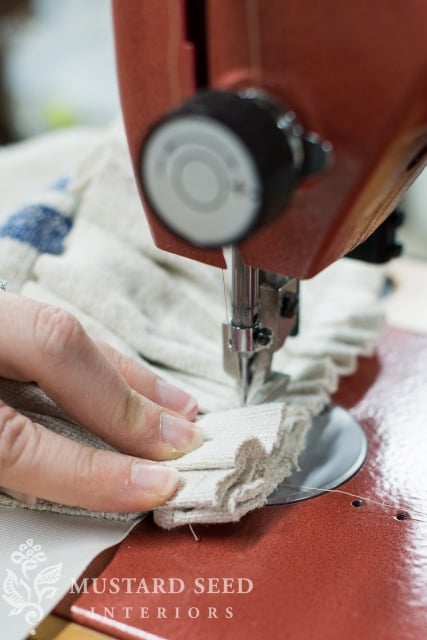
Sew the ribbon into place on the underside of the fabric. The hemp fabric I’m working with is very forgiving, so I just sew in zig-zags.
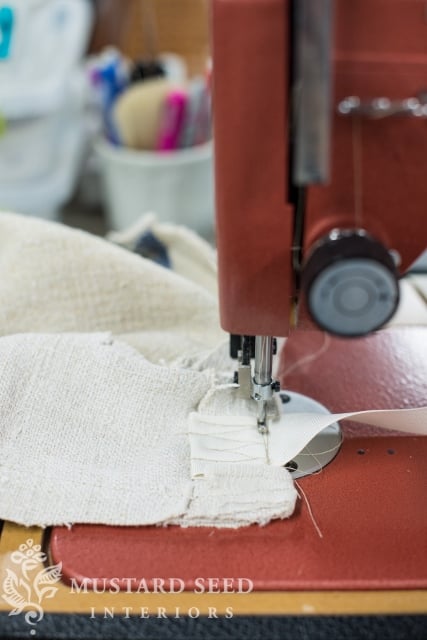
Repeat with the other ties. To make sure they hold the slipcover on tight, position them towards the bottom edge.
Perfectionists are going to freak out now. If they weren’t already. This fabric really doesn’t fray, so I just cut 3″ strips to make the skirt. To start the skirt, I roll the fabric under to hide the raw edge…

…and then I just scrunch it to make the ruffle.
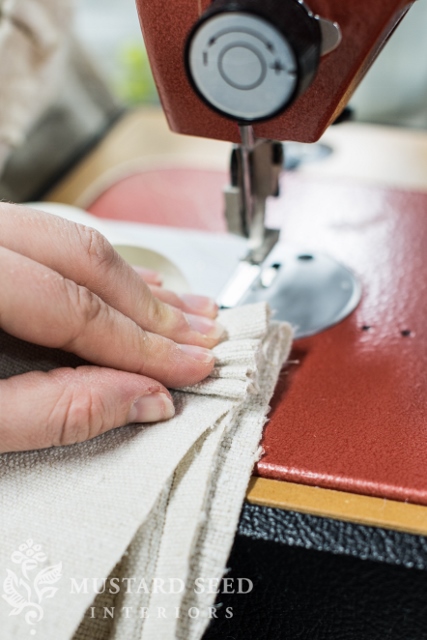
Scrunch and sew. Very technical and I’m sure it’s the totally “wrong” way to do it, but it works for me.

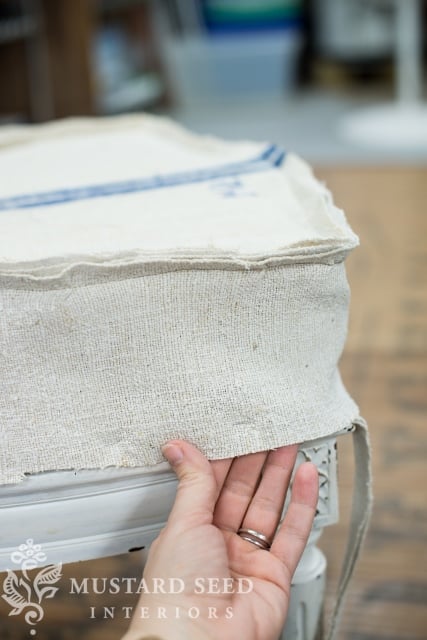
Finish sewing the skirt, trim all of the threads, turn it right-side-out and put it on the chair. This is the point where I usually feel that swell of DIY pride. I made THAT out of a piece of fabric with some well positioned stitches.

It’s a pretty amazing feeling.
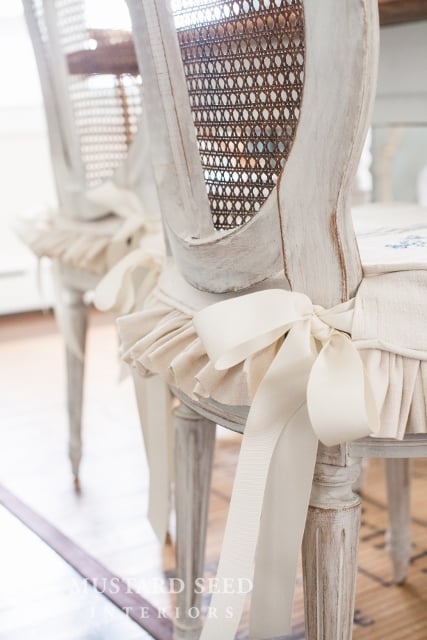
…and you can get that feeling, too!
I’m sure there are hundreds of ways to make a slipcover or to adjust things. I’m a self-taught “sew-er”, so I have just figured out what works for me. I’m not precise. I’m not picky. I’m not super detail oriented. And I still have a lot to learn. I just work towards the end result. How can I make a pretty slipcover in the simplest way? So, find what works best for you and start knocking out those projects!


47 Responses
Now I think I can actually do that! I love all your slipcovers and even though I've been an avid sewer for many years I don't have the patience for making the sofa covers. So you just put this cover over the existing seat? Looks pretty easy to me! Thanks,
Nancy
I've been waiting for this tutorial. Can't wait to try it.
I too have been waiting on this tutorial! Thanks so much for sharing your talents with us. I've watched your slipcover series but was a little itimidated to start with such an ambitious project so I think this will help calm my fears!
Perfect!! Will be covering my dining room chairs this week.
THANK YOU!!
Janet xox
You sure make it seem easy!…And your finished chair is wonderful!
Oh Miss MS…you make it all seem so easy! I actually have a question about the little lamps on your side table in the first picture. Are they candles with shades or lamps? They are just adorable and if they are still available would you share the source? Thanks! ~Ann
Thanks for your great instructions!
Debbie
Well, that looked pretty easy. Thanks so much for sharing. Love your chairs!
Thank you! This is next on my list 🙂
mickey
Awesome!! I am so doing this for my dining chairs. I'm also going to add a honey-bee stamp on the seat since Melissa is greek for "Honey-bee!" 🙂 Thank you!
SOOOO love you and your tutorials!!!
These are just beautiful, and they make the chair look stunning! Thanks for this tutorial! Have a wonderful week!
Absolutely love the chair seat cover! Great idea!
SO adorable! Must try! Thank you for taking the time to post the tutorial. 🙂
Love those pleats! Great tutorial. 😉
Very timely! I get to start work on a set very similar to yours very soon, and I appreciate the inspiration and instructions!
absolutely gorgeous!
thanks for sharing the how to! really generous of you!
take care,
Rosa
Wonderful tut!!!! And it looks fabulous!! Thanks so much
Hugs
SueAnn
Creating a slipcover for a chair like that seems a hard thing to do. With this tutorial it gives us great idea on how it can be done so easily. Thanks for sharing! Great job!
Sell WoW Account
You are amazing Miss Mustard Seed,thanks for sharing!!
You make it look so easy! I can't wait to try it. Thanks 🙂
I swear I searched high and low here for this. THANK YOU for posting this tutorial!
But I still have issues with criss-crossing the piping at the end of the day. Sort of having a brain fart moment on those.
I looked at , at least, 5 stores looking for that issue and never found it!
Ohhh, what a great tutorial! Thank you for posting it. The fabric is gorgeous! 🙂 Alexandra
Bookmarked!! Thanks so much! I always admire your work and now maybe I can copy more of it!! Quick question about the chalk paint and wax…I've always used polyurethane to protect my painted pieces, can you use poly with chalk paint or does wax provide the same protection?
Appreciate the tutorial. I love the slip and will give it a try for my dining room chairs. Thanks! Maureen
Thank you so much. I also looked high and low for that issue and could never find it. You have an amazing ability to explain complicated things in a clear, concise way.
I have dining chairs that are all wood. I have made slips for the backs of the chairs, but I'm afraid that seat slips would just slide all around on the slippery wood surface.
Do you have any ideas????
Thank you, thank you, thank you! My friend and I have been waiting for this. Actually, we are quite obsessed with everything you do. I have been following you for a while. Thanks for all the amazing inspiration!
Thanks for sharing that!
It's so delicate and gorgeus…
I love your work! 🙂
I have been checking out a few of your article stories and I must say pretty clever stuff. I will definitely bookmark your blog. Thank you very much.
I just book marked your blog on Digg and StumbleUpon.I enjoy reading your posting. thank you very much.
This was interesting to read and the furniture with a nice post.
Found it really descriptive. I found this site on Yahoo, thanks so much.
Anybody who read this article will be feel usefull, I will wait your more articles next time. thanks mate.
FANTASTIC tutorial! I’ve pinned it and I so appreciate you sharing it!
Thanks for this tutorial! I reupholstered my chairs a while back and, although the fabric is washable and waterproof, it’s so hard to keep them clean! I have 3 little kids who spill a lot. I was thinking it’ll be better to have a chair cover that I can remove and wash. It might be easier to keep clean than washable chairs.
I’ll give this tutorial a try.
What fabric did you use? I love the very french vintage look to it!
What fabric did you use? Is it a french linen? I can’t find what kind of fabric you used.
I used canvas drop cloths! 🙂
Thanks for this tutorial. It is useful to decorate chairs….
I just bought a stuffed chair at Goodwill and I am going to take the plunge and make a slipcover. I made one for a wing back chair in the past and it turned out so-so. Your tutorial really helped me with the problem areas. I will show you before and after pics if it turns out. Thank you, you have a great presence in front of the camera.
I love the dining room slipcovers…I was just curious, didn’t you like the gold? I thought it looked nice after the white paint.
There must be something missing from this tutorial… are there only 6 steps? What do you do after you’ve pinned the pleats? 🙂
Very pretty, may I ask what type of fabric did you use?
Hi! I’m looking for the tutorial that has the box pleats instead of the ruffles on the dining chair covers. I had that Bookmarked here, but when I looked at the bookmark today it has changed to a ruffled skirt on the slip overs. Can anyone share the site for the posting with the box pleats? Thank you! Joan