
As promised, I am going to share my secrets of how I made my Antique German Grain Sacks. I am so pleased with how these turned out, but I am afraid that some of you might be mad at me when I reveal how I did it. Do not dismay, I have some alternatives…

First of all, I used the fabric that I purchased from Wal-Mart for $2.47/yard called Osnaburg. It’s a nubby, natural fabric with a loose weave and is an inexpensive substitution for linen or hemp.

Cut a piece to your desired size. If you’re going to want this to be washable, wash it first! This is cotton, so it will shrink. I’m going to frame this piece, so I just ironed it out and cut it to the size of my frame. Back the fabric with a plastic bag to protect your work surface from any paint that bleeds through.

I used acrylic craft paint in Pewter Grey (Apple Barrel 2620), Black (Apple Barrel 20404) and Burnt Umber (Creamcoat 02026.) The ratio is about 30% Pewter, 60% Burnt Umber, and 10% Black. Using a straight black would look too stark and new. This dark grey/brown color looks like a warm, faded black.

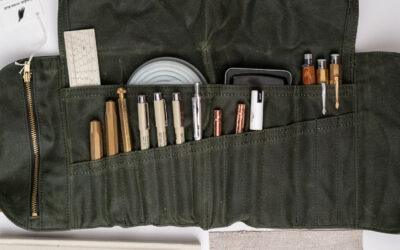
I used a 10/0 liner and a no 4 filbert brush. The liner was used for the lettering and details and the filbert for the leaves.

Ok, here’s where you’re going to hate me. I then painted the design. Free hand. Sorry! But, I do have some ideas for those of you who are not comfortable with this. First off, make sure you follow my Workshop Series, Decorative Painting 101. Until you are a proficient decorative artist, you can cut your own stencil out of card stock using a printed image as a template. Another idea is to use chalk to draw out your design and then paint over that. Any chalk will come out in the wash. Lastly, you could tack the fabric to a wall and use a projector. 

I started with the writing that is top and center. This gives me a reference point for everything else.

I started in the middle with the second line and lightly painted the lettering.

I then added the lettering that was to the left of center.

Once the 2nd line was complete, I filled out and added the detail to the lettering.

I continued with other lettering in that same manner. Then, I drew the “vine” around the lettering and added the leaves.


I wanted to show you the paint that bled through the fabric on the bag. Don’t do this project on your newly painted table…you will be sad.

I put the finished product in my $1.00 antique yard sale frame (with wavy glass and all.)

I love it! I can’t wait to make more.

Now, before everyone gets all over me…yes, I know the lettering is not even. If you look at antique grain sacks, guess what? The lettering is not even. I can instantly tell a reproduction because the lettering is too perfectly spaced. It’s clearly made with a modern stencil. The imperfections make it look more authentic. (By the way, I’m just teasing those who busted me on my crooked tray. It was slightly tipped and I righted it. I’ll have to get a level out with this crowd!)
I’m also planning to make some pillows and try some different paint colors and designs. The good news about using this for pillows is that you can machine wash and dry it. The piece below just came out of my dryer and it looks even better. It fades the paint just slightly and softens it up.

These will be for sale in my Esty shop, which will be opening soon. So, if you see a feed sack pillow you love, but it’s like $100, get in touch with me and I can replicate it for you for a lot less!

The Workshop Series, Decorative Painting 101 starts tomorrow with Getting Started – What to Buy. Don’t miss it! I’m also still looking through all the of the Furniture Feature Friday links and I have already seen some awesome makeovers. I am very impressed, ladies!
I’m posting this to DIY Day at A Soft Place to Land and Show and Tell at Blue Cricket Design
and


56 Responses
Mad at you??? Heavens no!! BRAVO to you for your talents and thanks so much for sharing them with us!
Oh, and by the way…your cracked, crazed, and time worn dishes are KILLING me!!! I'm drooling all over my computer!
OOO, this is so cute, I could just spit. I LOVE IT…
Thanks so much for sharing this idea. My hubby is very good at numbers and I am thinking he may be able to do this for me. I will see….:)
hugs, bj
LOve it…great fabric, my son might do the painting. Also love your small cloches! Lezlee
I do love this and will try to replicate but am curious — how did you decide what to paint, words, format, font, etc. thanks
I love how you hung it! So creative. I always use this osanburg fabric too!
Osnaburg, boy that goes way back. My sister and I used it all the time in high school and I recently re-discovered it. Makes great slipcovers also.
wohooo!! love it!!!
You're right…I hate you! lol, just kidding! You did a great job and I admire your talent. It's really cool framed like that. Thanks for sharing!!
Nancy
Hating you. 🙂
And the way you are hanging it… ugh, hate even more.
LOVE.
Can't wait for the workshop. I have my paper and pencil ready.
~Amy
Gotta' love you Miss Mustard Seed! You make me feel like I can do anything (with paint that is – I won't be piloting any airplanes in the near future)!
Yep, add me to the "hating you" list…
😉
Oh, how could I ever?! You are always more than generous with your tips and tricks, I will allow you this one wee transgression.
As usual, just brilliant!
Anne
fabbbbbbbbulous! (As usual!) 🙂
Susan @ http://www.peanutpetunia.blogspot.com
Classy, elegant and sooo creative!!!!!
Oh to be SO talented. They are unique and beautiful. I love the Onasburg, it has such a nice vintage feel. I discovered it at Walmart last year when I stenciled some pillow covers. Never know what you're going to find at Walmart.
How long did it take you to freehand that? You have some talent!
Freehand? Oh No, I am hopeless at that. I'll have to check out your other painting tutorials for options because I want one, I want it badly.
It looks wonderful and you are one steadyhanded talented lady.
So jealous of your talent! It came out wonderful and I never would have guessed it was hand-painted! Thanks for the tip on the Walmart fabric. Adding to my list of things to get!
Wow – you have some serious painting talent! It's gorgeous! and the frame is fabulous! Thanks for sharing – you did an amazing job!
Groan… that's so beautiful I can barely STAND it. This is so going in my Today's Hot Find for Tuesday.
I adore how you framed it out! That PLATE!!! I want a cracked plate! Never knew that until now. What you learn on a blog.
Donna
Thanks for the sharing and I just love the frame. Looking forward to tomorrow.
Have a wonderful day.
Very beautiful, love the way you have it hanging with the plate.
Thanks for sharing.
Sandy
This is so pretty and I've been waiting to hear about it since you teased us the other day. My only question is , will you make me one? LOL, your hand is much steadier than mine Miss Mustard Seed.
I KNEW you were going to say you painted it! : ) How could anyone get mad about it ~ you are so talented. I think it turned out great; I love it framed and I love the size.
I'm going to have to see how steady of a hand I have to do this. I love the look so it's worth a try. Thanks for the tips.
Jane
Amazing! You are a talented lady.
When I first looked at this I thought what a beautiful old piece… I was shocked to read you made it… you did an amazing job and I love how you creatively hung it also… the frame is perfect for such a perfect piece. You make it look so easy.
Hugs Deb
That simply turned out awesome. I am simply amazed at your artistic hand. You have so much control over a paint brush. Just beautiful work!
Wow, it looks amazing. I thought it was a real antique grain sack at first!
No hating here – pure jealousy though! WOW – you have some amazing talent!
Blogging is going to be the death of me or break my bank one! I'm adding that to my list though, love it!
Thanks for the tut – can't wait for the workshops – I'm so ready!
Thanks for sharing! And — free hand?? — you are awesome!!
I love it! You did a great job and I love the fact that it looks authentic.
Love it in the frame too!!!!
Love it. You have some serious patience!
As I was reading I was thinking "I love the lettering's imperfections". It looks so authentic like an original done in the early 1900's!
I won't be doing it any time soon! However, I will be "drooling" as some one above just said!!!
~Kolein
Love the plate above the picture
Nice work. I priced old feedbags on ebay and they were about $50. This beats that any day.
AWESOME!! But yeah, when you got the the part about "freehand" I gasped! lol
I need to male a stencil!
Lou Cinda
So pretty! I love this idea!
I can't wait for your Etsy shop. 🙂
This is so beautiful and thanks for the how to.
Love it!
You can do anything…and everything.
Totally impressed with your free hand painting ability!!!
It is gorgeous!
Rhonda
Thanks for the tutorial! I want to make a few pillows soon….
I am passing a blog award along to you! No pressure to accept, but I wanted you to know I enjoy your blog, and i was thinking of you!
I just found the website who writes about
Several
home based business opportunity
If you want to know more here it is
home based business
That is gorgeous! So elegant!
I adore this!!! I'll be featuring this in my Readers Rock post this weekend!
Looks great. Wish I could free hand paint that well. I will just stick with stencils. Good job.
This is fantastic! Thanks for posting. I had a stencil pattern I was going to try this with, but I think I will try it your way. I doubt I can do as good as you did. I agree with you, I like the uneven print the best.
Oh my. That is simply stunning! I've done hand-painting on fabric before, so I know how much time it takes. You did a marvelous job!
Thanks for joining my linky party. 🙂
I just found a new favorite blog. Thank you very, very much! 🙂
Marian,
Thank you for your opinion on my table, it gives me food for thought. Something that I have difficulty with(have only hand painted once, love spray painting!), is knowing which brush will work best for what project. I saw mention here about brush types, would you consider giving a workshop on tools for painting(which is best for what piece and what finish)? I could really use some knowledge and honestly this lack of knowledge keeps me from doing some projects(like my table). Thanks again, and I am forwarding your blog to some friends that will greatly benefit too!
Alright, I am an idiot and somehow missed the workshop series decorative painting 101 part written here. Glad I re-read it! Sorry for that post, but man this is like some sort of key moment in life, finding you!
I have been working on little salvage projects from actual grain sacks and I took the easy way out and used laundry fabric markers and it worked very well… I just free handed them and had it done within 2 minutes… Enjoyed your post… Have fun…
I'm adding your framed grain sack to the list of ideas I could do with my coffee bean sack project at Mel's Cabin. Visit me when you're in the area and sip some coffee with me.
I want to upholster a 100-yr-old chair and decided to stencil the cloth. My concern is that the paint could possibly chip or come off on people's clothing. This won't happen with the acrylic paint method, will it? Thanks. Your work is awesome.
Oh my goodness! Thank you for this tutorial!! I am covering my dining room chairs in muslin, and I'm planning to give them a grain sack look! I have not been able to decide the exact design, but I know now! Here I thought I came up with the painting idea since I can't afford real sacks…LOL! You posted it over a year ago…how'd I miss it? I've been thinking of doing different designs on each chair…I have 8! I'm not a matchy girl, but I do like order so…don't know.
I'm so glad to find this! Best, Vicki
This is beautiful! You have a beautiful hand at decorative painting. I on the other hand, prefer to trace – ha ha. I made a video once about how I transferred using a well lit window and held the fabric up against it. Here’s the link if anyone is interested. (You can skip to about 1:00 minute in to get to the stool with the grain sack style graphic). http://www.youtube.com/watch?v=Sjx03_tftu4&feature=c4-overview-vl&list=PLU6lAUeaBqeSKXfULgjNDfk4mQF0kd-Nl
Love it!!!
I love, love, love this……………I adore everything you do. I’m guessing this is much easier fabric to paint on than burlap. Oh and, HTTR!