
A couple of weeks ago, we started working on cleaning up the yard. (You can read about that HERE.) As I’ve shared before, we have a great yard with some beautiful mature trees and bushes, but much of it has gotten a little overgrown and wild. In some cases, I just have a different vision for the yard and would like a fresh start to put in the bushes and plants that I love or simply give the house a little more breathing room. While I do hope to do some planting this year to get some of the structures of the landscaping in place, I think the bulk of the work on the exterior of the house this season is going to be clean-up. This is sort of the demo part of the renovation. We need to peel back the layers, clean things up, get a fresh coat of paint on the siding and trim, and then we can start the “decorating.”
For our yard clean-up day last week, we focused our attention on the backyard. I want to put some good effort into the front and side yards since they are the most visible and will really boost the curb appeal, but the backyard is where we’ll be spending most of our time, especially with the pool. At the very least, I want to get it cleaned up.
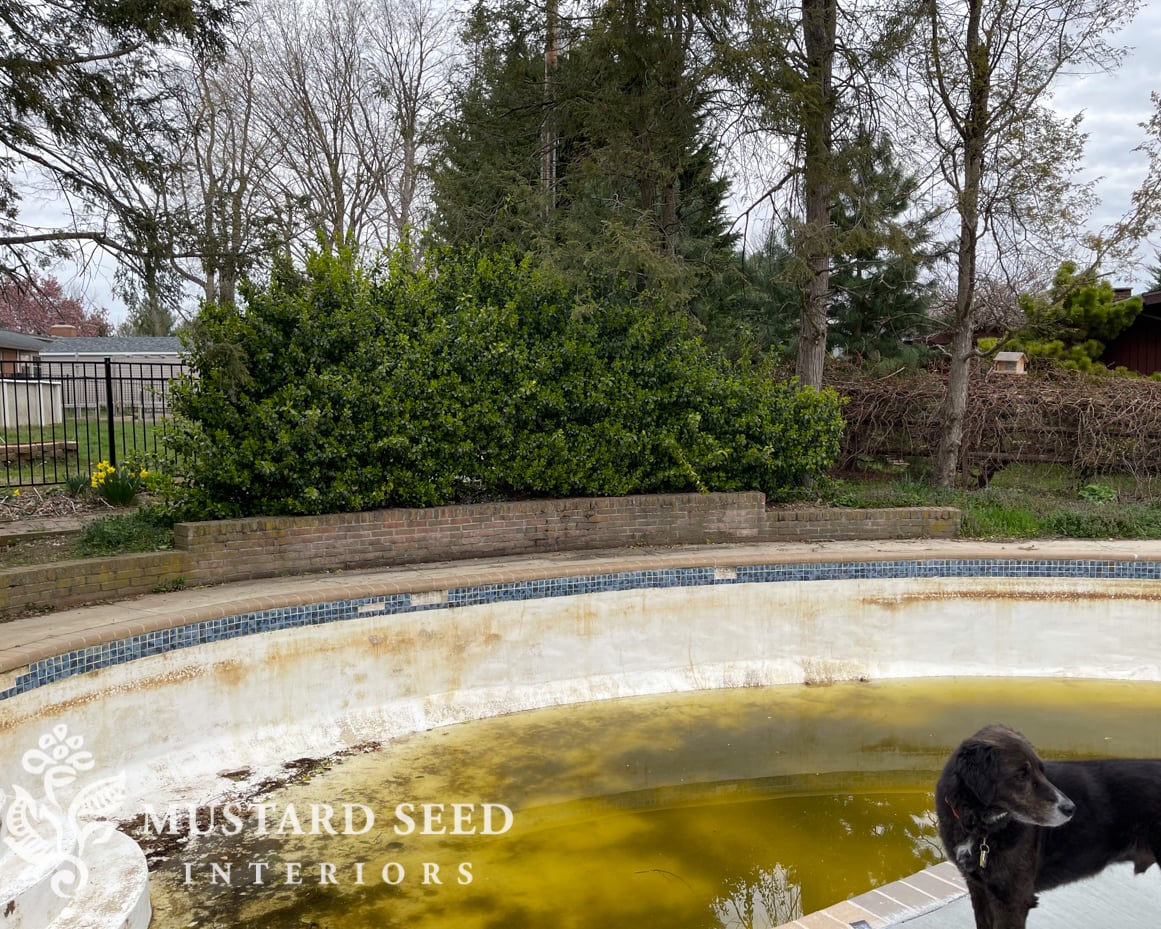
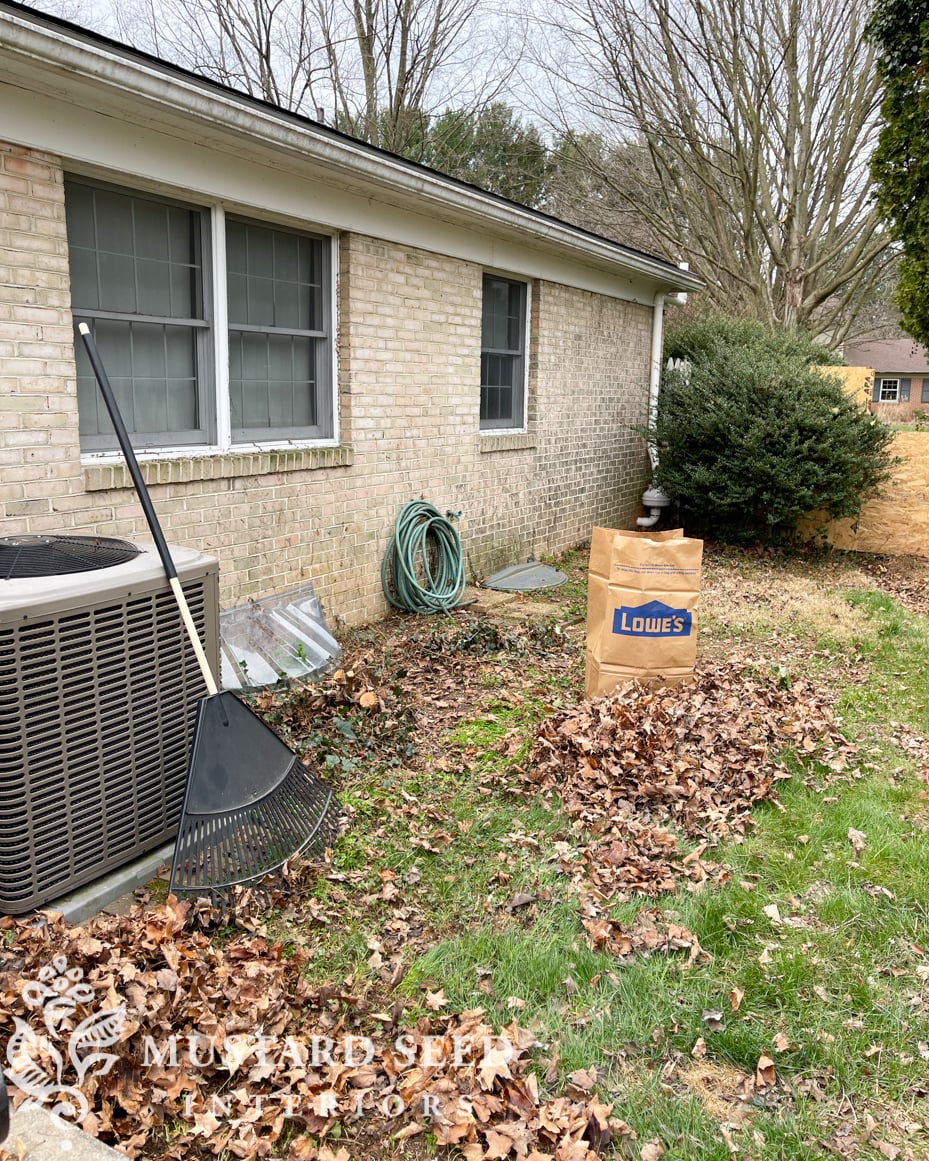
Here is the before…
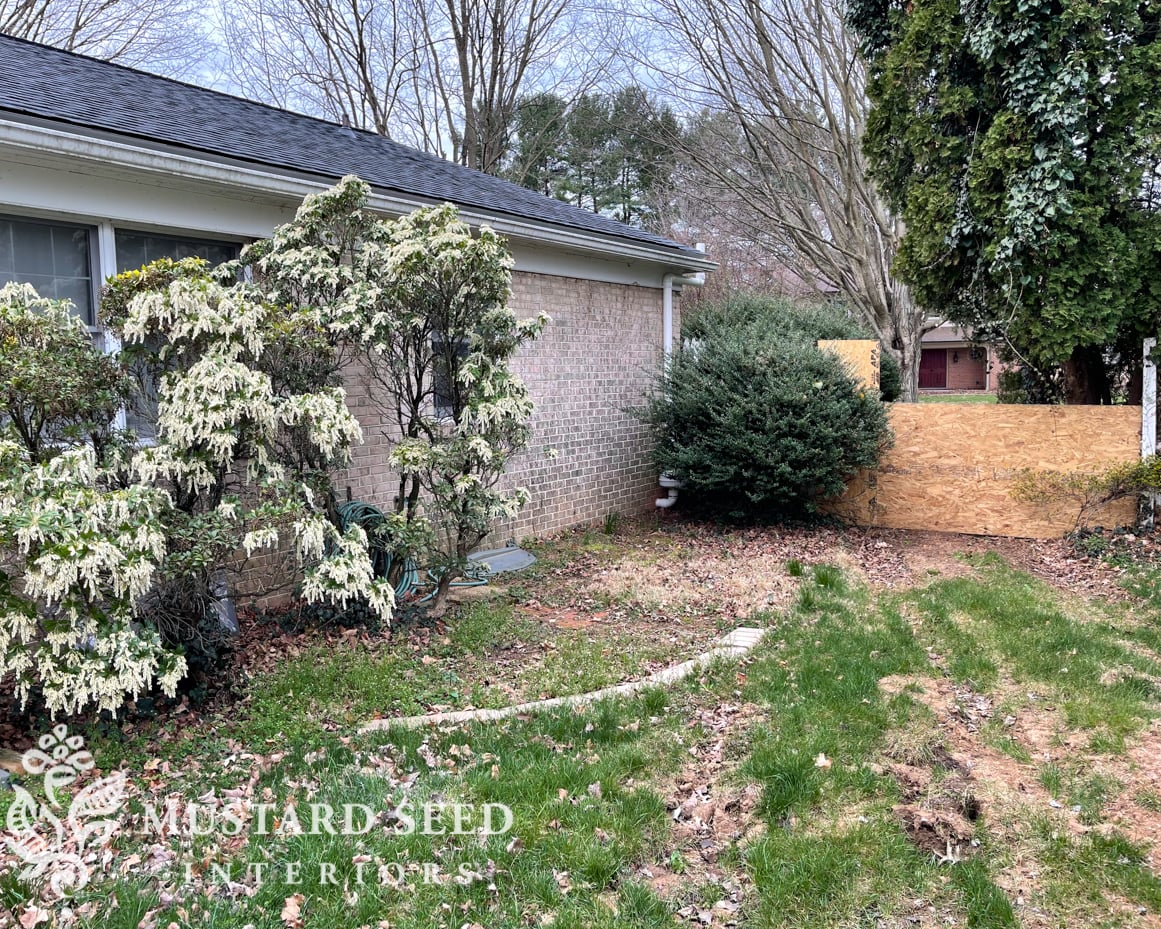
The backyard has taken “two steps back” in the past few weeks because of the work on the pool deck. They had to take down part of the fence to get their equipment through, which ended up chewing up the yard. All of that will be fixed when the pool work is completed, but it’s pretty ugly at the moment.
In the slice of the yard that’s pictured above, I wanted to remove the bushes with the white blooms, remove the pool coping that was used as a sort of landscaping border, trim the Japanese holly (which looks a lot like boxwood), clean out the window wells, and rake up the rubbish. The bushes with the white blooms are pretty and I contemplated keeping them, but they have become pretty leggy and are almost completely covering a bedroom window. I would prefer to take them down and put something a little neater (and lower) in their place. We also need to powerwash the brick and the bushes really limited access to the exterior wall.
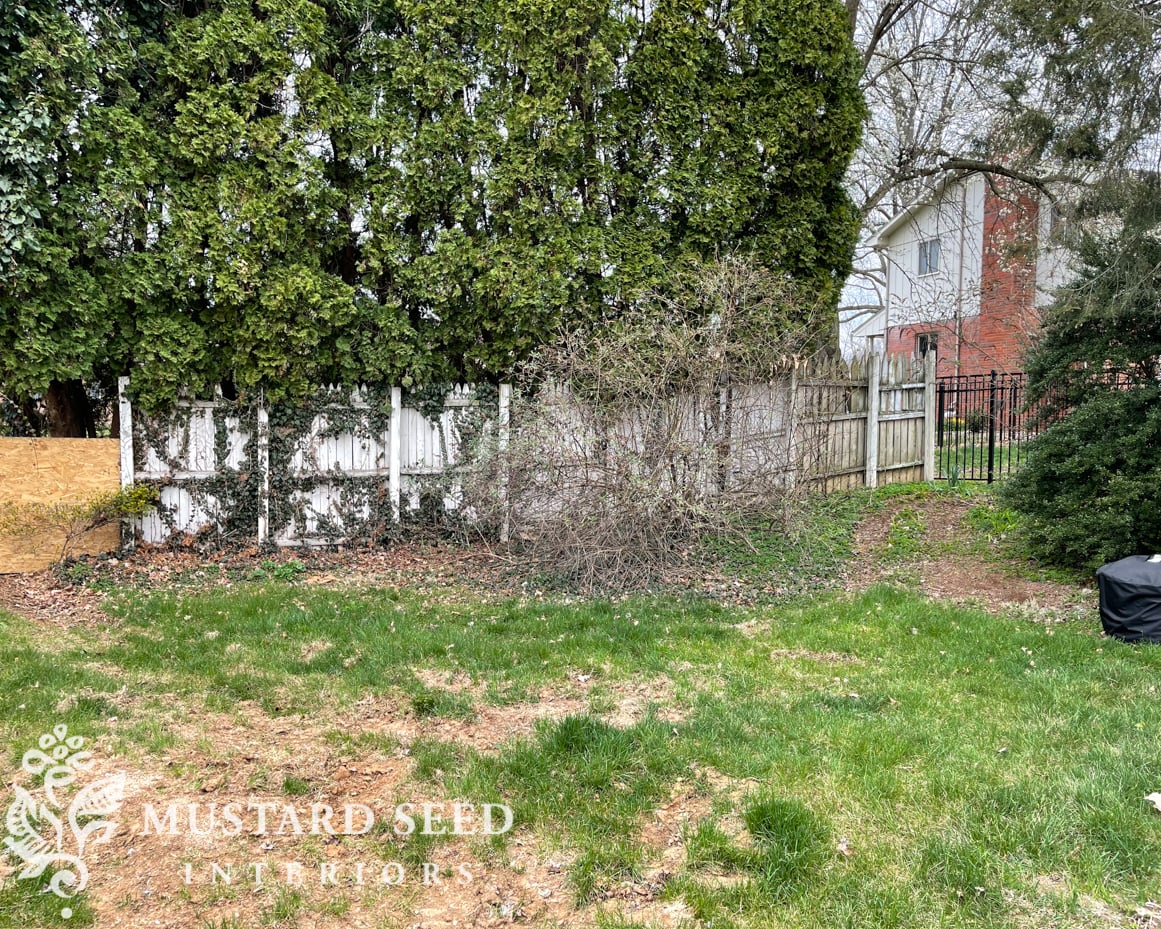
In this portion of the yard, I wanted to remove the large butterfly bush. I know butterfly bushes can be very pretty, but this one was about 3/4 dead and I wanted to open up that part of the yard a bit more. We have to leave the ivy for now because it might be all that’s holding the fence together!
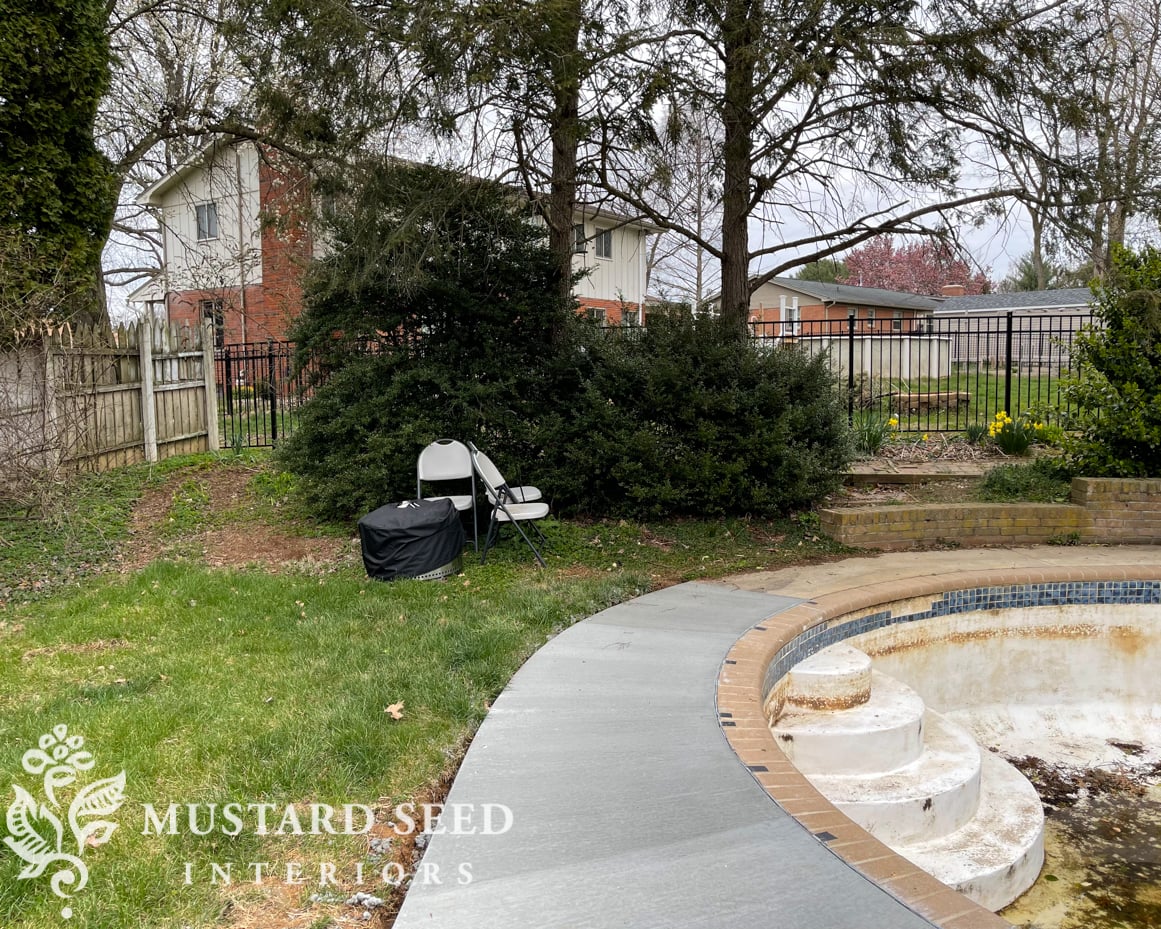
Along the back of the yard, I wanted to get the leaves and debris cleaned up and trim the bushes.
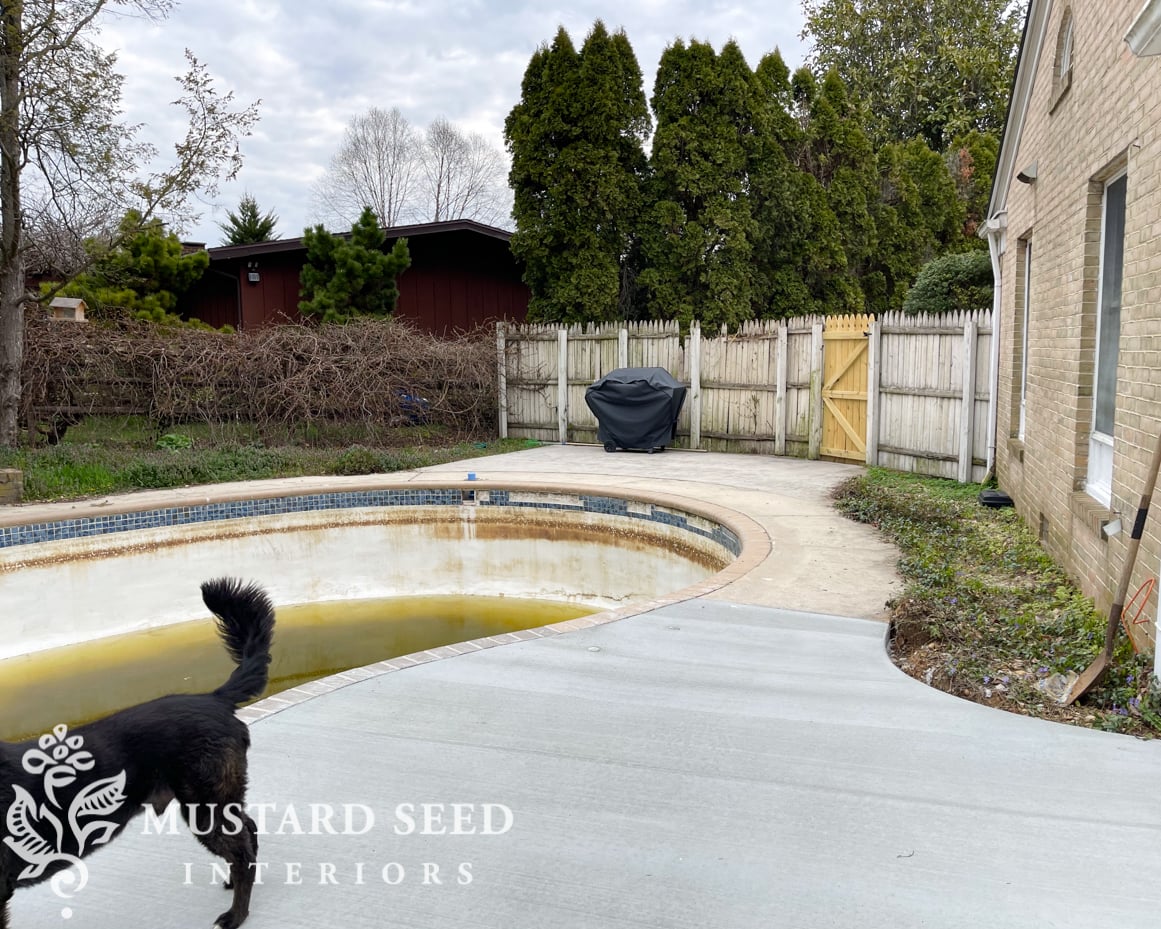
Every time I looked at the garden beds on the left and right of the photo above, I felt a bit overwhelmed by how to tackle them. They are full of rocks and I just see them as a big invitation for weeds. Come on over here and get completely out of control. I hate having areas in the yard that are easily taken over by weeds, so I needed to get my hands in these two beds to figure out what I was dealing with and to put a plan in place.

We started the day by cutting down, breaking up, and burning the dead parts of the bushes. So much of the butterfly bush was dead wood that we were able to burn the entire thing. Breaking it up to get it in the took a long time, but it was worth the effort and really opened the yard.
We dragged the bushes with the white blossoms to our refuse pile by the side of the house for Jeff to haul away. Already, the yard was looking better. Not beautiful, yet, but much cleaner.
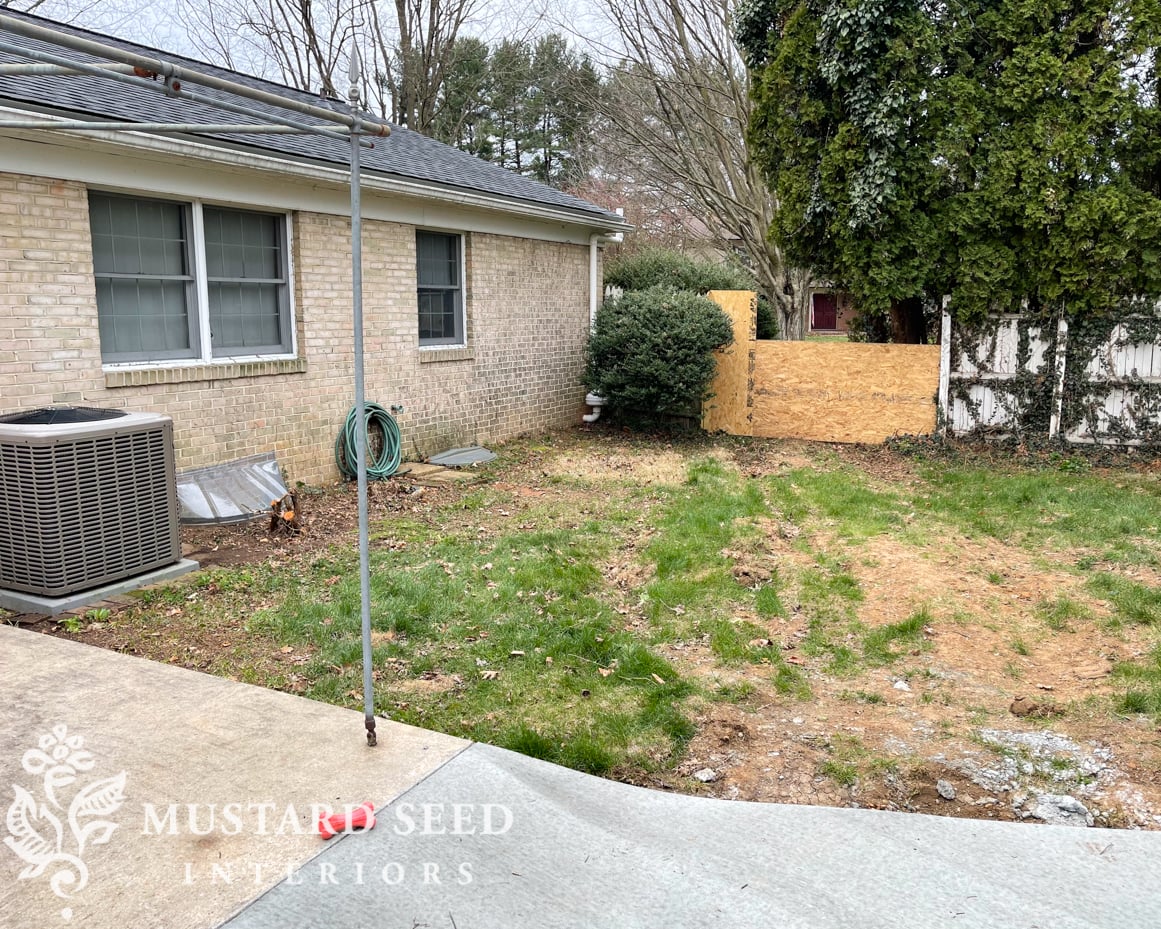
Of course, topsoil and grass seed will go down to level things out and make it look like a yard again. We’re going clean the brick, get some new shutters (you can see where ones were once mounted), come up with something to camouflage the A/C unit, and rebuild the fence. The posts are in good shape so we’re just going to replace the pickets.
We’re going to trim the bushes along the back of the pool a bit more, but I trimmed what I could reach. We all decided that me up on a ladder holding a hedge trimmer next to a concrete hole was probably not a good idea.
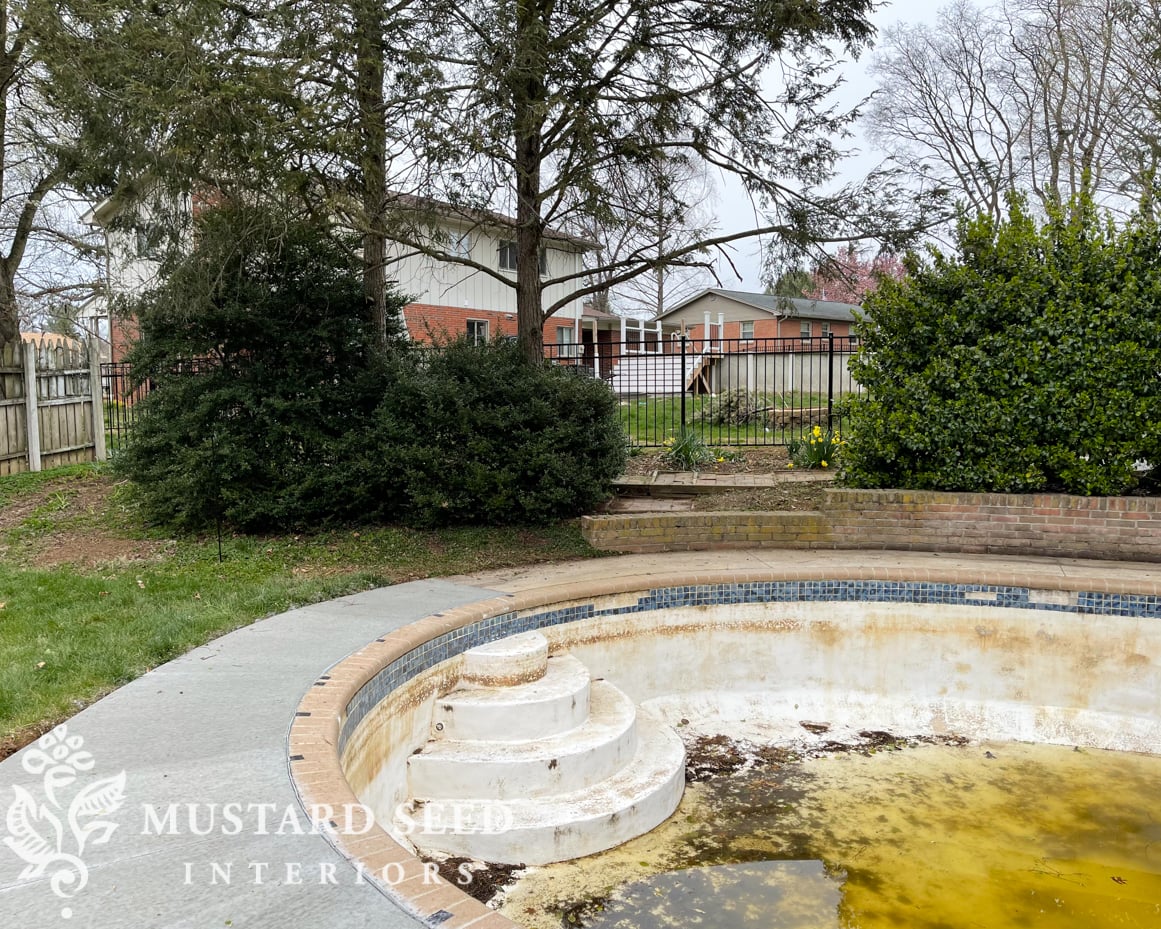
We are going to plant a hedge along the neighbor’s fence just to provide more privacy and a consistent backdrop. We have really awesome neighbors, so it is more about looks than trying to barricade ourselves from those around us. I think the hedge along the brick wall is made of Skip Laurel (mom’s app identified it as a dicot) and I think I’m going to use those. Skip Laurel is fast-growing, evergreen, and makes a nice, thick hedge that does well in sun or shade and isn’t picky about soil. It’s obviously doing great here, so I’m planning to plant more of it and will keep it neatly trimmed as it grows.
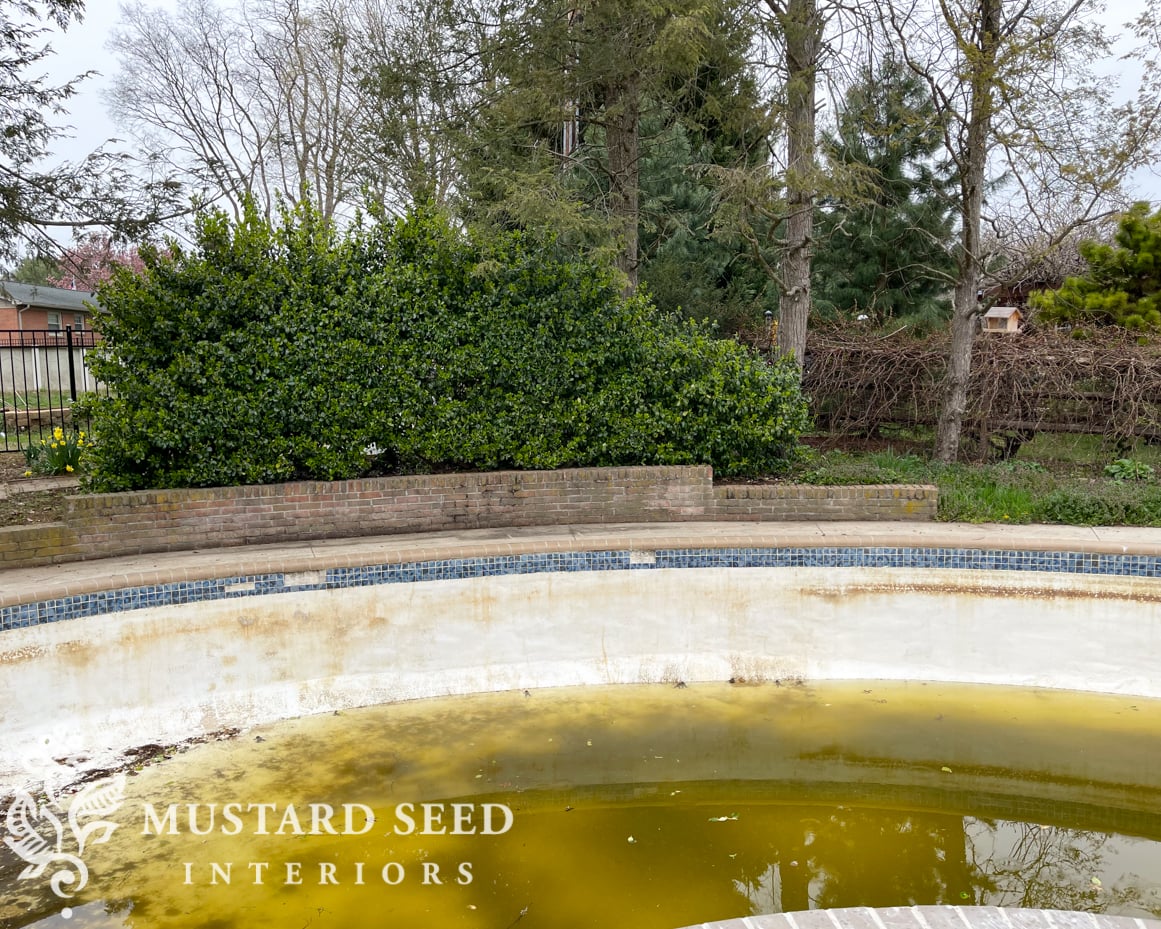
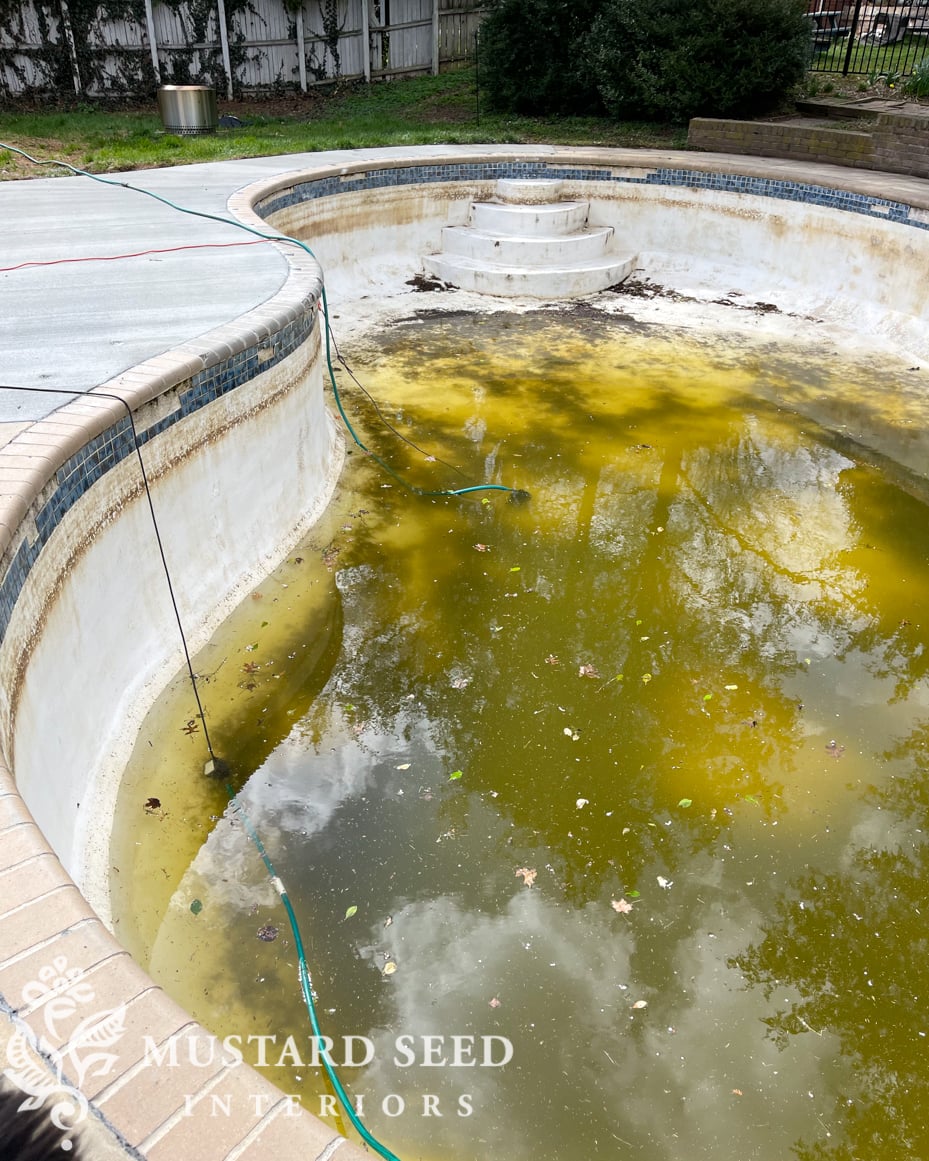
Another thing we needed to address was the pool that became a cesspool over the winter. We were supposed to have a cover for it (it was ordered in early October), but it was delayed and then the buckles were wrong and by the time everything was right and ready with the cover, the contractor was ready to do the concrete work. So, the pool was filled with leaves, branches, and muck. We’re getting a permeable cover, so it would’ve filled with water anyway, but at least the water would’ve been clean.
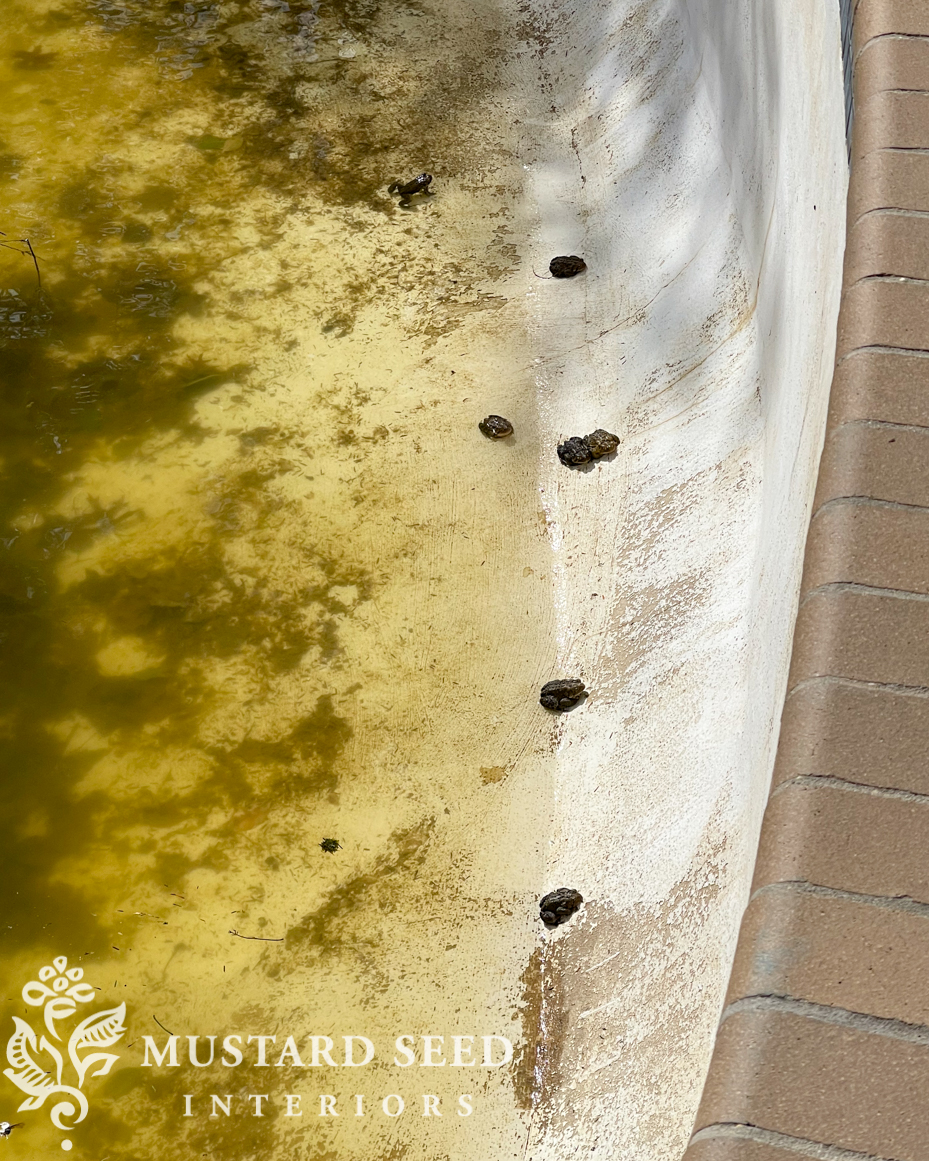
About a week ago, we noticed our inadvertent pond had become a little habitat for some toads. (See them along the waterline?) I think they are toads, anyway. To me, that meant it was time to drain the water and get the pool cleaned up and ready for its makeover.
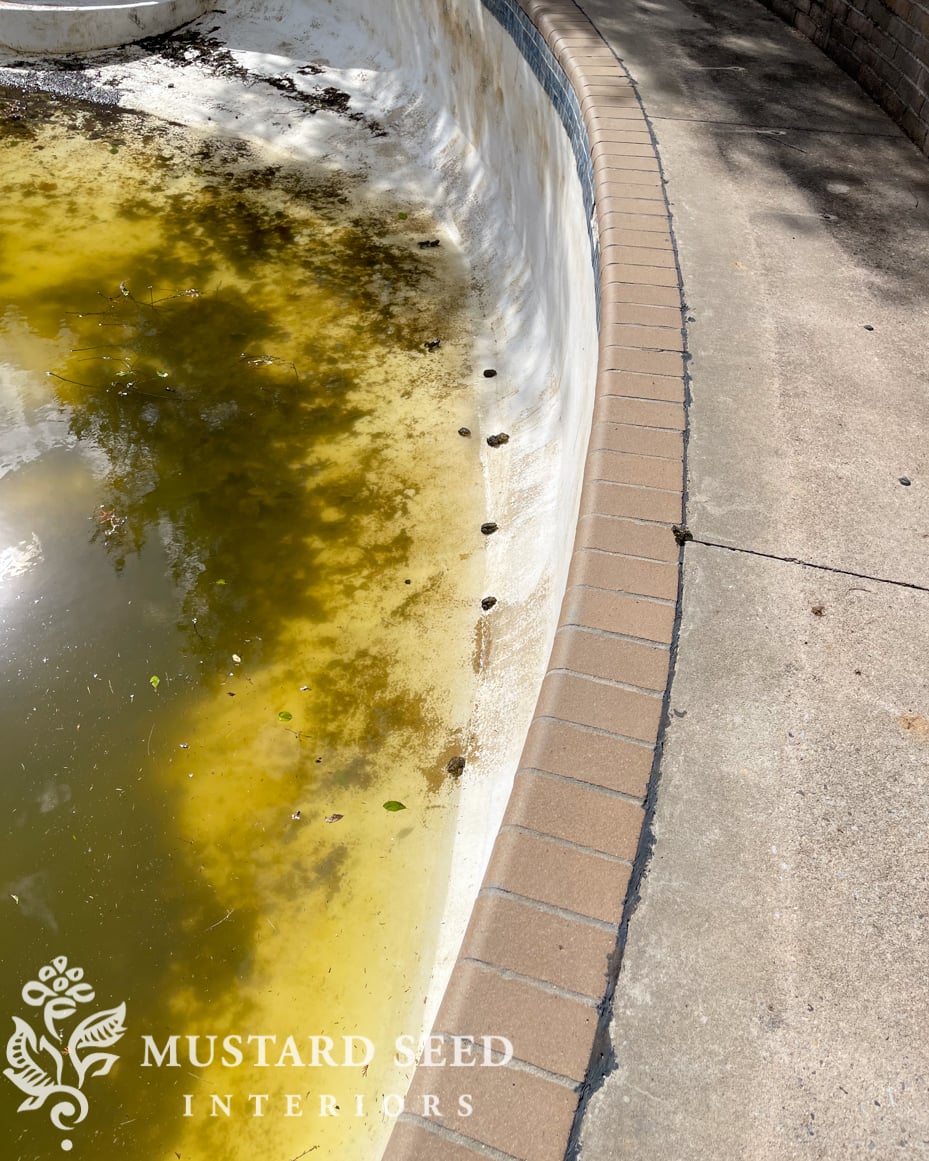
Sorry, guys, but this is not going to be your home.
We’ve been running a small pump left by the previous homeowner and a boat pump we already had (from pumping water out of our basement in PA before we had basement waterproofing done.) We’ve been running them for a few hours each day to slowly pump the water out of the pool and into the streets on either side of our house.
I’ve never had a pool or any kind of water feature before and I must say, even as a mucky cesspool, I love sitting out there and watching the ripples on the water from light breezes and looking at the reflection of the clouds and trees. I know I’ll be sitting out by the pool a lot, most likely barefoot with my feet dangling in the water.
Of course, we’ll be getting new blue tile, some of the coping will be replaced so it all matches, and the surface will be replastered in a mid-toned gray so the water will be a soft blue. If we kept it white, the water would be bright turquoise which isn’t really what I want. Since it has to be redone anyway, it’s a good time to change the color. I can’t wait for it to be finished, functional, and looking nice.
With momentum from our long workday on Thursday, I spent some time working on the beds on either side of the deep end of the pool. I knew it would be tedious work, but I set about pulling the weeds to see what I had to work with. As a side note, working on this with my mom is so funny. I want to pull everything out and she wants to take pictures of everything with her plant-identifying app to make sure we’re not pulling out something “valuable.” For me, if I don’t like it, I don’t really care what it is! But, her method has been helpful and I’m sure I’ll appreciate it when she stops me from pulling out something nice in my frenzy to get things tidy.
This mess of plants, for example, doesn’t look pretty to me at all. I want it cleaned up and orderly. In the process of pulling up weeds, I decided I would try to get a bit more order to the rocks as well. The left side of the bed is mostly rock, which, I’m assuming, is for drainage. The left side is mostly dirt. But, there is definitely a mingling of the two that makes this bed a bit of a challenge. I’m trying to pull out the larger landscaping rock to make the drainage area a bit more defined. We’ll see how it goes. I’m sort of making it up as I go.
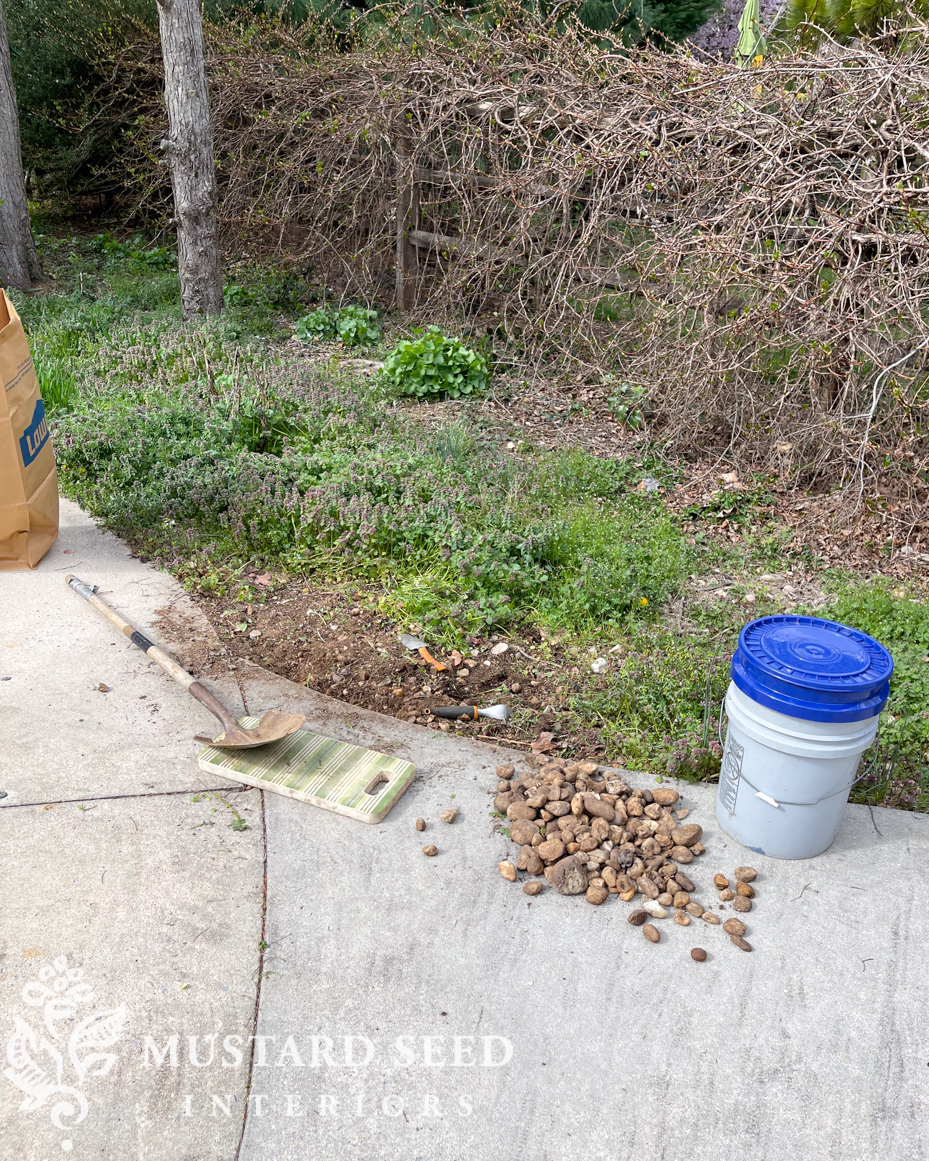
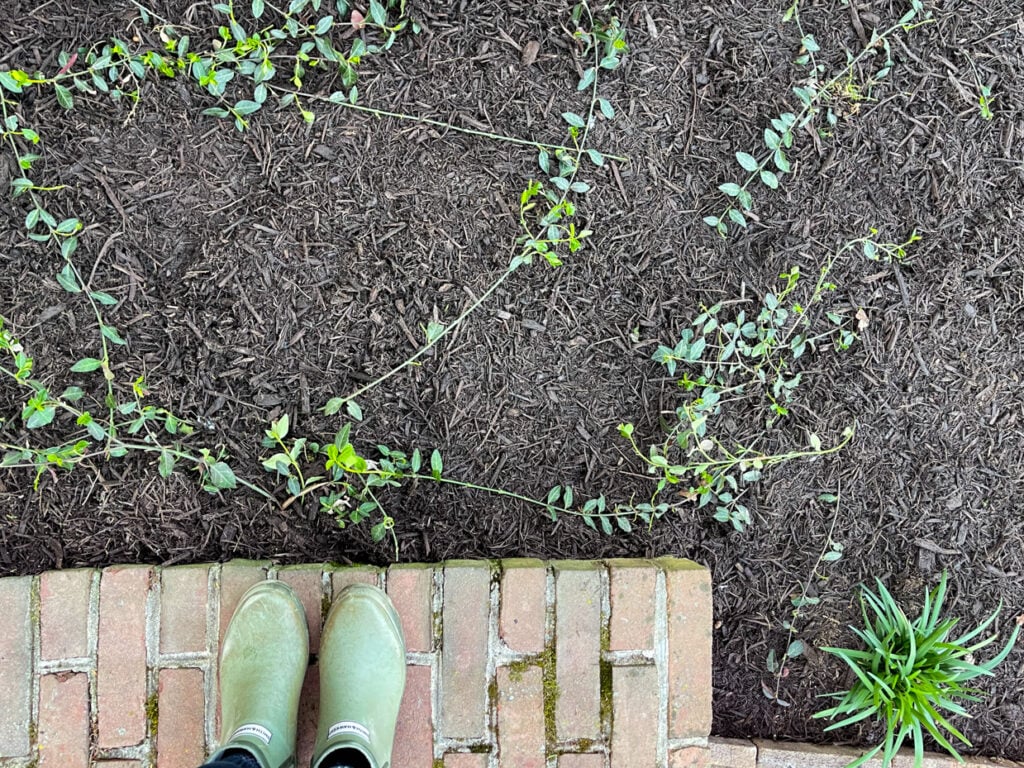
Working on the weeds and rocks on the left side of the bed wasn’t much fun, so I gave myself a break and started working on the right side to see what I would encounter there. This was much easier because I didn’t have the rocks to contend with and I discovered there was a nice, vining ground cover throughout this area. It was just hidden by weeds. I pulled the weeds, raked up the leaves, and carefully untangled the ground cover.
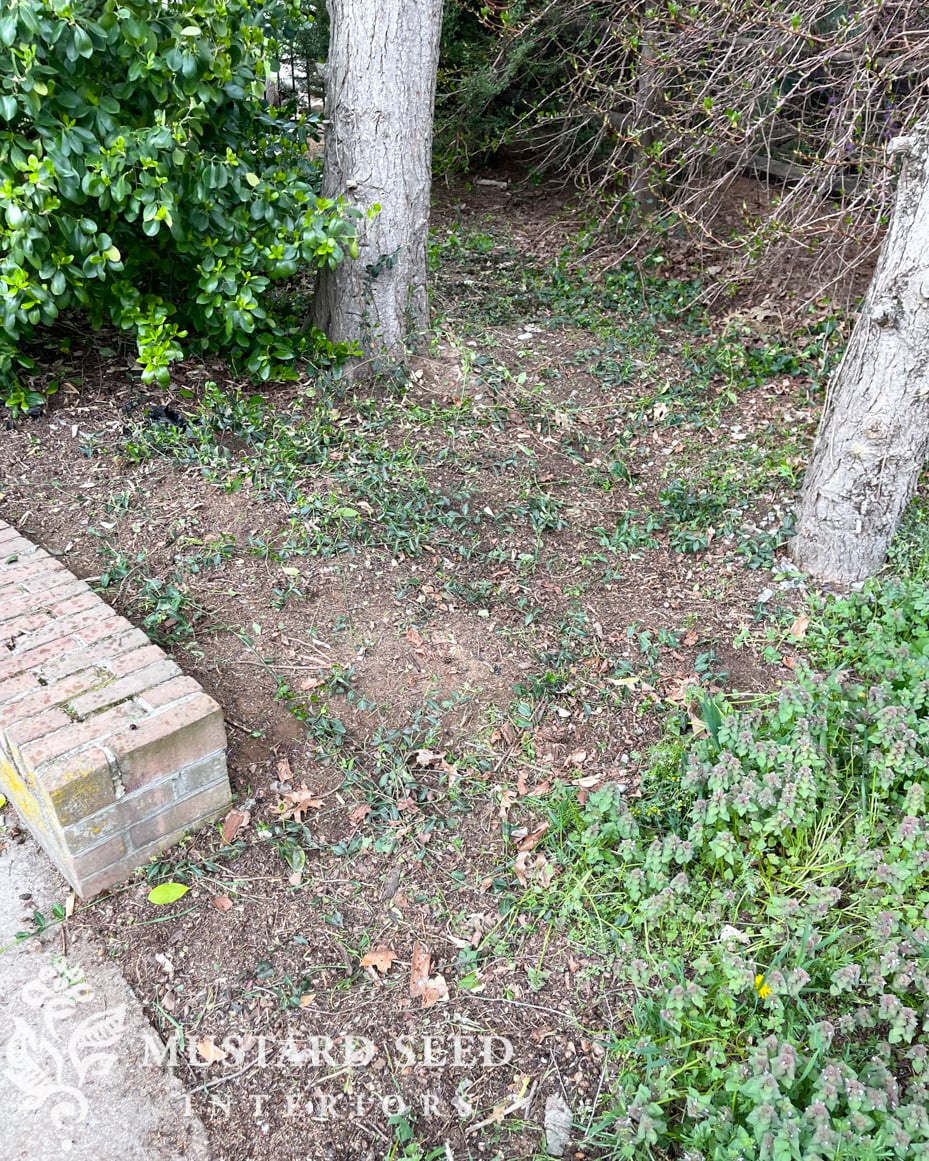
The problem with doing all of that work is that now I had to take measures to prevent the weeds from popping right back up. If I left it as is, the ground cover would be buried again in just a couple of weeks. So, I sweet-talked Jeff into going to get some mulch with me. My mom had already collected newspapers to use as a weed blocker, so I just needed the mulch to weigh it down and provide another layer of protection. It would also bring to life all of the work I had just done.
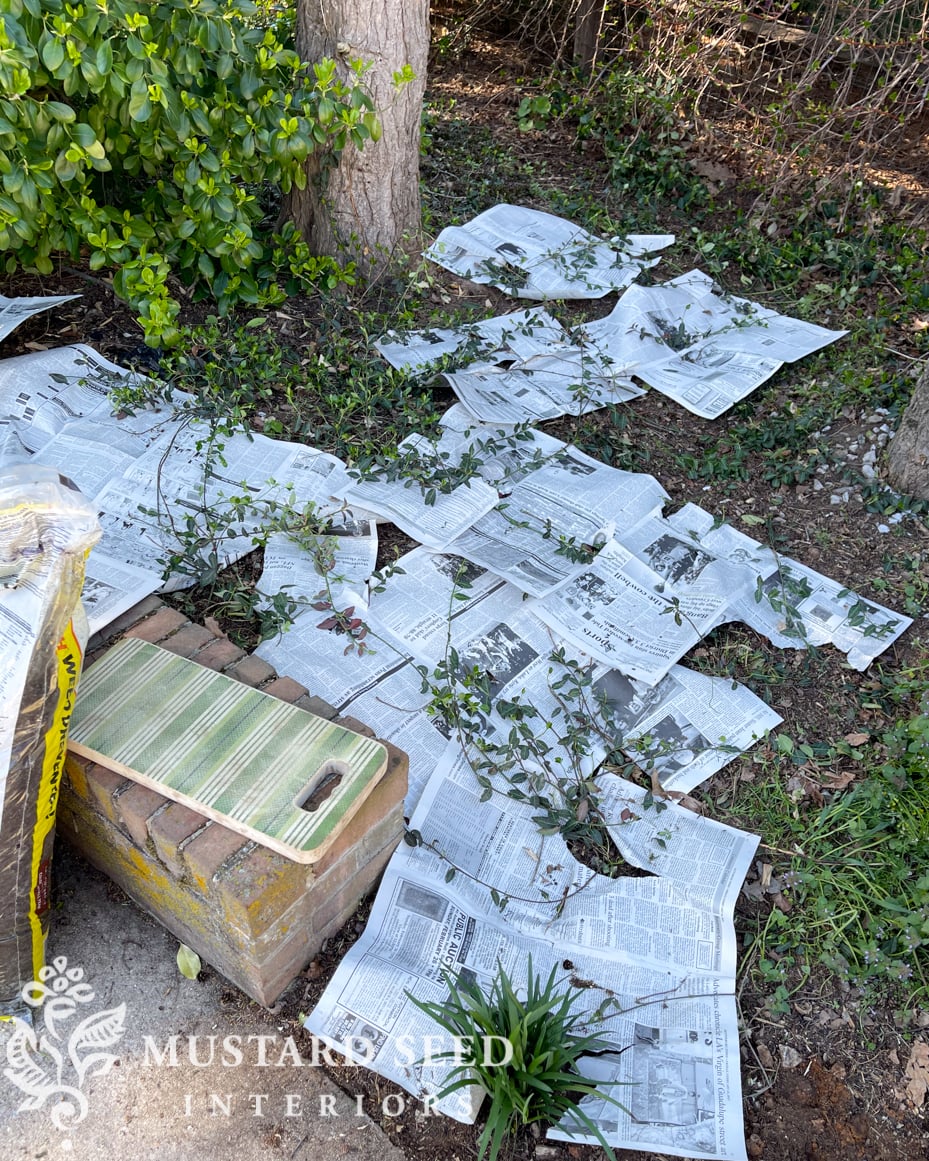
I have never used newsprint as a weed blocker before, but I have seen some articles about it and decided to give it a try. I like that it’s effective for a season or two and then starts to break down. I won’t be pulling up bits of plastic in a few years. I’ll report back in a couple of years to let you know how it worked. (Or you can read one of many articles about using newsprint as a weed blocker!)
I was a little hesitant about putting mulch down in this bed because of its close proximity to the pool. Would mulch just wash into the pool every time it rained? I could see remnants of old mulch, so I figured if the previous owners did it, it was probably okay. I wanted to put a little insurance in place with a border, though, and, as I was working, I remembered all of the random bricks we’d been finding throughout the yard. There are bricks, pavers, and rocks tucked in and around the house all over the yard. I can see that some of them are likely leftovers from projects, but many are just random pavers or bricks that don’t match anything else. I’ve been setting them aside to see if I have enough to use anywhere.
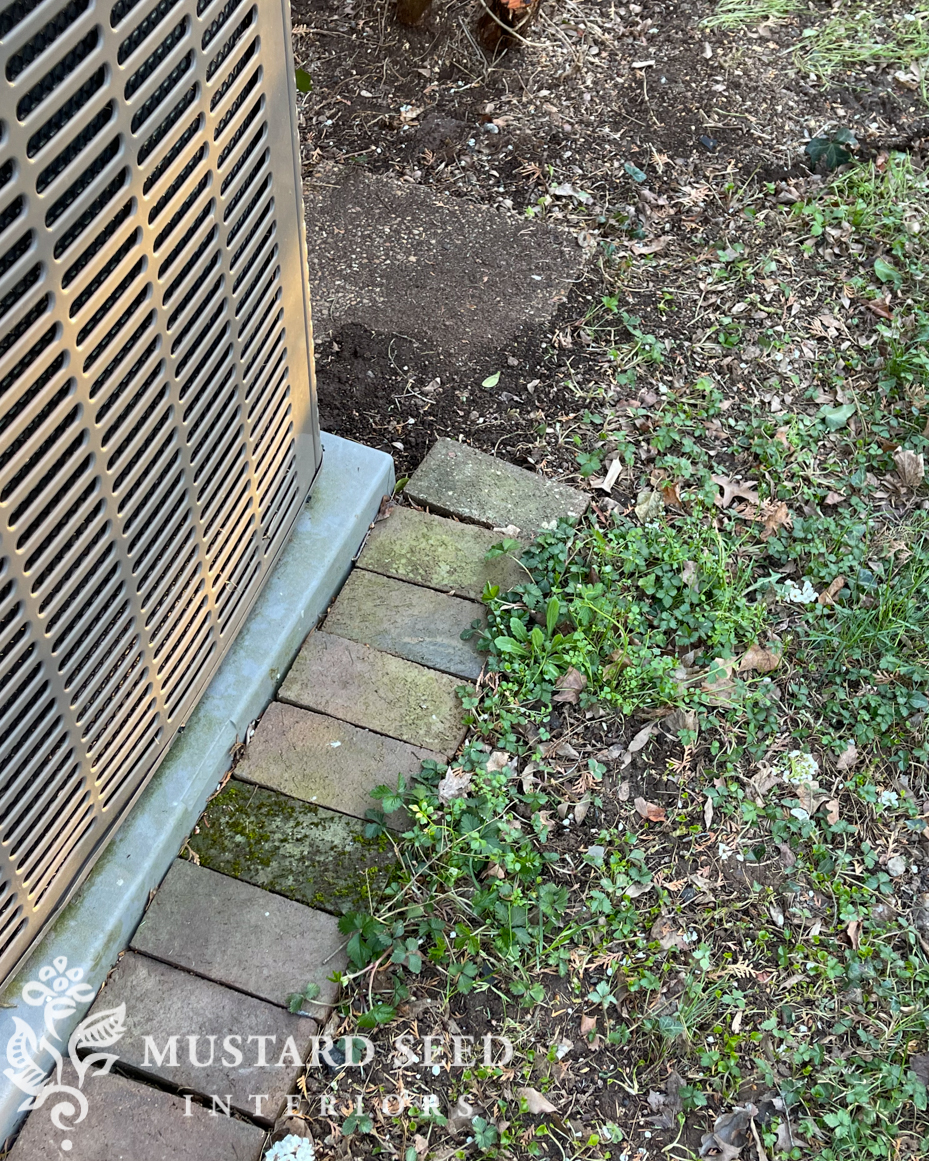
We’ve been finding a bunch of these thin bricks, so I used to make a little trench for the bricks to create a border.
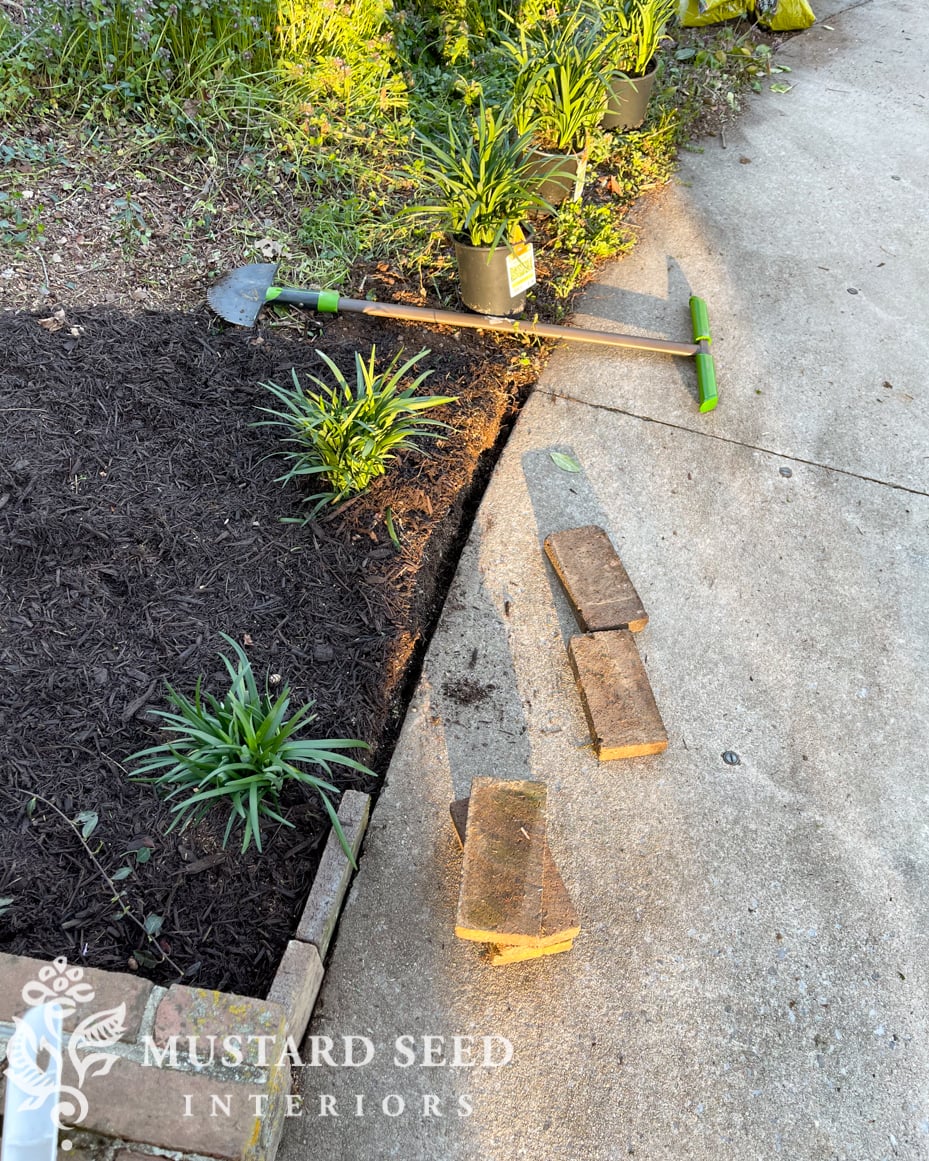
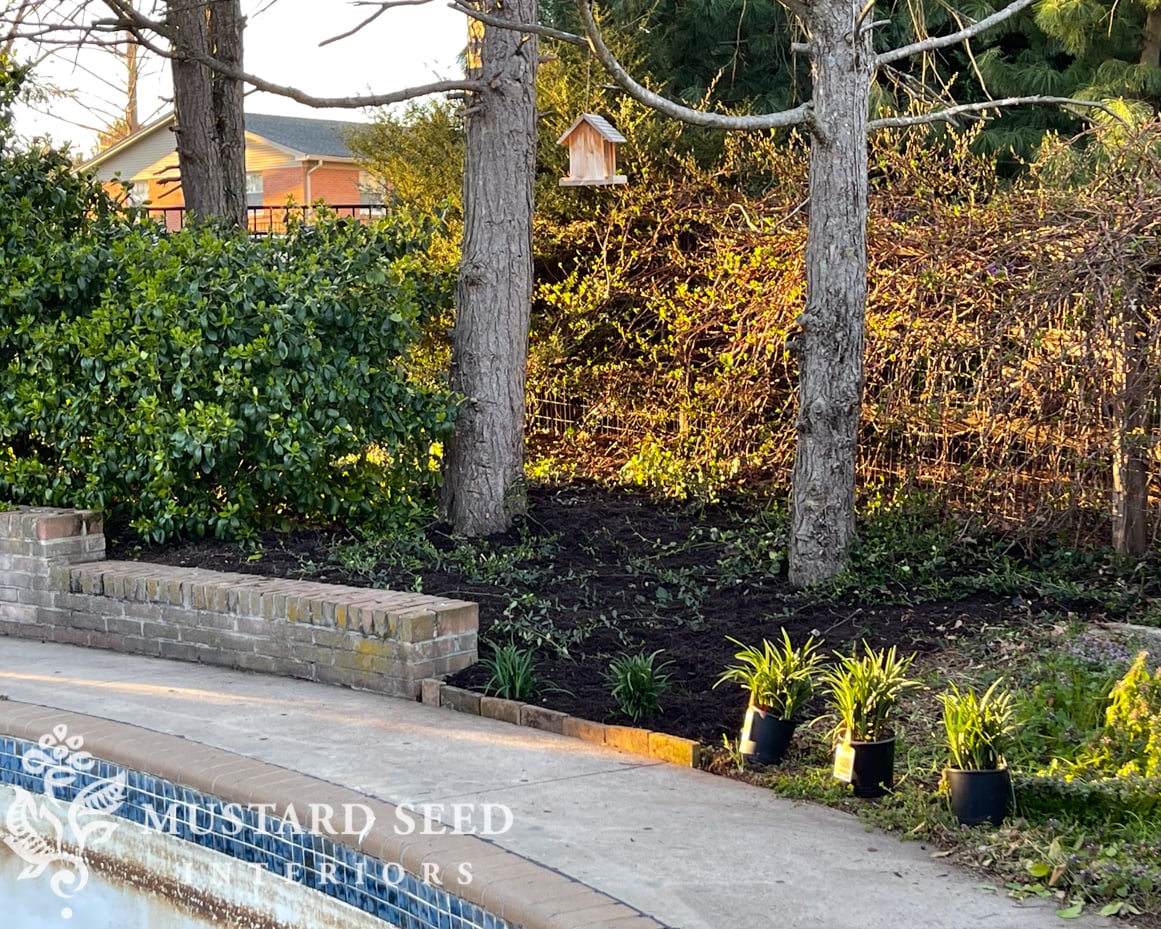
I think it’ll be just enough to hold the mulch back. I’m guessing that the ground cover will help as it grows unencumbered by weeds. It looks so much better, doesn’t it? I also couldn’t resist buying a few liriope plants to make a border of grasses. In a few years, as it spreads, that will help hold back any stray mulch as well.
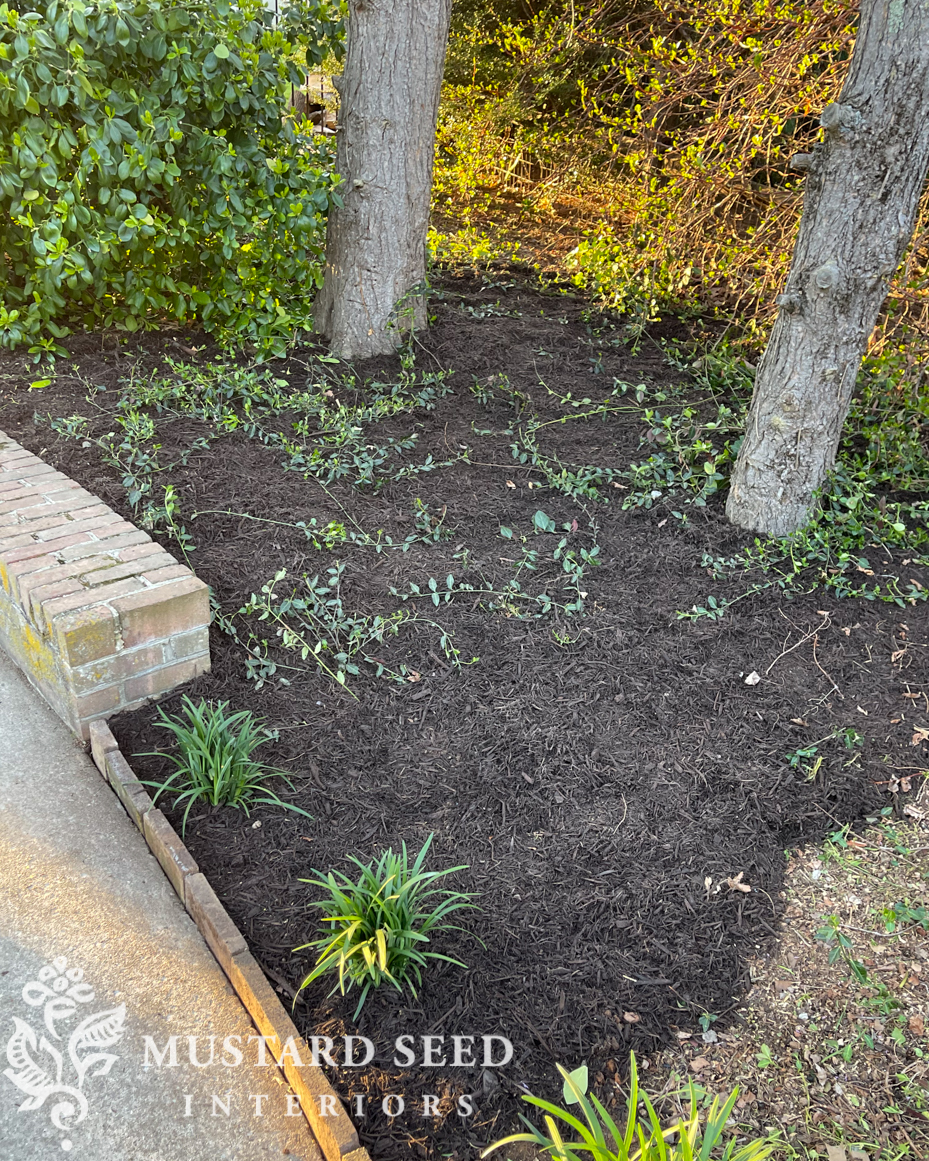
The mulch I bought is by and it has inside the mulch. I had never seen that before and am super excited about it. from Lowe’s and we got it in Chestnut Brown.
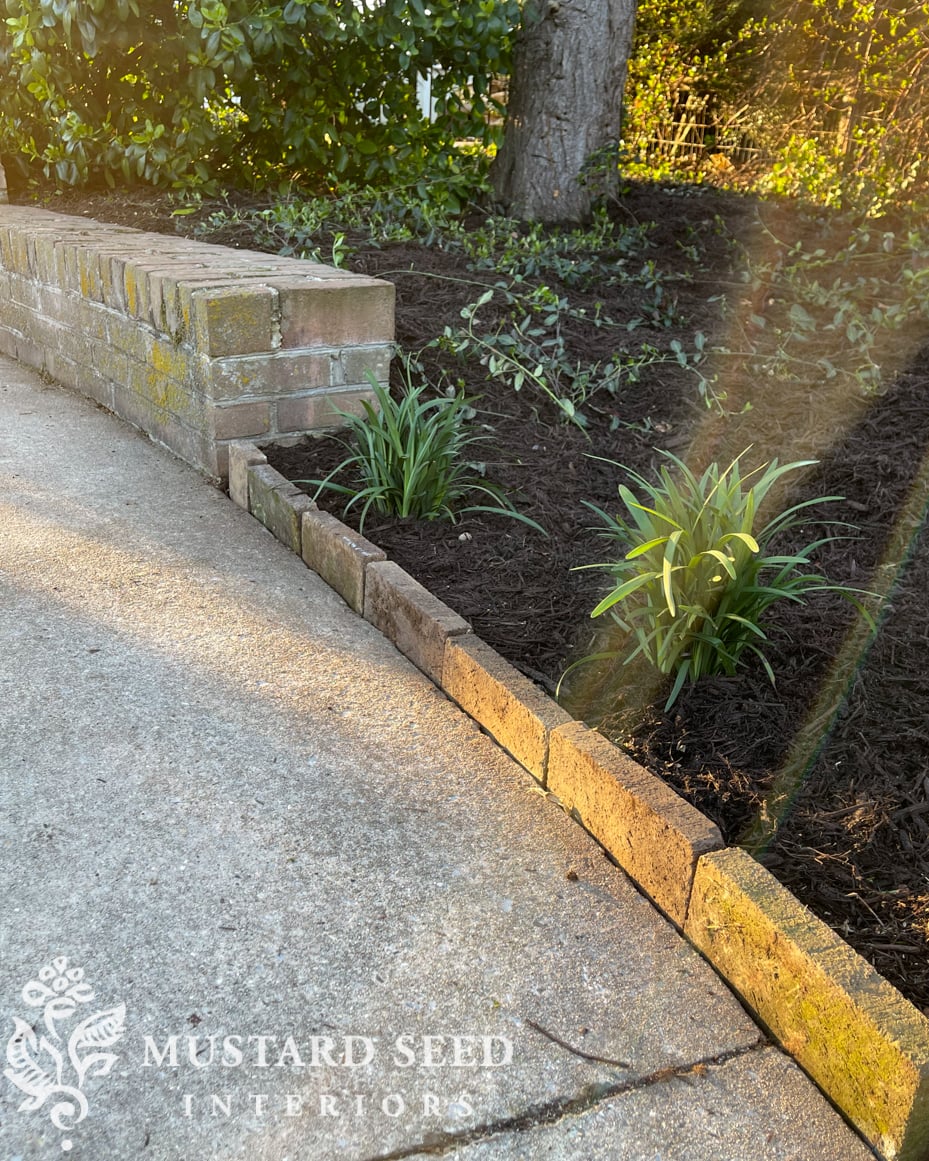
It’s not a big corner of the yard, but I’m so happy about it. It gives me a little glimpse of how pretty this yard is going to look when we can put in some new plants and bushes and make more defined garden beds.
I was only planning to work outside for an hour or so, but I ended up staying out for about three hours. It was such a gift of a night and I was enjoying the work, the dirt under my fingernails, and the golden light as the sun sunk lower on the horizon. I even sat on the brick wall for a bit, enjoying the little patch of yard that feels finished.
I just tried to not make eye contact with the rest of the yard!
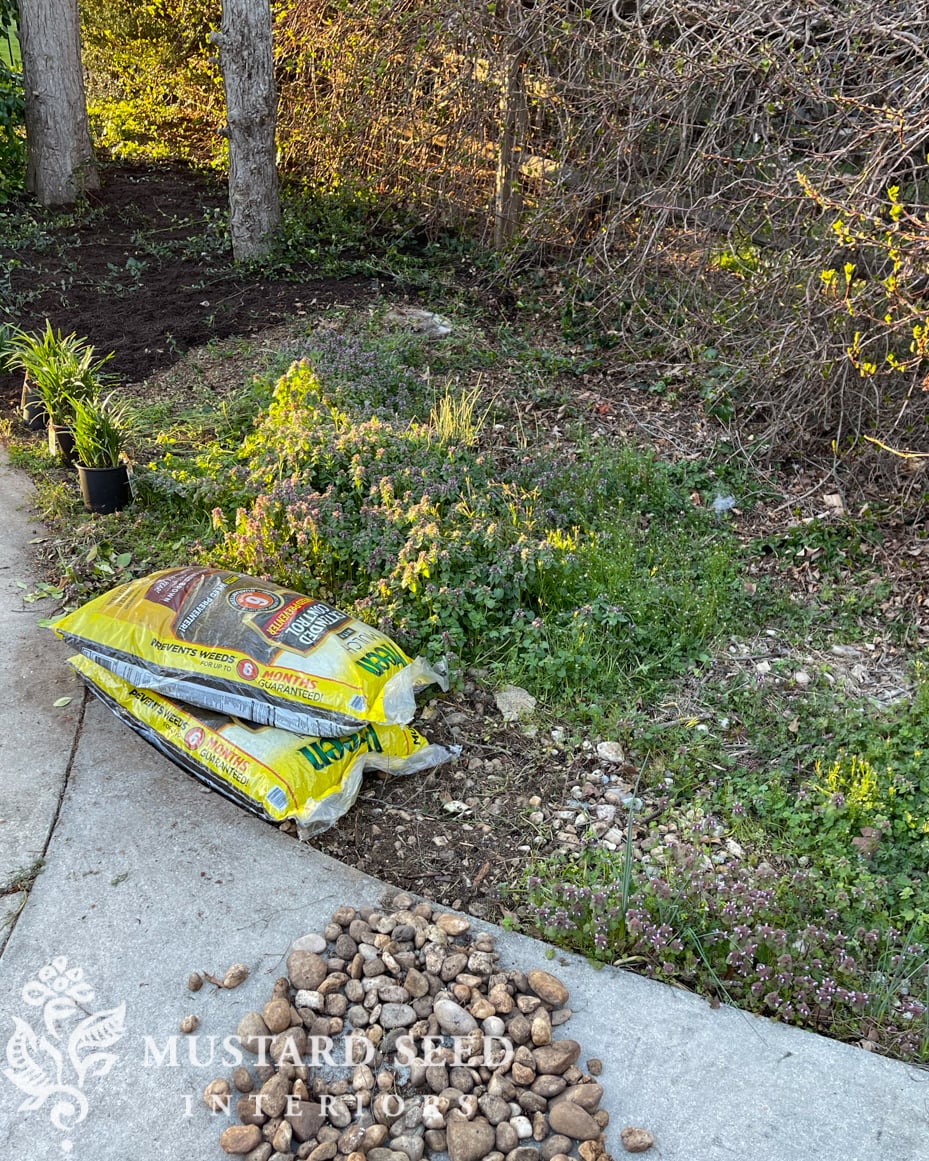
And this little garden bed is on my naughty list. It looks unassuming, but it is a total thorn in my side. My mom and I tried working on it and it was maddening. Not only is it filled with rocks, which is understandable for drainage, but the rocks are tangled into this ground cover that has roots that go to the center of the earth. I think napalm might be in order to start fresh over here.
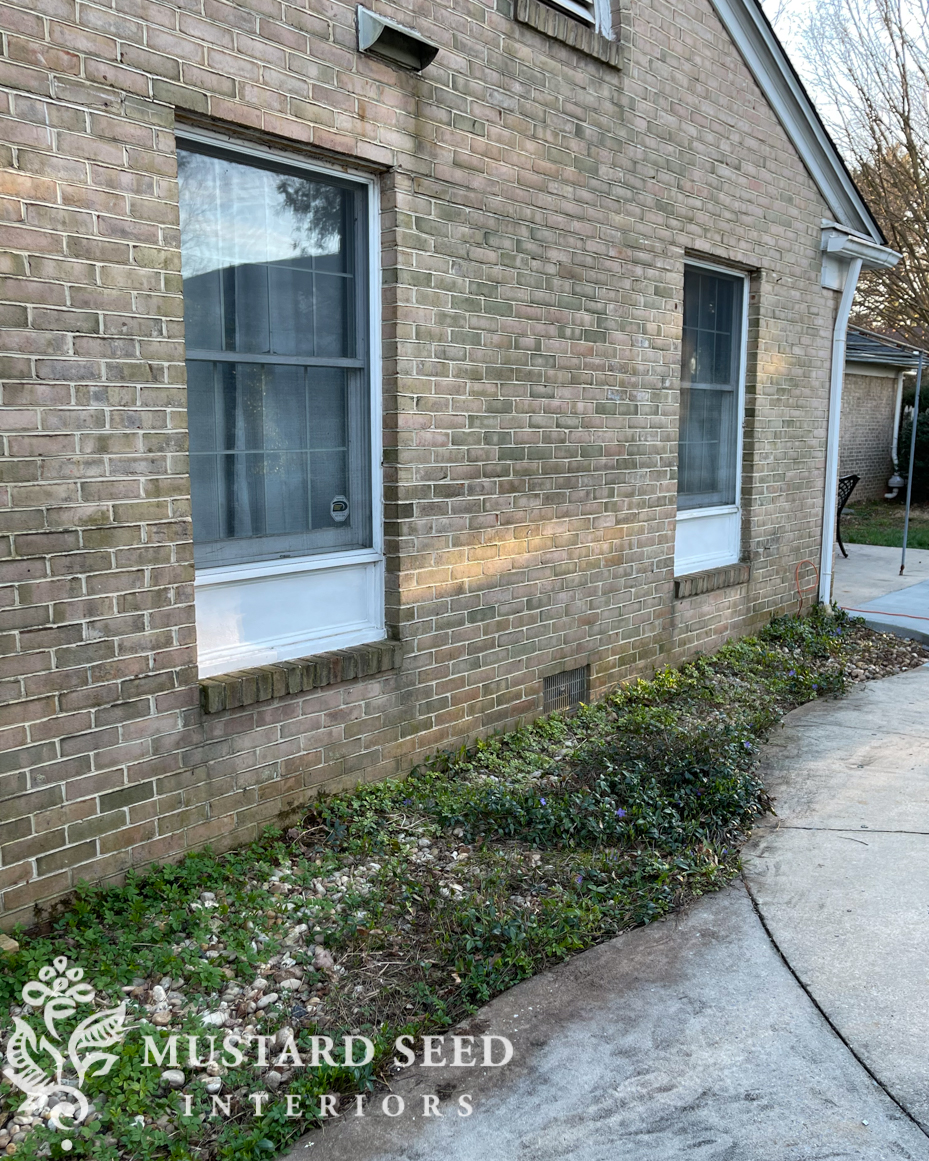
I’m going to hose it down with kill-everything spray, dig out the corpses, clean up the rocks, put down a new weed blocker, and replace the rocks. It’s going to be a process, but I hope the result will be a nice bed of clean landscaping rocks that won’t be a tangled mess. I’d like to plant something like a climbing rose bush between the two windows and then put planters under the windows to add some greenery without having to put a bunch of plants in the rocks. I think it’ll be nice to leave that area clean and simple. Again, we’ll see how it goes.
I hope to pick away at the backyard more this week, but the top priority is getting ready for the construction in the kitchen, which starts next Monday.
We’ll also continue draining the pool and, as it drains, I’m raking the muck to dry, sunny parts of the pool floor so it dries and I can rake and bag it. I never thought I would be raking a pool, but that’s where we are. I’m just ready for the pool to no longer look like the set of a post-apocalyptic movie.

Aren’t the tree reflections so pretty, though?
















54 Responses
We save brown paper bags (from the grocery store) and corrugated boxes (Amazon etc) all winter to use under our mulch in the spring. They last much longer and don’t fold or wrinkle like newspaper. We usually get 300 bags of bark mulch each spring; I can feel your pain over the rock mulch. I don’t know why rock mulch ever came into being because it is awful.
Your garden looks great in its infancy. Power washing will help immensely.
When you replaster the pool, just make sure that the grey isn’t too dark. You want to be able to see the bottom and make sure there are no snakes or other critters in there!
Yeah, we’re not doing it dark. Just a mid-gray that will soften the color of the water a bit.
A thought on the laurels. They are great in many ways, but I absolutely hate the way the flowers smell when it’s in bloom. If you’ve never smelled them before, you may want to wait before making a decision regarding getting more.
We have several butterfly bushes and we cut them down to the ground every March. They send up new pretty branches with new flowers for each summer season. I live in northern Indiana. You may have a “new” butterfly bush unless you dug up the roots. In more southern states I understand they don’t have to be cut down. Your yard is really shaping up. I am enjoying your journey.
Out here in Colorado, butterfly bushes die back to the ground and look dead and then erupt in the late spring to bloom anew. If you didn’t dig out the roots, that may happen to yours! Also you may be amazed at what pops up during this growing season! Maybe daffodils in your little forest…
WOW your property is in really bad shape esp the grass. But people with animals dogs etc have a really difficult time maintaining a beautiful yard with green grass because dogs tend to destroy the grass. Such a shame. My friend has 10 acres with her dogs and her property esp her grass is pristine because she cares for it beautifully so she us the exception. You have a lot of work ahead of you there may take years to bring it back even with professional landscapers. Our lawn was cut gor first time this year so happy to see them here working hard to pick up sticks from the Tornado we had last week. We were so lucky it was only sticks and no trees down did not even loose electricity !
Don’t you just love progress! Even a small area clean and mulched is such a great start. We downsized about 5 years ago to a home that came with a pool. We had never owned a home with one and it has been big learning curve. We will need to replaster this year as well and are going to do a pebble tech finish. My one request is like yours, I don’t want the water to look like Windex. The hardscaping around the pool is a long term project. I look forward to seeing your posts as the landscape work continues.
Windex! That made me laugh. Yes, we aren’t going dark with the color, but just a mid-gray that will soften the color of the water.
I’m so excited to see how you remodel the pool. You’re going to love watching the water… it changes every day. Our last house we had a pool and then a small lake beyond the pool. The sunsets and reflections were just magical. The wind on the water calls to me. I miss it.
I agree with the rock mulch (once upon a time my MIL covered her whole back yard in white rocks). I dug up a planter with rocks and found separating the rocks was like a meditation. Dirt, rock, dirt, rock. I highly recommend one of those Gorilla wheel carts that have a dumper on them… I filled up two of them and dumped the rocks in the woods.
Your groundcover looks like it might be vinca? The redone part looks wonderful and I totally get sitting and just taking in the freshness of your hard work. I love the edging you created!
I’m just now catching up on your posts, you are going to town! Bravo! We had our pool resurfaced this winter. We live in Louisiana so I don’t know if this affects you but our pool contractor warned us about leaving the pool empty for too long. It seems the earth can start buckling from the lack of the weight and cause the pool to come up in parts. I totally would want all that muck out too, great mosquito home, but I’d hate for you to have an added expense!
YES!!! Newsprint and even cardboard is GREAT for keeping weeds out. I can’t tell from the picture….but you do need to put it on thick……thicker the better!!!! One sheet will do nothing really…after it gets wet.
YES!!! the reflection of the trees in the water of the pool looks lovely….but not if they drop all their leaves and bark bits into the pool. It could even clog your pool sweep and be a pain to keep the lines clear. Ask me how I know!!!!
I am a BIG gardener lover…and I totally get being happy with one area cleared and clean out. Sit back and enjoy it…it is a lot of work!!! It will all come around to your vision and be glorious.
I was going to say the same about the thickness of newspaper. When starting a new garden bed many years ago, at the suggestion of an very experienced gardener I put down layers of newspaper, compost, sand, and peat moss then mulch. I left it all winter then planted in the spring. It has been fantastic soil.
Wow! Your hard work looks great! It will be all looking great before you know if. It just takes some time and as you well know LOTS of energy. 😃 So very sweet of your Mom to help you. I find that it makes hard tasks go better when you have someone to help and share good conversation with. Your pool is going to be so beautiful! Oh, one thought. I have always loved Laurel shrubs and I still do. However, it has the worst smelling blooms in the Spring. It was hard to enjoy sitting on our front porch until the blooms dropped off. At least mine did. We had them removed this past Fall after about 20 years. Maybe there are different varieties of Laurel that don’t have stinky blooms, but I didn’t want you to get a bunch and then have regrets. I am enjoying your journey as you and your family make this new place your own. May God continue to richly bless you and your family. 😃👍🏻🙏🏻
You are one brave woman, Marian~ and I can’t wait to see everything come together. Please remember to take a break every so often.
Hugs~ xo
As far as the bushes with the white flowers go, can’t you just trim the branches up, making it look like a blooming tree? This way you can have the flowers on upper branches and plant some low growing bushes below. That would add dimension and layers to that area.
The white bloomed bushes are Pieris japonica. There are shorter varieties available, and some have red new growth that is pretty. The vine is vinca or periwinkle. It should fill in nicely and it has lovely blue flowers in early spring. Good job! Remember that your Maryland Master Gardeners are fonts of useful information! The
Our house had japonica along the entire front when we bought it. We liked it, just not so MUCH of it! So we got rid of over half of it and are gradually adding other plantings. The bees love it!
What you have done looks great. It is nice to get a section completely done with mulch, as it becomes encouragement to start the next section. It is my opinion that rock is the least desirable cover for a garden; it does nothing to improve the soil and is so very very difficult to remove if/when you wish to do something different. Cardboard, thick newspaper and the like are very effective weed barriers under mulch.
Bravo! I am enjoying every post of your remodel.
I hope your neighbors realize how fortunate they are that you and Jeff bought that house! It will be so beautiful!
I love the area you edged and mulched! A glimpse of things to come – just getting that small area tidy so you can focus on other areas is a great accomplishment. I know it will come together beautifully – with some time, planning and elbow grease of course! The pool will eventually become the backyard star of your home and will entertain you and your family for years to come! Love watching the progress:-)
I’ve done rock removal chores and it’s just hard! A very sturdy wide garden hoe with a long handle, like a rake, helps with rock removal. Also, a flat edged shovel to scoop them up helps and works better than a regular garden spade. It takes years to bring a tired yard and plantings back to life and you’ve got a good start. Such hard work, but the joy it’ll being is worth the effort.
Here are just a couple tips learned the hard way! Be sure to use entire thick sections of newspaper to be effective! Also, a lighter color in the pool bottom makes it much easier to see particles that need to be vacuumed. Good luck!
You may want to have some (tasteful) light reflectors or something to define the edges of your pool steps. I have a gray gunite pool, and someone always misses the bottom step!
Great job! It is so rewarding to tackle a garden project and see an improvement within a couple of hours. You will thoroughly enjoy your yard and appreciate every bit of it when it’s finished. I’m anxious to know what ideas you will come up with for your air conditioning unit. My husband put in a patio that is near our heat pump/air conditioning unit and in the summer when it kicks on we usually end up moving to our screened in area that is attached to our shed. We usually have a cup of coffee in the morning before it becomes hot and the unit starts to run more. Your home is looking beautiful. Hard work pays off.
My dear Marian, I am exhausted just looking at what you have done and what you need to do! You are such a go-getter.
I have a fairly large yard with a lot of beds. When I weed I can’t think of the whole thing. I take one section and a smaller section of that and work on weeding that. That way I can see real progress. The more I get done the more I want to do because it looks so much better. I cleaned out a new area last year and used news paper. I put down at least 3-4 sheets and it is completely gone this year. Cardboard lasts much longer. I feel your pain but it is rewarding when it is done. Good luck.
I love the progress you’re making on your new to you home. It’s going to be beautiful and fun to watch as you make it yours.
One suggestion if it’s in your budget—add a handrail to those steps in the pool. You won’t regret it, especially when you have friends with kids or older adults over for a swim.
Looking good! Love skip laurels. Ours do have not grown very big so not effective for screening. We use either Nellie Stevens Holly or Oak Leaf Holly for screening. Looking forward to your next project.
Marian, you are making such progress with your backyard. It is looking so good! Your mulch is perfect and the plants you have along the edge are going to be so pretty. Also, I like the brick work you did along the edge to hold the mulch. You have so many wonderful ideas. Your yard will be so beautiful once you finish all your weeding and get the mulch put down. I like using mulch because each Spring or Fall, you can just add to it. It won’t be long now until you can enjoy your pool — and your lovely yard! I bet your boys can hardly wait for the pool to be finished. Hope your kitchen reno goes well next week! How exciting this is for you! We are so happy to be taken along on your journey as you make all the changes and add all your special personal touches!
The newspaper will be more effective if it’s is many pages thick as it will stay together long enough when wet to block the light to the weeds, a single page or two is not enough.
Cardboard boxes opened up are another good option, thicker & longer lasting, don’t blow around in the wind as you are laying them down & you can easily cut them to shape as well to fit up close to curved edges. 🙂
I hope your newspaper is several layers thick. It really works well that way. Not so much if only one or two sheets.
You don’t really have to have rocks. Just get rid of them. Also cardboard makes a very good barrier. It also breaks down but lasts longer to protect against weeds than newspaper.
Here in southern Iowa I have two butterfly bushes that I cut down to the ground in the spring before any green appears near the base. They grow into beautiful bushes for the summer and they get their name appropriately because the butterflies love them. I have them near my front windows and I love seeing the butterflies all summer and fall. Hopefully yours will return from the roots and you’ll enjoy butterflies, too.
I wish I could magically transport those river rocks to my yard; we are also doing new landscaping in the front yard because it was looking “tired”, and some areas will have river rock because grass just refuses to grow there. The price of the bagged rocks have more than doubled at Home Depot, so I would love to take them off your hands. Here in South Florida we are having hot and humid 90+ degree weather, so working outdoors is not much fun, thankfully we did the heavy work (removing an old palm with horrendous roots) before it got this hot, but we have lots left to do. Gardening is never a job that ends, but when you do anything to clean, rake and plant new flowers, it is always so rewarding and looks so beautiful. Your yard is huge so it will take a lot of hard work, but I believe gardens are “grateful” and they will reward you with beauty and enjoyment in the end. I’m sure your boys will be loving that pool come summer!!
Oh, the ROCKS!!! I have dug out enough to last me a
lifetime!!! Lily of the Valley was planted here, and then the
“rocks” were placed on top of the Lily of the Valley. I’ve never
worked so hard in my life getting rid of that mess!! Lily of the
Valley is an aggressive spreader…. beware if you are slightly
interested in planting it. It will make your life miserable. I
had such a huge area of it, my best plan was to put down a
layer of black plastic bags, and 2 x 4’s to hold the plastic down, and bricks to hold the edges in place. It sat like that for one full summer and winter. The next spring I pulled up the
black plastic and it was FINALLY dead!!! I still have nighmares
about that!!! 🙂
Mary, I am totally jealous of your Lily of the Valley “nightmare!” I have planted pips so many times, praying for them to grow in a section of my yard, and I cannot get them to grow. My grandfather grew them, so they are very sentimental for me. Maybe I should change the phrase to say “one man’s weed is another man’s treasure!” LOL!
Your yard is going to be a stunner, Marian. I can see with its shape and the pool and established brickwork that it’ll be just gorgeous, especially when you add the decorative stuff! This is really fun seeing your house transformed! Bravo!
We bought the proverbial worst house in a good neighborhood 30 years ago. (It turned out so well in the end that it has become our forever home.) I have experienced so many of the same gardening issues you have. Our rocks were buried underground, the base for a brick walkway that we removed and repurposed elsewhere. I still hit a patch occasionally when I’m planting something new. One feature that attracted me to the house was its mature garden, but when I started cleaning it up, I realized it was more like a jungle, and I ended up removing a lot of overgrown shrubs. Keep on keeping on. The rewards are worth it! I’m enjoying your journey.
I have to agree with Kim, use a flat shovel to scoop out the rocks, save your hands and fingers! Expect to go down at least 4-6 inches and take it all to the dump. Invest in a wheel barrow to save your back. Please be very cautious about any kind of “napalm” including Preen . When it rains it will leach out and could enter your pool. Please use a natural brown wood mulch if at all possible. Mulch that is dyed could be covering what ever they used to make it , usually construction debris, I have found chunks of concrete in it!
Newspaper and cardboard, never plastic, under at least 3-4 inches of wood mulch works perfectly. Packing paper also works great. Real wood mulch breaks down over time and creates beautiful loam . Just top off with more mulch every 3 years or so .
Best way to kill weeds in your lawn is to Seed and Feed not weed and feed. Weeds only grow in poor soil. Over seeding and feeding and improving the soil in the lawn will work so much better that a pesticide that will run off into the storm drains.
Looking forward to see how it all turns out!
I’m in agreement with you about the herbicides, including Preen. Not good for the pool, not good for groundwater, not good for bees and helpful bugs, and not good for humans!
Yes, I agree with Tina. Preen is not good. I learned last year from a “Save the Bees” group that Preen kills honey bees and other beneficial insects. Best not to use it. I do a lot of gardening, and have nine perennial gardens. The best way to fight weeds is to dig them out (go down at least 6 inches). Then mulch heavily with a cedar bark mulch (no chemicals). That has worked very well for my gardens.
You will have a beautiful garden in time. It takes lots of work, but you are ambitious and will do a good job.
As I’m removing weeds, if there is something that might be a weed but could also be a perennial I’ll put it into a small pot and keep it for a bit. If it turns into a plant I like I’ll put it back into the garden….and if it turns into a weed it goes into the yard waste bag. That way it doesn’t run wild in my garden, and if it’s a plant it’ll be placed where I want it and not necessarily where I found it.
if it turns into a perennial that’s not what I’d like in my garden it goes to the bottom of our drive for one of my neighbours to take!
Actually, using paper, cardboard or plastic in landscaping can cause other problems worse than weeds. It traps too much moisture and can be a breeding ground for fungus which is much harder to get rid of that a few weeds and will kill your expensive plants. The only time one should use a physical “weed blocker” is when an area is to be covered in rock, not plants.
Hi Marian,
I bought a 1960’s split level ranch in Oct of 2021 and I love following your renovations and yard work to see what you are doing to update your house. I invested $20,000 on the outside of the house my first year. I had the house power washed, all the trees trimmed, some were touching the house, I added a cedar lean to porch to the lower front of the house which helped the curb appeal a lot. It looks like a French country farm house now. I added new fencing all around my half acre property, and had all doors painted and new cedar shutters made.
I also spent $20,000 on the inside mostly on things that don’t show that much. I had work done on two chimmney’s. I added new steal liners in the chimmneys, and had two new wood stove inserts put in. I had new insulation added to the attic, mold remediation in the attic, new venting for the attic and venting the bathroom fan to the outside instead of directly into the attic. I also had a propane gas line run for a new gas stove, and purchased a new dishwasher and a new freezer. I planted quite a few fruit trees and bushes my first year, 2 apple, 2 elderberry, 4 red raspberry and 4 black raspberry bushes a hazel nut tree, 2 cherry trees, 2 blueberry bushes, a fig bush, 2 grape vines, rhubarb, asparagus, and 7 raised garden beds. I also bought an arbor for over my front gate with yellow rambling rose bushes on each side and a metal arbor over my garden gate for a Clematis. I planted sunflowers and Zinnas and several rose bushes.
I love watching your work in your yard because I have one area of my garden beds near my house that is also full of stones. I just left it last summer because I had so much to do, and I felt too overwhelmed to pick them out. I look forward to see what you do with your gardens as I also try to develop my vision for my gardens. I bought your book Feels LIke Home, for inspiration after I moved here. I know I would like to make some drapes, and do some painting and wallpapering and make a sink skirt for my guest bathroom. It is going to take me a couple of years to bring my vision to life both in the house and in the gardens. I find watching your progress keeps me motivated. I love watching your progress. You are an inspiration to many.
Hi Marian. I have been reading your blog for 5+ years now! Loved how you and Jeff did over your Minn. house. And am enjoying watching your progress on your new house. Please be careful clearing out the muck from your pool. I hope you are taking precaution from the horrible bacteria exposure with gloves and a quality mask. We all want you to be healthy!
How can you be Marian and use non organic things in the yard/garden? KILL EVERYTHING? What about Sebastian’s paws when he licks them covered in herbicide? Squirrels, bees, birds? I’m so disappointed.
Sorry you’re disappointed! A friend just told me about high-acid vinegar as a better option for killing weeds, so I’m going to give that a try. I just didn’t know about it before.
Thank you for the reply and the consideration. But…how can you be so unaware? Suggestion=try heating the vinegar in the microwave before using. Also, it doesn’t need to be full strength, you can cut it by a third with water. Also, there is a gardening knife I use more than any tool, a hori hori knife. I tried to post a pic but couldn’t. You can get at Amazon, Ebay etc. It will last and for digging unwanted plants, digging holes for new plants, there is nothing better. It replaced a lot of my garden tools. It is the tool I always reach for. Thank you for being open and willing to learn. I’ve been gardening for 50 years, I’n still learning and that’s one of the fun things.
Well, you don’t know what you don’t know. We’ve just always used a weed-killing spray for weeds. Thanks for the tool suggestion! I looked it up and will get one.
I’m just now reading your post, and it is April 17, so I may be too late. But please consult a professional before you power wash that brick. Some things are fine to power wash, brick may not be one of them. It can strip off the outer baked on coating that was there originally to protect the brick from disintegrating. It can also blast out any loose grout, leaving you with a repointing job you never want. And you’ll never re-match the grout color (first hand experience there). I’ve seen brick on historical homes just get destroyed and no way to fix it, when someone did a power wash. I do believe your brick needs some cleaning to get the mildew and junk off, but I’m not sure a wash job is the way to go. If you have any live ivy on the house, cut the vines at ground level or spray with roundup. Let the stuff die completely and gently pull the dead brown vines off carefully. It grows into loose grout and you’ll yank grout out if you pull on it live. I am also not a professional in these trades. I just know the damage I’ve seen and suggest an advisor who is knowledgeable (and preferably NOT the guy trying to sell you the job). You’re plowing through a big job, but doing great as usual! Keep it up, pace yourself, and take a break between jobs to prevent burnout.
I didn’t consult a pro, but I did read a bunch of articles on power-washing brick. Everything I read said it was fine to power wash on a low setting and if you’re mindful of any loose mortar. Jeff did a great job so far and made sure to be gentle with the brick. The only issue we’ve had is that the brick is discolored where there was ivy growing and power washing to remove the aerial roots of the ivy only emphasized that. I’m going to allow some ivy to grow back in certain areas and keep it neatly trimmed in order to camouflage that.