
Here we are at parts two and three of our makeover of these French chairs I found on Craig’s List…

We stripped off the upholstery in part one, which you can find HERE in case you missed it. Once the upholstery is stripped, that is the time to deal with the frame if you want to change it at all. I love leaving wood frames alone when they are to my taste, but this one had a shiny finish, black speckles that speak to the 1970’s-80’s and a hand painted gold detail that wasn’t really my thing.

Stripping the finish would’ve been much more than I wanted to take on, so I decided to paint. Kriste and I painted the frames in MMSMP in Mora…
(In case it’s driving you nuts, I did paint the inside of the back left leg of my chair once the camera stopped rolling.)
Since the chair frames were shiny, we did add the bonding agent to the paint. I toyed with the idea of sanding them lightly first, but I decided to just go with it.


Well, it turns out that sanding would’ve been a good idea. Even with the Bonding Agent added, the paint resisted in a few specific areas, mostly the inside of the frame back. This isn’t normal, but it does happen on occasion with certain pieces. They are just stubborn.
I love when milk paint chips, but this is just a little too much and too focused to one area.
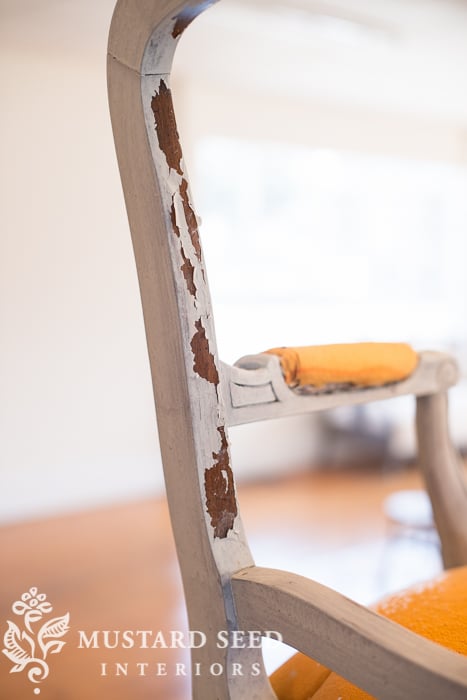
If you ever get to this stage with a piece, don’t worry, it’s not ruined. There are very few things in furniture painting that can’t be fixed with some light sanding. I sanded over the area with a medium grit paper to remove the flaking paint and give the surface some tooth.

…and then painted over it with some more Milk Paint with the Bonding Agent added in. Again, this usually isn’t necessary, but I wanted to share it, because it does happen in rare cases.
Once the paint is dry, it’s time to distress (if you like that sort of thing) and apply a finish. Since these chairs chipped a bit more than expected, I decided not to fight it and distressed them heavily followed by an application of Antiquing Wax…


12 Responses
I love the heavier distressing on them!
Wow! Great videos! Now, I’m on the hunt for the perfect chair/s to do this to!
It so comforting to know that if a project doesn’t go as planned you don’t freak out and toss it. It calms me that things can be fixed, not rejected.
Time to tackle a chair. Calmly tackle a chair. 😉
I feel the same way Wendy, I have been fearful of attempting such a project until now
I’m wondering why you didn’t just paint the fabric too, instead of reupholstering….
I wondered about thAT TOO… PAINTING THE UPHOLSTERY…bten I noticed the tacks, and unless you paint the tacks too, it is really difficult to solve that “edge” issue…Reupholstering, you can just staple and glue on guimp.
I know lots of people who have painted upholstery, but I am generally not a fan of it. I think slipcovering and reupholstering is a much better option, if you can do it. Since I know how to do both, I have never painted a piece of upholstered furniture.
Hi Marian;
I have 2 almost identical chairs. I have yet to attempt the re-upholstery as it is not the drop in seat that I can staple my fabric too.
I’m so glad you’re doing this so I can do the same with my chairs.
Waiting with anticipation for the final results.
Debbie
Great video girls. I have painted and upholstered a couple of chairs but it will be interesting to see if I have been doing it right or not. LOVE these chairs, they are just going to be gorgeous. You can tell even without the upholstery.
OMG, I am in the process of pulling all of one hundred or more individual tacks off my chairs, my wrist is starting to ache, (lol) I discovered staples all around the underneath of the fabric, they are hard to pull out, maybe I will put the tacks back on and paint the chair, or take it to an upholster, OK Marian, I’m bring it over! haha… Blessings! 😉
very helpful to see the techniques up close
Great info in your videos! I love SEEING it happen. So informative.
Do you have a page where you show the combination of paint and antiquing wax for each of your colors? It would help with decision making of the paint color. Maybe you could do a video of just antiquing each color on a wood samples?