
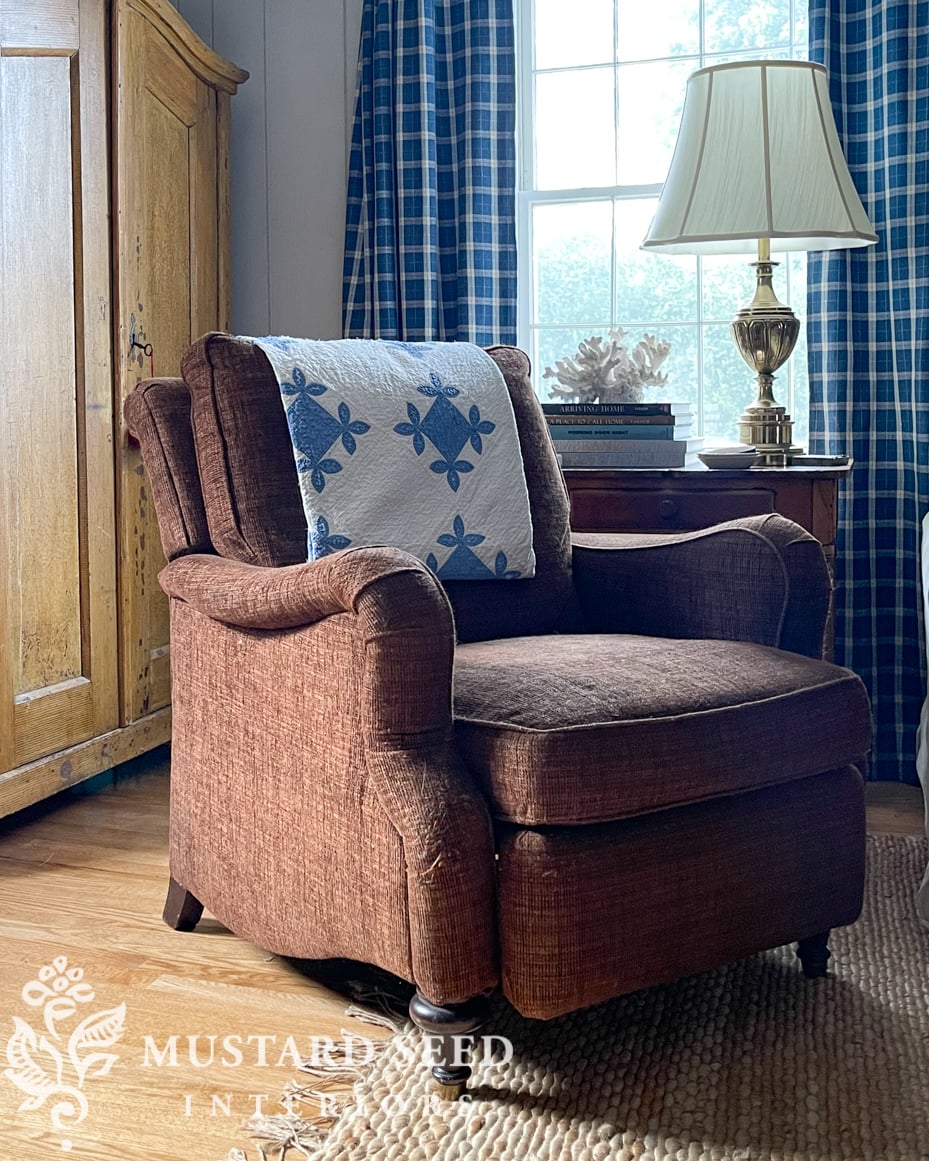
Shortly after we moved in, I bought a manual wingchair recliner off of Facebook Marketplace for $40. I had a feeling it would be a “placeholder” for a nicer recliner in the future, but it seemed like a good tester piece. We could see how much we used it, see how it fit in the room (while fully open), and help us make a more informed decision in the future. I intended to make a slipcover for this recliner, but after using it for a few weeks, it became clear that it wasn’t worth the effort or the cost. The chair wasn’t comfortable and piece by piece, the mechanism was falling apart and got to the point where it would just randomly pop open.

So, for almost a year, I looked around at recliners. I looked at new and used and was very wishy-washy and undecided. I didn’t mind saving up for a nice, new recliner, but I had a feeling I would want to slipcover a new recliner just as I would a used one. I also got lost in the mixed reviews on bargain recliners as well as ones from reputable brands. I even asked my Instagram followers for more personal reviews, hoping to find an overall favorite, but I received a smattering of recommendations. (I will share those in a post, by the way, since several people have asked.) That was helpful, but it didn’t narrow the choices down.
I hopped on Facebook Marketplace again to see if anything new had been posted. A recliner caught my eye for its styling and price. I liked that it had seat and back cushions, which generally added more comfort, and that it didn’t look at all like a recliner. It looked like an English armchair, which was just what I was looking for. Even the turned legs stood out as something I liked better than anything new I was considering. And, best of all, it was $100. It’s nothing to sneeze at, but I felt like it was a great deal.
I drove that day to pick up the chair. I sat in it, reclined, and gave it the sniff test. It passed all of the tests and I bought it. When I got home, I looked at the cushions a bit closer and realized they were down-wrapped, which is my preference. I also tried to find the chair and discovered it was the Oxford of Charles recliner by Bassett, which is almost $3,000 when not on sale. The stationary armchair is still available, but the recliner is not. I’d say $100 was a pretty good deal!
Relishing in my find, I gave it a good vacuuming and started making the slipcover for the recliner in less than 24 hours.
Well, we all had to test it out and get our smell on it first.

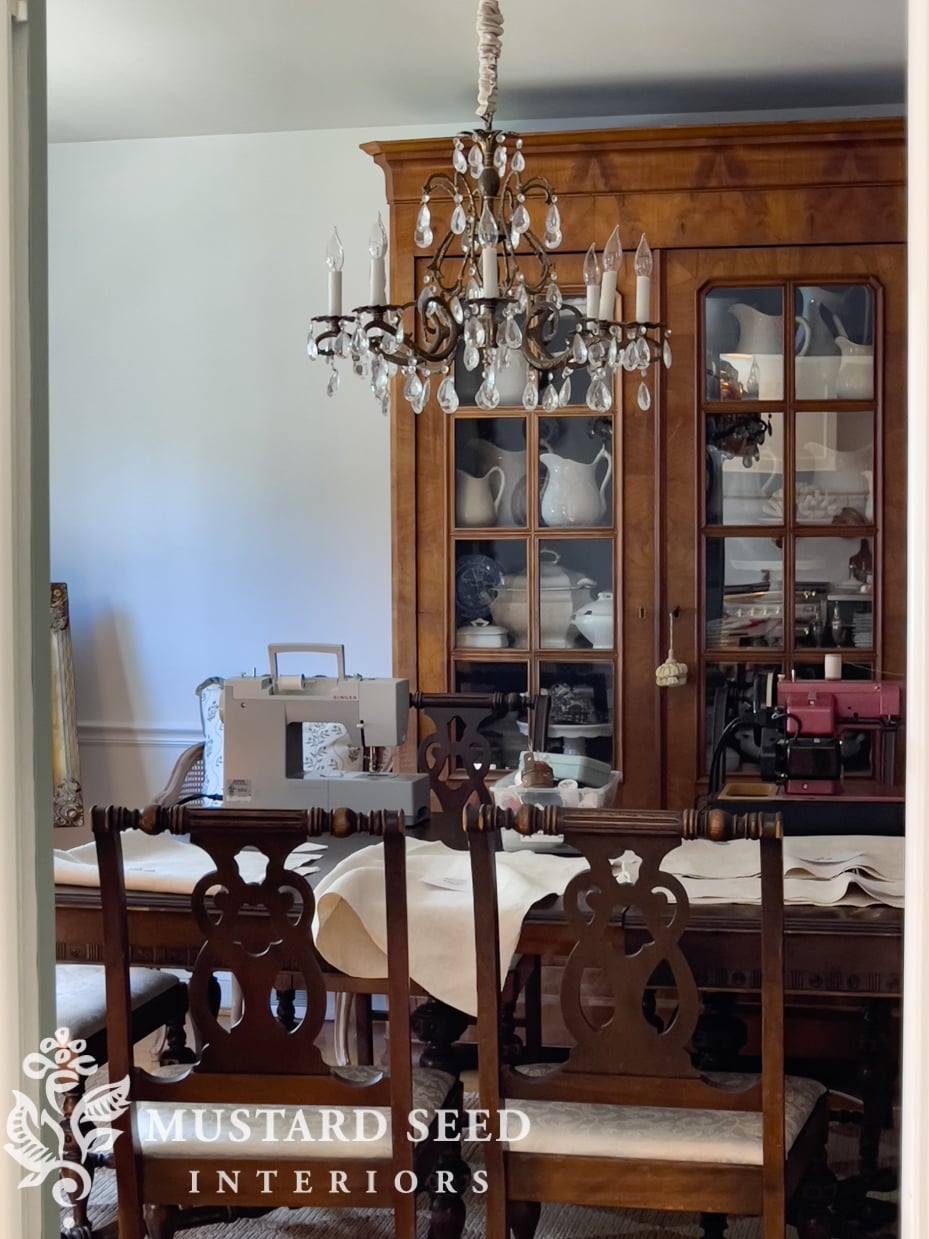
And, I called reinforcements since this was a big job. Thankfully, my mom was free to help with the recliner slipcover project and I tacked in a few other sewing projects that have been on my list. I no longer have a dedicated sewing room, so I set up the machines on the dining table and we took over the room.
I examined the chair for quite a while to make a plan on how I would tackle the slipcover. I’ve made plenty of slipcovers and done lots of upholstery projects, but working on a piece that has moving parts is a whole different ball of wax. My first big decision was to cut off the back cushion so I could make a separate cover for it. I felt it would look too bulky if I covered the cushion and the back together. This is what I would do if the chair was stationary, so I decided to approach it that way and go with my first inclination.

As I do with all of my slipovers, I started by cutting pieces of fabric and laying them in place. Since the recliner needed to move, I decided to make the slipcover in pieces. The slipcover would be made of seven pieces – The back, the back cushion cover, the seat cushion over, two arm covers, and two upholstered pieces on the folding footrest.
Oh, as far as the fabric, I used antique hemp sheets from my stash. I buy them from a wholesale supplier because I used to sell them and I order bulk. You can find hemp sheets and rolls on and , though. I used four sheets for this project. If you’re going to order several from a seller, I would ask for them to pick ones that go well together and ask for a discount for buying multiples. If you’re using decorator fabric, I would order 10 yards, so you have plenty to work with.


This plan worked because the construction of the chair allowed for the arm slipcovers to slide between the seat and the arm. It also worked because the seat cushion was removable.

Cutting off the back cushion was the right thing to do and ended up working great.

As I was sharing the process on Instagram, people were asking for a tutorial. Unfortunately, I was making it up as I went along, so I wasn’t going to be able to make a tutorial. What I will say, though, is it was a challenging slipcover and I wouldn’t suggest trying to slipcover a recliner until you have a few other slipovers under your belt! If you’d like a full tutorial on making a slipcover for a chair, you can find a video series I made a few years ago HERE. It will walk you through piecing, pin-fitting, making custom piping, covering a cushion, and all of the finishing details. Once you learn the principles, it becomes easier to get a bit more creative with difficult pieces like a recliner.
To hold the pieces together and in place, I tied the back to the side of the arms where they meet on each side and I tied the back piece to the frame before the “flap” that allows the fabric to drape when the recliner is open.

Because it’s hard to show in pictures and fully explain in writing, I shared a little walk-through of the pieces and the ties and saved it to my Instagram highlights HERE. But, here is how it turned out!

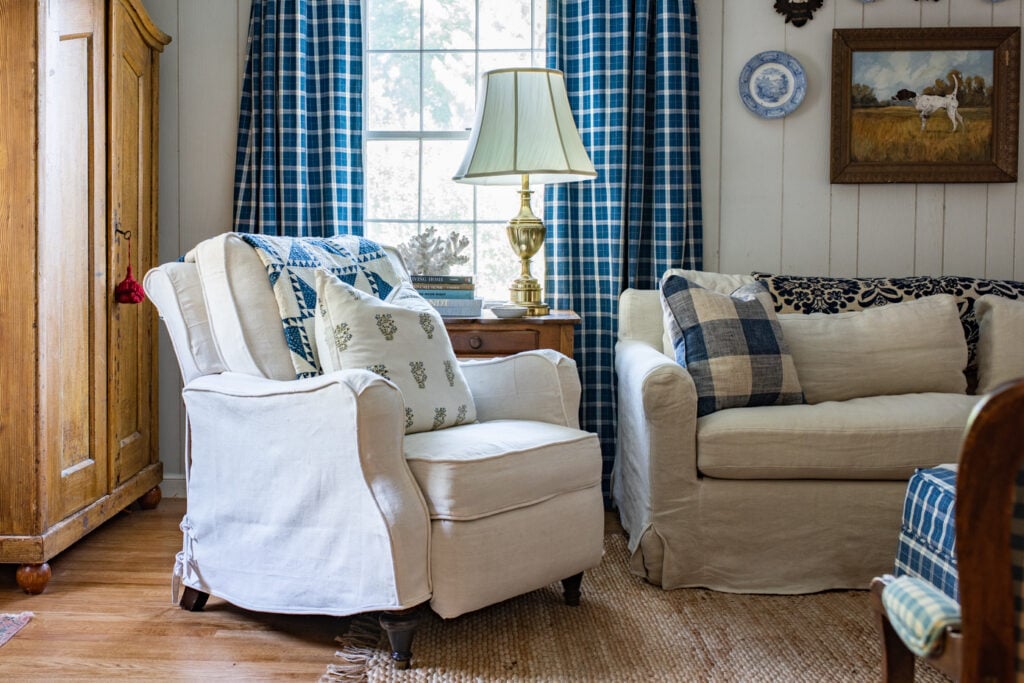
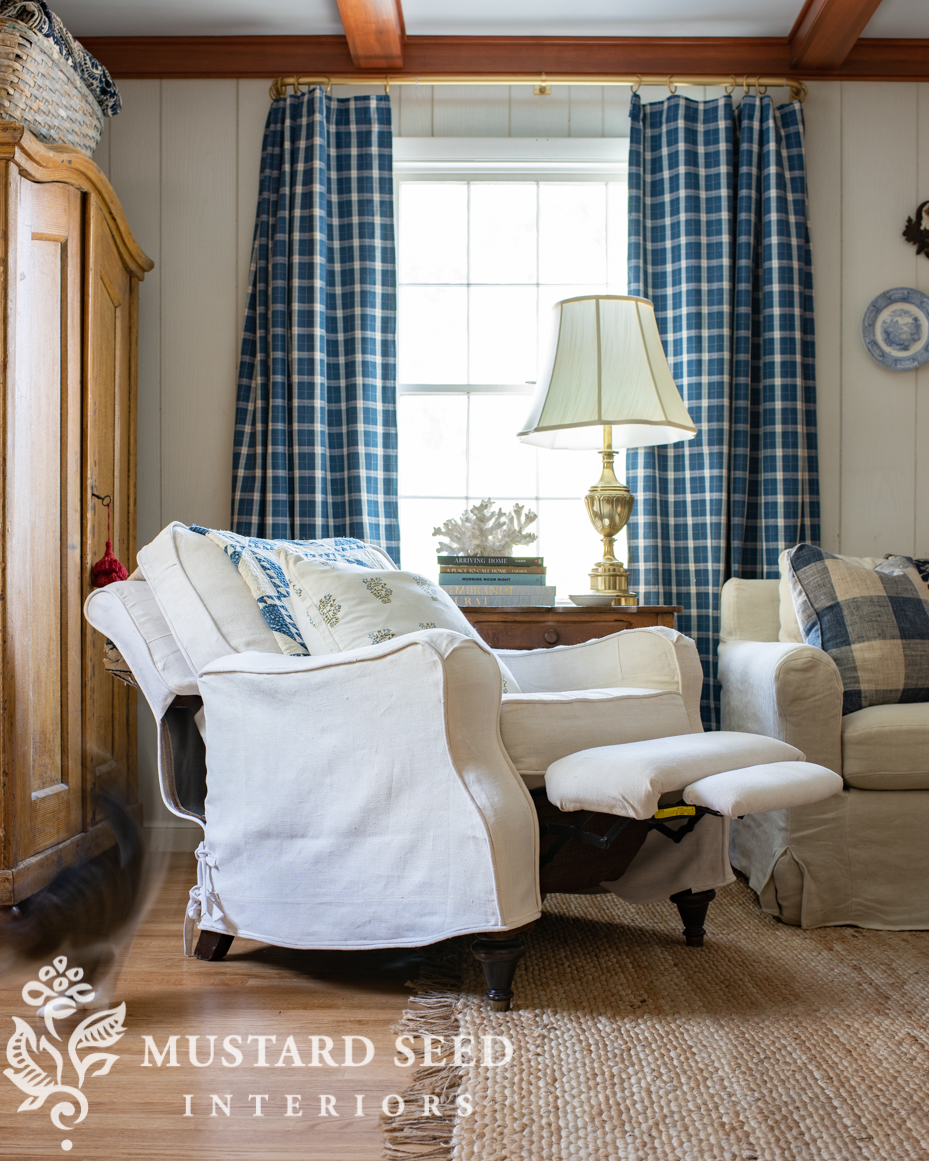
I absolutely love that it doesn’t look like a recliner at all. The scale and style fit perfectly with the room, which I wasn’t 100% sure I would find in a recliner.

And yes, it still opens and closes! I was a little nervous the slipcover might be fiddly as the recliner opened and closed, but I made it a pretty snug fit, so you don’t have to worry about it at all. It moves freely and doesn’t need fluffing after it’s closed.

It’s not perfect, but my slipcovers never are and I’m okay with that. I am super proud that it works so well, though.

And it looks sharp…

I’ll be doing more work on the living room soon and I can’t wait to see how evolves. I’m hoping to have it all completed by the holidays…

A few other room sources…
The pillow is from JSH Home Essentials. The rug is from Rugs USA. You can read about how I made the curtains HERE. The European stag antlers are from HERE.


29 Responses
Honestly that’s amazing.
Congratulations!
Wow, that project turned out to be amazing!! It looks perfect in the room.
Nice job!!!!
Another win!
PS. Think you meant 10 yards vs years… 🙂
So Fast and looks wonderful! Is that your new couch? I love it also
Yes! I will be sharing that tomorrow.
Ha, thank you! yes, I fixed that.
Great job! You were very smart to remove and cover the back cushion separately.
Recliners are certainly very comfortable…thank goodness they are making them a little more attractive now. They used to be hideous!
Just wow. Yeesh, Marian – you really can do almost anything. Very impressive. Looks GREAT and what a fabulous piece of furniture scored so frugally. WELL DONE!
I might have the patience to attempt this project if it can be done without the piping. I know it looks much nicer with piping but is it absolutely necessary? I don’t have enough patience for that? The recliner looks so lovely with your cover!
You don’t have to use piping. Some slipcovers don’t have it and it looks fine. For me, it adds structure and makes it look more polished and, honestly, it hides my imperfect sewing!
What a find!!! I love this so much. I would love to find one!! Thanks for posting. You are extremely talented. I enjoy your blog very much.
That is impressive. Im curious if you plan to wash it or replace it. You and your mother are quite a team!
Great job. Wonderful makeover.
I think your new slipcover looks just fine in your living room. Years ago I made a slipcover for a wicker sofa. I agree that many of the older recliners were awful looking. Yours is certainly not in that category.
You are a brave woman! I’ve been toying with the idea of just such a project but I don’t think I have it in me. I’ve slip-covered a sofa and loveseat and I think I’ve hit my lifetime threshold for slipcover stress. Yours looks great – good job!
there’s something about a sharp dressed … recliner!
You do a wonderful job! I wish I could do that. Do you have a problem with you cats scratching all your furniture? We have a cat it’s my son’s we love her but she is making a mess of all my furniture!
A successful slip cover on a recliner is a HUGE victory!!!! Awesome
Beautiful job! Just wondering why slip cover instead of reupholstering?
Good question! I considered upholster, but that would’ve involved dismantling more of the chair (specifically the side panels on the arms and parts of the back) and I really didn’t want to do that. I also wanted the arms and cushion covers to be washable.
Amazing!! The stars were definitely in alignment for you the day you found this treasure. Wow! And what a beautiful slipcover. I know it’s wrong, but I’m jealous of this beautiful piece of furniture!! It would take me months to make that slipcover. You are such an inspiration Marion.
Is it necessary to have a heavy duty or commercial sewing machine to do slipcovers? Would really like to attempt to slipcover cushions for set of antique wicker but I just have a regular machine. I love your recliner, and the covers look just perfect. What a lucky find!
I used a typical machine for a few years as I made slipcovers, but it started to choke on the heavier fabrics and multiple layers. When you have piping, a skirt, and the body fabric of the slipcover, that can be 5+ layers of fabric and it was just too much for a standard machine. I upgraded to a Sailrite upholstery machine to handle those layers and heavier fabrics.
Now that looks like a chair that belongs in your house! I appreciate all the slipcover tutorials that you made over the years. They helped me understand how to see the slipcover “inside out” and though I haven’t slipcovered any chairs, I have slipcovered desks, filing cabinets, stacks of plastic containers, kleenex boxes, and air conditioners with the same technique! Once you’ve got the mental part down, you can slipcover anything!
I really like your approach on this slipcover. I do reupholster my chairs and love a good project but never choose a slipcover. The way that you did the back and the sides is brilliant and makes perfect sense, especially when you see the chair reclined. AND I am also a piping fan – such a good touch on this chair.
Great find! Beautiful, practical slipcover!
Probably ten years ago (?) I followed your tutorial on making a slip cover for a large chair and a half. It was a great and and easy to follow tutorial. Ofcourse I thrashed several rooms making it leaving a trail as I ran back and forth to the computer. I only made one mistake in the pattern (upside down} in an obscure place. Honestly the ottaman gave me more problems than the recliner. So Marion konows what she is doing!!!!
You are amazing, wish I had 1/10th of your talent!
Love your dog Sebastian, have admired him since you got him and thought I might get one that looked similar, well I found my Maysie, She could be Sebastian’s little sister.
Would love to try a slip cover some day, have the perfect chair.