
I’ve been working on my deck off and on throughout the spring and summer and it’s finally starting to come together. I know I’m not going to break any makeover speed records with this project, but that’s life, right? Spaces take time to come together. So, there is still more to do, but last week I jumped a big hurtle – I made new chair cushions for the vintage iron armchairs my mom passed along to me and I thought I would share a tutorial on how to make a chair cushion.
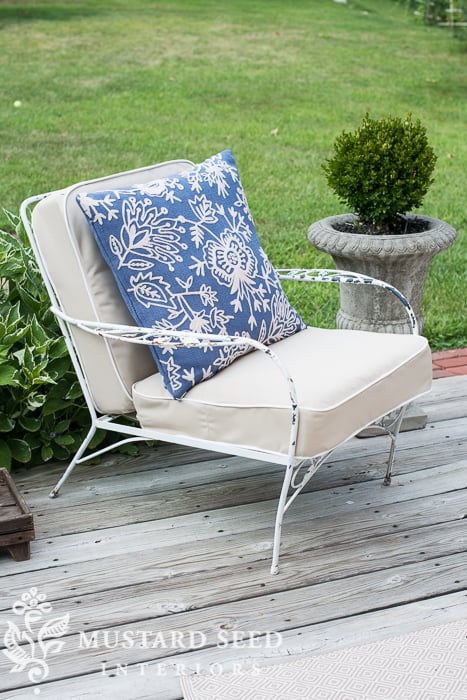
They really, really needed new chair cushions. The old ones were deteriorated, mildewed, faded and ripped. They were beyond cleaning or recovering. I needed to start from scratch.

The chairs are comfortable and in great shape, though, so it was worth the time to make new cushions.

I actually tried to find pre-made cushions that were the right size, but I couldn’t. They were either the right size, but not thick enough or they were thick enough, but too big or too small. Making four cushions from scratch is not my idea of a fun time, but I knew I could do it, so I went the DIY route.
I needed four 20 x 21 x 4″ anti-microbial polyurethane cushions for the two chairs. It was handy that all of the cushions are the same size, but I could’ve cut two of them down for the backs, if needed.
I also needed 3/4″ thick polyester batting, enough to wrap around each cushion.
For indoor furniture
I like using as many natural materials as possible…cotton batting, feather filler, etc., but for outside, it all has to be quick-drying to avoid mold and mildew. My deck is not covered, so all of the furniture, including the cushions, will be in the elements.
Making the cushions is super simple.
Cut the batting to the same width as the cushion and long enough to wrap all the way around. The two sides will not be covered.

Spray one side of the cushion with a heavy-duty spray adhesive. This prevents the batting from shifting, specifically when it’s being stuffed into a cover, which is no easy task.

Spray one side of the foam cushion with adhesive and stick it to the batting, making sure it’s on straight and smooth. Repeat with the other four sides, until the foam cushion is wrapped.

Cut off excess, so the batting is flush with the cushion.
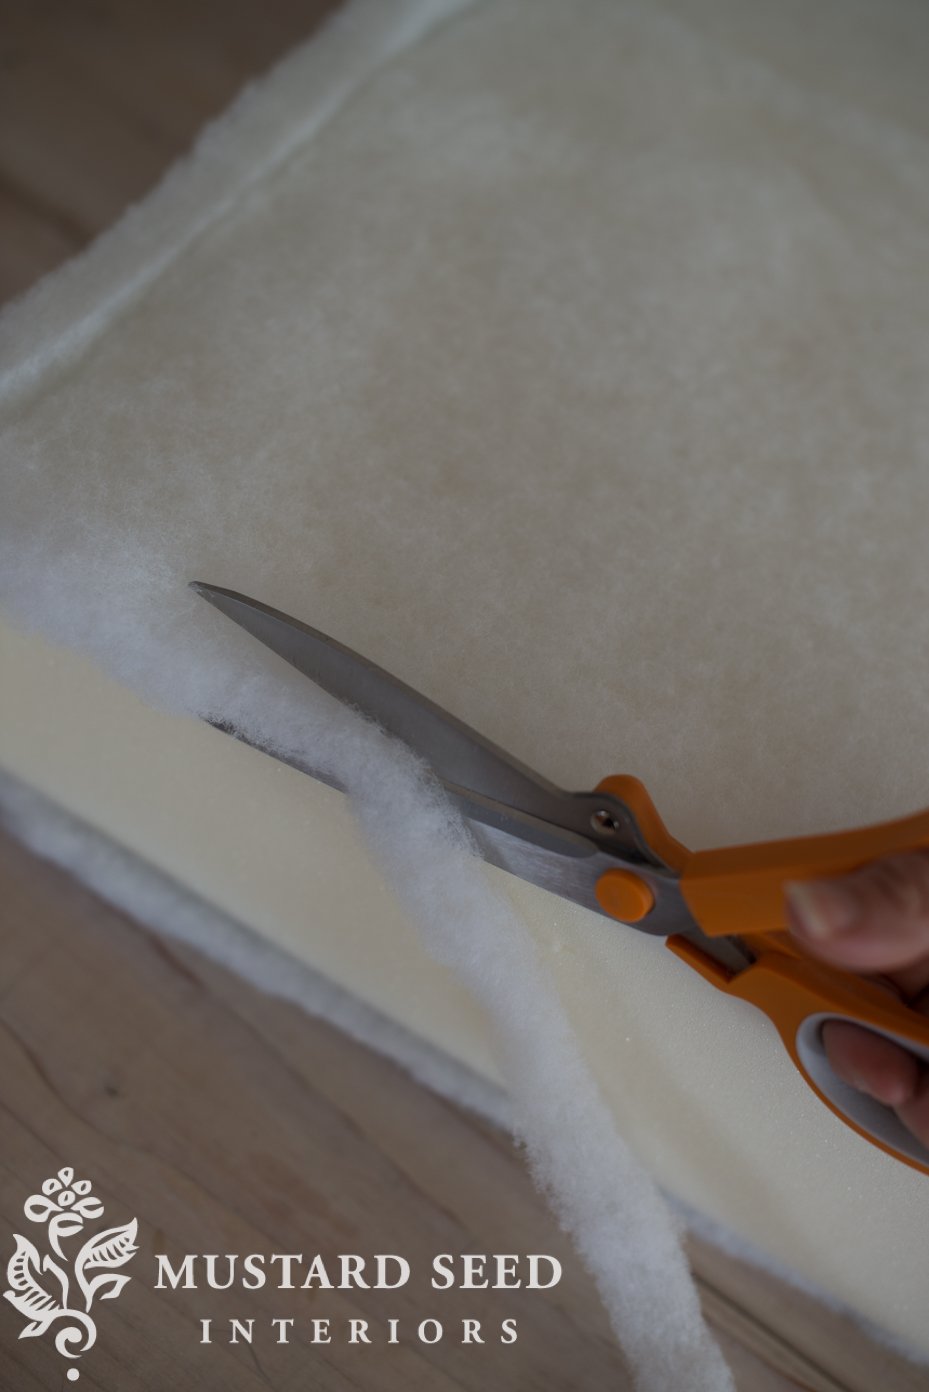
Here’s a quick video tutorial, showing exactly what I did, since the directions above aren’t very detailed…

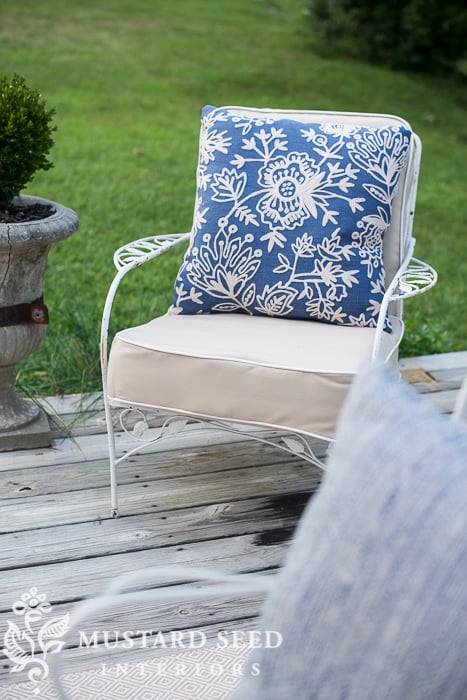
Making the cushions was the easy part. Now, I needed to make all of the cushion covers, including piping and zippers.
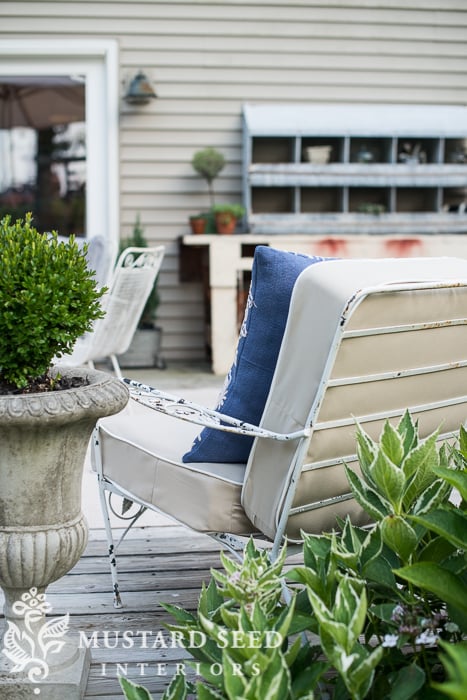
(And I really need to clean up that grease spot under the chair. It looks like we’ve been parking our car on the deck.)
Oh, and that pretty crewel-work pillow is from Pine Cone Hill, but I’ll share more on those and the outdoor rug in another post.
To see how to sew a zipper closure on a box cushion, check out THIS TUTORIAL.
For more upholstery tutorials, click HERE.

![]()
A funny little behind-the-scenes thing before I sign off. We live in a rural area and there are tractors lined up behind our house (stock and maintenance from the local tractor store.) And, of course, they are all bright orange! So, I have to be really tricky with my camera angles and cropping to keep the bright orange tractors out of my pretty deck pictures!

I think it’s time to plant some hedges.
Subscribe today
and receive a free e-version of Milk Paint Look Book One (full of inspiration, tutorials & tips).
Let’s move mountains together…
![]()
Disclosure: Sailrite, one of the brands I partner with, provided the foam and fabric for this project. I purchased the batting and adhesive. All opinions shared are my own.


26 Responses
Love those chairs and the cushions look great! I would love to be able to use light colored fabrics outside but with 3 muddy dogs that is not an option.
Question: Finished size was 20x21x4, what size did you cut your fabric?
Love those cushions. But oh my gosh I love the last photo with the tractor peeking into the photo the best. I grew up on a farm and the best memories I have are of manure fights, chasing down loose cows and horses and riding the tractor in the early morning. Maybe they’re beckoning you to move out onto a little farm someday. Thanks for the tutorial 🙂
Think I have the twins to your chairs. I am a veteran of many wrought iron adventures and only wish I had your tutorials. I find the best outside fabric is Sunbrella as it will not fade etc. I bought some HGTV outdoor fabric (at JoAnn’s) last year to make cushions for my daughter and guess what> The color just disappeared. I went back to the store and they didn’t care. It is the same labor no matter what you use but you want it to last and last. Guess I will get off my soap box.lol
I have a card table wrought iron table and chairs in my kitchen from the 1920’s and it looks really nice. I sprayed it to look rusty brown with toile seats. You can tell really old wrought iron with
“spoon feet” not the saucer feet.
If you wrap the cushion in a plastic shopping bag with the opening facing the part of the cover farthest away from you, it will slip into the cover much easier, then when it’s in, give the bottom of the plastic bag a tug, and it will slip out.
Janine you are brilliant!
I cut a piece of super thin dropcloth plastic (the cheapest kind sold on a roll at any big box store) to fit all the way around the cushion and then use a shop vac to flatten it (sort of like a cheap space bag thing) – the cushion goes into the cover real easy, take off the shop vac and it fluffs right up – then just fish out the plastic. Easiest method ever to stuff the cushion back in!
Thanks for a great post! I have always been in love with tractors and wouldn’t mind at all seeing them in your backgrounds. They would add a whole new dimension and level of interest. I had a quick driving lesson on one a few years ago on a farm in Prince Edward Island. My dream plan: to have a small farm with my own tractor and pick -up!
You’re doing a great job!!
The cushions are a perfect fit. I picked up similar chairs at a vintage show last year and found cushions at Target on line for reasonable price. Next time I will try your method!
Thank you thank you for this post!! I have the exact same vintage iron chairs with a settee
And ottoman. I have had a heck of a time finding cushions that fit AND cute! I’m going to give this project a whirl!
You did a great job! I love Sailrite, they have a great variety of reasonably priced fabric and loads of DIY videos! I took an upholstery class recently and the I bought the fabric from Sailrite, quickly shipped and beautifully packaged!
I was going to offer the plastic trash bag trick too. I have a three – seat vintage glider that sorely needed recovering but although I can sew, there was no way I was going to tackle piping and welting. So I wrapped my Sunbrella fabric around the existing vinyl-covered cushion like an envelope and just attached it with duct tape. Still looks great after five years, but my glider is under a roof. This hack also uses much less fabric. Love your projects and I’m glad you’re branching out into outdoor decor…no pun intended.
Marian:
Every outdoor chair cushion I have ever seen for chairs like this has the bottom cushion that goes all the way to the back of the chair, with the cushion that your back rests against sitting on top of the bottom cushion. They just don’t look quite right to me. I was actually just going through two outdoor furniture catalogues before I checked e-mail and none of those chairs has the cushions set up like this. I referred back to them when I saw your post. My deck furniture is similar to yours and the cushions that came with them have the deeper cushion on the bottom with the smaller one resting on top of it. Might want to check it out before you make any more.
Deborah
I concur. All my vintage wrought iron pieces have the bottom cushion that goes all the way to the back and the back cushion sits on top of the bottom cushion. You might just need to switch your two cushions.
Jan
Yeah, they actually do fit the other way. If you see, the bottom cushion is hanging over the front. I finished them, threw them on for the pictures and starting packing for our vacation. I fixed them and just need to take some new pictures. 🙂
Thanks. Just what I needed as I prepare to recover patio furniture. I have always had a weakness for “C” chairs. As I child, I would watch my grandmom with her larger bum sit in the chair and wonder if it would touch the ground. Unfortunately, no one knew how much I loved those chairs. I’ve bought some nice chairs but never seen any like the ones from my childhood. (60’s)
Bonnie
So we totally did it! We went to an auction on Saturday and bought a 2 story traditional. I am a home owner! So thank goodness for the DIY tutorials. I call the house farmhouse meets city. The inside is old but in a good way. Old wallpaper, old cherry hardwood floors and great old molding. We are doing all the reno ourselves. But the best part is we got it for a song! It also has a big beautiful yard. I couldn’t be more excited. I couldn’t be more happy about all the projects. I will be using you as a guide post and I don’t think I feel overwhelmed, just happy for a new beginning. Thanks Marian!
I’d like to win the covered ironstone dish. Thanks for your site just love you !
How much did the supplies cost?
Hi Marian-
I was wondering if you know the name of this fabric! I just love it and cannot find on Sailrite website.
Thanks
Amanda Bodden
Where did you buy your foam? Is it dry fast? How much? I’ve been searching online and one site wanted $112 for one seat cushion. That didan’t include the back cushion or cover or even fabric. I will need 9 cushions And thus far exterior foam has made my project cost prohibitive. So if you have any suggestions for sources I’d love to know about them. Thanks!
Thank you so much for this! My outside cushion covers were shredded and filthy and an unusual shape, but the cushions inside were fine, so I opted to make new covers and am nearly done. But, I was wondering what I’d need to do if (when) the insides need to be replaced. The insides are a combination of foam and batting, and now I know how to replicate them. Perfect!
I’m sorry I’m new to this. I’m not sure if I’m missing it or if you didn’t put it in the instructions. you were very clear on how to cut the foam & batting but how much fabric do u need? how much bigger did u cut it
A simple trick of stuffing the foam cushion into cover is to wrap a piece of plastic like you did the batting/no glue. It is slick and will go into cover easily. Just pull on plastic once inserted and you are done:)
I too bought material from JoAnn’s. It was a Waverly brand. The design just faded away, with only one seasons use. As,you said, JoAnn did not care
I need to make cushions of this type for a pair of indoor chairs. You mentioned you prefer natural materials for indoors. What materials would you suggest to make the cushions (not the covers) for indoor chairs?
I have those same exact chairs plus I have the sofa, coffee table and accent table. The furniture has been in our family for close to 50 years and want to be able to continue to use it so I’m in the same position of having to make cushions for it. Thank you for sharing.