
The family room is the first room I stepped into in our house and I’m sure that was planned by the realtor. I was charmed by the 1940’s part of the house – the glass knobs, original creaky floors and plaster walls, but it was the modern addition containing the family room, kitchen and master suite, that sold us on the home. The family room is at the back of the house and has high ceilings and lots of space. With as much as it has going for it, the room is lacking a bit in the architectural detail department and I think a big room needs that. Or at least benefits from it a lot.

I knew I wanted some kind of 3/4 height wainscoting, but I wasn’t exactly sure of the style. When we took a little getaway to Charlottesville, VA we stayed in a charming inn and I found my inspiration…

…which I pointed out to Jeff immediately and the poor guy must’ve wondered if I ever stop decorating. How could I not be inspired? They had this fantastic 3/4 height trim in several rooms.
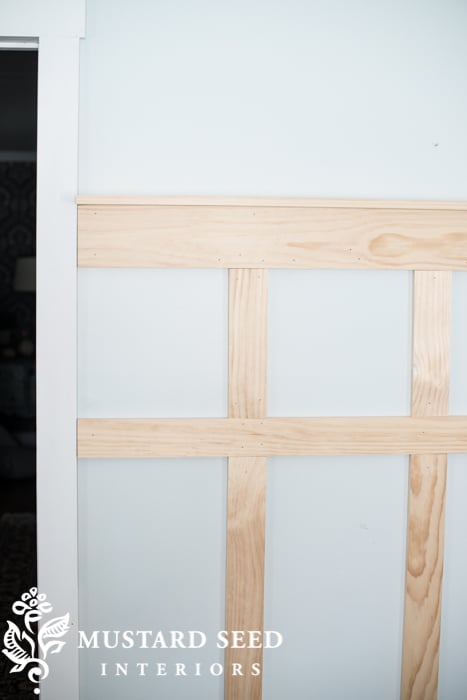
We didn’t want to copy it exactly, so Jeff designed a simplified version that would work with the style of our home and the other trim in the house. We’ve had the plan and the wood for a while, but we haven’t had the time.
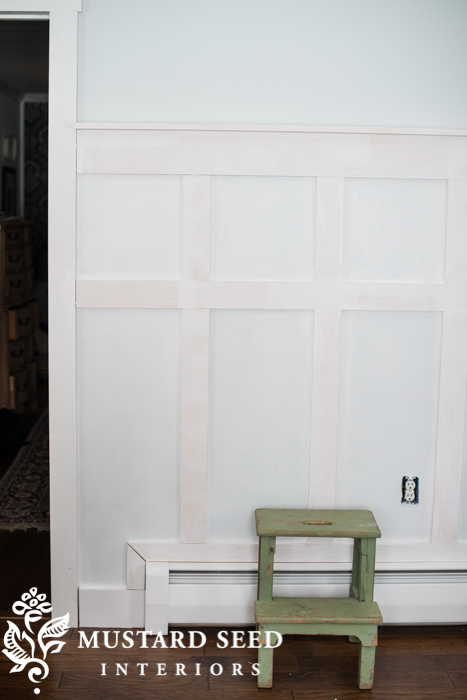
On Saturday, Jeff had time to get the trim started on the big blank wall by the side door…

Oh yes. Trim makes me happy.
Now it’s time to fill, prime, paint and caulk. (This isn’t a paid post. I just took a picture of what I used.)

As I’ve shared before, I like to fill nail holes with my finger. I feel like I can put it on neater and feel that the surface is smooth.
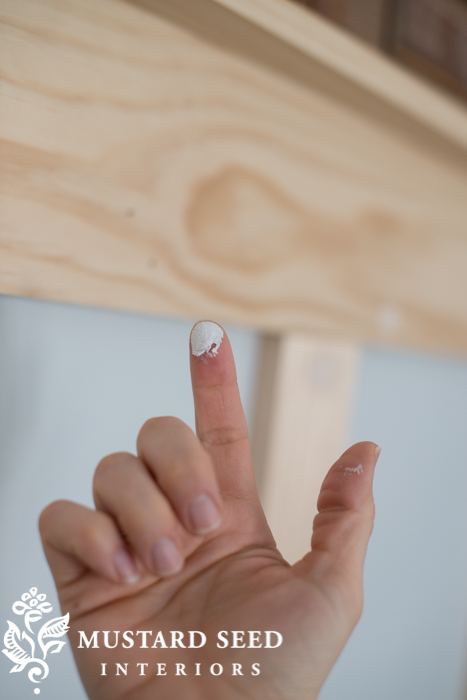
So, I just take a bit on my finger tip…
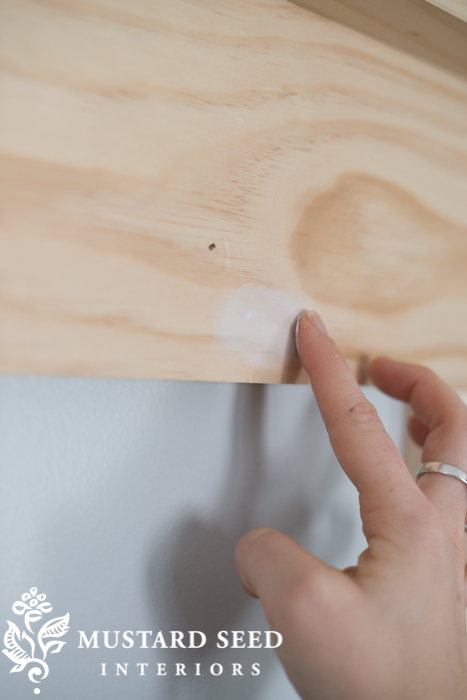
…and rub it into the hole. I work the spackle in a circular motion until it’s smooth.


My little helper worked with me to prime the trim and wall.
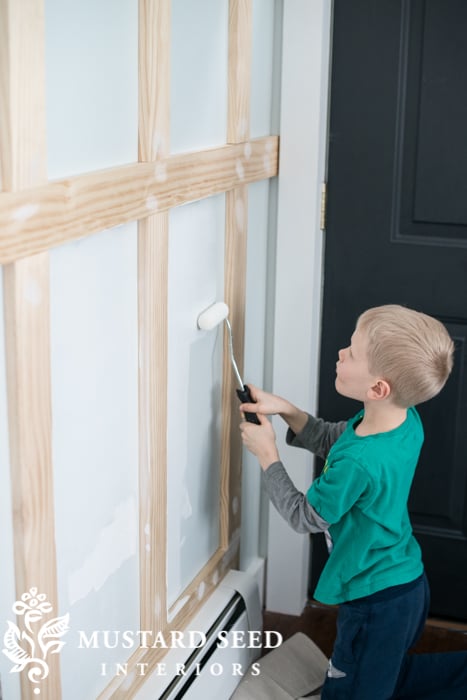
He rolled…

…and I did the cutting in and cleaning up drips and roller marks.

He kept saying, “Mom, this part needs a lot of help with your brush” as paint would be dripping down the wall. Well, we all have to learn! He actually did really well and I was the one who splatter pain all over the floor and my face. Really. My face. He got a kick out of that.
I haven’t gotten beyond the primer, so it still needs caulk and a final coat of paint, but it’s looking amazing so far and I can’t wait to see the entire room sporting the look. We’ll take it a section at a time and Jeff will share the measurements and how-to’s soon.
My mom had the day off work, so the two of us did some shopping together. I bought a bunch of ironstone and some other antiques. Some are going to the stash I need to start for the Lucketts Spring Market and the rest will be listed in the online shop soon.
I am hoping to paint, caulk and do some photo shoots tomorrow, but we’re expecting more snow, so we’ll see…


43 Responses
Everyone needs a great helper like yours! I just spent a couple of weeks with my “little” boy helper. He is now almost 30 and I’m helping him and his girl remodel his main bath in his first home. It is fun to see them all grown up and working on their own home! Can’t wait to see the room when you are done.
Love the character wainscotting adds! I can see what you mean by the vastness of the space – some added architectural detail would be lovely.
When we clad our nursery in board and batten I wish we had pre-painted the timber lengths. Would have saved some time (slash frustration!) in cutting-in. Maybe if you have more to go, it might be helpful to pre-paint your timber lengths before you attach them to the wall.
xoxo
Marian, you and Jeff are a great team and make it look fairly easy and so doable!
I enjoy your blog immensely and so like the results that you have achieved in your home. Have completed a MMS class in Ellicott City and looking forward to tackling my first piece in a room makeover.
Thanks for the inspiration and lovely times with your family…FUN!
It is looking very good so far and I know you will love it when you are finished! I did a similar technique in my study and now want to do more in the master bedroom. However, I don’t want to overdo it, if you know what I mean. I will look forward to Jeff’s info on how he achieved this look…maybe it will be perfect for my bedroom!
I love it. I can’t wait to see the how to and specs and ofcourse the final results.
Marian,
I am really enjoying the pictures of your angel helping you around the house. I am sure he is loving it and feels quite like the little man. 🙂 It is not only fun for him, but he gets more Mommy time when he helps!
Blessings
That is looking nice! Your family room looks great already, but when the wainscoting is done, it will look so cozy. I’m guessing it will also serve as a little insulation and could even save on heating bills. Seems like a win-win situation!
~Siggie
I really like the wall. I have one long wall in the dining room on which I have been wanting to attempt something similar. My son bought me a beautiful laser compound miter saw for Christmas 2 years ago and I am embarrassed to say that it still hasn’t come out of the box! I am looking forward to Jeff’s update!
I love trim too! Such a big “bang” for the buck. Can’t wait to see the finished room.
What a cute helper you have! My “helper” is 15 now and he actually really HELPS (i.e. makes the job easier instead of harder 🙂 ) – train them young!
Looks amazing! I’ve been wanting yo fo this in my own home. Can you provide the sizes of the wood boards used?
In my bath room i want to do a wainscotting but i do not what to paint the baseboards. Is there a way that i can do it with out painting and i what the rest of it to be white?
Looks great.Have you thought of reclaimed beams for the ceiling?
OMG!!! I love it. You’re so lucky your husband is handy around the house. Can’t wait to see the finished look.
Just love it!! And, having all boys, I love the little helper too!
That looks amazing! You’re going to love it. I did a board-and-batten style wainscoting in my tiny mudroom, and while it currently looks dirty and in need of repainting, I still love it. I really like how you framed around the radiator. It makes it look intentional.
The sneak peek of trim work looks amazing! What a sweet memory for you both to work on things together. We did that with our daughter when she was little. We actually built a house and she still remembers drawing and writing Bible verses on the 2 X 6 ‘s before the drywall went up. 🙂
Stay warm and dry! Winter is sure to end soon….right? The weather has been so crazy out west too. It has been so warm, my tulips are coming up a month early!
PS: I’m a finger filler too. You have more control that way 🙂
Several years ago we hired our first carpenter…My husband has always done 100% of the repairs and building of our home, barn, you name it he has fixed it…Anyhoo…..Hired carpenter had me sand, prime, paint, sand, then paint again every stick of trim …before putting up…so much easier and faster…a light sanding between coats of paint gives a little tooth for the semi gloss to hold on too….sure we had to go back and fill in countersunk (is that even a word) nailholes but soo much fast than cutting in….Since then we have beefed up trim around most doorways with column trim and bulleyes and for me/us painting and priming before installation seems much easier and faster…of course every piece is retro fit and marked on back- top or bottom. whatever so we know where it goes and I like the comfort of working on saw horses .Seeing it go up painted is almost magical, I am so easily impressed…Just a thought I would pass on.. whatever works for you…On another note my duaghter recived her new insulin pump with sensors last week….She gets sugar levels every couple minutes and her blood machine works with it…after she tests, blood machine tells her pump how much more or less insulin she needs….She feels safer than she has in years…she can drop from 120 to 40 in minutes…and the pump has an alarm a loud alarm….in case it is dropping as she sleeps….modern medicine is a wonderful thing….Maybee’s Mom
The wainscoting is looking amazing and I cant wait to see it finished. Counting down the days until Luckett’s… it seems so far away.
The wainscoting is looking amazing and I cant wait to see it finished. Someone mentioned using reclaimed beams on your ceiling which I think that would look ever more amazing. I love the way “Dear Lillie” left her beams in the family room dark.
Marian – It’s looking good. The room will have so much more character. Can’t wait to see the end result.
Marian..it’s lookin good! Such a great job so far….it’s so nice having free help isn’t it?…lol…actually mine are out of the stage of “wanting” to help…your little one is adorbs. I was thinking about doing that in my bathroom soon, so I’m glad to watch you first. lol I just did a tongue and groove ceiling this past summer and I’m in love with the difference that texture makes! I can’t wait to see your finished product!
Looks amazing! This is great, I hope to one day use your skills and decor inspiration in my own home. I’m a sucker when it comes to wainscoting!
Thank you!!!
I have this blank wall behind the upholstered kitchen nook in my 50’s kitchen and now I know what to do with it. Thank you for all you do. Glad to see your little “handyman” working side by side with mom. Memories are made of this. God bless.
It’s already looking good, Marian. Oh, and tell your little helper he did a great job.
Looking amazing! So fun that your son is getting in on the action. My oldest wants so badly to help with everything but she’s not quite there yet in terms of it being helpful vs. frustrating.
Hi Marian
I love your present wainscoting project. Can’t wait to see it finished.
I love this type of trim work and detail, and had asked my husband a couple of years ago to add a full wall of 2″ trim work in our living room from ceiling to baseboards with custom made crowns to meet. He did such a beautiful and original job that it inspired me to do almost the same treatment in the dining room. He did a full ceiling to baseboard trim work on one wall, and the rest of the dining room he did half walls with chair rails, and of course custom crowns as well.
I was on a Trim Roll, and I believe my husband was too. The trim work added so much architectural detail to the rooms, and our home was really feeling original and much more interesting.
The next project was the large wall along the stairway from the main floor to the second floor. It was alot of work for my husband, but it was well worth it. That large wall used to be so boring and now, it is like a work of art. We refuse to deface the wall in any way, and will not put one hole to hang any pictures. The wall just doesn’t need anything and looks beautiful all on its own.
The last trim work project was one of the walls leading to the basement. This time my husband used wider trims. I think they are 4″ or 5″ inches wide. He did half the wall with a wider chair rail type ledge. It looks so beautiful .
Trim work doesn’t look too hard to do, but after you get the trims up, you have to fill the holes, sand a little, prime, caulk, and then paint. There are many steps just for one wall.
After reading your blog today about your inspiration for your family room, it has inspired me to do one large wall in my master bedroom behind my bed. I just talked to my husband about my plans, so we will see what happens. I haven’t done any work in that room for at least three to four years, and just one wall will change the feel of the room, and make it even more beautiful.
Thanks Marian for inspiring me.
I love this look. I have a very large guest bedroom and I want to use this trim. I’m looking forward to the instructions!
Hi Marian,
I saw this chair and ottoman in the new Grandinroad catalog and I love it. You might like it. It is called the leather and teak Augusto chair and ottoman. If you check it out, let me know what you think.
Letting your little one help will instill a good sense of DIY spirit that I am sure will carry on to adulthood. My son just hated that his dad made him work in the garden but out of 4 boys in adulthood, guess who the gardener is! He will take pride in a job well done too and I love the trim too!
You two make it look SOOOOOO simple! Love it!
Marion it looks fabulous already! You have quite the helper there. Look forward to seeing finished results!
tell us the size of the boards you are using and how they are being attached. It is looking great!
I love wainscotting, this is a really cool version. Gonna steal it!!! Thanks
May I borrow your husband!?? I promise to return him after he finishes all my projects. You are blessed with someone who is skilled and wants to fulfill your dreams. I am sure you know that.
simply LOVE!
I can already see how beautiful this will be! It will add so much character and charm to your space. Can’t wait to see it all finished. Go, Jeff! : )
Jeanette
So exciting! Can’t wait to see it finished!
Wow! It does look amazing already!!!!
I have an empty wall downstairs… huuummm…
This is inspiring!!!
XOXO
Claudine
Love the molding! I’ve been wanting to add some to our entryway as well as the craft-play room but we have only 8′ ceiling height. I’ve heard people say that we shouldn’t add it because it’ll make the room feel too small and cramped and others say to lower the height of the wainscoting. What do you think? Any suggestions?
It already looks amazing. I think it is the perfect idea for the room, and will add so much. Can’t wait to see it done… and so nice to have your good helper to make it go faster!
Cindy
Love this DIY tutorial. We bought a new house two years ago and during the design stage I wanted to add wainscoting but at the time could not afford the cost. I saw a post somewhere a while ago when searching for wainscoting ideas similar to the style you are installing. Now… I’m inspired to try this myself. Thanks for posting your ideas and tutorials.
Love it! Love your family room! Would you please share where you found your ceiling fans with uprights? I just had all of ours removed in our home in Arizona and have not yet replaced and I am not sure we can make it without them this summer but I can not find anything I like!
Hi Marion! Did I miss Jeff’s measurements and how-to somewhere? I would love to know how this was done.