
I’ve shared before that I grew up an Army brat. Some kids really hate the instability of moving around, but I thrived on change and, despite crying when they were ripping up flower beds to work on WWII era pipes, I loved living on a military base. We could walk everywhere and had so much freedom as kids. There were also tons of programs to get involved in. I did theatre, baton twirling, tap dancing, basketball, soccer, baseball, ballet, tin-punching, rafting, hiking, ice skating and was a part of a ski club…it was a really cool way to grow up. My mom also got involved in the classes they offered for military wives. One of those classes was learning how to frame and custom mat a photo.
I remember my mom taking family pictures to the frame shop to work on and, eventually, we had a beautiful gallery wall. So, it wasn’t far-fetched for me when I decided to mat my own pictures. I didn’t have access to a framing shop, so I didn’t make my own frames, but I’ve been collecting wood and gilded frames over the years. I found most of them at thrift stores, yard sales, and antique stores for just a few dollars each. I didn’t pay more than $10 for a frame. And last week, I shared my own gallery wall.

When I shared my gallery wall, I received a lot of requests for a tutorial on how to custom mat a photo, so here it is…
How to Custom Mat a Photo (with a Logan Mat Cutter)
I couldn’t find the exact mat cutter I have, but this one listed on Amazon for $198 is almost identical and may just be an updated version of the one I have, since the model number is the same.
In the video, I talk about “weighting” a mat at the bottom, which I decided not to do with the picture I was matting, but I wanted to show an example. The picture to the right of the doorway below is “weighted”, meaning there is more mat below the photo than above it…
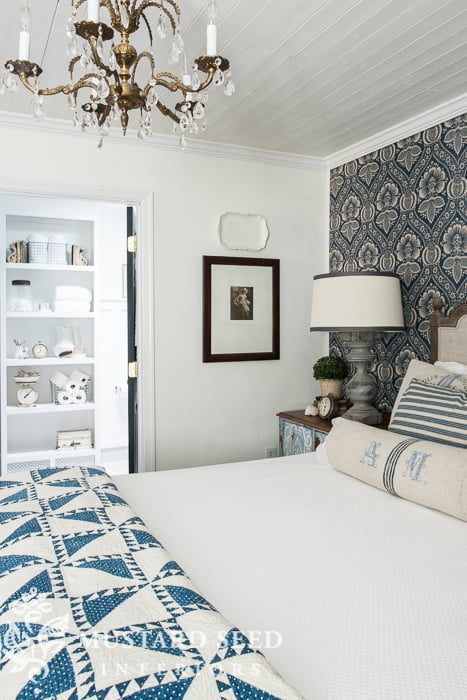
I don’t know the technical reason for doing this, but it’s a common option in custom framing and I do think it sort of “lifts” the picture in a custom mat. I like the way this looks when there is a lot of mat surrounding the picture. I think it can look a little odd if there’s only a mat border of an inch or two, but that’s just my opinion!
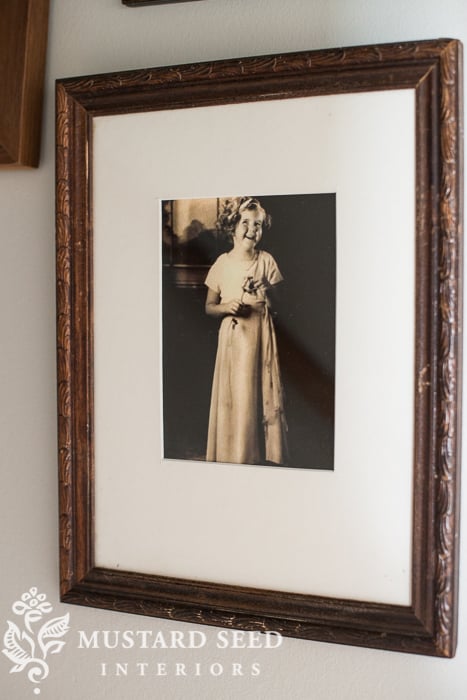
Since I am framing original antique photos, I used an acid-free mat and tape to hold the picture in place. I don’t use any glue and I don’t seal the back of the picture, in case I want to swap it out later. I back the piece with cardboard and hold it in the frame with small wire nails. If these pictures were exposed to sun, I would use U/V protective glass, but since these are in a hall with little or no natural light, I purchased regular glass. (It was $10 for five pieces cut to custom sizes.)
I hope this gives you some direction if you’re interested in doing some matting and framing of your own!
We’re expecting temperatures in the high 40’s and low 50’s next week, so I’m hopeful that the tile will be installed. Fingers are crossed!


23 Responses
Can you tell me what kind of mat cutter you use? I formerly lived in a large city where I had access to a “do-it-yourself” frame shop, and could use their equipment. I no longer have access, in my small town, to such a facility. It has been my experience that to get a truly professional look on the mat cut, one needs to have some sort of tool especially designed for that purpose. Just cutting the mat with an Exacto knife does not always give such a nice look. I looked up mat cutting devices online and even the simple ones are quite expensive. Thanks for your help.
Ooops, sorry. I didn’t watch your video. $150 is quite a bit.
Well, if you’re doing one or two pictures, it’s a lot, but if you have a lot of framing to do, it will save you a lot of money in the end.
Great video. A mat cutter really is a good investment. I have been using the same basic logan cutter for 15 – 20 years. One of my favorite extra tools is a small clear tsquare ruler with holes along length. The triangle top rests on outside of mat you’ve already cut to size. Pick your mat depth along the ruler length. Put your pencil in the hole you choose & then just run the triangle along the outer edge. Your pencil will make a straight cut line. Do this for each side for super easy inner cut measuring. A center ruler and bone folder come in handy sometimes too.
I love the look of weighted mats, too. Thanks for sharing how you’ve done your framing!
Well done, Marian! You have prompted me to dig out the mat cutting “system” I bought years ago and give it another go. Your videos are excellent.
Marian,
This was an excellent tutorial. What a great mat cutter! i can see why the investment is worth it. Imagine doing all that with an Xacto knife and a ruler or t-square. It makes me tired just thinking about it.
i have been thinking about doing a genealogical display as well, but I am thinking I will go with a tree painted on a wall somewhere and small round or oval frames with the ancestors pictures in them like leaves. We’ll have to see though. I love your staircase display. So great for your kids to see who they come from.
The Other Marian
You make this sound doable. I am going to try and then probabaly try try again. 😉
Hi Marion,
Thanks for the great video tutorial! I tried to find the mat cutting app and had zero luck. Would you mind sharing the app title or a link? Thanks much!
Yep! Sorry about that. Here is the link to the app… https://itunes.apple.com/us/app/matting-calculator/id327268757?mt=8
Sometimes I feel like you are describing my childhood. My father was also in the Army and I lived on bases in Italy and Germany until age 10. I think it was the very best childhood anyone could have and I wish I could give it to my children now!
Awesome video Marian! Thank you so much for sharing! I have ALWAYS wanted to cut my own mats and your video makes it look so easy! You have inspired me to give it a try!
Marian, great video, just one suggestion. If you are framing old pictures, or artwork that you want to preserve and you are going to the trouble of using acid free mats and tape, then you should use acid free to back it with also. You could buy acid free paper and slip it between the picture and the cardboard. Love the gallery wall!
Thank you for sharing this information and video. This is so helpful to those of us that are not familiar with professional type framing. Looking forward to giving this a try. Love your photo’s!!
Thank you for this great video, it’s so clear and precise. I would have loved if you added the part on putting it all together: backing, tape, etc…
Please keep the videos coming!
Cardboard on the back is a bad choice. You should always use an acid free material for the back. If you have ever taken old photos or artwork apart and see yellow or brown spots it is from the acid in the mat and backing. This is called foxing.
Marion your work is breathtaking. Hats off to you.
That was a very clear, informative tutorial, Marian. I have wished for years–for YEARS–that I could cut my own mats. I just never learned to do it because I think I felt intimidated or something. But watching you it looked completely do-able. All I need now is the extra $$$ for the mat cutter! I think I will figure out a way to buy it fairly soon!
Your gallery wall is just spectacular! I am so in love with old photos and with old frames. And I have a lot of both, so, like you, I just have to take the time to sort them out and match them up. Thanks for inspiring me with this video and the photos of your beautiful gallery wall. I’m so glad I found you!
great how to video….
Marian, your gallery wall is absolutely beautiful! You seriously never cease to amaze. (Is there anything you can not do?) What a treasure to have all of those incredible family photos in your possession! And the frames you have collected to display them are so lovely! Well done! Thanks for the the inspiration and the great tutorial! (Also, your latest outtake reel is so cute. Made me laugh. You guys are adorable!) 🙂
Such a fabulous video! You continue to amaze me with your generosity. Thank you!
I have tons of old photos I have framed and never knew about the acid.. Makes sense why they have yellowed. Ugh.. Live and learn. Do you know whether they will stop yellowing if removed and put in proper mat? My kids too are Army brats. We don’t live on base, but they are great little communities on bases and always have a lot to offer. We chose Williamsburg instead of Ft. Eustis..sometimes too much politics on post. Any who.. Off to finish my photo gallery. Great tips!
Thank you for the great video. I’m keeping the link to this one, so hopefully one day I can create a wall like yours for my family photos. Thank you so much.