
I hope you had a good weekend! And happy Mother’s Day to all of the moms out there.
We finally saw the sun in our part of the world, which was nice after a week of gray skies and rain. I’m hoping it gets all of the rain out of its system, so it’s nice and dry for Lucketts. I know it doesn’t work that way, but still…
As I said we would, my mom and I worked on in the studio on Saturday. We make a great team and were able to get a lot accomplished. I upholstered two chairs, made a bedskirt and rearranged the furniture and smalls that are going to Lucketts. The pile was getting a little (a lot) out of control.
My mom packed breakables like ironstone and glass cloches and jars while I worked on the sewing, upholstery and furniture scooting. (Thank goodness most of our piece are on wheels!)
I’ll share more about packing for Lucketts and additional details we’ve been working on for the booth throughout this week and into next.
Today, I’m sharing about an industrial cart.
I bought a great antique industrial cart off of craigslist a few weeks ago and I was really happy I found one. I thought it would be a great addition to my space at Lucketts this year. And then, I found another one while I was out antiquing a couple of weeks ago. This one was in rough shape, but it was a little smaller than the first and I liked the hardware. It was a good price, so I decided to buy it and figure it out once I got it home.
I didn’t take a before picture of it, but you can see it at the end of my “Lucketts Haul” video. It had clearly been sitting outside for a long time and all of the boards were warped, weathered and even a little rotted, in a few cases. After looking at it in the studio for a few days, I decided the best course of action was to replace the top boards and then paint everything to make it look like it was all the same age.
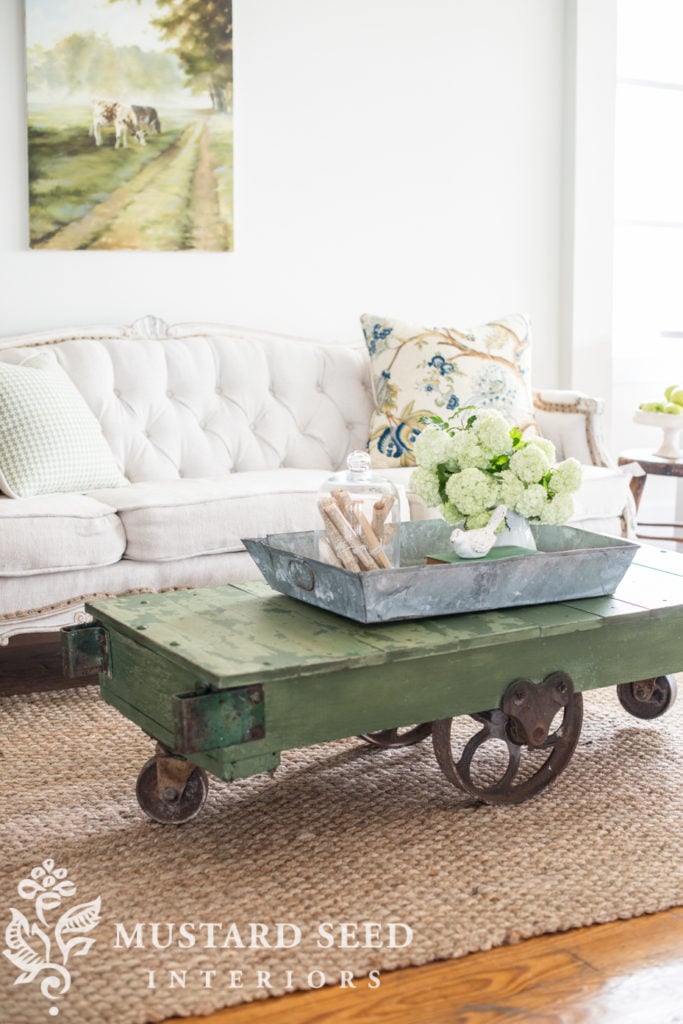
Here’s how it turned out…

Let’s back up a step and here is how it looked before it was painted…
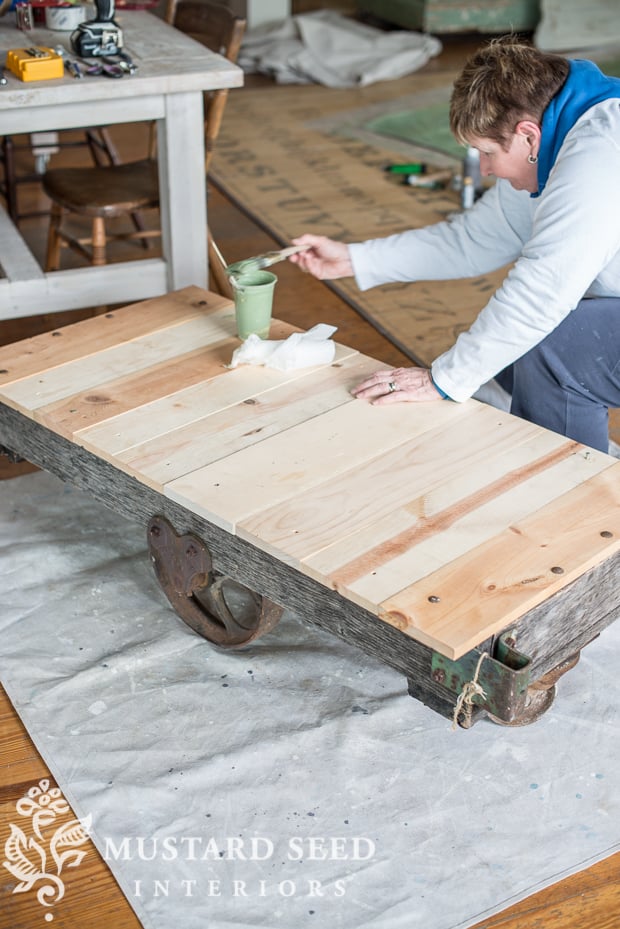
Clearly a marriage of the old and new.
My dad cut some boards to size and screwed them to the top, using new screws, but also the old original bolts for the sake of authenticity. I meant to take more process pictures, but he just came in and worked on it while we were engrossed in the mural and I didn’t stop to snap pictures. It basically involved cutting boards to the right size and then screwing them into the frame.
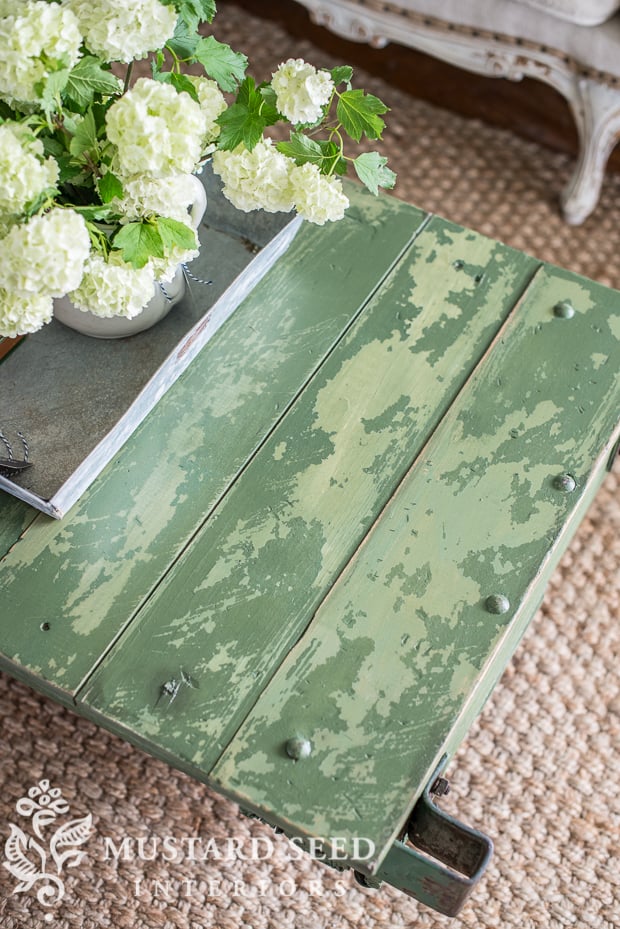
We beat up the top with chains, a hammer, etc. to make the new wood look not-as-new and then painted it in Lucketts Green, followed by 100% Beeswax, followed by two coats of Boxwood. The paint really flaked up, due to the Beeswax layer, which was exactly what I was hoping for. I distressed the edges and added a touch of Antiquing Wax to the exposed raw wood, just to give it a little patina. The whole piece was finished with Tough Coat to seal the chippiness.
Since we lost the literal texture when we removed the old boards, I wanted to add a lot of visual texture with the two-toned chipped paint. It’s now a functional piece, but it still feels old and didn’t lose any character. With the original wood, I would’ve been concerned about splinters and the practicality of using it in a home. It was pretty bad.

Of course, the hardware is the real star of this show.

Many people use these old carts as coffee tables (including me) and for good reason! They really are the perfect height and it is nice that you can roll it out of the way when you need some open space.
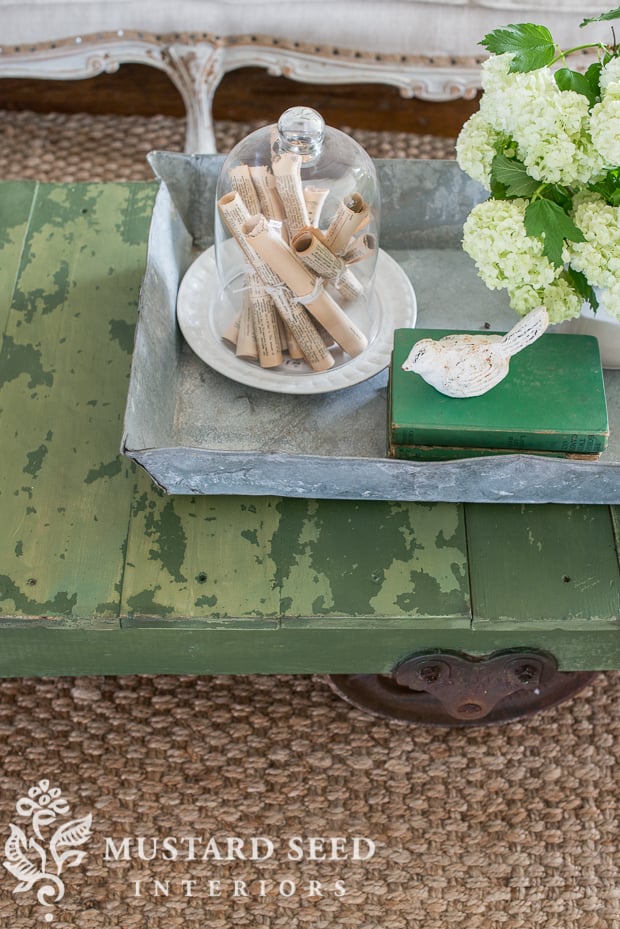
And my snowball blooms are hanging in there. I was told these usually don’t last more than a day or so, but these are on their fourth day and still look pretty good!

As with everything else I have been sharing these days, this cart will be for sale at Lucketts. We’re heading into the final full week before the sale and it’s all coming together…


19 Responses
Love this cart Marian! And the paint color – swoonworthy for sure!! Hope you had a lovely Mother’s Day!
Sheila
http://www.maisondecinq.blogspot.com
It looks great! My husband rebuilds the originals, and if he has to replace the wood he has a stash of reclaimed wood from his factory. But if you’re painting the wood, it doesn’t matter.
It looks great!
You are a master at your craft!
More eye candy for us!
Just love the greens! I’m going to paint some wooden bookcases in these colors! After mulling it over for 3 years.
Hi!
Did you bees wax the entire piece or just where you wanted the flaking? Also, in the look book you wrote “layered under” for example boxwood under lucketts green. In this post you wrote that you put Lucketts on first. Which do you think is better?
Thanks,
Pam
Love that table!! You just do such a nice job!! Like I said , I could purchase so many
love the colors! and my snowballs last for at least a week, sometimes longer.
Beautiful piece, I love that green! I have a question: you say you apply wax then finish with Tough Coat. Will Tough Coat stick on top of wax then?
I generally wouldn’t do that, but I just applied a little in a few places to give the exposed new wood some patina.
Many thanks for your reply Marian! It makes sense 🙂
Love the cart! I look forward to meeting you at the Luckett’s Flea. I’m Jerri from The Weathered Shed in Wisconsin. It just so happens that I will be in the area for a wedding, so I plan to hit the flea first thing on Saturday morning! Can’t wait!
How do i find the answers to some of the questions people have asked about your paint and wax application?
Sorry, I answer a lot of questions directly by e-mail, because it’s quicker for me. Did you want to know something specifically?
I LOVE how this turned out! I can’t wait to check out your space again at Luckett’s!
I absolutely love how this cart turned out! Way to save it! And love the chippy green on green paint!
Hi there. I echo pam’s question about beeswax application. Did you apply it all over and see where it chipped? Or was it more strategically placed? Thank you!
We have done it both ways. In this case, we applied it all over.