
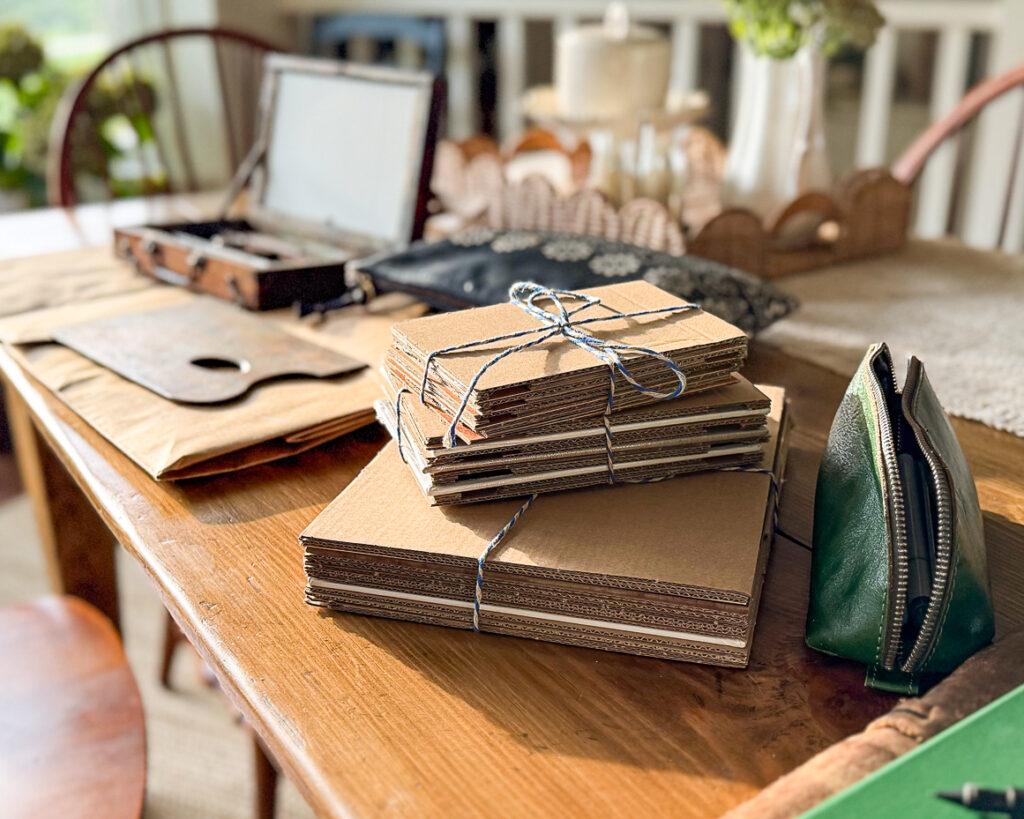
In my previous post about traveling with oil paints, I mentioned I would share a DIY wet panel carrier tutorial, and here it is! If you don’t use oil paints, you may wonder what a wet panel carrier is and why it’s necessary. One of the wonderful things about oil paints is that they are slow-drying. This gives you a lot of time to blend and nudge the paint around, or even just scrape it off. I find it’s even more forgiving than a pencil, which is one of the reasons I love working with oils.
The downside of working with a slow-drying medium when traveling is that you now have a wet painting to transport home. That is why artists who work with oil paints need a wet panel carrier. I usually use premade wet panel cases from Raymar when I’m painting on the go, and they work great. They are a bit bulky for a suitcase, though, so I needed something smaller and lighter.
Erin Spencer shared a DIY wet panel carrier she made for an overseas painting trip, and I decided to make something similar. I tested it out during my trip to Minnesota, and I was able to bring home several wet panels successfully! It worked so well that I’ll be taking it to Europe along with my other art supplies.
For my trip to Minnesota, I made three different sizes: 4 x 6, 5 x 7, and 8 x 10. I only painted on 8×10 panels, so I’ll bring that size to Europe.

DIY wet panel carrier | materials & tools
- cardboard (I bought THIS PACK of 8×10 pieces)
- cutting mat
- clear ruler
- rotary cutter (you can skip the mat, ruler, and rotary cutter and just use a craft knife or scissors)
- hot glue gun & glue sticks

DIY wet panel carrier | video tutorial
This is a simple project, but I made a video tutorial so you can see how I assemble the pieces and how the wet panel carrier looks in action.
I can’t wait to share all the paintings I bring home from my trip to Europe. It has been a long-time dream of mine to find a spot in Florence where I can sit with my pochade box and paint. It will be an amazing experience no matter how the painting turns out!












9 Responses
do you also use a drying medium? How will am 8×10 fit that 8×10 cardboard with the spacers genius
Yes, I use Galkyd gel.
So why wouldn’t you just cut the base pieces 1/2” or so bigger in both directions so that the painting is essentially held without touching the spacers at all? So, a carrier for an 8×10 would have a 8.5×10.5 base, with the little strips 1/4” each? It makes a little larger package, but then you wouldn’t have to touch it up at all. What am I missing?
My thought exactly
The spacers hold the paintings in place since they are in a suitcase. if the spacers were just around the edges, the paintings could stick to the top if it ends up upside down.
I was thinking tacks instead of the added spacers. I’d tape the tack head so they didn’t pop out.
Just a thought.
I wouldn’t want to have to touch up or repaint all the edges that got messed up by the panel carrier. I’ve always wondered why this seems to be an acceptable inconvenience with all wet panel carriers.
I have made a similar setup to yours but put the spacers around the outside edges of cardboard which has been cut to about 8.75” x 10.75”. So the wet panel sits next to, not on top of, the spacers. I then put pieces of rolled masking tape on the back of an 8×10 panel and attach the panel to the open space in the middle of each cardboard piece. Alternatively, you could use squares of adhesive loop Velcro on the panel back and adhesive hook Velcro on the cardboard to hold them even more securely in place.
Yep, good thoughts!
All of the above comments are valid too, MMS has us thinking and providing solutions in our own ways, thank you MMS!