
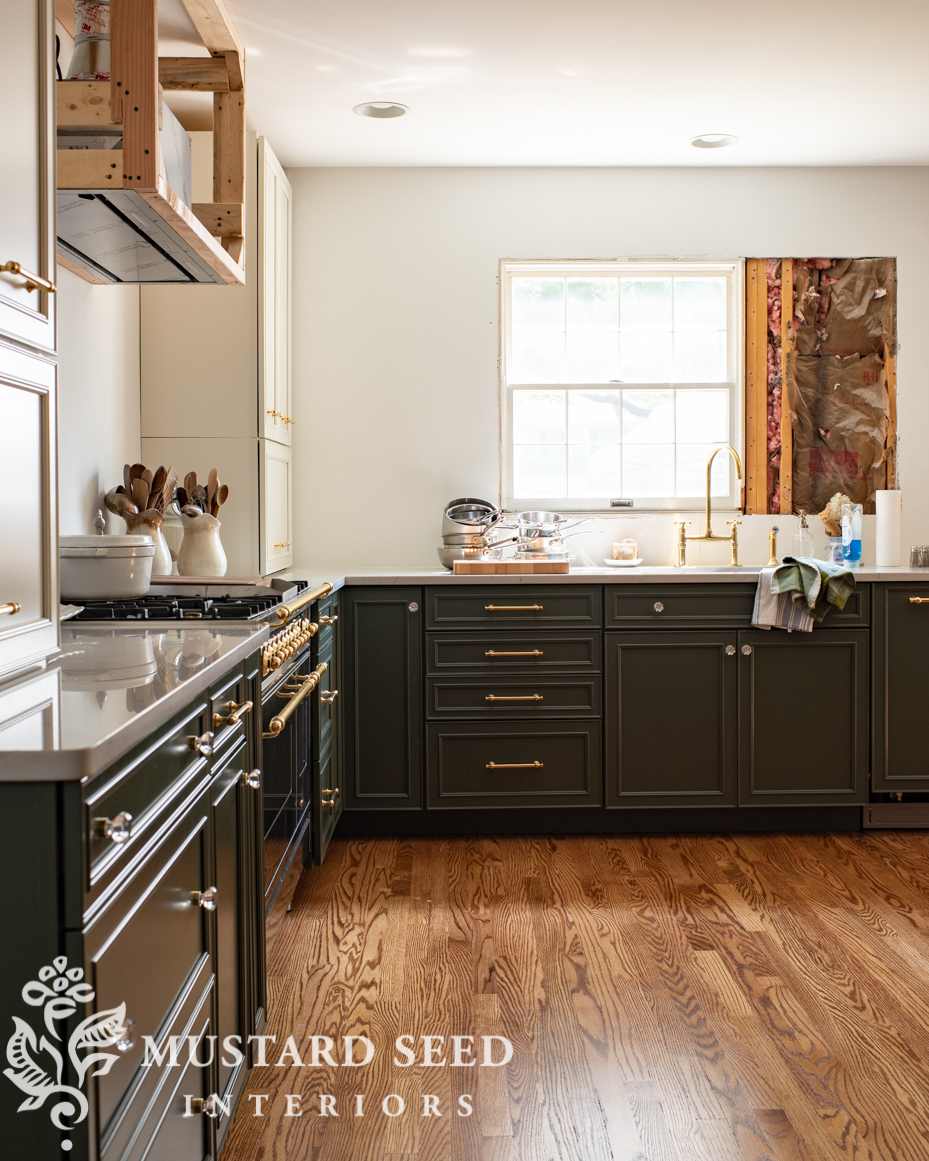
It seems like the kitchen should be done already, but all of the little finishing details take time and that’s what’s been happening in the kitchen for the past few days. It’s a little bit of this and that. Installing trim, caulking, painting, patching, finishing, and starting to get things more organized. So, I thought I would share some of the this and that, because it’s all a part of the kitchen renovation.
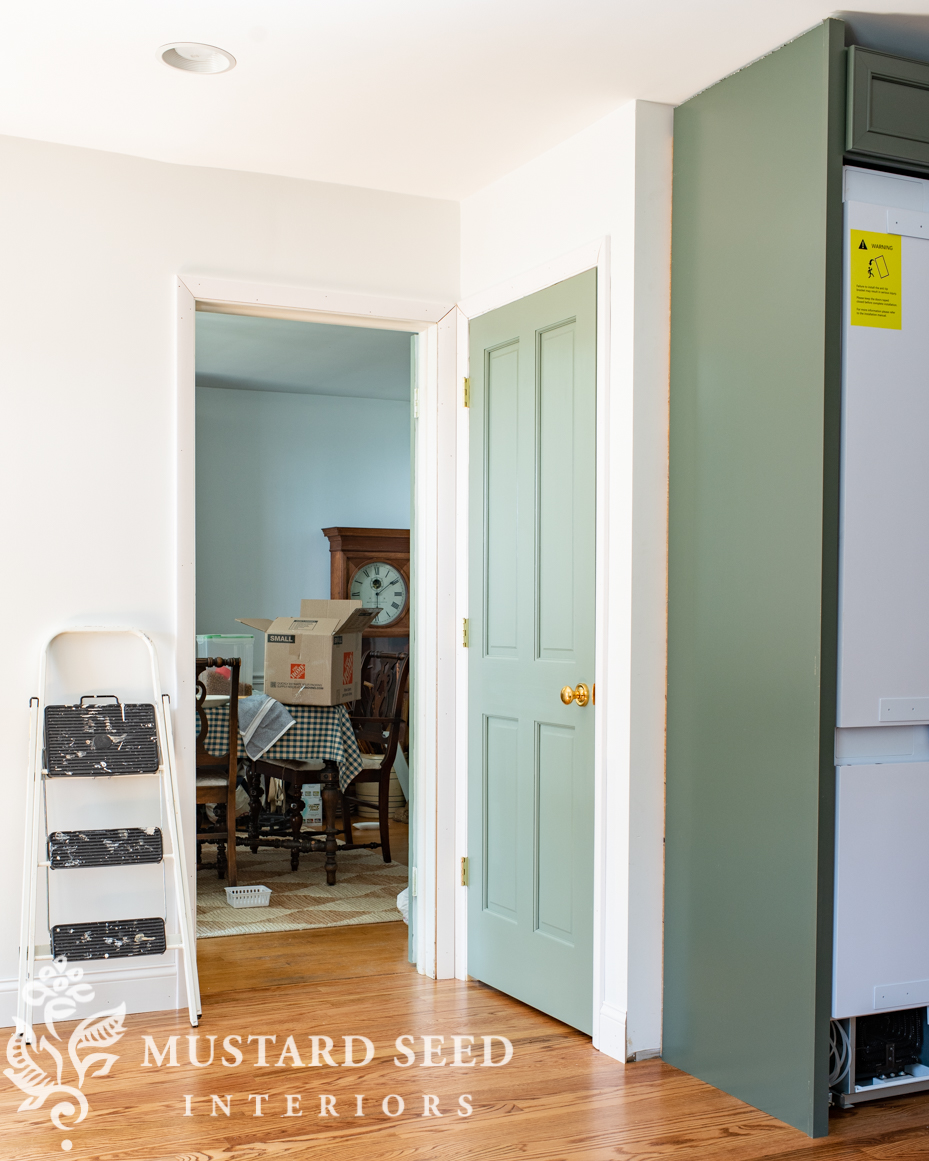
Last week, the trim went in around the dining room and basement door frames and it’s amazing how much that added! It’s just simple trim, but it did the trick at making these mismatched doors make more sense together. (The dining room doors are open in the photo below.) We worked on filling, caulking, and painting them yesterday.
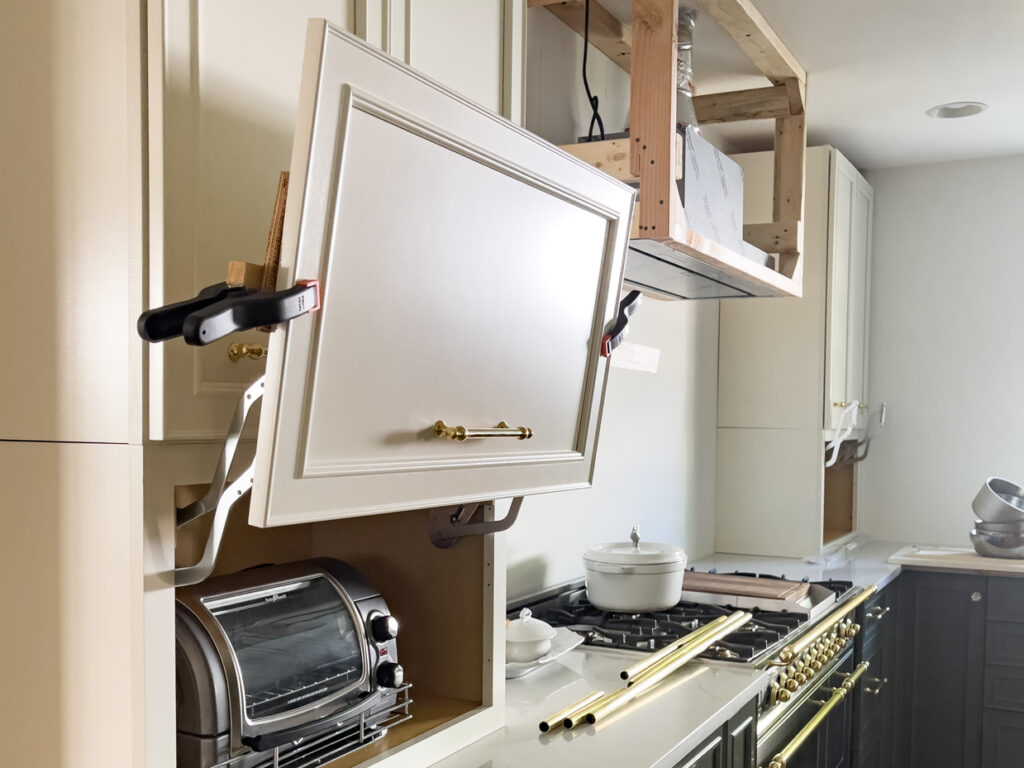
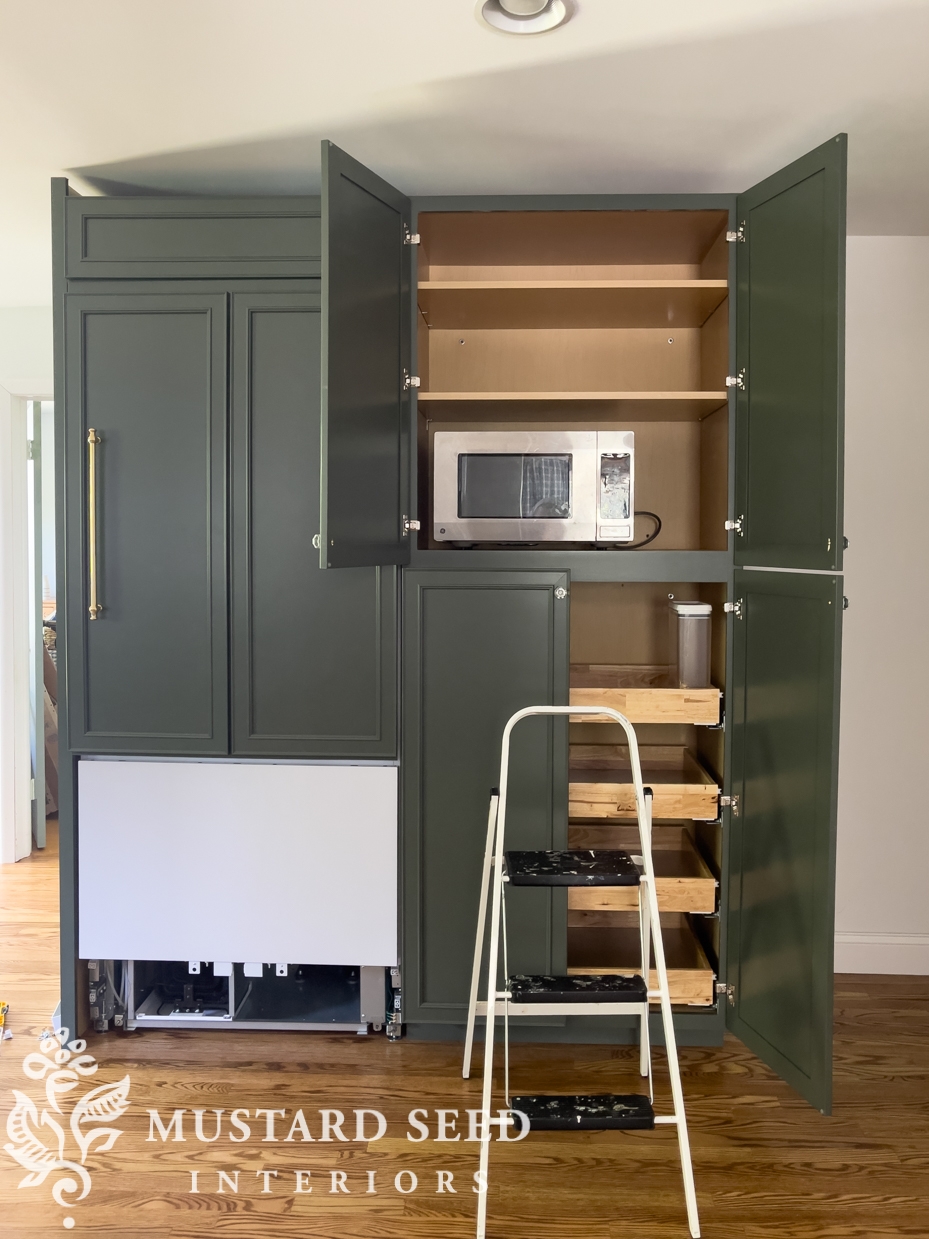
The “appliance garages” are actually regular cabinets with hinges that will hold the door up when opened. We looked at appliance garage options in the Waypoint line and there weren’t any that worked for what I had in mind, so this was the best choice. There were several sizes available, so I was able to pick one that would fit most small appliances we use regularly, like a kettle and toaster.
I knew when I ordered them that the door sticking out might be awkward, but I had a backup plan.
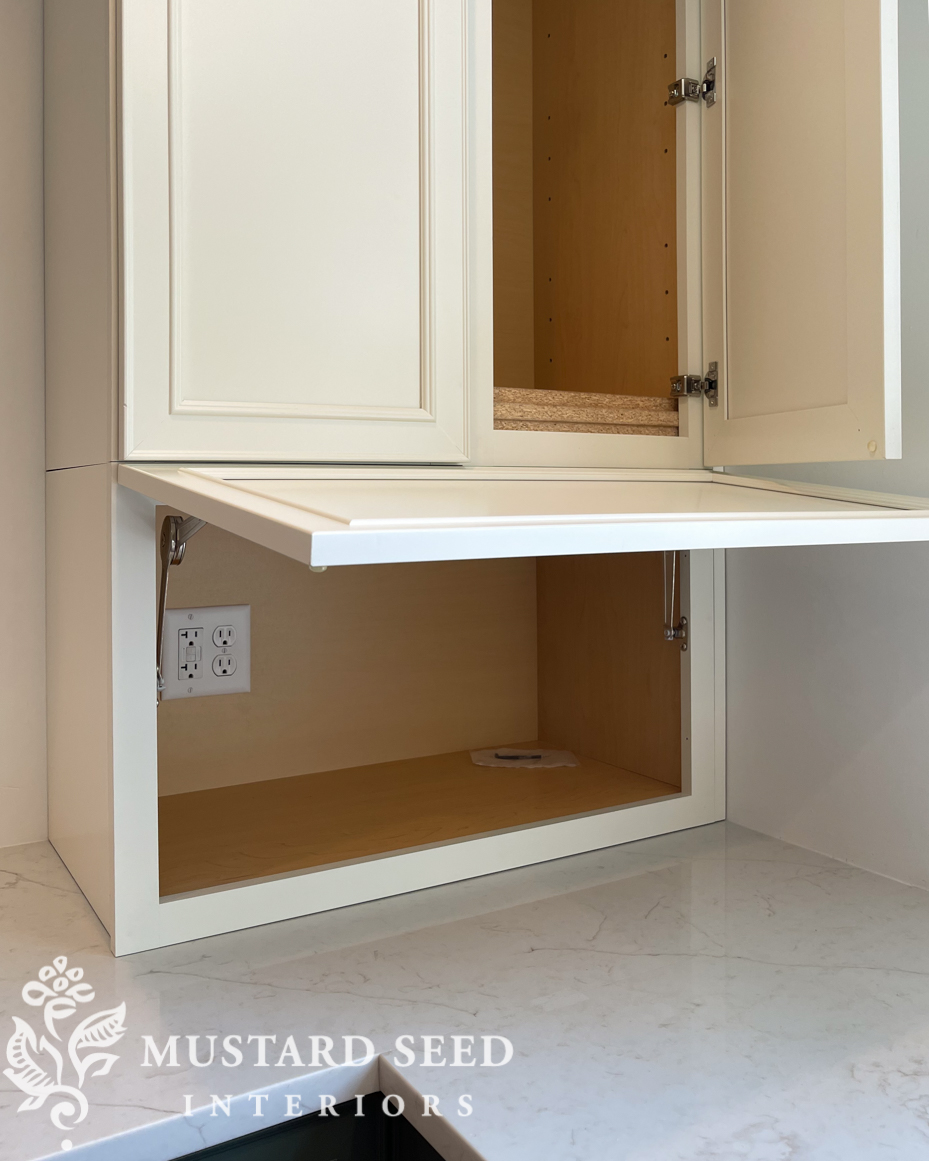
I ordered some hinges that would lift the door up and out of the way. I saw a similar cabinet door in the showroom, so I had an idea of how it would work. It took a bit of customizing, but my contractor was able to get the hinges installed and they work great. We purchased THESE specialty hinges to adapt the doors to swing up.
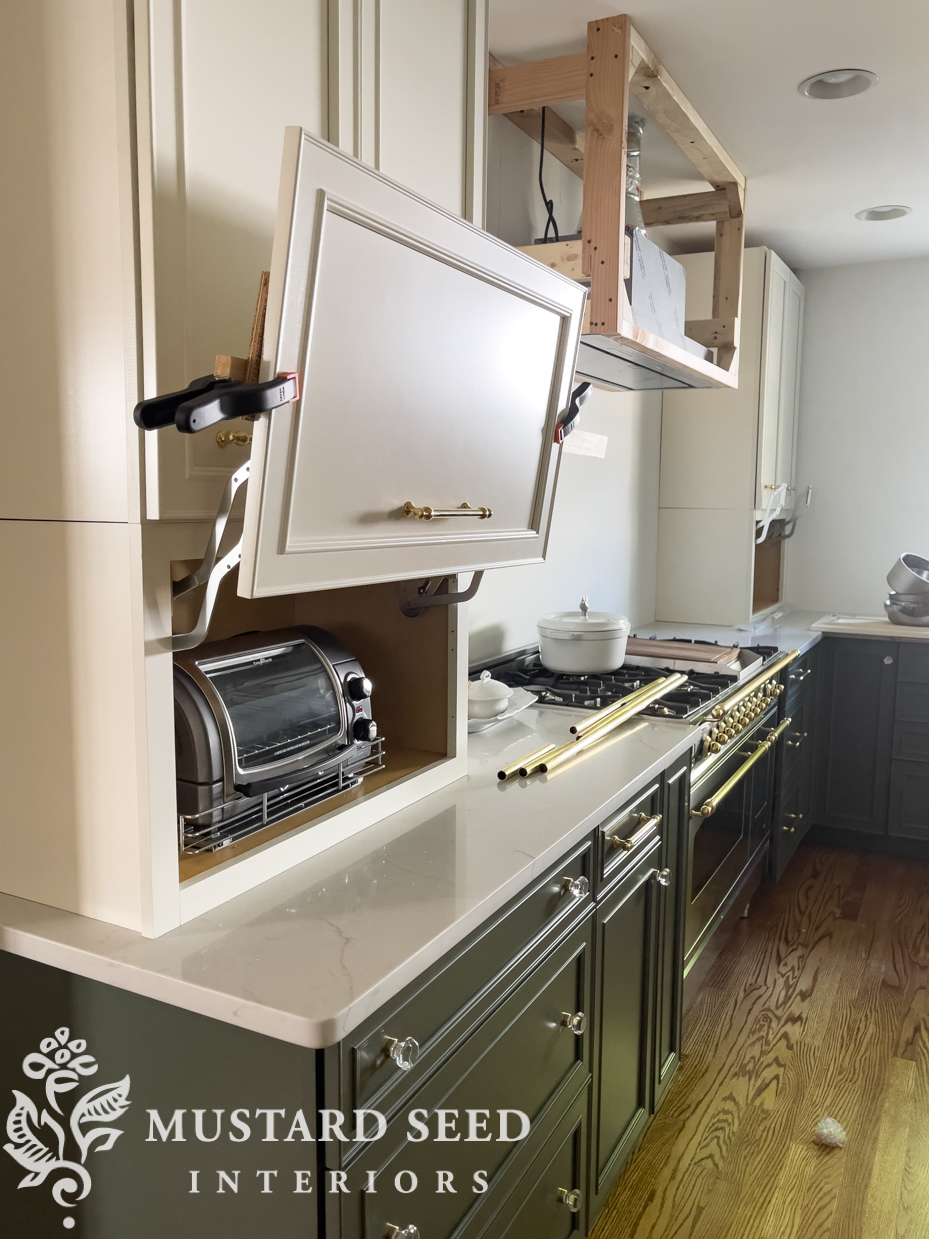
I also ordered THIS slide-out tray to fit inside the cabinet that houses the toaster. When we use the toaster, we open the door, pull the toaster out, and then slide it back in when the toaster cools. It’s only open for a few minutes and then it stays hidden.
We put the kettle, hand mixer, immersion blender, and waffle maker on the other side. Again, we’ll just pull the kettle out when we want to use it and then put it back.

Several people have asked where our microwave is, so I thought I would show you where we put it. As in our last house, we put it in the pantry. Since we were starting from scratch in this kitchen, we had a dedicated outlet installed in the cabinet, so the microwave could run without interfering with anything else. We just keep the doors open when it’s in use and then close them when we’re done. I joked about this when I posted about the microwave-in-the-pantry in Minnesota… It’s not the 1980s and we’re not cooking a roast in the microwave. Most of the things we heat up take a minute or two. The longest is when I’m steaming veggies and that’s usually around 10-12 minutes. We can live with having the doors open for that.
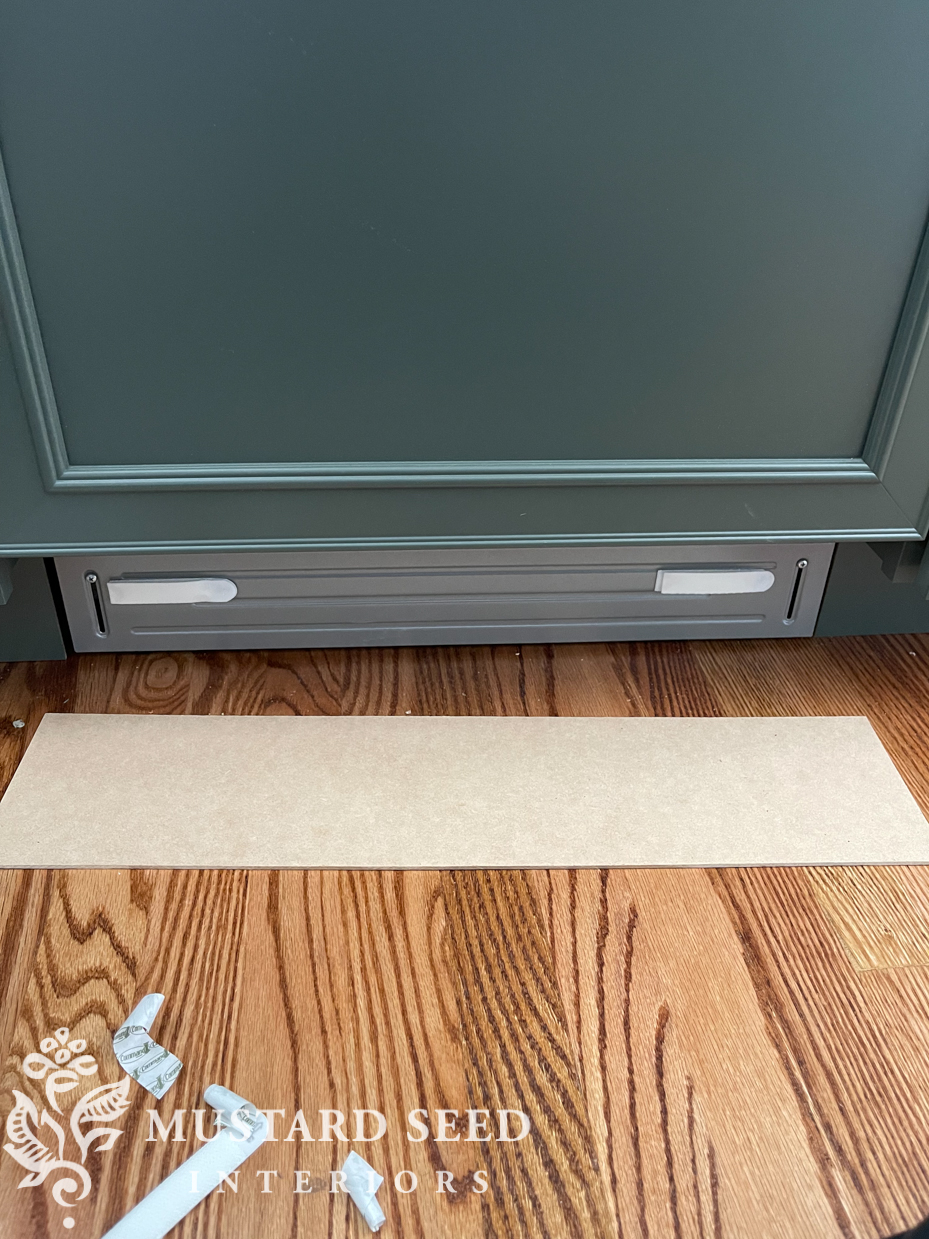
You can see on the far right edge of this picture that the dishwasher needed some sort of a toe kick cover underneath to hide the metal bits…
We had some scrap from the fridge panel, so the contractor cut a piece of green 1/4″ panel to fit under the dishwasher and we attached it with some .
We did the same thing with a cream panel to hide the electrical box under the range…

The electrical box was the most noticeable, but I might cut a larger piece to hide the propane pipe as well.
As we were getting ready to install the crown molding, the contractor, Nathan, asked me to paint some 1 x 2s to act as fillers. We have very uneven, plaster ceilings, so he needed to have some wiggle room and these 1 x 2s would provide that. We learned through this process, though, that the cream paint I ordered from Waypoint (the cabinet manufacturer) was not quite the right white. It wasn’t as warm as the color of the cabinets, so they are sending a replacement.

While I was painting and sanding, I also painted some stair treads to use as shelves. They were the perfect size, had a bullnose edge, and were $16 each. When paired with inexpensive metal brackets, I was able to make five shelves for around $130.

In addition to hanging the shelves, Jeff and I worked together on building the range hood.

I caulked and finished priming the hood cover yesterday and it’s looking so good!
I’ll get some updated pictures to show how the kitchen is looking today so I can share the crown, range hood, and other finishing details.
PS – No one warns you how much hardware you’ll have left over after a kitchen renovation!


24 Responses
What color are your cabinets?
May I ask how you decided to paint your basement door a color? We just had a discussion about that at dinner the other night. We were trying to decide whether we wanted the door to be less noticeable or add color.
I like making doors a feature and painting it a color made it more special. We mostly have hollow core doors and those look boring anyway and painting them white makes them even more ho-hum.
Whenever I see the space under the stove, I have to wonder if you thought of a perforated brass piece under there. You could tuck it way back or move it more forward . Similar to the heat vent cover.
Basement door color? What is it, love it
It is Card Room Green by Farrow & Ball.
I’m sure you do this, but an idea for all that leftover hardware … label and save it! In years to come, you may need one of those extra screws or “bits” for a repair. Labeling and saving this type of stuff has saved me a lot of headaches for repair projects.
Yes, that’s exactly what I did. I put it all in a clear bin along with the appliance instructions, so everything for the kitchen is together. I’m sure bits and pieces will come in handy down the road.
After seeing how you put your
Microwave in your pantry in your last house, I had my handyman install an outlet in my pantry. Perfect solution to freeing up the space above the stove for a decorative vent hood, and keeps my limited counter pace clear! Thanks for the idea!
I wonder if someone has invented tambour style doors for appliance garages? They could slide open from a center point in the cabinet…
yes, there are tambour style appliance garages but they are “old school” and look a bit dated. The current trend is to do exactly what Marian has done here and it works very well.
That option was in their catalog, but I think it was retired and it wasn’t the right size, anyway.
Our microwave is hidden away in our pantry as well. Best idea we had with our new cabinets. I love the green cabinets. I almost got our island in a green but was afraid I might tire of it. But there is always paint.
Looking good! Love the organization. My toaster is in the pantry, similar to to your microwave. I wish I had space dedicated for coffee. Otherwise my counters could be clear.
If you have any leftover base molding (the kind that goes on the bottom of walls), you could make the cover for the electric box and gas line under your range out of that, it would look like a continuation of the wall, and it could be made so you could remove it for service or cleaning. Just an idea!
Yep, that’s a thought. I think just adding some of the panel will work in that same way and we already have it on hand. 🙂
I just love having all the ugly stuff tucked away – toaster ovens, microwaves, big mixers, kettles – it makes everything so nice and clean looking. It is looking amazing over there, Marian! Can’t wait till you have an open house for all your millions of readers and invite us to tea, coffee and cupcakes so we can see your new home.
Hahahaha. If only, right???
The crown moulding is so nice! I couldn’t do that in my kitchen–the ceilings were too wonky. I couldn’t go to the ceiling with the cabinets and left some space above them…but what to do with that space? On a whim I threw some rope lights on top of the cabinets. and Wow! Everyone remarks how great they look. I can even leave them on for a moody night light. Very elegant, very inexpensive.
Yes! We had rope lighting above the cabinets in our last kitchen and that was a great feature.
We used stair treads for our open shelving in out kitchen re-do years ago.
They worked great for us. too We chose an undercounter drawer microwave.
It was a splurge but I love that thing. Your kitchen is going to be such a
great room.
I love that! It’s exactly what I’m doing. Splurge where it’s worth it to me and save where I can to make it all work in the budget.
Wow, I never thought of using stair treads as shelving! What a great idea if you want a rounded front edge!
It seems like maybe you should have a protective cover for that gas pipe under the stove just to keep things from bumping into it, whether the broom, vacuum, or cat toys.
Coming down the finish line Marian. Can’t wait to see it all finished. The floors are stunning!
It is coming together beautifully….and so fun to watch!! Silly question, but what is your wall color and baseboard color in the kitchen?