
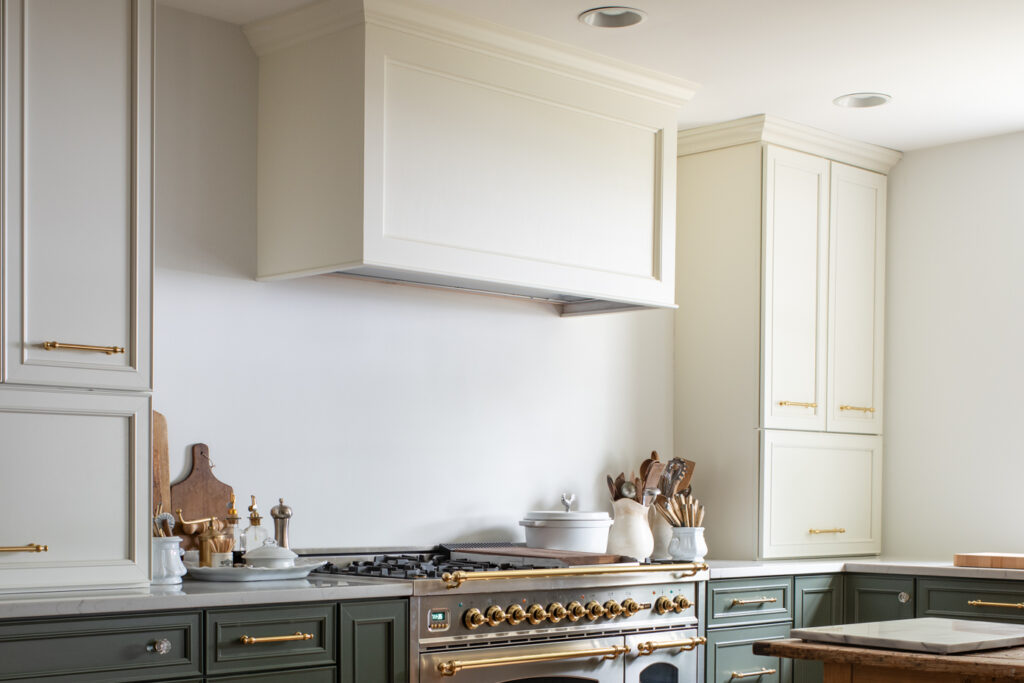
As I’ve shared throughout the 1970 kitchen renovation series, we hired out the large projects and decided to do the painting and finishing work ourselves in order to make everything fit into our budget. Jeff and I built a custom range hood for our PA kitchen (you can find the plans and tutorial HERE), so we decided to do that piece. When we started to plan out installing the range hood and building the wood surround, we ended up collaborating on the project with our contractor. He built the frame and installed the hood and we built the cabinet. It just made sense since he was doing the ductwork and installing the other appliances. He’s also going to have a stainless steel frame made to trim out the bottom of the hood so wood isn’t exposed on the underside. I will show all of that and give a full review of the range hood soon.

is the range hood we purchased.
I did look into getting a range hood through the cabinet line we purchased, but they didn’t offer 48″ hood cabinets and they were much more expensive than building one on our own. This is another splurge & save decision. We could have a nicer range hood if we built our own cabinet for it.

Before we started building, I sanded and primed all of the wood plywood and trim pieces we were using to make everything smooth and ready to paint. We then cut the pieces of 3/4″ plywood to size to make the front and sides of the cabinet. Since we were using trim on the front, we were able to use a 24″ x 48″ piece of plywood, which is a standard size, and not have to cut down a full sheet. (That’s why there is a little gap at the top of the front piece.) Plywood is so expensive, so it’s worth trying to figure out the cuts to minimize waste. We assembled the cabinet on a work table, slid it into place on the hood frame, and screwed it into place.

Since we’re building shelves between the hood and upper cabinets, I decided to leave the sides plain and just add trim to the front. We kept that simple with a 1 x 6 at the top and 1 x 3s along the sides and bottom.

We added a piece of cove molding inside the box to create a paneled look, bullnose trim to the bottom, and crown to the top.

I caulked everything and applied two coats of paint mixed to match the cream cabinet color.
The hood looks amazing and it offers just the simple elegance I was hoping for. This wall isn’t done, yet, but it’s coming along!

(The stainless steel trim will cover that little bit of wood that’s currently showing.)
And, you can see a little peek at the furniture! We were able to move in on Friday and we’ll be able to put rugs down on Thursday.
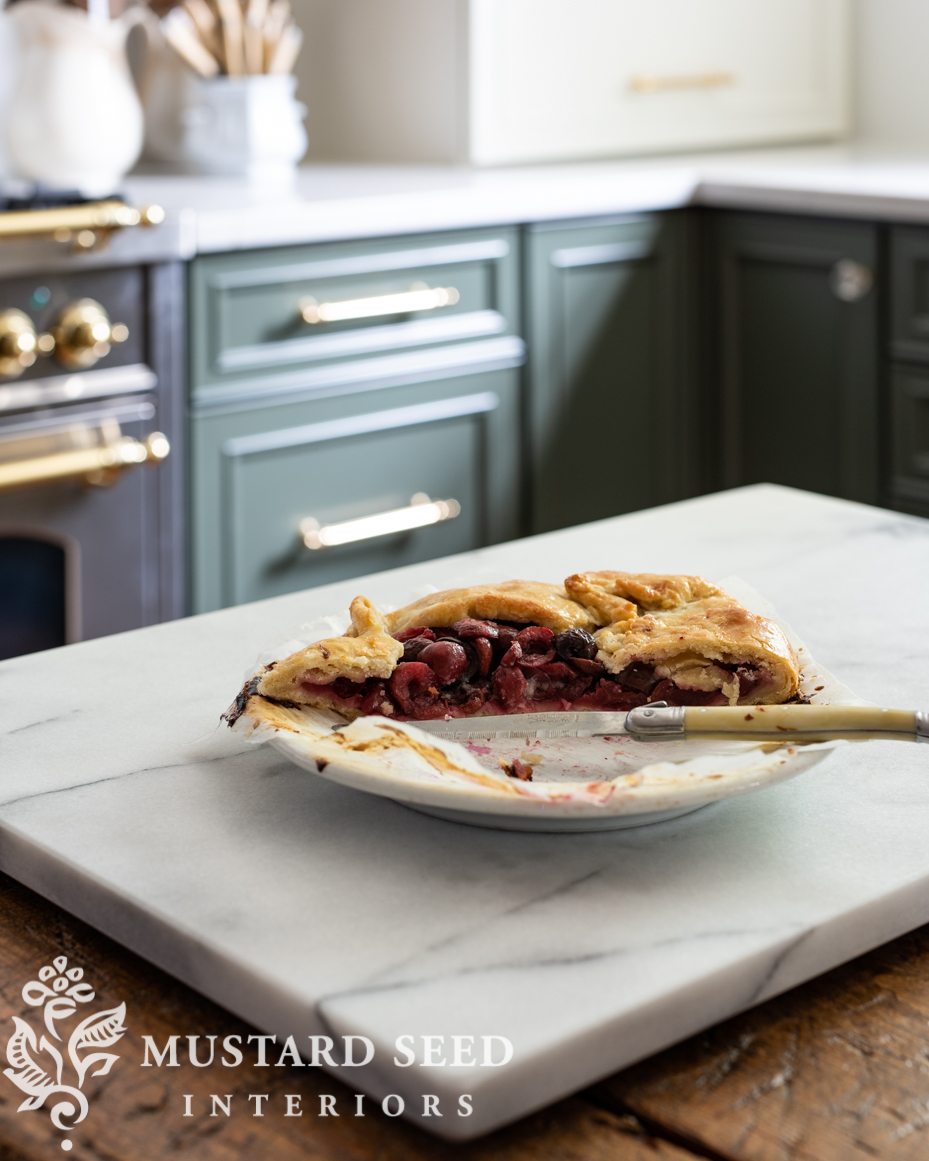
This weekend, I made a couple of cherry galettes (rustic French pies) to test out the kitchen. You know, just to make sure it all works okay. it’s sort of like when my dad wants to test out something my mom made to make sure it’s not poison. It was really just an excuse to bake something.

And, I’m happy to report the kitchen works great.
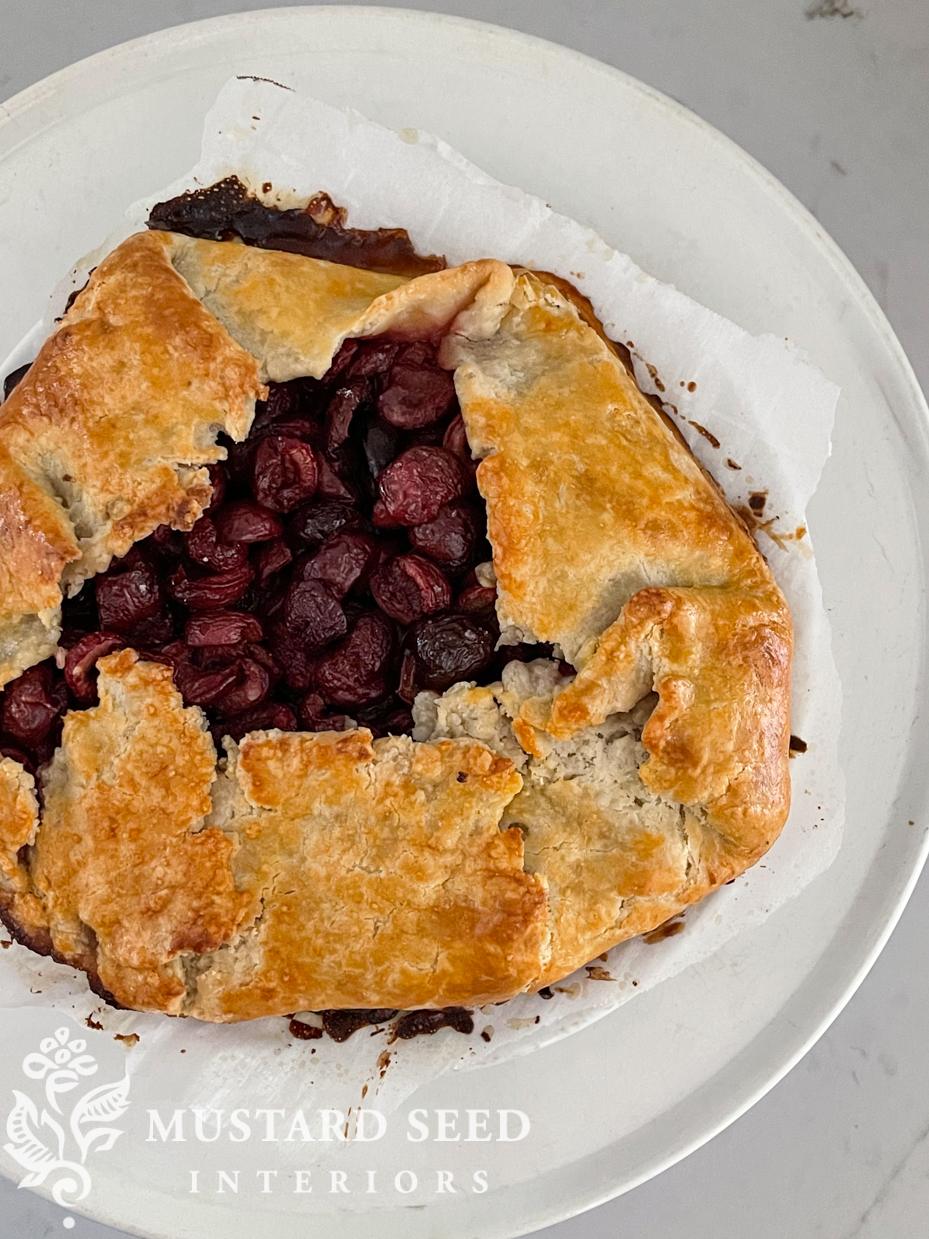
And the galettes were pretty amazing as well.


30 Responses
Hi Marion
I love reading your blog.
I also love your newly renovated kitchen.
Could you please email me the recipe for the cherry galettes they look so yummy.
Thanks
Cherry galettes look so good. Yes to recipe! (Thanks). Your kitchen also looks lovely.
I made the recipe from the Cooks Atelier cook book.
The range hood turned out so nice. 🥰
Imagine it feels good to look and see the touches y’all have made to this beautiful kitchen.
I am working on a kitchen remodel. Can you tell me the width and depth of the cabinets that flank your range. I can’t decide if I want to use 27 or 30 width.
It is from the Cooks Atelier cook book.
I would also like the recipe pless as e.
I love it!
I love your kitchen design & colors! I’m curious though why the white upper cabinet doesn’t line up with the lower green cabinet—or is it just the angle of the photos?
They do line up. It’s just the camera angle.
I noticed that too.
Also, will you show the table in the middle of kitchen you are using as Island, please.
I just shared it in a blog post today!
Beautiful range hood!! I see a mounted brass bar below that with utensils hanging from them!!
Love the kitchen!! I know you’re ready to unpack and nest for a while…
That’s exactly what we did today!
I LOVE everything you’ve shown so far! While, I might make a couple of changes if it were mine, I think it looks absolutely lovely and fits so well with what you seem to always show of your home style. I had not seen a kitchen with top cabinets white and bottom cabinets a color that I like before. I do really love the choices you made, however, and am making notes for when we can redo our own kitchen. The range hood looks great! (The one change I would make there if it were mine is that I would change the bottom 1×3 to a 1×6 and add a support/bracket at the bottom and a little shelf so that I could add some sort of decor – probably a pretty platter that leans or maybe a wreath or artwork during different seasons.) Your kitchen is really shaping up to be beautiful and the baking looks delicious!
Yes, that would look great! I’m hanging a pot rail under mine, so there isn’t room for a shelf.
We designed our own hood as well. The one thing I regret was not putting a small shelf along the front (like a fireplace mantel) for decorating – especially at the holidays. This could be the perfect time to add one so you could paint it all at the same time. Just a thought….
I considered that and we did have a shelf on our last one, but with everything else going on, I wanted to keep the range hood visually quiet.
Watching your kitchen come together is so exciting! You’ve worked and waited for it and now you can start enjoying its function and beauty!
Everything in the kitchen is coming along so well and it is looking so lovely. A dream kitchen!
LOVE your pot rack and copper pots! I miss mine when I down-sized from my larger home. When the windows were open, the pots would blow together, and my husband would comment about “the world’s largest wind chime.” Enjoy both your ceiling pot rack and your pot bar behind the range. They become their own pieces of dimensional art in the kitchen, and you have perfected that art so often!
You always amaze me..your talents are truly awesome! I look forward to each aspect of your locations and new designs!
Lovely range hood. The two of you make the most wonderful team. I think this is our first sneak peek of the fabulous pine baker’s table. Can hardly wait.
It looks beautiful! I love the vintage gas oven look- and the gold finishes. It’s beautiful 🤩. That’s a lot of work. Great job!
Your kitchen is looking just beautiful, and I’m excited to see the furnishings and you style it all.
We made our own range hood after I found a photo on Pinterest for inspiration. It was straightforward as our cooktop was down-drafted. I hung my copper from a black iron rod underneath it on the back wall. We used pumpkin pine in our 1775 house for that and for our kitchen’s open shelving. It warmed up the white cabinets and quartz and gray island. I hung an oil still life of fruit on it. It’s def a focal point.
Looks amazing.
Marion this kitchen is going to be so beautiful 😍
Your kitchen is stunning. I love the range hood. It gives me ideas for making my own . The one thing I would add is a tiny brass trim around the bottom edge. It would tie into the cabinets and drawer hardware.
Everything is progressing nicely!
Your kitchen is so beautiful. I look forward to reading every blog on the progress.
I’m sure I’m not the only one to ask. Would you share the recipe for the galettes?