

Several people asked for a tutorial on the part upholstered/part slipcovered French chair I revealed yesterday, so this is it! This isn’t a comprehensive upholstery post, but it will give you an idea of what’s involved in upholstering the back and arms of a chair in this style.

To get you started, you can read THIS POST on stripping upholstery. I didn’t strip the upholstery off the seat and cushion, because I’m going to make a slipcover instead. I had to take everything off of the back and I stripped the arms down to the muslin. There just wasn’t a reason to strip them down beyond that.

I salvaged the batting, webbing and burlap to reuse and used the fabric pieces I removed as templates for the new fabric pieces. I cut all of my pieces and set them out so I was all ready to go.

When upholstering a chair like this, you start with the piece of fabric that shows as the back panel. Make sure it’s facing out, since it will be seen from the back! I like to staple it in a few places around the frame to make sure the pattern is straight and the fabric is tight and even.

Then I’ll go back and add about 2-3 staples per linear inch, so it’s secure and there aren’t any gaps in the fabric. Let me talk about the upholstery gun for a second. I use a pneumatic upholstery staple gun by Porter Cable. It hooks up to a compressor. I have tried using a manual staple gun and an electric one and they just don’t cut it with upholstery. They are too bulky and not powerful enough. If you’re going to upholster, the proper tools make a huge difference, so get whatever brand you want, but get a pneumatic, upholstery staple gun.

Once the back is on, I trimmed the fabric, so it’s not hanging over the frame, causing excess bulk.

Then, I rebuilt the back as it was before I took it apart. If you’re working on a complicated chair, it’s a good idea to take pictures and notes, so you can put it back together the same way. In this case, it had a layer of thin batting…

…a vertical strip of upholstery webbing stapled into the frame at the top and bottom…
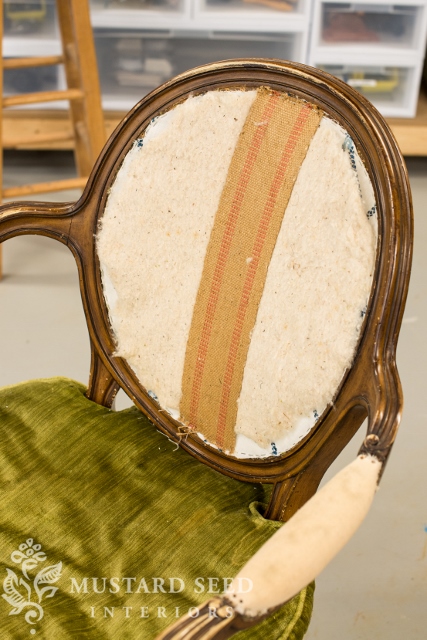
…burlap to add further stability, stapled to the frame around the perimeter…

…the cushioning and then the top layer of fabric. I stapled the top layer of fabric the same as I did the back, so the stripe was properly positioned and I didn’t end up with pleats, gaps or other wonky things that can happen in upholstery.

Even if you try to cut the fabric to exactly what you need, you might have to trim or you might come up short, because different fabrics have a different amount of stretch to them. I always give myself a little bit more fabric to work with, because I’d rather trim excess than not have enough and have to remove the piece and start over. That’s not fun. I know.
Obviously, this grain sack fabric needed a trim, so I clipped it with some sharp scissors.

I did the arms in the same manner…replacing the layer of batting and then stapling on the fabric.

I covered the line of staples with gimp trim affixed with hot glue. You could use a double welting here, but gimp trim is just so much easier!

If you’re new to the world of upholstery, I think this style of chair is one of the easiest to start with, since the panels of fabric are framed in wood. So, if you have this style of chair and want to tackle it, don’t be intimidated. It’s a very doable beginner upholstery project…
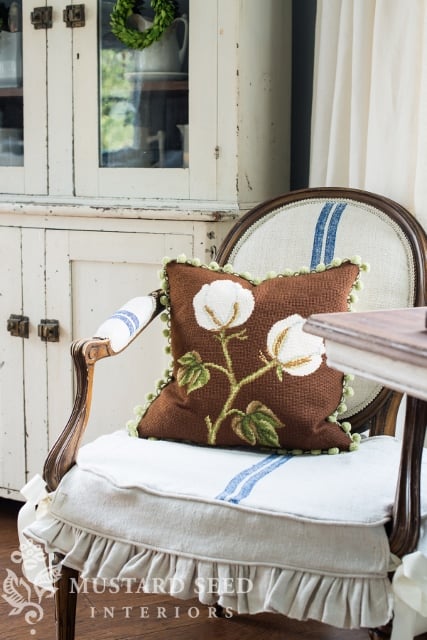
…with beautiful results!


5 Responses
Pretty article blog sharing. Using heavy duty stapler you make a better furniture.
Hi Marian; I really enjoy your tutorials especially on the upholstery projects. You mentioned in one of your videos about the spring loaded scissors that you use to get into difficult areas when upholstering. I would love to know what brand of the scissors you use. Are they pneumatic or manual. I’m about to start my first project but would love first to have these awesome scissors. Thanks so much. Donna-Marie
They are Fiskars scissor and are the kind with the short nose designed for people with arthritis. They are great for tight trimming in upholstery projects, though.
Hi Marian, Wondering where you source fabric? Live in Houston and the large fabric center we used to use has all but stopped carrying home decor fabric?.
Other than Calico Corner or Joanne Fabric, any ideas? Have looked online (and also ordered samples which were about 6” sq at $5 per sample! ). Just a bit cumbersome…
If you have any fave sites or stores would love to know.
I buy the same way you do. Unfortunately, there aren’t any great fabric stores near where I live. I buy a lot of vintage fabrics, too, or I’ll order 1/2 yard of fabric before I buy a lot for curtains or an upholstery project in order to make sure it’ll work.