

I’m currently working on revamping the MMS Milk Paint site and making some updated video tutorials. I also want to share more about it on my blog to help those who are dipping their toes or taking the plunge into the world of milk paint. It’s different than any other paint, so it’s nice to know some things to expect.
For those who are brand-spanking new, milk paint comes in powdered form (since it’s perishable), so you mix it with water to turn it into paint. There are a variety of mixing methods and I’ll make some new videos sharing my favorite tips to getting a super smooth consistency. Today, though, I mixed it the way a lot of people probably would… in a cup with a plastic fork.
When you’re mixing in a cup with a spoon, stir stick, fork, whisk, etc., it’s normal to have a few lumps…

The paint is smooth, but a few lumps are hanging out at the bottom of the cup. Usually, I mix paint with an immersion blender, so I don’t have any lumps remaining, but it’s okay if you’re mixing by hand to have a few lumps. They aren’t going to mess anything up. Now, you shouldn’t have a big lumpy mess, but a few are okay.

As you can see, it’s brushing on smooth and lump-free…

Milk Paint is thin, so don’t expect opaque coverage with the first coat if you’re painting over an existing finish. (If this finish is raw wood or porous, the coverage will be better.) A slightly watery, thin look like below is normal…

This is a characteristic I actually love about milk paint and it’s one reason it has so much dimension in the finish. Two or three thin layers create an amazing depth of color.

The paint shouldn’t be dripping, but it’s normal for it to collect in carved details, ending up a bit thicker there.

I will also let you know that it’s normal for the first coat of milk paint to look bad! Well, not always. It does depend a lot on the color you’re using, the color and finish of the piece, etc, but if your first coat looks a little questionable, don’t quit. It’s going to look great when you see it through.
The last tip I’ll share is that it’s normal for a color to look different on different pieces. I painted a French chair with a yellowish finish and a Target bar stool with more of a reddish finish. The color and mix are the same, but French Enamel, the color used here, looks different on each piece.

The colors evens out with the second coat, but I can see how this would be alarming if you’re trying to paint pieces to match. It’s a good idea to paint a test swatch to make sure the color is going to read the way you want it to, especially if you’re painting something that is already finished.

More on those chairs soon.
I also worked on this beauty today, although I didn’t get to finish…

…and more of the pieces for my master bathroom makeover have arrived, including the sink and a pair of vintage sconces…
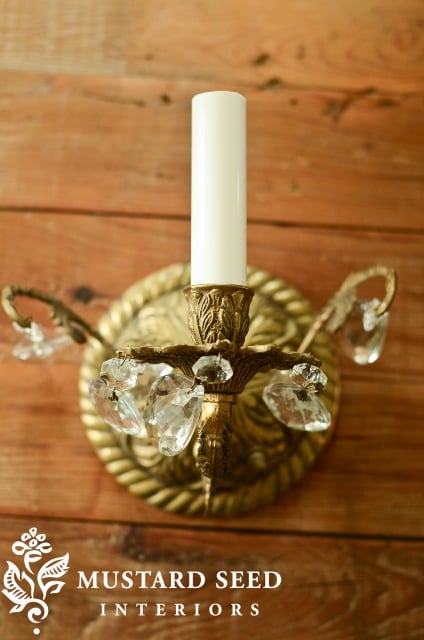

I love that they match the chandelier in my bedroom.

It’s all coming together!


54 Responses
This is so crazy! I was going to email you asking if I screwed up with not mixing the paint enough. I painted two pieces with your paint two days ago. Was so excited to use it and see the results! I’ll share the post once it gets on my blog this week : )
Thank you for sharing. I have yet to try your product, but have heard people raving about it. It’s nice to see it in action with the tips.
I strain my milk paint through cheesecloth.
This post is very timely. I bought some a few weeks ago and after watching all the videos dove into my first project. I had to scrap the first batch I made because I think I added to much bonding agent and maybe used the immersion blender too long because I couldn’t get rid of the bubbles on the table. The second batch I mixed a bit better (by hand) and I’m glad you said to not be discouraged by the first coat. I will give it a second coat this weekend.
The sconces are beautiful!! About the milk paint, I’ve used all the colors and love them all! I was wondering, if you use the bonding agent on the 1st coat, then put a 2nd coat with no bonding agent, will the 2nd coat chip? I’ve used the bonding agent but have used it for both coats because I didn’t want chipping. Have you tried this?
I love milk paint, you never really know what it will do but I always love it in the end! I am planning to order some of yours very soon and am excited to give it a try. Love the colors!
LOVE those sconces!
I am glad you show how to work with your Milk Paint. I am looking forward to using it really soon.
Marti, I’m not expert but I was told that you only had to add bonding agent on the first coat.
The vendor suggested that I mix enough paint for the first coat with the bonding agent and then mix another batch without the bonding agent for the second coat so I wouldn’t waste bonding agent. It worked and no chipping.
I have a question: Can milk paint be mixed to create new colors and if so, is there a formula/ratio somewhere as a reference?
I’m looking forward to using MMS milk paint more often.
Could you pretty, pretty please post the link to the paint mixer thingy? The one where you can put in some of the colors and sort of see what color it will make? I can’t seem to find it anywhere!
I love your milk paint! My friend just did a piece –it had an existing (probably latex gloss paint)–she wanted a chippy look (she used no bonding agent) and it wouldn’t chip. is that what you expect w/ latex or previously painted surfaces. She is pleased w/ the end product-she did an adorable mini secretary in your Kitchen Scale.
Was so glad to see this post because I thought I was doing something wrong with my milk paint. I will persevere and keep the faith and continue on with the second coat on my vanity. I will share pics on my blog when completed. Thanks for the tips!
This is all so useful! All your tutorials/videos are great. Am hoping to have a go soon with your Milk Paints having found a supplier in the UK from your website, and might have been a little disillusioned after the first coat having been used to using thicker Chalk Paints.
Your book came at the weekend too, and I read it cover to cover! So inspiring, so useful, thank you!
Gill xx
I started painting my first piece yesterday. I am so nervous about choosing the right color for a piece and if wax or hemp oil is best for the piece. Hoping it looks a lot better when I add the next coat!
I’m getting ready to start my first milk paint project in a couple of weeks. I can’t wait to try it out — thanks for the tips!
That’s just what this MMSMP newbie needed to see today. First project this week and I’m going to touch is up a bit and move onto a 2nd piece…Blessings to you!
Still thinking I want to try a piece with milk paint. I love how this post gave such detail into the look of the paint and it going on the piece. I have watched the tutorials and this was a nice addition. I am thinking I may find the right piece/figure out which one I have that I may want to do by the Fall!
Thank you so much for your tips and tutorials on what to expect when using milk paint. I ordered and received the sample packs of all colors a few months back and still have NOT gotten enough nerve up to mix one up and paint something. I am not sure why I am so hesitant, but I may just get those packs out of storage and dive right in on a piece.
Marian, I forgot to ask …. I am researching the immersion blenders on Amazon and wondered if the cheaper version (less powerful) would work sufficiently on blending the milk paint? Any advice? What is your brand? I would only use this particular blender for mixing milk paint only. Thanks!
We use a cheap frother from Ikea, it works great.
Debbie
thanks for the additional tips with the milk paint. I painted two pieces over the weekend, one in ironstone and one in mustard. The mustard was painted onto a stool (old stool at that that’s been outside and banged up alot), but the first coat chipped practically completely off. I am not a real lover of the chippy look, and definitely didn’t like how this turned out. But I realized it wasn’t the paint, it was the finish on the stool. So I waxed it with MMS wax (and it continued to chip off) so waxed it with another brand and then added a dark wax to age it. I’ll just sell it because I wasn’t ‘ happy with how it turned out. The Ironstone was applied to a side table and I added bonding agent to the paint to control the chipping (I like a little chipping…just not alot). I didn’t apply two coats of paint and learned firsthand that the lumps don’t necessarily brush out as the side table had tiny lumps of paint all over it. So….not to be discouraged, I’m going to work on some more projects in the next while. I realize it’s not the paint, it’s me and my technique. Just gotta learn how to work with it. Thanks again for the added tips…I’m sure it’ll help me for sure. For the rest of those posting….paint something and tell us how it worked for you and what you did to work through the challenges. Carry on!
Kathryn,
Thanks for letting me know your experience. Yes, milk paint can take some getting used to in some cases. Please let me know if you need a bit more paint to work with, so you can have more product to play with. 🙂
I bought my first bag of MMSMP last weekend! I’m so excited to start…I’ve got several projects in mind, but will start with a vintage wall shelf that I started with latex paint and got discouraged. I’m hoping the grain sack will chip well and let the gorgeous cobalt blue shine through…I will be sure to publish a blog post when I’m done!
PS – Aidan helped me pick the color, and the owner of 3 Oaks Studio gave me some good tips while we were chatting. I think you need to come back out to California and give a class at her shop!
I’m getting a small inventory of the colors, I love the French Enamel and think I need that one and grainsack.
Oh, those sconces are beautiful! And it looks like they will match the chandelier perfectly.
Great post! One that I am glad I have had a chance to read too. I tried your Milk Paint before but with results I wasn’t happy with, and you sent me more because of what had happened. I still have it and have been waiting for the perfect piece to use it on ever since. I am book marking this page for future reference so I can reread and do a nice piece without the stress!
Bev @ Give me a paintbrush
Very informative ! Never used milk paint but I like the look. I will have to give it a try. It looks beautiful and soft. Thank you for the advice. Always great to get help from an expert.
All this is really good to know. I want to try this when I move and I would never have known this about the milk paint. Thank you. Love the scounces, too.
Marian, I would like to know how you decided on the names of the paint (sorry if you have answered this already). Especially the ones that have nothing to do with the actual color of the paint like Kitchen Scale!
I linked your website to this post yesterday showing hoa I used your milk paint! Thanks for all the helpful hints. Follow you everyday!
I am looking for the paint with the “most least expensive” way to ship – Have been looking and need help – Cincinnati area!! Long time fan!!
I think that there is a shop in the Glendale area that sells the MMSMP. But I believe that they have very limited hours. Hope this helps!
Tracy in Fairfield, Ohio
Just used Milk Paint on a makeover project I just shot in a vintage barn (coming out next week). The original interior was from the 1800s and I decided to remain true to the spirit of that time by using Milk Paint – which I had never worked with in all my years of doing makeovers. Loved it. Plus, it’s the original eco-friendly paint! I turned the space into a creative space for a homeowner with a modern twist to it – yet remained true to the original essence of the place. Milk Paint is a creative source that many should consider.
Congrats on your product!
It sounds beautiful! I love your designs, so I hope you can share some pictures of it. If you ever need some milk paint, just send me in e-mail and I would be glad to send some your way!
Dear Marian….I have been reading your blog for about 2 years or so. I check yours every day…..you inspire me 🙂
We were traveling south from Lancaster County and stopped at Lucketts ( I have been there twice before), and I understand why your things sold so well….they are each a piece of art. So nice to see how your business has grown over the years.
Hi Marian, I like to buy pieces for personal use so my paint choices vary according to what room I use them in. There are times I will use a certain color only once for that piece so I don’t like to buy paint in large sizes. Does your Milk Paint come in single use sizes? I adore your blues, but would only use that color in one room of my house and probably only on one piece of furniture.
Oh, I like the light coverage of the milk paint. I have yet to try using milk paint. I found this very informative and helpful. Now I am just looking for this piece of furniture I can try this on.
Thanks, Patty
Your chair will turn our beautifully! Great information as always! What a color!!
Cheers!,
Barbara
I love how thorough you are. Your advice today on milk paint was very well put. I did my very first milk paint project last week. Everything was exactly as you described in today’s blog. I painted a chair with spindles. Probably a bit ambitious for my first experience with milk paint because spindles are a pain. After the first coat, the chair looked like it belonged on the curb, but the second coat was much easier and when finished it looked super cute. Definitely way different from using latex paint, but the finished product is way more unique. I can’t forget to comment on the wax. It was sort of like adding icing to a cake. It made the chair look rich and complete.
I have discovered that I like mixing the milk paint in our old “Magic Bullet.” It is small, so easy to clean and it fits nicely on my workbench. It makes the paint a little bubbly at first, but I find I don’t usually notice this once it dries on the piece. I just wish I had more time to devote to it. Currently have a dining set and an experimental chandelier project underway!
I have never used milk paint but have a project that I want to try. When I got married it was fashionable to have your bouquet “preserved”. Mine is in a plain brown shadowbox. It has been in a closet for a lot of years! I am thinking that some milk paint or chalk paint could help it and maybe I would have it displayed somewhere! Thanks for the tips.
Marian would you recommend using milk paint for painting butcher block counter tops?
I installed the ikea butcher block counter tops last year and I have been very disappointed with it. the edges which were joint together turned out to be a mess. So I’m thinking that painting over the whole countertops would be a quick and easy beatifying solution. I would appreciate your thoughts.
thanks
Going to do 2 nite stands in irongate very soon. These tips are very helpful as I am new to this kind of paint too. Doesn’t sound too hard. Looking forward to the finished product. Love your house!
I made the leap today with MP and not so good. But I assume it’s ‘operator error’ and I’m back reading all the info. I used 1 cup MP and 1 & 1/4 c. water and chose to stir by hand, after 12 mins. I added 1tbs water and still more lumps and larger than in your picture. I decided to just move on and painted 2 raw pine 7foot shutters.When I did get paint and no lumps I did like the paint but there are so many small lumps that never smoothed out I will have to sand all of it tomorrow. But I’m not giving up, still have one box of paint and will try again and use a stick blender. I have 5 of the large shutters to paint, I don’t know what I was thinking. The paint looks so smooth on your brush. I’d like to use the antiquing wax on this but the project is so large I’m looking for another choice to darken the paint. I’m surprised how much product (paint lumps) I had to throw out. Seems so wasteful. Other than tips already mentioned is there anything more I can do to fix this?
There are a few options. I think the blender will solve the lumpiness, though. That’s my favorite method. You can also try shaking it in a jar. You definitely don’t need to throw away anything that settles on the bottle. Add more water to it and give it another stir with the blender.
Let me know how things go. I would be happy to send you some more product if you need a bit more to practice with. We also have the antiquing wax available in larger sizes…
Thanks for the reply. I’m making a second attempt now. I will use the stick blender with the same amount of paint and water. If there is much left in the bottom of the container as I get to end of project I will try adding more water and blending again. I was concerned with diluting the color too much. I think if it all blends/dissolves this time I can squeek by and finish these shutters. Thanks again.
This is sort of off topic but I am getting ready to install New England White Pine – 6″ wide planks – hardwood floors. The planks have no finish – ever. They are totally raw wood. I want to paint rather than stain my floors and am contemplating using your milk paint. I want a rustic farmhouse look. I have Googled and am unable to find any clear guidance on how to go about it, what I can expect them to look like, and so forth. The only advice I found was from a milk paint supplier that is not Miss Mustard. Can you tell me where to find guidance and a picture of milk painted hardwood floors? I would be so grateful. Somewhere on your website you say it is great for hardwood floors but I can’t seem to find specific information for the ‘how to’ and I can’t find any pictures of wood floors painted with milk paint. Many thanks in advance.
I’m curious if you did the project described above because it fits me nearly to a T, which is how I found your comment! Did she respond? Do you have tips or pics for me? I would really appreciate any advice as our project is approx 1100 sq. ft. of 8 inch New England White Pine 8″ wide planks that have never been finished. In fact, they are acclimating as we speak and I need to decide what to do after installation! So exciting, but such a commitment too!
I just wanted to share that I have found the $6.99 blender cups at Bed Bath and Beyond work wonderfully to mix Milk Paint. No lumps, just shake and go. If you use your 20% off coupon from your mail or smartphone it is even better. I have tried many ways of mixing, but this is my favorite and the one I find works the best!
Hi Marian,
I was just wondering if a cured project would be a problem for someone that has a milk allergy. I really would love to try milk paint but am hesitant because my nephew, who spends much time here, has a severe allergy to milk.
Thanks!
Karen
Hello,
I painted my first dresser with milk paint today, and it went on well at first with the drawers. I left the top of the dresser for last, and when I started to paint, I had big gummy lumps all over the top. Its not like the paint didnt mix. I mixed with a blender. The paint looks almost like its drying in the container and is a big gummy mess. I had to throw it away. Im hoping I just did something wrong! I used a container that may have had too much surface space on the bottom if thats possible?
Thanks,
Holly
I painted my first piece yesterday and it was beautiful until it started to chip in large chunks. I added MMS bonding to the first coat and none to the second or third. I like a little chipping but this was a lot. I used a degreaser prior to painting. What did I do wrong, and can I go back and paint over it? The wood is two different colors where it has chipped, so it doesn’t look great.
Thanks
Lisa
Hi Marian! I LOVE LOVE LOVE MMSMP – I have painted several things with it! My latest is a dresser for our bedroom that I stained the top a dark wood and did the bottom in Shutter Grey with hemp oil and a mix of antique/furniture wax. The shutter grey turned out a little more blue that I had expected but we just love how it came out – and it matches perfect with the blue tones in my bedroom. Even my boyfriend thinks it is one of the coolest pieces in our new house!
I was wondering if I could mix a different kind of paint – like a latex or acrylic – with my MMSMP to create another color? I want to paint an end table with the Shutter Grey I have left but don’t want it as blue as the dresser turned out. I painted it first with linen and wanted to top if with another color. So what do you think if I add a little acrylic or latex grey to my shutter grey to cut out some of the blue or a little black to make it a little darker? What do you think?
There are no retailers nearby that I can run and pick up another MMSMP color and I wanted to complete this project sooner than having to order it and wait for it to arrive so I was trying to think of what I could do with something I already had.
I’ve tried to search the web but haven’t found anyone who has done anything like this so I figured what better way to get an answer than by asking Miss Mustard Seed herself!
Thanks so much for your reply! 🙂
911:
My cousin purchased Miss Mustard Seed milk paint and was telling me she had a bad experience. The finish was gritty and there was no flaking on the finished furniture…as she wanted. I’ve been painting for years and currently use Annie Sloan Chalk…so I have experience with paint. I imagined my cousin had missed some obvious steps in the mixing process…didn’t add enough water, didn’t stir enough…
So I ordered some thinking it would be easy as pie as it seems from my extensive research…blogs, book and videos. I was not going to fail at this! Well…guess what?! Same thing happened to me! It was gritty and there was no flaking! What are we doing wrong?! Please help!!!