
Well, it took me a little while, but I finally got around to editing the final video in the Selbu mitten knitting tutorial. I really hope this is a helpful tutorial for those who, like me, always, wanted to make something like this. You learn so many knitting skills when working on a mitten like this, so it’s easy to move on to other projects like socks, more details hats, and (dare I say) even sweaters! I don’t know if I’ll ever have the patience and perseverance to make a sweater, but I like little projects like mittens and socks that take a few hours and still look pretty impressive.
In case you missed it, you can find the first two parts of this Selbu mitten knitting tutorial below…
Selbu Mitten Tutorial Part 2 | Knitting in Two Colors
I actually posted the third video on my YouTube channel, but I never wrote a post about it here! I’m not sure why, but I’m pretty sure it has something to do with being in total upheaval, moving, and dealing with a broken foot. Anyway, here is the third video in the series which shows how to create the thumb hole and set those stitches aside to revisit later.

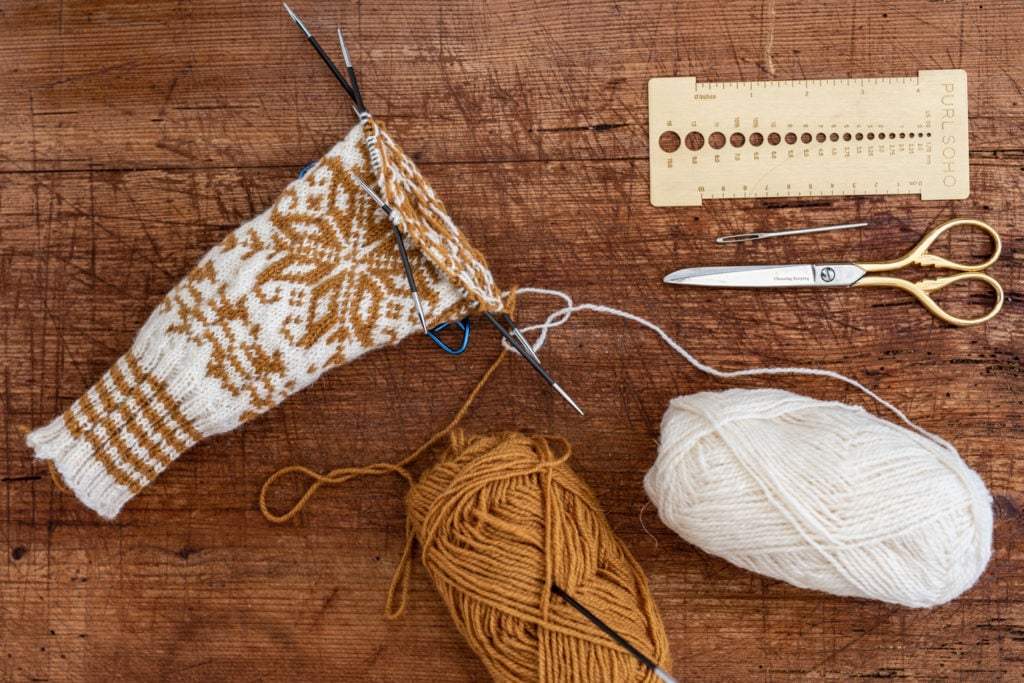
In the final Selbu mitten knitting video tutorial, we cover a lot. I go over how to decrease to create the signature Selbu mitten point for the fingers, finish the top, and weave in the ends. We then go back and deal with the thumb hole which, in my opinion, is the trickiest part of making a mitten. It’s not that it’s hard or overly technical, but I’ve learned (and you’ll see in the video), I need to take my time to make sure the pattern lines up, to pick up stitches on the back end of the thumb, get my needles set up, and to get the first row done.

I didn’t want to edit the video too much so you could see what I was doing and you could see that I had to make some adjustments when I got a little off. Making a perfect mitten isn’t the goal (or it shouldn’t be.) If this is your first time making a pair of Selbu mittens, the main goal is to learn how to make mittens, and learning when and how to make simple adjustments or when to undo the stitches is a part of that.
Another goal with your first part (or second or third) is to simply make your mittens. They are yours to wear, to decorate with, to give as gifts, and they don’t have to be perfect. If you don’t take anything else away from the tutorials, I hope you take that.
Here are the Selbu Mitten Knitting Tutorial video markers in case there are specific places you want to skip to…
- Decreasing for the fingers – 0:05
- Finishing the top of the mitten – 3:54
- Weaving in the ends – 10:06
- Knitting into the thumb hole – 13:13
- Finishing the mitten – 28:57
- Notes about making the second mitten – 33:36
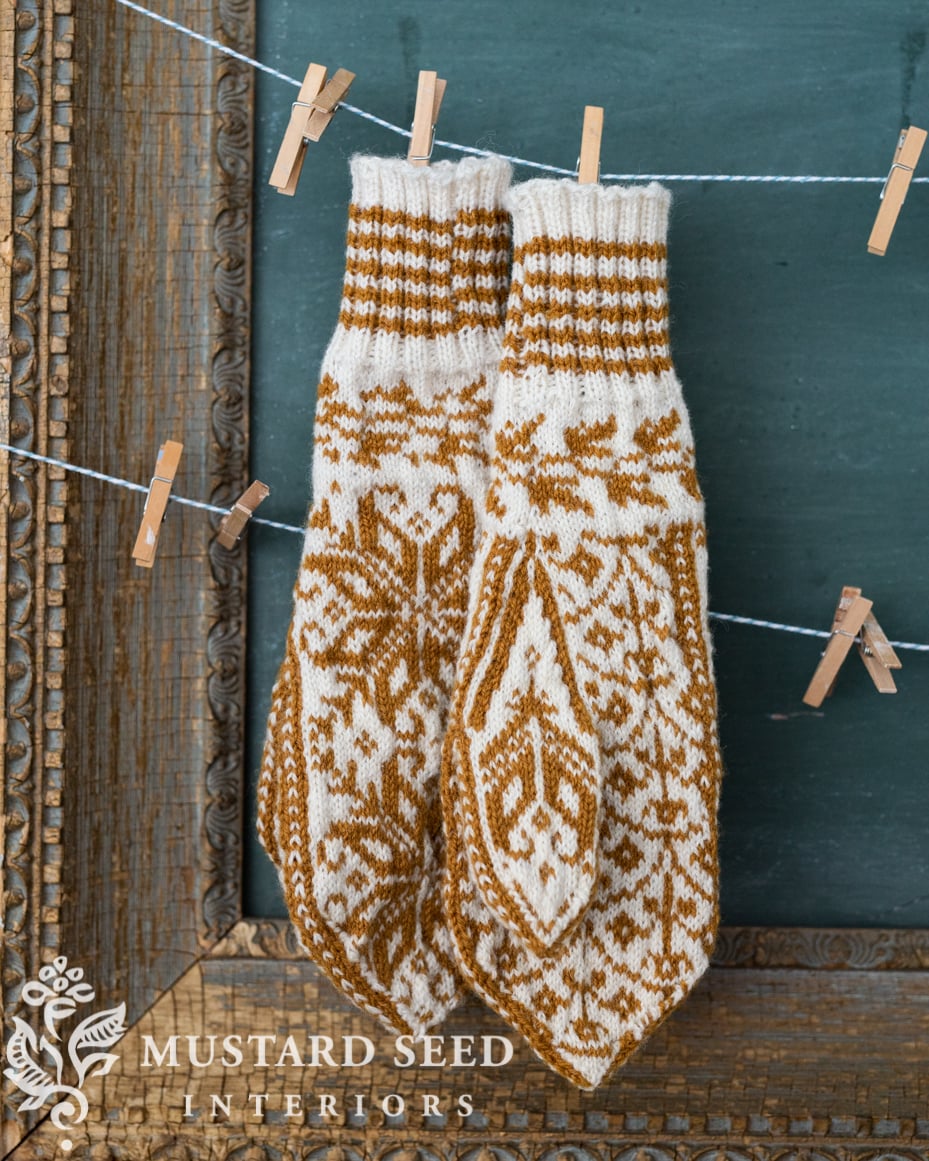
I have really enjoyed making these mittens for myself and for gifts (I have a few more pairs to make) and I’ll likely continue making them each year for fun and to give to new friends I make. I hope you find the same joy in them as I have. It’s good busy work for your hands when the evenings grow darker.
If you’re new to knitting Selbu (Norweigian/Scandinavian) Mittens, I would suggest checking out this post as a resource before you get started – Making Selbu Mittens |Tips for Beginners.
You can find more knitting and crochet tutorials and patterns HERE.
Do you have any questions for me about knitting Selbu mittens? Did I miss anything?


6 Responses
The mittens look lovely! I love the look of Norwegian Selbu mittens and Fair Isle style colorwork and have wanted to learn how to do colorwork for many years. Last year I made a set of solid color mittens following a Selbu pattern so that I could first learn the process of mitten-making without having to learn how to do colorwork (managing two yarns, yarn tension, etc) at the same time. That approach helped me a lot. Thanks for the tutorials. All the tutorials I found on YouTube were in Norwegian!
Marian, your socks look very complicated and detailed. Way too much for me to do I knitted and croched years ago when I sat in many lobbies waiting for my appointmant and while flying. Not sure if you can even take any type of needles on planes probably not. Gave it up for sewing which I enjoy much more since I stay at home now. Keep up the good work and keep on sharing all your progression with your new home.
Ok so the mittens are nice, but you look wonderful!! All the upheaval seems like it’s been good for you!!
It really is smart of you to pick something eye catching and useful to share on your blog! To go right to something GREAT looking!
And then to offer instruction on it!
I have taught myself to knit and taken a few Craftsy classes in it. It is not that difficult except when the written instructions don’t make sense. That can cause panic. But having a video watch…..PERFECT!!!
Those are BEAUTIFUL mittens! Nicely done!
I’m so grateful for this tutorial. I’m also making these mittens and yours is the best tutorial out there on this specific topic! Thank you, Marian.