
I realized I totally dropped the ball on our Milk Paint 101 series! I left you at the first coat and promptly forgot about you.
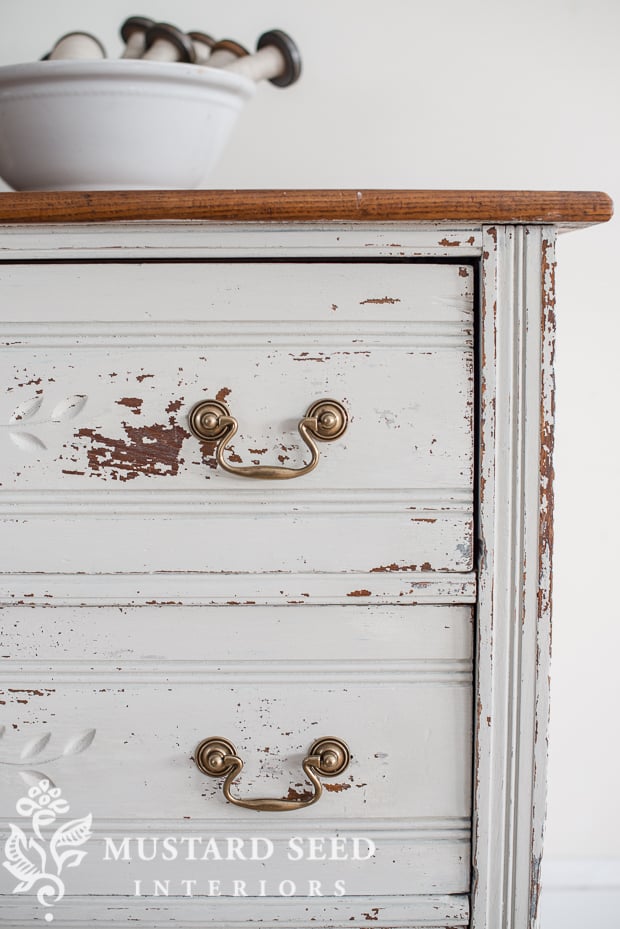
So, you’ve applied the number of coats needed in order to get the finish as opaque as desired. In most cases, two coats do it. Sometimes more are required if there is a high contrast between the color you chose and the surface you’re painting.
Once everything is dry, this is when I like to distress. Some people like to apply wax or oil finishes first, then distress, then apply the finish again, while others like to dive right into the distressing. I fall in the latter camp. It’s one less step and it uses less product. The advantage to waxing or oiling first is that it cuts down dramatically on the amount of dust that is produced.
If you’re interested in my distressing tips and techniques, you can read this post.
Now, the paint is dry, the distressing is done and you’re ready for a topcoat.
Let me insert here that you can leave milk paint raw and I often do. Raw milk paint is matte, chalky and so beautiful on certain pieces and in certain colors. If you like the piece as is, then just leave it! I wouldn’t leave a tabletop or other well-used horizontal surfaces raw, but it’s fine for table legs, chairs, dressers, hutches, etc.
If you want to apply a finish, you have a few different options within our product line. You can, of course, use whatever topcoat you want, but I’m going to cover the ones I carry in my line in this post. If you’d like my take on other topcoats I’ve used in the past, you can check out THIS POST.
This is a long, packed-with-information kind of post, so let’s dive in…
![]()
WAXES
We currently offer four waxes, plus a limited edition of the Furniture Wax with a lavender scent added.

Furniture Wax goes on clear. It can be applied with a brush (a fluffy, natural brush is best) or a cloth. I prefer a cloth when I’m applying to large, flat surfaces, and a brush to get into nooks and crannies of spindles and carvings.
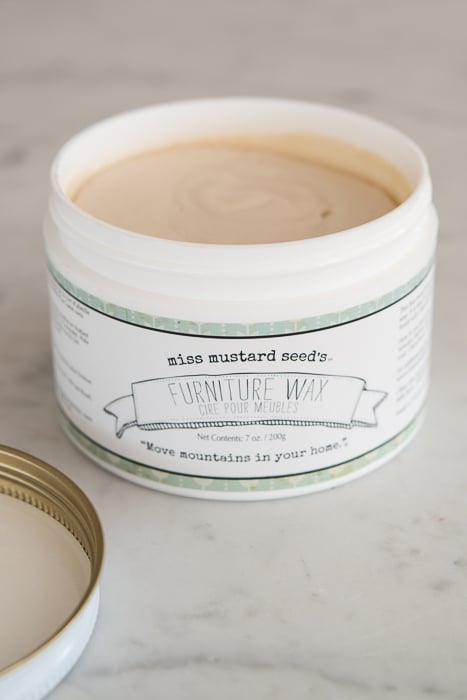
The key with any wax is to apply it in a thin layer. If you ever have trouble with wax being smudgy, sticky, smeary, tacky, etc., it means you applied too much wax. Think of wax like a skin lotion. It needs to be worked into the surface evenly, allowing it to be absorbed. Too much will just sit on top and be a mess.
It should feel dry to the touch almost immediately. It might feel a little cool and waxy, but the piece can be touched and used right away.
WAX PROS
- It gives a super smooth, hard, water-repellant finish without any brush strokes.
- Wax is a finish that absorbs, but it’s also a “buildable” finish. You can build the finish by adding more (thin) layers of wax, which can make the finish glossier and thicker.
- The gloss can also vary based on how you buff it. If you just buff it with your brush as you apply it, it will be matte. If you buff it by hand, with gusto, or with an electric buffer/buffing pad, it can have a nice gloss to it.
- If a wax finish is marred/scratched, it can be repaired. Lightly sand the marred area and reapply more wax.
WAX CONS
- It is labor intensive to apply wax. Our wax is soft, like the consistency of margarine, so it spreads on easily, but it still takes some muscle.
- It can be tricky to get it really smooth in appearance on a large, flat surface, like a table top. An electric buffer or a buffing pad on an orbital sander really helps with that.
- It is wax and it will melt if it gets too hot. It does have to be pretty intense heat and sunshine, so being inside under a window would be fine. Just keep it in mind, especially if you have pieces on a porch or are putting them in a garage or storage unit that isn’t climate controlled.
![]()

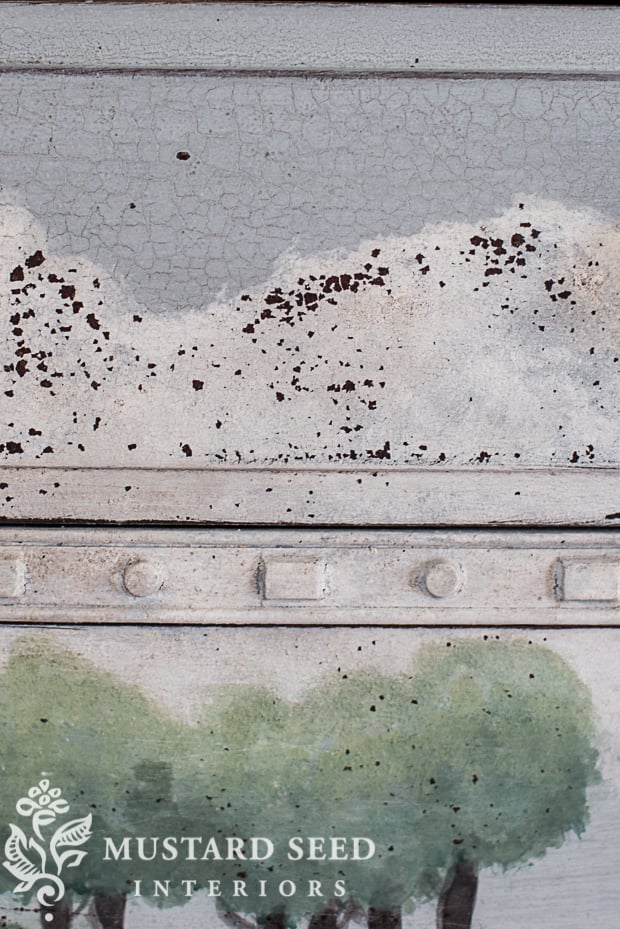
TINTED WAXES
The tinted waxes, White Wax and Antiquing Wax, are applied in the same way and the pros and cons apply to them as well. As few tips on working with tinted waxes…
- Remember these are a decorative technique and a finish in one. It’s not necessary to apply another finish over Antiquing or White Wax.
- If you want more control over the intensity of the tinted wax, apply it over Furniture Wax. The clear Furniture Wax will act as a barrier, sealing in the color, preventing the tinted wax from staining the paint. It makes it easier to slide around, too, for a more subtle end result.
- The idea is to work the tinted wax into all of the recesses of the piece and then wipe it off of the “high points”, so the wax remains more intense in those recesses. This highlights texture, dings, dents, crazing, carvings, etc.
- You can mix the two waxes together to make a “gray wax”, which is lovely, especially over whites.
- The tinted waxes can also be used directly on raw wood, almost as a staining wax. The Antiquing Wax gives a beautiful warm stain and the White Wax lends a pickled/limed look.

![]()

100% BEESWAX FINISH
This is the new wax on the block. We introduced it, so we could have a food safe, all-natural wax. It is stiffer than the other waxes in our line and, for that reason, I prefer to apply it with a rag, using a brush only to get it into nooks and crannies. A little bit goes a very long way with this particular wax.
This wax can be used in all of the ways Furniture Wax can, but it is food safe, so it can be used on cutting boards, rolling pins, butcher block counters, wooden children’s toys, etc.
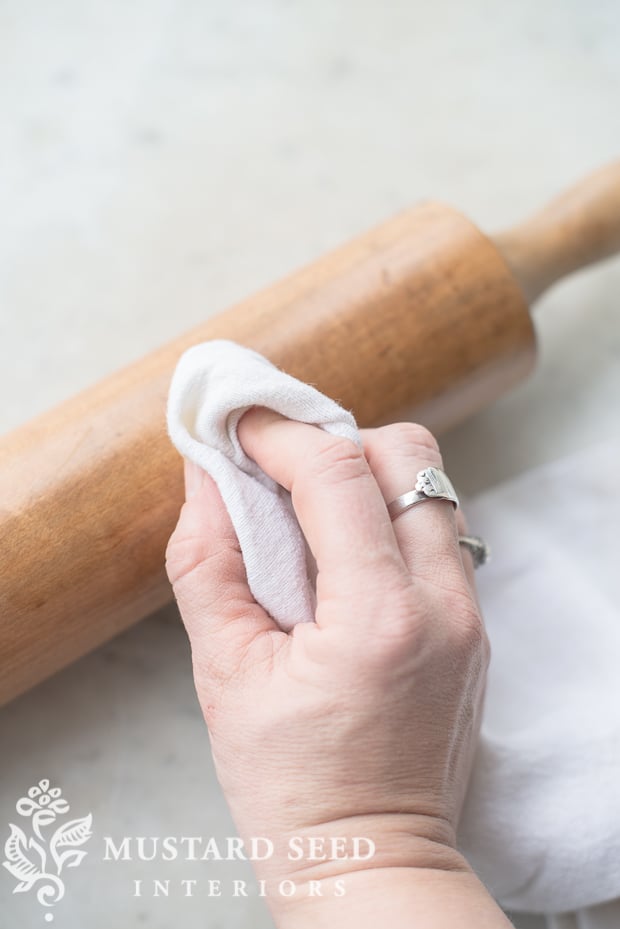
I also love using it as a resist between layers of paint. You can achieve some really great chippy, crackly goodness with the 100% Beeswax Finish. (Here is a tutorial on using Beeswax as a resist.)

![]()

HEMP OIL
I wasn’t even sure I was going to carry this finish with the milk paint line when it first launched. I was new to oil finishes and wasn’t 100% sold on them. Now, Hemp Oil is probably my favorite product in our line and my favorite finish ever. It is so versatile, so easy to use, and it gives consistently good results.
You can use it on raw wood, stained wood, porous paint, metal, leather and more. Like wax, it’s a finish that absorbs, but unlike wax, it isn’t “buildable”. If you apply more layers of Hemp Oil, it’s just going to sit on top and get sticky. You only want to apply as much oil as the surface can absorb.
Just brush it on with a natural bristle brush and wipe away the excess with a clean(ish), lint-free cloth. We started using microfiber cloths in the studio last year and those are the best for this. They don’t leave lint behind and they are great at wicking up the oil and leaving the finish nice and smooth.

Some tips for working with Hemp Oil –
- You may notice the oil leaching out of the surface a day or two after application. Just wipe it down with a microfiber cloth. It will stop, but the surface is just letting you know it can’t absorb that oil and it should be wiped up.
- In dryer climates, as the hemp oil dries out, it can be reapplied at any time to bring back richness and a slight gloss to the finish.
- One of my favorite techniques with Hemp Oil is “wet sanding”. Apply Hemp Oil and don’t wipe up the excess. Leave the surface wet and then sand it with a fine sand paper. Once you’re done sanding, wipe away the excess oil. The result is a buttery smooth finish like no other. It’s just divine.
![]()

TOUGH COAT (water based poly)
I was really hesitant to add a water based poly to our line. I like finishes that absorb, like waxes and oils, not ones that sit on top, like poly finishes. The problem comes in when moisture gets under it and they chip, flake, etc. They aren’t as forgiving with gouges, scratches, heat and watermarks. BUT, before I talk you out of it altogether, there are some great uses for a water based poly, which is why I decided to add Tough Coat to the line.
Tough Coat is a buildable, durable finish that is the hardest finish in our line. It is self-leveling and non-yellowing. You can apply it with a brush, roller, sprayer or applicator pad.
We have been carrying it in a satin finish, but the “new & improved” formula is matte.
I personally like to use it for two main things…as a sealer for chipping paint (new milk paint or old paint) and as a sealer/primer for pieces that might bleed.

![]()
CURE TIME
One thing to keep in mind is that almost all finishes, including these, require about 30 days to fully cure. This means that you cannot expect the topcoat to perform at its best until it’s been allowed to cure completely. That’s like expecting a fresh manicure to hold up while you’re fishing your keys out of your purse. The finish needs to dry AND cure before it’s heavily used. You can use pieces finished with all of the products above the same day they are finished, but just be gentle with them. Don’t place things that are heavy or wet on top. Be careful as you’re moving them and living with them.
You will notice a difference in the feel and durability of the finish once it’s cured, so be patient!
WHICH FINISH IS RIGHT FOR YOUR PROJECT?
I wish there was a clearcut answer. There are just so many variables and a lot of it comes down to preference. I hear of people combining our topcoats and using them in ways I hadn’t tried or even thought of and the look is brilliant.
In the studio, we use Hemp Oil about 80% of the time. We keep it in a cup sitting out when we’re working on furniture a lot, because it’s just our go-to. I know other people who love Tough Coat or love Waxes. I think there are projects that are well-suited to one finish or the other, but there really aren’t set rules.
Remember that furniture painting/refinishing is part technical, part art. The art part of that equation gives you license to experiment, play, break from convention and discover what you love.
I hope that sharing the details about each finish will give you a point in the direction of which finish is right for you!


32 Responses
Hi! I love your blog- I’m so glad I came across it! I’m from Australia and having some trouble finding who stocks your paint- I’ve tried your website but it most likely is my internet that for some reason won’t work! I was just wondering if you would be able to give a few stores? I’m from Queensland if that helps! Thanks!
Thank you for this! While I use a number of topcoats depending on the project, I have yet to try Hemp Oil. I had a feeling I would love it before even reading this and now you’ve convinced me to order some. I can’t wait to try it!
I have 1900 wooden panel doors in our house and have been scratching my head on how to clean them up. They appear very dried out and need something to bring them back to life. Thoughts?
Great recap! I love hemp oil and antiquing wax!
Sara, go at it on those doors with the Hemp oil!! You’ll be glad you did and most likely hooked ! As long as they don’t have a thick poly coat or finish keeping the oil from being absorbed.
I found a solid wood cabinet at Restore store intending to paint it with MMS paint but decided first to give the wood a bit of moisture pick up. After seeing how HO brought out the beauty of the wood I left it as is. Though did paint the inside back and sides with MMS paint to brighten the inside. My fabrics really POP against the color inside. I have a list of wood piece I want to freshen with Hemp oil??
What do you think about using just HO or wax on kitchen cabinets? I’m a big wax fan, but have been reading that it’s not practical for kitchen use. Also, can you use Tough Coat over wax or HO? Defeating the point?
Thanks!
May I ask where you purchased the clock? Love it.
Marian, I noticed the pic where you are waxing the rolling pin…..on your finger is that an antique spoon made into a ring?
Yep, it’s an antique baby spoon handle.
I recently did a post where I shared your antiquing wax on a piece that I did not milk paint, but I LOVE the wax brushed into crevices.
Oh yeah, a lot of people prefer a liquid paint, but they love using our waxes with them. 🙂
Just to clarify – if you use Hemp Oil does this mean that it becomes the top coat or would you still use wax over the Hemp Oil?
Thanks!
Kathleen
Hemp Oil is the topcoat, but you can use Wax over Hemp Oil for an added layer of protection. You cannot use Hemp Oil over oil, though.
Thanks, Marian! Great post!
Thanks, Marian!
A quick question: Do you ever use the milk paint without distressing? I am afraid that Handsome Man is not into the “chippy” look.
What happened to the Tung Oil from your line? I used it on an industrial cart that I refinished and it was excellent. I loved it so much that I tried to buy more but apparently it’s discontinued. May I ask why?
Thank you ,thank you, I am about half way done with my kitchen cupboard s and was having a hard time making a decision on what the top coat was going to be. I really love them unfinished but being it is the kitchen I will be sealing them with the matte tough coat.
What about a top coat on a pine floor I just finished in Grain Sack? Which by the way is gorgeous!
Oh, I’d love to see that! I would use Hemp Oil. Since it’s a penetrating finish, it will absorb into the paint and the wood and create a nice, durable finish.
Marian, thank you for this post! You helped me decide that it is wax that I want to apply to my cherry table.
Question: could you please explain to us how best to clean wood before waxing it? I have a solid cherry table that we use for our every day dining, so it gets a lot of use, plus, our home is heated with a woodstove that produces a fine grey dust. I want to make sure my table is clean before i wax it. Thanks!
Eleanor
I clean most pieces with some grease-cutting soap, like Dawn, and warm water. You can also use something like TSP or a degreaser or a vinegar solution.
Marian,
I painted my sons high chair using your milk paint but it put the furniture wax on it instead of the beeswax. Is this a problem since he is eating off it and likes to gnaw on the tray and if so can I save it by putting the beeswax over top?
The Furniture Wax isn’t food safe, so I would suggest wiping it off with Mineral Spirits and then finishing the piece with the beeswax or hemp oil, both of white are food safe.
Thank you for this helpful post!
Is hemp oil food safe? Could I use it on cutting boards, wooden spoons, etc., and if so, why would I choose that over the beeswax?
Yes, both are food safe, but offer different kinds of finishes.
Marion – please tell us something about that beautiful Mora Clock…..I love it
Hello Marian!
Today I read through your blog, and also the link you have on here to an older post, on topcoats. I am seeking some advice. I am looking for a strong, working topcoat to use on my Mother’s natural wood dining room table. She wants something that will not cause water rings to form on the top. We used your milk paint on the middle pedestal and the base portion. But my Mom wants the top to remain natural wood. I read through this post and saw that you said that wax is water repellent. Would water form rings with wax? My Mom has worked on this table for over two months, finally getting the old stain and paint off. We have gone to three different hardware stores to ask, but no one seems to know the answer from personal experience as to what will prevent the rings. Do you have any thoughts?
Thank you!
-Ginni
Ginni,
I prefer hemp oil for table tops. It is water resistant and holds up nicely. It’s also easy to apply and not stinky at all. It’s all natural and food safe. The reason I like it is that if you get a water ring, which happens with most finishes, you can just lightly sand it out and apply more. That being said, I used stain and hemp oil on the side table we use most (without a coaster) and it has been amazing with not showing water rings!
Hi! I am in the process of redoing a very old table. It will go behind our couch, its actually taken quite awhile to get it finished. I started by lightly sanding the table and making sure it was clean and dry before I painted. I did one coat of flow blue and let dry for about a year and a half! HAHAHAHA then I got the table out last week, dusted it off, then did a layer of Tricycle. let that dry for a couple days. I was waiting for my farmhouse white to arrive. So today I started with the farmhouse white. My goal was to sand the table so the other colors will come though while predominately being white. BUT the white is bubbling and chipping something fierce. I sand lightly between colors and neither the tricycle or the flow blue did this at all. I even added some of the bonding agent before I did the second coat of white. Any thoughts on why this happed? I’m going to let it dry overnight and I a hoping I will still end up with an amazing outcome.
I am going to paint with milk paint for the 1st time. Small space that I wanted to lighten/whiten up. My plan was to do a white layer 1st on the cabinets and then if I decided on a color later on, such as a yellow or pink tint, I could just do a thin layer over the white. Will this work to get a light color and not have to decide right away?
Also, if you put an oil or wax finish on a cabinet, will you ever be able to paint a different color layer of milk paint over it?
Thanks for help!
I am going to be painting a slab door and using it as a dining room table. I just wondered which I should use to finish/seal it so t doesn’t get ruined:)
Thanks,
Cassi
Do you recommend the hemp oil to finish projects where the farmhouse white milk paint is used? I’m concerned about maintaining the integrity of the white. Thanks so much!!!