
Now, you know what milk paint is (part 1), you’ve mixed it for your project (part 2), and now it’s time to get your piece ready to paint. This is the part that many people are confused about and where many projects go off the rails. I’ll be honest in saying that I have contributed to that confusion, I’m sure. In this day and age where no sanding, priming or prep is the trend, there is an assumption that you don’t ever have to prep anything before painting it.
So, can you paint a piece without prepping it? Yes. You definitely can. And I have many times, which is how I’ve contributed to the confusion. But, I’ve painted enough to know which ones need to be prepped before applying milk paint and which ones don’t.

And that’s what we’re going to cover today.
So, which ones need to be prepped and how?
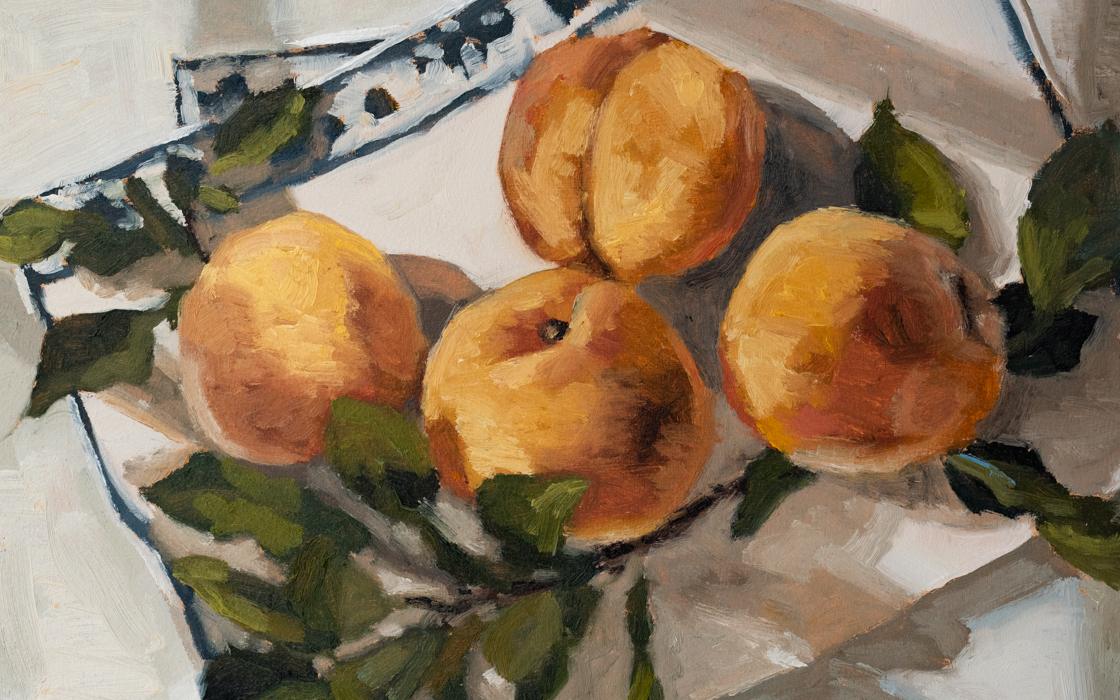
![]()
raw wood
Milk paint is the absolute best paint I know of for raw wood. It will soak in like a stain (as opposed to sitting on top, like modern paints) and will stay there for decades. Even centuries. Seriously. If you have raw wood cabinetry, floors, paneling, etc, milk paint is a fantastic option. You do not need to prime, that would defeat the purpose, but you do want to sand the wood to make it smooth prior to painting. You can also seal knots with Shellac, if you don’t want them to show through the paint.
![]()
porous/flat finish

A porous finish is any surface that is flat or matte. This could be a flat latex or acrylic paint, a chalk-type paint, gesso, primer or an older piece where the finish has dulled or mostly worn off. These are the pieces that require the least amount of prep and you can get away with no prep, in most cases. I would say that 95% of the time with these pieces, I just dip the brush in and go for it. Milk paint tends to like these surfaces and, since they’ve been previously finished, you don’t have to sand them smooth as you would with raw wood.
![]()
glossy/slick finish

When painting a piece that has a slick, glossy coat of paint or polyurethane (like most “factory finishes”), prep work is very important. Paint needs something to grip. By sanding the surface, you can create “tooth” for the paint to grab onto. This is especially important for milk paint. We’ll talk about this more when we get to the Bonding Agent, but if milk paint doesn’t properly adhere to a surface (it’s being resisted or repelled by the existing finish), it will chip and flake away.

The result can look really cool and authentically old, but it can also fall off in sheets and look terrible.
One of the best ways to prevent the paint from chipping (or to make sure it doesn’t get out of hand) is to sand the surface first. For glossy pieces, I rub an 80-100 grit paper over the entire surface. It’s not about stripping off the finish, but scratching it up. I know sanding sounds like a bummer, but this should only take five minutes or so for a dresser. It’s a small investment of time that will make a big difference in the end result.
We’ll talk more about the “chippy look” and the Bonding Agent in a future post in this series.
![]()
oily finish
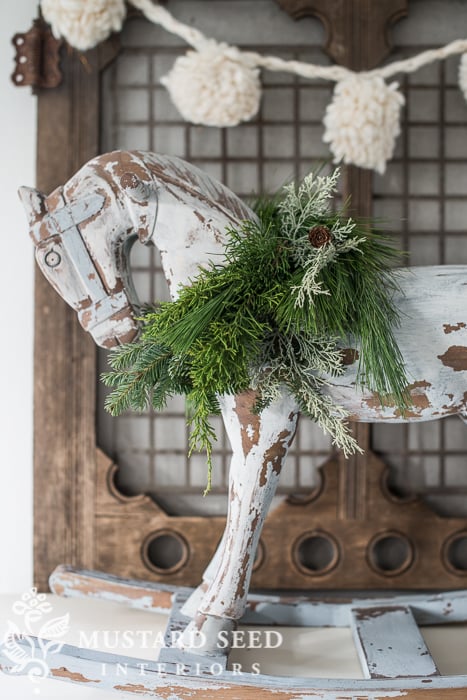
These are pretty rare, but they are definitely the trickiest. I bought this rocking horse from Restoration Hardware and painted it with milk paint and the paint would just not stick! I sanded, I used the Bonding Agent. I coaxed it and pleaded with it. I finally did achieve a very cool look, but not one that would work for a functional piece of furniture. If you’re painting a really oily wood, like teak, or a piece that has an oiled or polished finish, there might be some issues. This can also be a problem with kitchen cabinets that have an oily build-up from cooking.
I was finally able to get the paint to (mostly) stick to the horse by heavily sanding, so that’s what I would suggest for similar pieces. If you’re dealing with pieces that have been heavily polished or have oil sitting on top, like the kitchen cabinets, or a piece that’s been in a workshop/garage and has oily spills on the top, I would take the extra step and clean them with a degreaser.
![]()
There are always exceptions to these rules…pieces I think will chip and they won’t, etc., but these are pretty general guidelines that will be true in most cases.
If you’re a “watcher”, I explain prepping a piece in this video (that I made a few months ago) and also talk about the Bonding Agent and what to expect when applying the first coat of milk paint.
And we’ll talk more about that first coat and the “ugly stage” next time…
![]()
PS – And please remove handles and pulls before you paint!


28 Responses
Last year was the first time I ever tried to paint/ restore a cabinet. I decided to try your products. I read everything I could on your site, blog etc.. and was still confused and had questions.
The owner of the store where I purchased your products was very helpful. ( Can’t say the same for her employee) I liked the ease of the use and the fact that looked good from someone like me that has no artistic talent.
I am getting ready to use your products again on a new project raw wood cabinets for my sewing room and I am so glad to have everything explained more clearly this time. Thank you for these recent posts with greater explanation, it is most appreciated!!
I agree! Thanks for the clarifications! 🙂 I have a chair that I’ve been wanting to paint, but haven’t, partly because I keep wondering… Do I need to sand it? Should I use the bonding agent? Will it chip? Agh! 🙂 I know I just need to go for it, and see what happens. It’s a $10 chair, for crying out loud! 😉
I love all these different subjects you are talking about,they are very informative and have been wondering about some i have used before but been awhile so anyway thanks.
Hello, can I use milk paint to paint walls?
Kriste painted the walls in her house.
I’m right in the middle of painting a piece with your paint in Linen. I am waiting to see if it does anything after the first coat. It has been two days, and so far no chipping, just some crackle. How long before it chips? This is a varnished old piece of furniture, and I just put the paint straight on it.
Will it chip after the second coat? I do not want it to look like the first photo of the cart that you show in this post. I am thinking that I probably should have used the bonding agent. I’m okay with it if it does chip. I expected it to anyway.
Thanks for this post.
If it’s been two days, it’s not going to chip more than it has. (Or I would say it’s very unusual for a piece to chip days after.) You’re good to apply another coat or a finish.
Milk paint acts as a stain on raw wood. Does that mean there is no way of getting the paint off ever? I painted a dresser with MMSMP a while ago but on second thought I would have liked to have left the top unpainted like you do with a lot of your pieces. Is it too late?
If you painted MMSMP on raw wood, it soaked into the grain and will be much harder to remove. It is possible, but you’ll need to most likely sand it off. If you painted it over an existing finish, then it can be stripped off just like any other paint.
I have been wondering the same thing as Saskia. Can milk paint be removed? I imagine it would depend upon the original condition of the wood – raw etc.
Thanks so much for posting this series. I picked up an awesome empire dresser a few months ago at a great price, and picked up a bag of your paint last week. It still has a glossy finish, even though its over 100 years old! I want it to chip, so I’m hesitant to add the bonding agent. I look forward to the rest of your posts/updates!
I am getting ready to wax the piece I have already painted with milk paint for an antique worn look but I am wondering do I use the hemp oil also and which comes first?
Great advice! Thanks for sharing this!
Lauren Baxter | Lovely Decor
xx
Hi! You mentioned you paint to sell sometimes… Where do you sell your items? I’ve just started painting furniture.. With chalk paint and came across milk paint with a specific color I pinned… I get a lot of interest but only sold one. ( painted 4 pieces) any tips?
Hi
Just getting ready to paint my dresser…I am a first time user of your product.
My question: Do I have to mix your bonding agent in the milk paint if my dresser has already been stain primed?
We used your lovely milk paints for our kitchen cabinets, island and pantry. Everything is abosolutely gorgeous, but we have some staining from oils, splatters, etc. we painted over new wood and there is a butchers wax finish. Do you have suggestions for cleaning milk paint surfaces?
Hello. I have a question… I have an old vanity that had severely damaged veneer on the drawers. So I scarily peeled it all off to the bare wood underneath. The etched designs were still visible so I used a Dremel to deepen them slightly to make them more noticeable. Since it’s bare wood and light, I want to use curio as a stain to get a dark wood look. BUT…I want to paint it a dark bluish teal over the wood and I DO want it to chip. From everything I’ve read it sounds like it won’t chip because it will be painted on bare wood with just a stain. Should I use hemp oil to deepen the curio color, let it cure, then paint it teal??? Will it chip randomly then? It’s a really old vanity and I don’t want to destroy it but I don’t want a solid teal piece. I don’t like distressing w sandpaper because it never turns out natural to me. What is my best solution? Please help! Thank you! Britt
Hi there, I am completely new to milk paint and in fact have stayed away from it as the ‘chippy’ look is a little too rustic for me. That said, while in my local store I was asking about the whitewash technique and the owner suggested your milk paint. My question is: I am hoping to get a whitewash finish on a cedar ceiling, if it is possible I may do the walls also. The cedar is 50 years old and has been left raw. Up until this recent visit to the local store all my research led me to believe that I would have to fully paint it out, likely with a primer. The rationale provided to me was that cedar is a darker wood with tannins. For my purposes I have no issue with knots or some discolorations showing through, I just can’t tell if milk paint can be used thinner to create that white wash look and if yes, is there a technique involved? MANY thanks in advance for your thoughts and advice.
Vanessa ;o)
I just did my first piece using MMS. Love everything about it except not one chip did I get. I painted over a painted surface that I’m sure was acrylic wall paint. Hopefully my next project will chip away.
HI I was wandering about painting walls with milk paint. Plaster or wallboard. Do you sand them? I once watched a show and in I believe it was Italy they routinely paint their walls with (What I think) is milk paint. I thought it was beautiful.
I painted some bee hives for outdoor use (real bees) by mixing mmsmp into a white exterior paint as a tint (paint is all in one, primer, paint and sealer). Do I need to put anything else as a top coat for outdoor use? Thanks
I painted a raw piece of furniture years ago using milk paint, and it easily shows scratch lines. If I reapply wax to the finish will the scratches go away?
Yes! Lightly sand it with fine sandpaper (220 grit) and then apply another coat of wax.
Hi. I have maple kitchen cabinets that have natural maple veneer on the front surface of the doors and drawers. They are getting shabby with water stains. I am thinking the least expensive way to refinish them is to whitewash. Do you have any experience with this approach?
Thanks so much,
Margaret
I’ve never used milk paint, yet watching your videos gives me the confidence that I can do this.
We are having a farmhouse kitchen table and chairs made (unfinished) and I’m so excited to try your milk paint brand. I don’t want the table to have a “super chippy” appearance, just distressed. We’ve thought about staining the wood first, then painting with milk paint. Then sanding for distressed look. What are the best steps to achieve a slight distressed look while still using your product?
Thanks!
I have a super old chair that’s dull and has been stained years ago. Will it chip? In hoping so.
Frist time user- I want to use it on a finished cherry coffee table – Do I need to sand it first or will the finish as an resistant? also have many coats of milk paint do I need 1,2,or 3 ?
This is so right on. I guess it just takes lots of experience to see which things need sanding and which don’t. I hadn’t been to see your blog in a few months and the new design is amazing. I just love everything you do. Your home is an inspiration for how you can make any home, new or old, be full of character.