
There’s a lot of good information and inspiration in this post, so get ready!
First of all, the beauty shot.

Now, the before shot.

I’m so happy with how these turned out. I’m taking the pair of arm chairs (only one is pictured in the before shot) to the Ground Hog Day Sale at Lucketts (Feb 4-6).
If you’d like to read about the paint technique I used on these chair frames, click here.
And, as promised, here is my “secret” glaze formula. It’s Ralph Lauren’s Faux Effects Glaze tinted in Espresso Beans by Behr. It gives a soft, aged finish that’s perfectly brown. I have found most “mocha” or “antique” glazes look really orange. Orange like a bad bronzer or self-tanning spray, so I have one custom mixed.
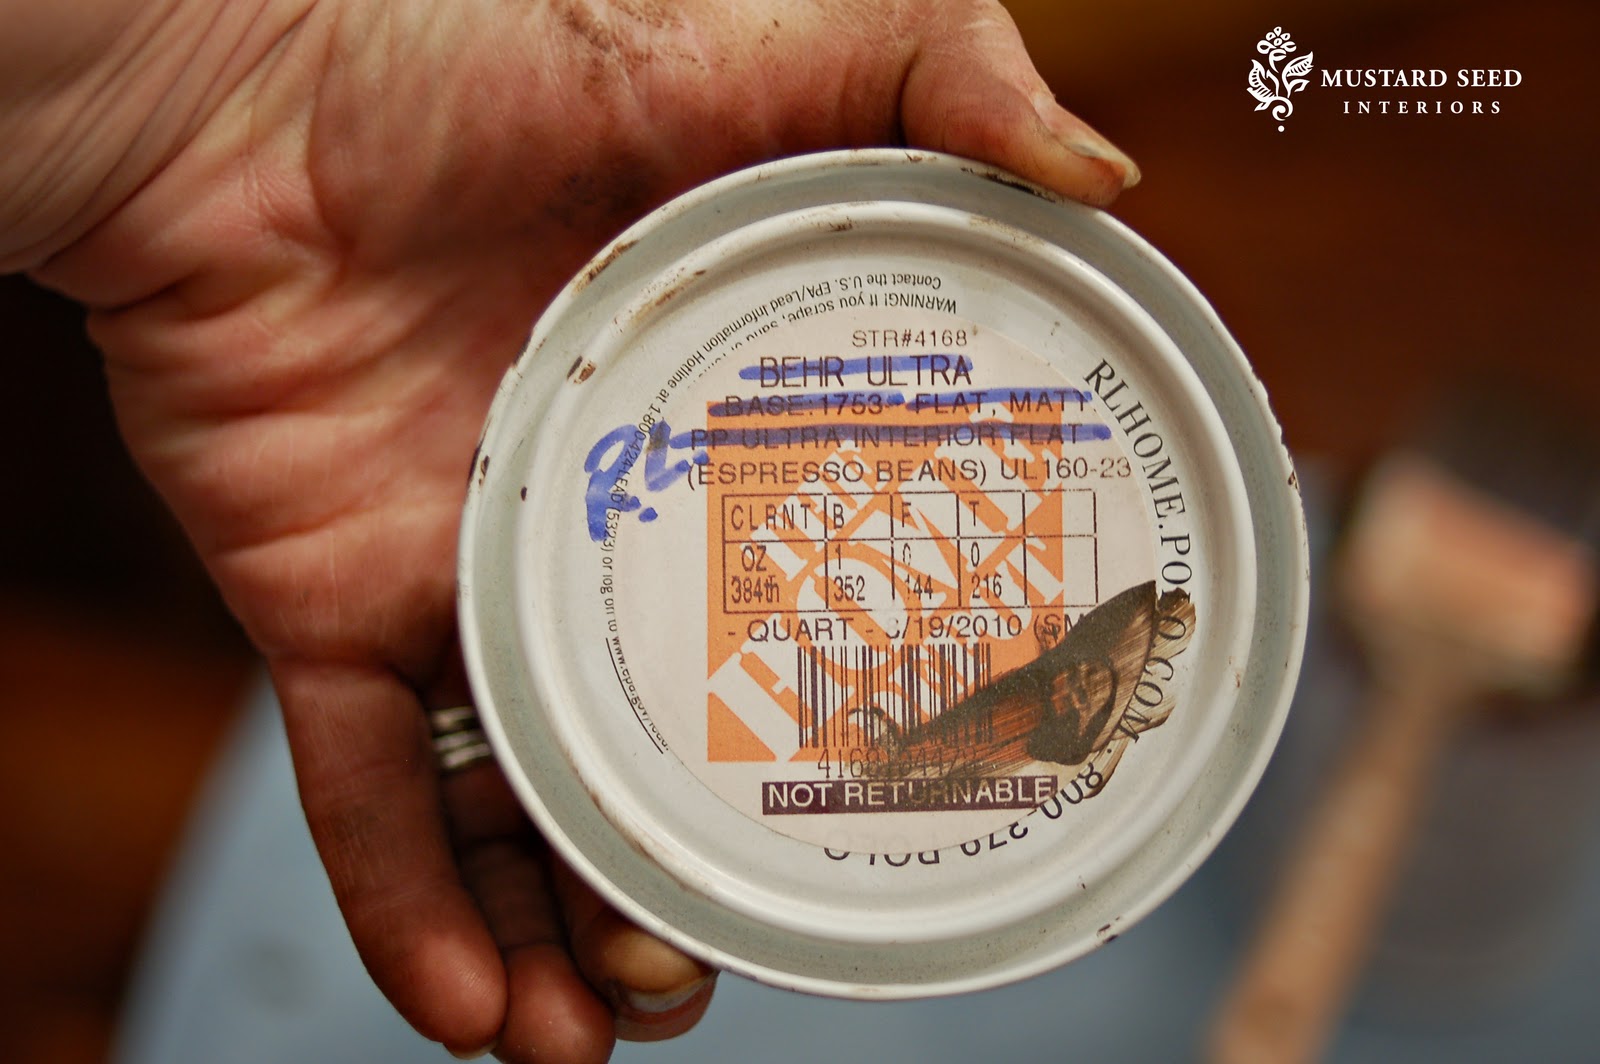
Click on the picture to enlarge. I use a lot of different antiquing techniques, but this one is good for a worn look. It’s also easy to work, so it’s ideal for pieces with nooks and crannies.
So, onto the upholstery. Once the frame was dry, I dragged it into my basement workshop to upholster the back. The chair was already upholstered, so I reused the batting, which was natural cotton and in good condition.

I smashed it into the recess behind the caning. The caning was left to give stability to the back, but if the caning is missing altogether, just stretch and staple some burlap in its place.
A piece of canvas drop cloth was placed over the batting and stapled to the wood frame. I have upholstered furniture with a manual staple gun, an electric one and a pneumatic one. There’s only one way to go. Pneumatic all the way. It does involve having a compressor and the gun is an additional $150, but it is the very best way to go and it will save you a lot of frustration. The other guns are a waste of time. Trust me.
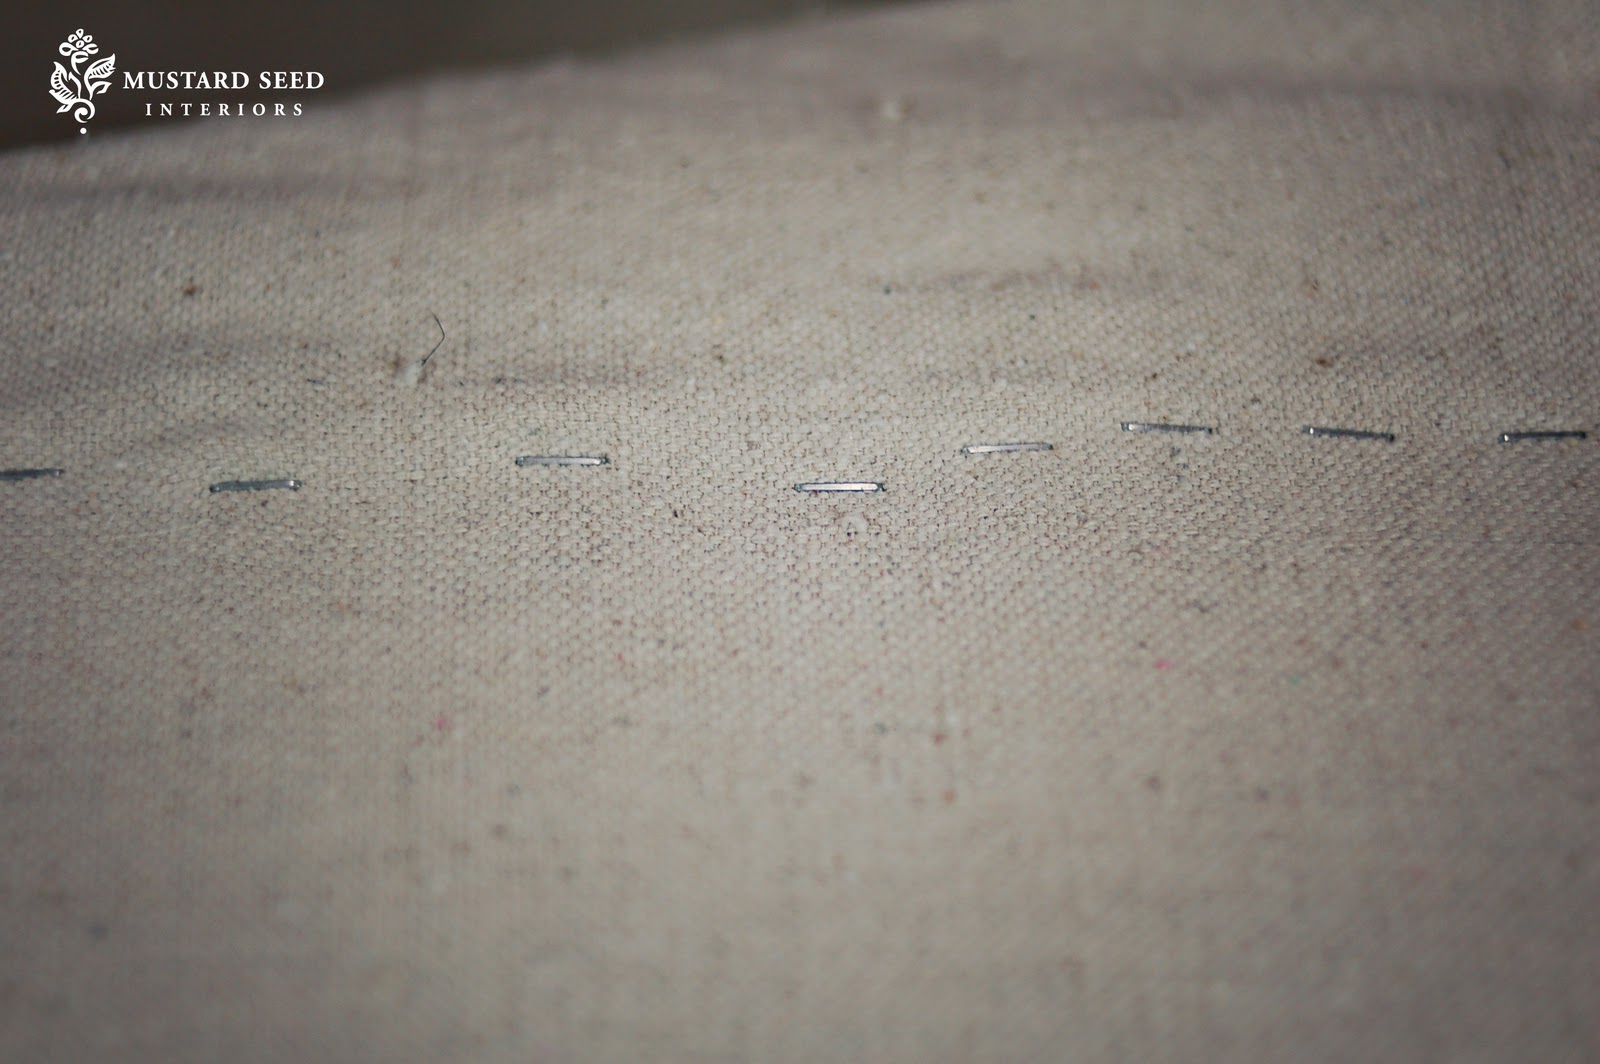
Here’s the back upholstered. Don’t worry about the line of staples. We’ll get to that in a minute.

This is the upholstered back from the front view.

Repeat the steps on the front side. This really is an excellent way to handle a chair with a broken back or one that’s been punched through, so don’t be scared of those anymore.

To cover the staples, I use hot glue and trim (in this case) or double welting. Ann, aka Nutbird, asked why I use bright white trim instead of an off white that would match the canvas better. Honestly, I like the bright white against the nubby canvas. I think it provides a nice clean contrast and frames the fabric better. It’s a personal taste thing, so use whatever color you want.

Apply a bead of glue in small sections and press the trim on the glue with your finger. Watch yourself. It’s hot stuff!

Cut the trim where the pieces meet and smush the ends together. If this is done well, it’s almost unnoticeable.

I chose a slipcovered skirt for the seat, so it’s machine washable. I wrote a full tutorial on how to make these and it will be published in March. I’ll let you know where you can find it, so stay tuned.


I was so tempted to keep these chairs and sell a couple of my dining chairs, to go with the mismatched look, but the arms didn’t fit under the table. Probably a good thing. I know they’ll find a good home.


I knew these were going to be worth the small investment…

…and I was right.

If you’re smitten, you can buy them at the Old Lucketts Store in a few days.

My numbers are climbing fast, so make sure you’re getting your projects ready for the Copy Me Challenge with Funky Junk Interiors and yours truly. It starts soon after my follower widget hits 4000. Prizes will be involved…


77 Responses
I just refinished a chair too. I love this!
STUNNING!!!!!
I bow to the master
Janet xox
What an amazing transformation! Just stunning.
Lovely, as always! I just used antique glaze for the first time yesterday, and can't believe I never tried a glaze before!! Where have I been?
Love!! And they look so beautiful!
When I had a girl upholster a similar chair for me, I was aghast at her glue-gunning job with the trim. I couldn't imagine it was actually done that way. Glue? Really? But lo and behold, it is! I still think I prefer upholstered pieces sans the gimp trim, but you certainly do a nice job with yours.
Hi Marian,
Looks so beautiful Marian,
I wanted to tell you how much I LOVE your photography too…. your photos are amazing…
It is always a treat to get an email saying you have posted again. I look forward to each one of your posts.
Take Care,
Maria
Amazing! Can't wait to try refinishing my old dining chairs. Yours turned out so beautiful!
What did you decide to do with the matching hutches you acquired from family…did you paint them?
Megan
um…i totally want them…how much? Do you think they can be shipped via UPS? I'm in Tucson…they would look awesome next to the pharmacy sign you painted…really…let me know!
Samantha
Samstartt@aol.com
You never fail to impress! 131 followers to go. Are you prepared to post your project if it happens during Blissdom? I took a decorative painting course once, I think in the 1600's. Some smarty paints (I really meant pants) women came with sample boards instead of a project. They were going to try different techniques to use in their artsy type business. I brought some teeny tiny doll type dresser. I think I painted it with karo syrup and vinegar paint and it took 5 years to dry. Probably in 1685. Anyway. It would be fascinating if you could show your techniques on molding boards with closeup pictures with your new lenses (a word?) Then we could see the differences between the orangey glazes and your secret glazes, etc. Or am I guessing that is what you will do in your book or future posts. I love to see what the variety of looks could be. Also: most furniture is made with machine made cane. A tutorial in replacing that would be interesting. Most people don't have time to recane the old way. If it wasn't done that way the first time, the original holes aren't there anyway. Good luck next week. Ann
Sigh! Another amazing job that leaves me jealous and speechless. Really just gorgeous!
Jeanine
AHHHHHH !!!!!!! Just beyond
gorgeousness !!
Thank you so very much for sharing!
I was at the Dallas market
yesterday and did not see one
thing that I LOVE as much as
what you do ~
They have alot of the same feel
but girl you've got it going on !!
xoxo
Lori
Your are a great painter! I will have to try your technique. Thank you for sharing your tips! sandi
Wow, it turned out gorgeous! I love how you showed how to upholster the back of the chair. I actually might attempt this! Blessings<3 Paula
I'm working on a chair right now & I needed this tutorial. Love the finish. You've helped me thru several projects now & it's greatly appreciated. I sell things in my shop & it's impossible to recoup your cost when you have to pay to have it done. Thanks, Jan
Wow Marian – how can you say you had a bad week?? – these are totally gorgeous and you are just amazing. Not sure how you manage such beautiful work every single time. thanks for your generosity in sharing the tutorial also.
good luck with your sale!
Wonderful, and I sure need to find a set of those! I am changing the living room into DR and hopefully hubby will be making me a farmhouse table. The chair is beautiful! Jackie
Simply FANTABULOUS!!!!!
The finished project looks great! Love the pleated cushion. I am such a sucker for pleats!
The finished project looks great! Love the pleated cushion. I am such a sucker for pleats!
Thanks for this tutorial. I've got a table & cane back chairs I have been dying to redo but just didn't know how. This makes it look easy!
omg! It is unbelievable!
Lou Cinda
Thank you so much for so generously sharing all your techniques. This one like all your other projects is an amazing transformation! I am constantly in awe…..No wonder you have nearly 4k followers *winks* Vanna
Beautiful! Thank you so much for sharing the steps, the glaze info, everything! For a newbie like me, this is invaluable. 🙂
Holy, wow. I cannot believe what you did with those chairs. They are truly unique show stoppers.
Your tutorials are very detailed, beautiful photography. You continue to inspire.
They look GREAT!!
Oh, my! You have such vision…I'd probably pass these by. I love how they came out. That glaze is fabulous and the slipcover seat is just what I need for a couple of my chairs. I'll look for the tutorial. Take care and keep on inspiring us!
Hugs,
Sherry
No doubt about it…you have a gift for "seeing" something when others (that would be me) do NOT! Thank you for offering hope and help to the rest of us. I can't believe all that blue led to such a subtle undertone….marvelous!
Really pretty Marian. I thought HD stopped carrying the RL line. I will have to see if they still have the glaze. I have used some browns that look orangey. Also, can you post a close up shot of how you meet the two end of both the welt and gimp? I'm never sure what is the best way to do that without it looking bulky. Thanks!
be still, my heart. I have a great chair for a makeover. If only it turned out as beautifully as yours 🙂
Amazing, just gorgeous!I can understand why you were tempted to keep them…I'm afraid if I had them they would never leave my house!
Beautiful chair…love the finish. It looks like it just happened naturally!
Amazing! I'm so in love with that paint finish! And after studying the seats, I just realized how easy they really are to make… did I tell you I have my sewing machine sitting on my island?!? It's trying to make friends with me. We shall see how that transpires. 🙂
Donna
The paint finish is fantastic. Thanks for the glaze recipe!! And that chair is amazing!!
Hugs
SueAnn
I really wish I lived over there I would be taking theese home for sure!
You made that look so simple. Know I may have to try to reupholster the chair that's been sitting in my basement for a while. I can only hope it turns out as beautiful as yours.
Your timing is great. I have removed the fabric and the entire back portion of a chair and I'm ready to tackle my first upholstry project. You answered so many of my questions – that I didn't know I had until I was staring at this bare frame.
Thank you! Beautiful job.
The chair is amazing! A stunning transformation.
What a fabulous looking chair. I love love love the finish on this chair! It is perfection! I can see why it kills you to let them go….It would make a pretty desk chair too!
I am blown away at the transformation this has been through. The finish on that chair is amazing and I like the way it all just says YUMMY!
Beautiful chairs……Am going to try something similar for the chairs I have to redo….
March?!? We have to wait until March for the seat cover tutorial? You're killing me! 😉
Thanks so much for this post. I just picked up a great chair that has caning on the back that is in really rough shape and was at a bit of a loss of what to do about it… leaving and upholstering right over it is a fantastic idea…I might be dragging out of the basement today. Thanks.
Great post! Now I'm not nearly as scared to looked at those wonderful chairs I see for sale on Craiglist that have the canes all punched through! Can't wait for you're tutorial on the skirt though. Keep up the good work.
These chairs turned out beautifully! I have caned back chairs that are in great shape but this makes me want to redo them anyway!
As for caning…I did it many years ago for an antique store where I worked. Learning to weave cane is fun but very time consuming. The "one piece" press-in kind is quite easy but does not befit true antiques that originally had the weaved kind.
xox
Nancy
I really appreciate this tutorial. I have a very nice chair that is definitely worth fixing up and now I don't feel so afraid to tackle it sometime. Thanks a lot!! 🙂
It is incredible for you to share your secret paint techniques with everyone. I was once told I share too many of my paint techniques. I look at it this way if you’re going to paint a piece, you’re going to do it weather you know my secret or not. If you re not going to paint, your still not going to paint even if you know my secret! I love sharing what I know, because you never know WHO will share what they know. ;~)
The chairs turned out beautiful! Becky
Beautiful. Want. Inspire!
~Tracie
gorgiiiiiiiiiious!
Marian,
It's gorgeous! I absolutely love the way it turned out. Loving the blue frame.
I am hoping to reupholster something soon. Getting that itch!
See you at Blissdom!
Marian, The chair is beautiful. If I had some place to put them they would be going home with me. I was at Lucketts last Thursday. Love that place.
hugs,
Sherry
Holy as in Moly! Do you ever sleep ?!!
Your chair is a true "pygmalion"….just gorgeous!
What a great job! My daughter has a similar chair that belonged to my grandmother. We have talked about trying our hand at recovering it. You have truly inspired me as you always do.
They are really beautiful, Marian. I'm shocked that you're parting with them. They go so well with your chairs in the living room. Hope you're enjoying the weekend.
xoxo,
Jami
i went to home depot to get them to tint the rl glaze with the espresso bean by behr and they said iy is impossible to do that. She tried to overide the computer to do it but it wouldnt. do you just mix it yourself? did anyone else have this problem?
Looks great and so versatile!
Mary Ann
You'd think after hanging with MMS for so long, I'd be jaded by the amazing "afters". Not so! Still swoon-worthy my friend. Hugs, Kim
Yes I had trouble too. HD would not mix it! Their reason was they can't mix RL with anything but RL!
I'm just going to mix it myself.
You certainly have the touch! Your finishes look so original and "real". I've been digging in your tutes but couldn't find if you add a final sealant, like polyurethane, polycrylic, wax or other??? Very interested!
aahhh…so beautiful! I am no longer afraid and can't wait to try this! I actually saw chairs just like this at Sally's the other day, but wasn't sure they were structurally sound…any advisement on this? They seemed super wobbly which was a downer for me as I was ready to buy them!'
Stacey
http://staceyembracingchange.
blogspot.com
I love the skirt on the chair. You do a really good job on your furniture. I'm glad to be a follower…
check me out! I'm just starting out with my blog.
Susan
myhomeroad.blogspot.com
These are spectacular! Beautiful color choice and especially love the pleated skirt! I totally agree that a pnuematic (sp?) stapler is the way to go…I bought one last year and will never go back to anything else. It's so much faster and the ease of handling it makes all the difference for tight spots. And I scored mine on sale at an outlet store for under $70!!! Blessings, Katy
I love how the chair turned out. A removable cushion may be just the ticket for the ladderback chair I picked up this past summer.
Your chairs are beautiful. Truly inspiring. Did you leave the chair's original gold upholstery on it since you made slipcovers?
Hi there! Just found your blog – so inspiring! I am planning to make chair skirts too so I can't wait for your tutorial! Will also add you to my blog roll!
Ali
letsdecorate.blogspot.com
Thank you, thank you, thank you for fixing up those tattered chairs and then giving us a tutorial on how to do it. Even my hubs was impressed with the results (it gives him hope that I am not crazy for picking up other people's useless junk). Today, I had my husband (brave soul) pick up this exact set for free off CL and of course it was beat up. I wanted to recover the seats and backs but needed a tutorial–and of course–you had one!! Happy me 🙂 Love your blog. I have always aspired to do what you do. I love thrifting. I love making old things new. I love your creativity!!
I was just about to ask about whether or not home depot would mix in the espresso beans with the glaze.
Has anyone tried it? What amount of color to the glaze?
I love this blog!
Hi,
I have four broken cane back chairs and am going to be doing exactly what you just did, but i have a couple of questions. Did you put batting on the front of the chair as well? And my cane is ripped on the sides should i use your burlap option or just work around the cane?
Can't wait to see my chairs transform,and hopefully they will be as beautiful as yours.
Ruth
Hi again,
my email address is ruthmgallo@gmail.com
thanks
Ruth
What is the ratio of the paint to the glaze? Did Home Depot mis it together for you? Thanks!
What kind of Paint did you use for the Blue on the chairs?? Chalk or milk or other?? Thanks! You are the best!
Stacy
Hi, I’ve looked for the name of the pneumatic staple gun you use, can’t find it. Can you tell me the brand? I’m currently using a hand stapler and that isn’t going to cut it on the antique couch I’m about to reupholster. 😉
Cheers,
Lisa lee
Thankfulness to my father who informed me about this
weblog, this webpage is genuinely remarkable.