

When I bought this piece, I thought I might have some trouble with the stain bleeding through. Unfortunately, I was right.
The piece looked like this…

…I sanded it to give the surface some tooth…

…painted it in MMSMP Trophy…
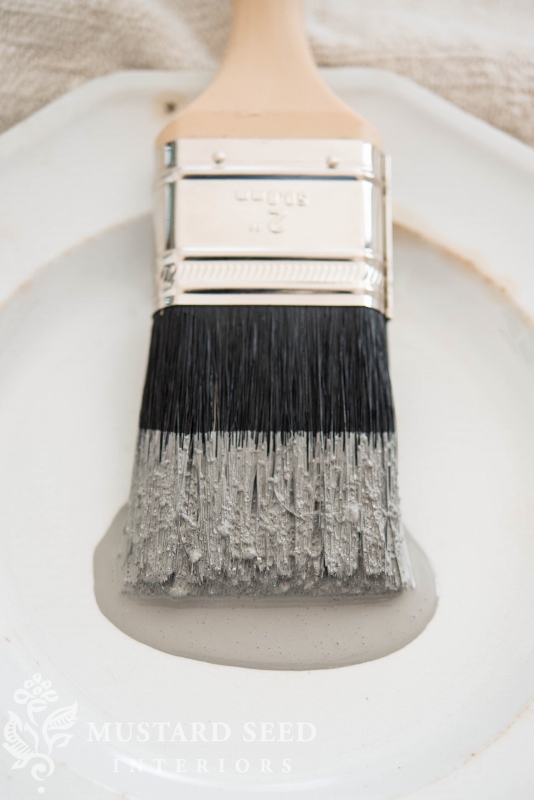
…which is supposed to look like the color shown above – a tarnished silver sort of color. I left it to dry, came back and it was gray-ish purple. Not exactly what I had in mind.
If you’ve painted even a little bit of vintage furniture, I’m sure you’ve come across it. You paint the piece, go make some dinner, come back an hour later and the color is not what you painted it. It’s turned more red or pink or yellow or orange. That is known not-so-affectionately as “the dreaded bleed through.” (This quirk that sometimes rears it’s ugly head when painting pre-finished pieces can happen with any type of paint, by the way.)
This is the place where people freak out. It looks ugly. You’ve just “ruined” Aunt Maude’s bedroom set and your husband is shaking his head for treating wood that way. It seems easier to take it to the thrift store than finish it. Don’t lose heart at this stage. You haven’t ruined anything. If you have bleed through, there is a remedy! The remedy is to seal it, so the stain can’t penetrate the paint.
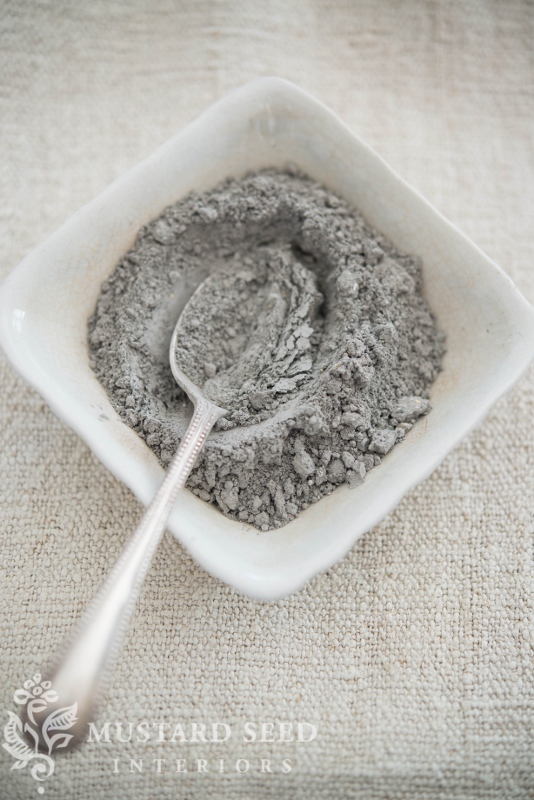
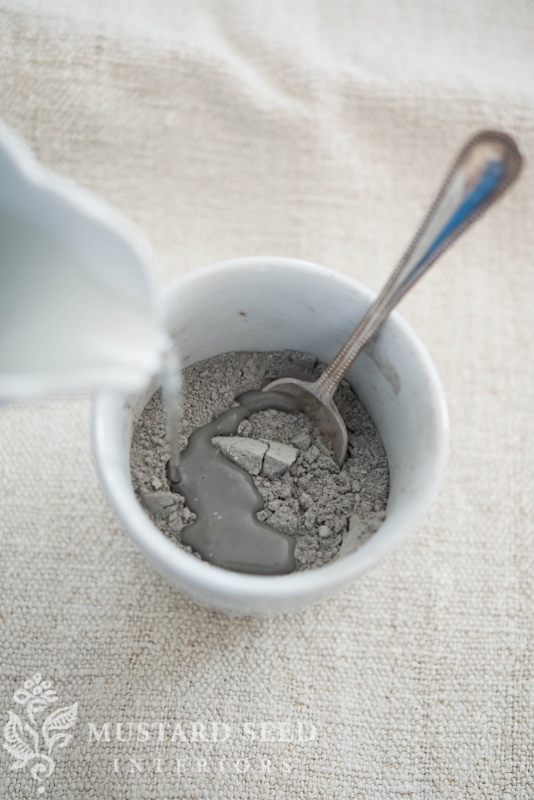
There are a lot of products you can use to do this…a sealing primer, polyurethane, shellac, etc. I have never tried wax before, so I thought I would try it to see how it worked.
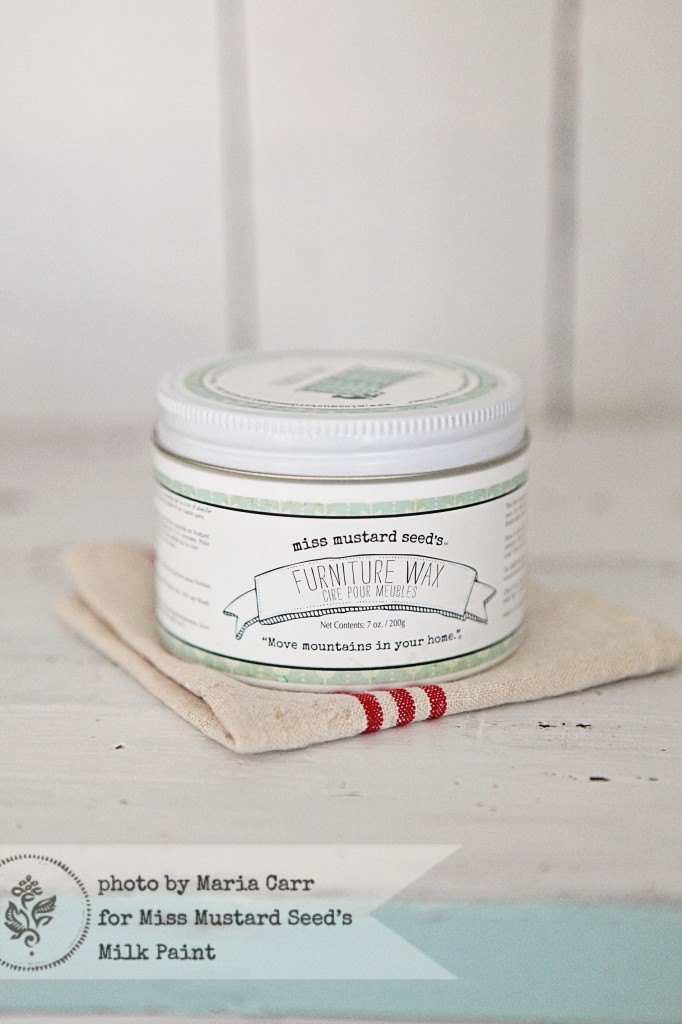
I rubbed it on in a very thin layer, massaging it into the pores of the paint. I think most of the issues people have with waxes involve applying too much. Wax shouldn’t be smeary, gloppy, sticky or smudgy. If it is, you most likely applied too much.

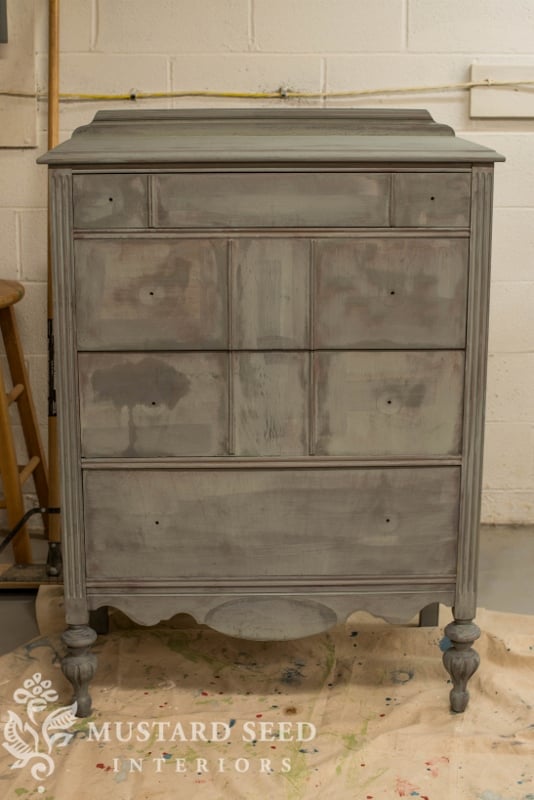
I then applied a second coat of paint and you can see how much better it looks…
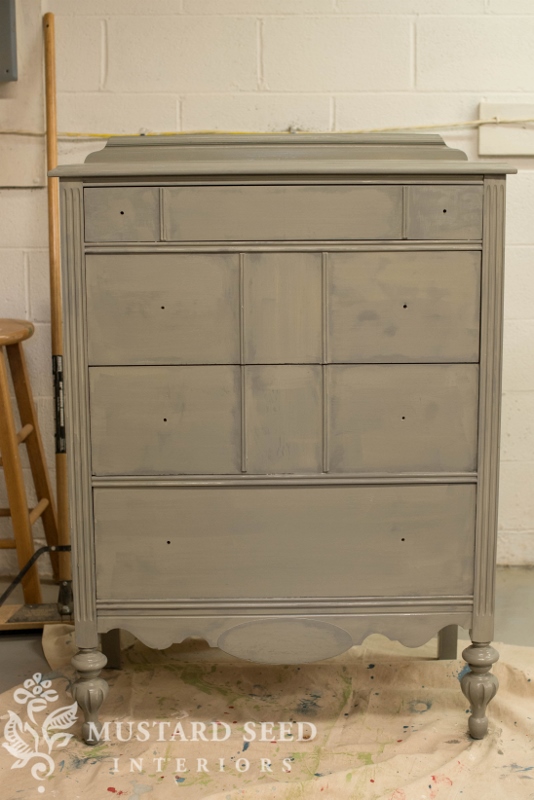
Don’t freak out at the uneven appearance. It’s still not done!
Now, I don’t think I would use wax if I was dealing with red stain bleeding through white paint. That calls for one of the other products I mentioned above. Since I’m working with a darker color, the wax provided just enough of a seal to keep the stain from seeping through to the second layer.
Now that I’ve dealt with the bleeding, it’s time to bring this piece to life. The vertical trim pieces on some of the drawers bug me, so next I’ll show how I made those work for me.
![]()
Speaking of waxes, we’re going to be coming out with some new wax, paint and oil brushes in just a few weeks. This is a peek at one of them…

![]()
Lastly, I found a new home for the wood French cane chair I bought at an antique mall a couple of weeks ago…

I needed something to stand out against the white dresser, pale blue walls and the soon-to-be cream drapes in the family room. This chair was the perfect solution. So, I’ll sell another one and keep this one instead.

I still need to deal with the saggy seat and a reader gave me some good tips on getting that tight, so I’ll give it a try and let you know how it works.


73 Responses
Thanks for showing that sometimes projects don’t start out as anticipated -even for the expert-and how to fix them. I’ve painted furniture, had the bleed-through and freaked out. The second and third coats vastly improved the result.
Nice…the chair is right in front of the child’s cabinet you bought off the same vendor. I hope she sees it, she will be super happy.
I have used the same technique with ASCP. Did you have to use bonding primer to get the milk paint to stick to the waxed surface?
No. Funny enough, milk paint sticks to the wax just fine!
Right! I forgot both piece came from the same vendor. 🙂 I love her stuff.
Thank you, Marian, as you can imagine I appreciate this post right now. I really wanted a chippy look for the dresser that is giving me some trouble, but should I use the bonding agent after the shellac to try and cover the yellow bleed through? Thanks, again. Oh, and I LOVE the new chair.
When using milk paint, I would use a sealing primer, since it will have some tooth. I’d be afraid the milk paint might not stick to a poly or shellac, but I haven’t test it out. If you do use that, I would lightly sand it when dry (not enough to break the seal) and use the bonding agent.
I just did that and even though it didn’t turn out like I planned I still love it! I had a trifold mirror vanity that had that dark stain. I sanded it to rough it up, but then was scared it would bleed through so I used shellac. I didn’t sand it after though. I used ironstone without any bonding agent. I had to use several coats because I didn’t use a gray color first (which you’ve now told me so I know for next time). Luckily it didn’t chip completely off, but instead has an awesome crackly finish that looks like it came straight out of grandma’s attic!
https://www.facebook.com/media/set/?set=a.533918270013285.1073741843.207367629335019&type=1
I just did that and even though it didn’t turn out like I planned I still love it! I had a trifold mirror vanity that had that dark stain. I sanded it to rough it up, but then was scared it would bleed through so I used shellac. I didn’t sand it after though. I used ironstone without any bonding agent. I had to use several coats because I didn’t use a gray color first (which you’ve now told me so I know for next time). Luckily it didn’t chip completely off, but instead has an awesome crackly finish that looks like it came straight out of grandma’s attic!
I have pictures of it on my facebook page.
Thank you so much, Marian, the shellac and bonding agent worked! Loving the color of Grain Sack now (without the horrible yellow bleed through).
Gorgeous chair. Interested to hear about the tips for the cane. I have a couple caned chairs that I need to redo entirely, but I wonder if this tightening tip might work on just a few pieces that are broken?
Will you show us the final look of this beautiful dresser? Can’t wait!!
Yes, definitely!
A few weeks back I tried using Shutter Grey over a piece that had previously been painted with milk paint and sealed with Annie Sloan wax. I was afraid that the milk paint wouldn’t bond to the wax so I sanded it down to rough things up a bit and added bonding agent and still had more chipping than I would have liked considering. The only reason I was repainting this particular piece was because I had someone purchase the piece, but they wanted it painted a different color. I know it’s hard to know for sure, but do you think it was just the difference in the brand of wax or just a toss of the dice?
Yes, it could be the ingredients of the wax. I’ve only tried painting over the wax sold with my line. There are so many factors that I’m not really sure what the culprit was…
I love the details and legs on this dresser. Looking forward to seeing a finished photo of this dresser. Thanks for teaching us how to handled bleed through on this post. It was extremely helpful.
Thank you so much for sharing this tip. I have a nightstand that has 2 coats of paint on it and it is STILL bleeding!! ugh. I will definitely try this. Now, if only I hadn’t just run out of wax….. 😉
Hope the mail man brings it tomorrow.
I love the white child or sample size cabinet. I thought you had said at one time that it was for sale. Is that still the case?
Love your style.
Thank You
Mindy
It was for sale at Lucketts ,but no one bought it, so I just kept it! I’m a little attached to it now, but I’m sure I’ll sell it at some point. 🙂 You know me…
Please email me if you ever decide to sale it. 🙂
Thank You
Mindy
Marian, you are so right that bleed through can happen with any type or brand of paint! I had an inexpensive “mahogany” stained piece that I used white Kilz primer on as a base coat for my white latex paint, and boy was I shocked to come back later to discover a PINK etagere in my living room! It took two coats of Kilz AND two coats of Benjamin Moore latex paint to kill that pink bleed-through, a lot more work than I had planned to spend on the piece, but the end result was good.
Question: would you recommend a latex primer under your MMSMP on a piece (like my etagere) where you just know you’re going to get some funky bleed through? Or does latex primer and milk paint not play well together? I’ve got another couple pieces of a bedroom set I can see going yellow on me and would love your advice on that. Thank you!
Kimberly
Yes, you can use a sealing primer under milk paint. I have not tested every brand, so there may be combinations that work better than others… I know Jennylyn of Homestead House uses Zinsser.
THANK YOU Marian, for your advice! I will try Zinsser sealing primer on the bedroom set pieces.
Just this weekend, I painted MMS dried lavender with bonding primer over a mahogany dresser with a layer of poly on it. I didn’t sand or do any prep work, and I didn’t even use as much bonding primer as we’re supposed to it, but it only took two coats to cover and achieve the smooth finish I wanted. I was so impressed with the tone of the dried lavender and how well the bonding primer worked.
Hello Kimberly! My name is Katy and I’m the social media coordinator for KILZ brand products. I stumbled upon this page and noticed your comments about our product. You said that it took two coats of KILZ and two coats of your top coat to cover the bleed through. Did you try topcoating after just one coat of KILZ? In regards to primer consistency, primers don’t have to be opaque to do it’s job. It’s very common for people to look for a ‘blanket of white’ primer coating, but it’s not specifically relevant. It’s one of the most common misunderstandings. We have a product called MAX Clear that blocks stains from bleeding through paint, but it dries clear so it doesn’t hide at all.
Another reason is you weren’t using the correct primer for the job. Our primers are formulated with specific features for specific projects.
Please email us at ask@kilz.com if you have any questions or concerns. Thanks!
I’ve always used the wax trick with bleed through and it makes me happy to see you doing the same 😉
On other pieces you’ve used the wax as a “resist” to help the milk paint peel off in desired areas. If you use the wax as a sealer on the whole dresser, don’t you have to use the bonding agent to keep the milk paint from peeling off the whole thing? I’m really new to this and just want to understand how it works!
Great question! They are different kind of waxes. The wax pucks will act as a resist and the paint will not adhere. The furniture wax can work as a sealer between colors to either minimize (not totally stop) bleed through or to give some separation between the colors when distressing.
I’m so glad you said that! I’ve been wondering the very same thing!
When will the new colors be available? I’m dying to get “apron strings!”
The preorders for retailers start next week and they will be shipped out the first week of November. There are some retailers who are taking pre-orders, like Laura at the Ironstone Nest.
Marian, just got home from vacation an the first thing I read was your back posts that I missed while gone (and avoiding computers). I read your blog (and many others) to find out what new stores are worth checking out and what is new. I expect you to promo furniture and things you love…that’s why I read blogs! I don’t care if you get free products or sponsorships, just keep doing what you think is appropriate. Your posts inspire me to be a better decorator and a better blogger. Thanks for all you do.
Amen to Rivercrest Cottage. Marian, you are the best, and thank you for all of your inspiration. I am so happy for your success.
The way I look at it , you are doing homework and research for us concerning different products. That is a valuable service! I like to hear about what products are good, etc. You are doing a great job Marian!. Your blog is easy to read and the pictures are so clean and crisp. Very easy on the eyes. I think any free products are blessings from God and I am so excited for you!
I love the questions and your responses immediately below. Sometimes so many questions
when trying to paint and your recommendations are appreciated—-products used are most helpful.
hi marion…this is not a comment on your post but I sent you an e-mail about the size of the boxwood wreath you used with your yearling calf head….since i’m sure you are behind on responding to individual e-mails and I see you respond to comments here on the blog, I thought maybe this might be a better place to pose my question. Could you please let me know the size of that wreath as mine (18″) is too small to fix the yearling head…also where did you get it?
Thanks!
Judy
Ha! I need to deal with my saggy seat also!
Have a beautiful Tuesday Marion!
Michelle
Marian, your blog is the first thing I read every morning – I love everything you do and am thankful that you share so much with us. I can’t wait to see how the dresser turns out, and I love the new chair. I’m a little embarrassed to ask, and maybe I missed it in another post, but do you have plans for your soon-to-be-replaced blue family room drapes? If they don’t have a new home, I would happily purchase them from you! ‘Hope you have a great week.
Kaille
Sure thing. It’s 24″. I got mine through American Farm House, but I know they are also sold on Amazon.
I finally bought some milk paint yesterday from Vintage Bliss. I started painting a little side table almost as soon as I gt home and could mix the paint. And sure enough! Bleed through on the top. Your post is quite timely! I was going to use kilz on the top but I may try the wax first. Now I just need to find some time to work on it. My job sure is getting in the way with my painting time!
You know, we are armed with an arsenal of info thanks to you, last week I was answering furniture questions from my massage client , lol, so I just loaned her my copy of your book and said, she has a lot more info on her blog! This was an issue I am about to encounter with a piece so thank you for this post and the help before I need it!
I haven’t tried to remodel a stained piece, but I’m certainly glad to have this solution! Definitely going to save and share!
This website is for those who cannot cane but would also like to support adults with disabilities that have been trained to cane chairs! I saw them featured on a tv show! They accept chairs from all over the USA.
http://thecenterhouston.org/
Hello: Home come no one ever mentions how hard waxing is on your arm and shoulder. I can only do a little and have to stop. Bad shoulder, weak arm. I have seen a brush attachment that attaches to a drill but wonder how it makes a smooth finish since the bristles look so rough. Is it possible that a small hand held car polisher would work for the overall flat areas. Any ideas out there for products to make waxing easier. Is it just me…..
Yes, waxing is hard work! I would suggest applying it with a rag when working on flat surfaces, like table tops and dresser drawer fronts. It’s easier to apply the wax, buffing it at the same time. The nice thing about wax is that you can apply it in small sections in order to give your arm a rest.
Oil is a much easier finish to work with. Just brush it on and wipe it off. I love both finishes, but you can really use whatever topcoat you want…poly, shellac, varnish, oil, wax. There isn’t a wrong choice…just preferences.
I’m dying to get the trophy color. Can’t wait until the colors are ready to ship!
Simone
I’m loving this trophy color. I can’t decide if it is gray or taupe, or a combo of both? Is it the color on my pad or is it pretty true to color? Either way this dresser is going to be killer, and you have us wondering about those vertical pieces, and what you have planned.
To prevent bleeding thru your paint I have found Zinzer primer with shellac works much better than Kilz.
Hello Marian! My name is Katy and I’m the social media coordinator for KILZ brand products. Have you tried our new KILZ MAX primer? This water-base primer, sealer and stainblocker was developed with new technology that’s formulated to perform like an oil and shellac -based product. You can find MAX at your local Ace, Do it Best, The Home Depot, Lowe’s and True Value stores. We definitely think you will be pleased with the results! : )
Thanks for all your wonderfully informative and relevant posts! I look forward to reading them everyday. Up here in Canada, we don’t have all the fabulous markets and junking venues that appear on your street corners in the US… instead we have Tim Hortons! lol! Love that you keep your posts honest, human and full of detail. You are very generous with all of your tips and helpful suggestions. I follow a few other blogs as well but one in particular shares beautiful pieces and vignettes but keeps her techniques ‘top secret’. Thank you for sharing and supporting all of our creativity.
Sincerely, Carol
Victoria, BC
I had a big problem with bleeding through after totally finishing a sofa table with ASCP Pure White and Clear Wax. Even after a few months! I tried Shellack as I always do (but never did it before on waxed pieces) and the Shellack got brown!!! It took me three layers of paint to cover that… 🙁 So next time I would try another product!
Bleed through is my arch enemy…not with furniture though, I’m attempting at painting an entire house filled with varnished wood walls. I have to put on at least two coats of primer before even thinking about paint. Such a pain! Your dresser is a gorgeous color!
Marian,
Terri here in Gilbert Az. I just recently purchased a 1920’s Credenza and its all original, but am wondering if I should leave it the way it is or refinish it. Your thoughts on this would be appreciated. I will be putting it along a wall in my living room. Also where can I get your paints here in town?
Thank you for any advise you can give,
Terri
Thanks – It’s good to know I am not the only one who needs to “step back” and conquer – Looks great now – Can’t wait to see the finished chest.
QUESTION – AGAIN!! What kind of poly can you use w/MMS – I used poly over white and it turned yellow on me – on a piece with chalk paint as well – very light color–Is there a difference between oil based and water based?
So glad i just read this since I have a few older pieces I have to refinish, as always, so glad you’re here miss M!
I actually like the look, after the wax It looks real rustic & not perfect , kinda like my body these days ! Lol!!!! 🙂 however, I know it may not be quite what you or others we trying to achieve! Good info. You never know with some woods!
I too deal with a saggy seat 🙂 sorry I just couldn’t resist!
The wax! yes, I had this issue with applying too much and you’re so right, it wasn’t pretty . But trial and error are the best teachers. For me at least, wax application with a soft cloth works best. The brush doesn’t work as well (for me that is), with cloth you have more control too.
By the way, have you ever shared which of your paint colors is your favorite?
Your timing is impeccable! I thought about painting a dresser in my garage today but I have been dragging my feet because I was afraid of exactly what happened to you! Thank you so much for sharing! Furniture wax wasn’t even in my thought pattern. I appreciate your hard work and being willing to teach us how to overcome frustrating obstacles. You rock!
Hi Marian-
I`m huge fan of painting furnitures…but in this case :- the furniture is telling you that you`re wrong ! “Bleeding” is pain and sometimes we have to respect old furnitures. I really loved the “before” ! Makes me sad & rethinking of painting all & everything !
However – thank you for that “lesson”
I have used shellac on two pieces before painting with milk paint. Both times there was very little chipping, if any. It adheres to the shellac very well. Thought some people might like to know that.
Soooo excited about your paint/wax brushes!!!
That CHAIR!!! That CHAIR!!! That CHAIR!!!
Gal, On the cane chairs, wet the cane and when it dries, it will be tight again. I love the gray and white look. Thinking of working it into my bedroom. Thanks… Patt
Marian,
I wanted to tell you how much I appreciate your reply to my comment on your blogpost the other day. I literally squealed with excitement when I saw it. My husband looked at me with a puzzled look and couldn’t figure out what I was so thrilled about. Then I told him…I think he understood.
I am also super thrilled that I will be able to purchase some milk paint close to my house. (Either in Jasper or Ragley). I hope to make my first purchase of your brand this month and I already have a few projects in mind. Keep up the great work! You’re amazing!
I just have a hard time seeing the trend of painting such beautiful wood furniture a really awful flat milk paint. How in the world did this furniture trend come into being? I know you, Marion, did not invent this but how can someone paint over the beautiful finishes without a thought as to how this is not a good thing. Just wondering.
Well, the piece isn’t finished, yet. 🙂 Milk Paint is very flat, but it looks lovely once a top coat is applied. Everyone has their own tastes, though, and that’s okay.
This post has reminded me of a problem that I keep having when using Ironstone on pieces. I can’t seem to get good coverage and while not bleed-through per se, the translucent issue is boggling my mind. I have tried using a primer first, have tried making the paint differing thicknesses but just can’t get that white white coverage that I am sometimes looking for and end up with blotchy bits showing through. Any ideas?
I had that same issue a while back. I had a vintage wall shelf that was very orange, and kept bleeding through my precious MMSMP Grain Sack. I decided to “seal” the piece with a coat of deep blue enamel, and that did the trick. I absolutely love how the Grain Sack color took to the blue undercoat, and now it’s a gorgeous silvery-blue that I adore.
The shelf still hasn’t found a semi-permanent home, but it’s functioning as my ‘fantel’ right now, and I’m happy about that!
I must be strange- i thought the bleed through was kind of cool- especially on the bottom left it looked like a tree – would have inspired an impromptu scene painting session on that piece 🙂 Good thing I don’t redo furniture!
I am addicted to your blog Miss mustard Seed- you are awesome- thanks for your style, knowledge ( and sharing of that knowledge) and the inspiration! 🙂
HELP!!!! I started to paint a small fern stand that is dark wood. I mixed my paint and used bonding agent. I used tricycle. Brown bled through. I used furniture wax over entire piece and the painted part. Put second coat. Still bled through. Put another coat of paint. Same thing. Also was not adhering to parts of the piece. Put a second coat of furniture wax and painted again. Just got worse! How can I fix this and what did I do wrong!?? I was painting this to use in a demo
Just beautiful!
How do I get a chippy look where I see the wood underneath the milk paint, when my piece is bleeding? Is clear shellac conducive to chipping? I could use zinnser stain block, but that’s white and then one won’t see the wood. I want to use my favorite linen MMS. Pointers?
Thank you for sharing!! I came searching for help and I found your site!! I have just painted my MIL 100 year old Queen Anne chair….terrible meltdown because the stain keeps bleeding through but easy fix now
So, I’ve been painting furniture for years now and have seen the bleed through a few times before, but it has always been manageable. However, I currently have a reproduction Duncan Phyfe drop leaf table that I wanted to paint a lovely farmhouse green, and when I prepped it with TWO coats of sealing primer, it STILL bled through terribly! I even did an experiment where I primed a portion that I sanded and a portion that I did not. Both looked like the elevator scene from The Shining! I’ve never seen it this bad before and I’m wondering at this point if my only recourse is to go with a darker color instead of the pale green. I’ve considered waxing it, but, to be brutally honest, I do not want to waste time on another step that I’m afraid will not work. Your thoughts? BTW, love what you do, MMS! Very inspiring.