

A few of you noticed the counter in the background of the cleaning cart turned kitchen cart post. It is actually a mobile shop counter I designed and Jeff built for me! I wanted a counter that had a vintage look and feel, but would be mobile and reasonably lightweight to take to the Lucketts Spring Market and any other future events. While I would love another large, antique counter, they are usually not mobile and definitely not lightweight. Building a new one was really a much better option.

So, Jeff and I went shopping for materials, discussing the design elements I wanted to incorporate as well as the practical aspect of how this mobile shop counter needs to function.
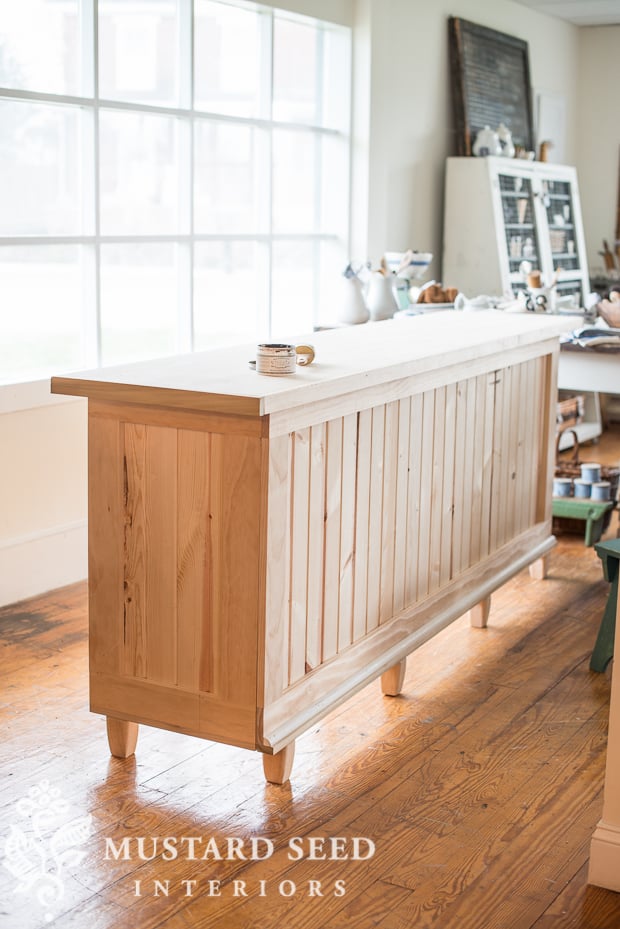
I wanted beadboard and a wood top. Jeff had the idea to put it up on feet, in case the ground is wet. We also needed a shelf on the backside, for bags and wrapping materials and it has to be sturdy enough to hold my antique cash register and allow for people to lean on it. We wanted this shop counter to be mobile, but it had to be functional and solid.
With all of those wants and needs, this is what I came up with…

I’m not really a graph paper kind of girl. Just give me a blank piece of paper and let me draw something that is wonky and totally not to scale.

(“Scrapts” is supposed to be “scraps”, by the way!)
For the sides and front of the mobile shop counter, we used beadboard paneling framed out by 1 x 4’s. For the top, we used an 8′ x 20″ piece of wood (actually a lot of smaller pieces of wood that were glued together) that we found at Lowe’s for $40. We had two other things loaded in our cart before we found this option, which was the easiest and most economical. We trimmed it in 1 x 2’s to make it look more substantial. The feet were also pre-fab feet that were just screwed into the bottom.

The sides and top are removable (can be disconnected by removing a few screws), so the entire counter can be stored flat.
Jeff built the piece with one of our former youth group students, Charles. He’s an ER doctor now, which is just crazy for me to wrap my head around, and he is a hobby woodworker. Charles and Jeff together built the counter and two antique-style rolling shoe carts in one day! (You can see how those turned out HERE.) I told Jeff that we need to have Charles over more often!
Charles’ Etsy shop is Wine Down Carpentry if you’re interested in checking out his work.
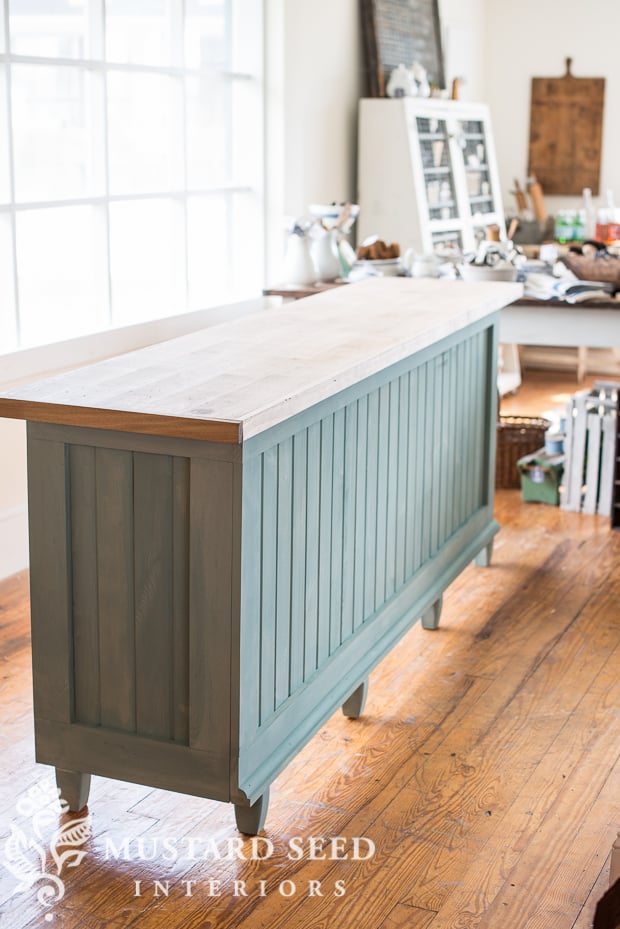
I want to add some visual texture to the base of the mobile shop counter, so I decided to layer a couple of different paint colors. I went with Kitchen Scale as the base with Boxwood on top. While my booth is pretty much all white this year, I am using some greens, because green will read as a neutral on the grass.
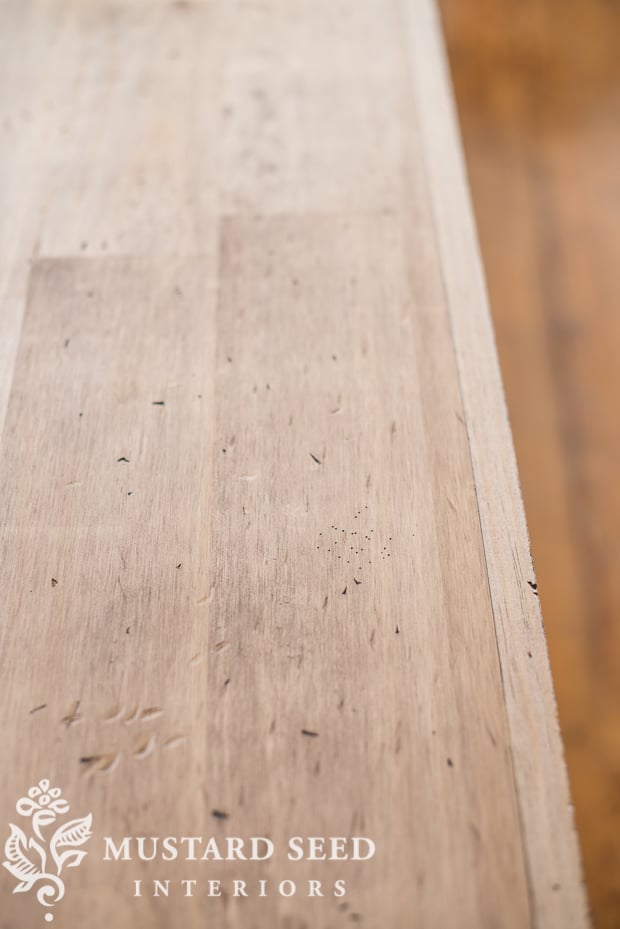
I beat up the top with various tools…a hammer, file, nails (to make wormholes), screwdriver, etc. and then I finished it with Antiquing Wax to bring out the dings and dents. I think this wood must’ve been treated in some way, because it didn’t accept the stain in the Antiquing Wax as well as other pieces I’ve done this exact technique on. So, the counter was lighter than I envisioned, but it still looks nice.
You can see a tutorial on how to make new wood look old HERE.
I applied a layer of 100% Beeswax Finish over the Kitchen Scale base coat and then added a layer of Boxwood, followed by some distressing. I finished it with a coat of the new Matte Tough Coat. I am falling more and more in love with that finish!

I’m expecting this piece will get a lot of abuse as it’s moved, assembled and disassembled, so this distress finish will hide the scratches and dents that are bound to happen.
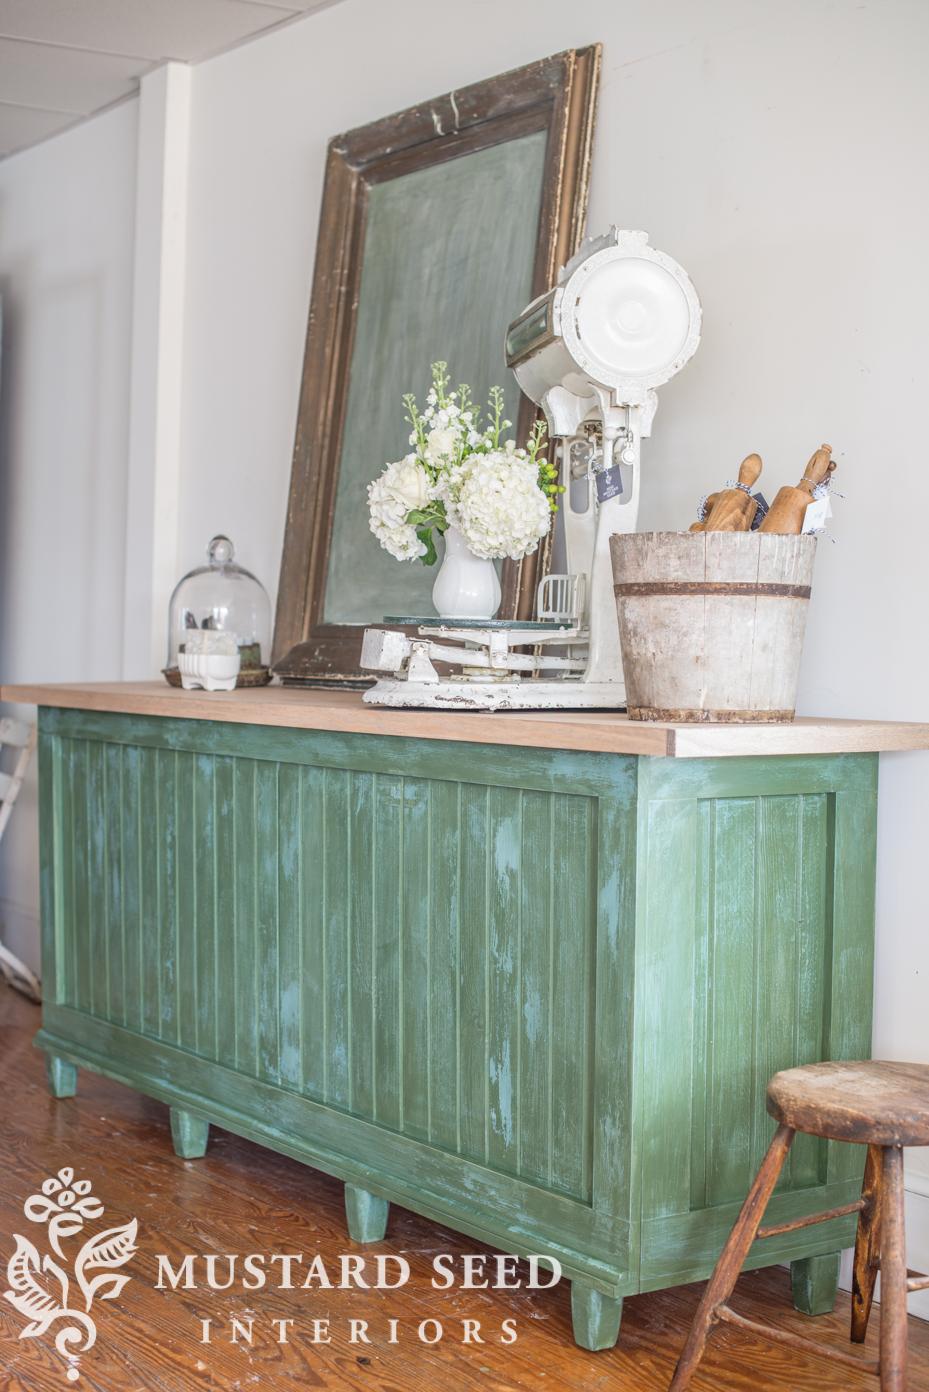

I found that awesome scale when my mom and I were out shopping last week. It was a little pricey and I initially decided not to buy it, but I kept thinking about it, so we went back to pick it up.
It is for sale, but I have a plan for using it in a display in my tent at Lucketts.


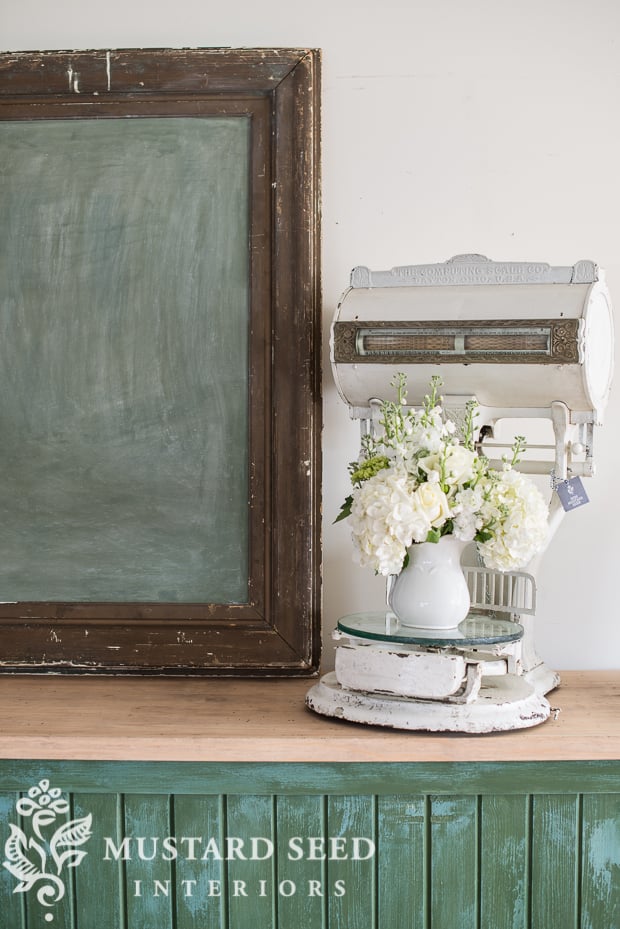
We have been super productive in the studio this week, working on new things, like the counter, and things that have been languishing in the to-do stash for way too long. This large frame was one of those things. I finally cut a piece of luan (thin plywood) to fit inside and painted it in the milk paint vintage chalkboard recipe (3 parts Boxwood to 2 parts Artissimo.) This color recipe has really reinvigorated my enthusiasm for chalkboards. I found it waning a little bit, but it’s back in full force.
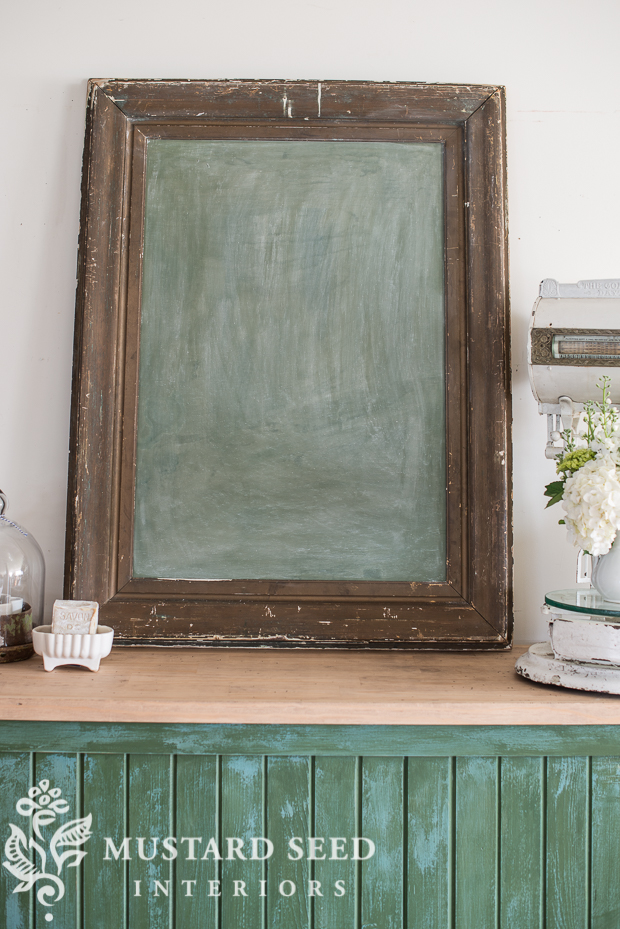
It’s another piece that will be for sale, but is a key part of one of my Lucketts displays.
Waiting for Lucketts is like waiting for Christmas. I am super excited about it this year especially with this sharp mobile shop counter we designed and built!
![]()
Happy Easter weekend everyone!
He is risen…


30 Responses
Looks great!
He is risen indeed!
That counter looks great and will be so useful for you! I love seeing all the things you are making and buying and taking to Lucketts. That should be a great event for you!
He is Risen indeed!
I love everything you do! this is fabulous. Thank you for sharing. A blessed Easter to you
He is risen indeed!
Marian, do you prime your chalk boards first? Do you sand in between coats? I have made a few but the surface is always ruff and that doesn’t make for nice writing. However I have always used chalkboard paint and maybe the milk paint would be so much better because you can get it silky smooth.
No, I don’t do either. I will sometimes give a light sanding when it’s done to knock down any bumps. I think the key is starting with a relatively smooth surface and applying the paint in thin layers.
I use a foam brush to apply chalkboard paint, being sure the paint is thoroughly mixed in the can. It turns out nice and smooth. chalkboard spray paint is easy to use but the fumes are really bad.
You floor me!! That is amazing. So well thought out! I bet you will have request for people to purchase those!!
Very nice! I’m jealous that you have such talented help.
Amen! He risen.
Ok I LOVE it!!! That finish on the bead board is YUUUUUUMMMO!!!! I have GOT to try that chalkboard recipe! It looks GREAT!!!
The counter looks great. I really like the green chalkboard too and the detail on the scale is so pretty. I hope you post another video of Lucketts. I really enjoyed it last year. Have a great time.
He is risen indeed.
Since I can’t get to Lucket’s I am really enjoying following along as you complete projects. I love everything so far, and I am marveling at your accomplishments.
Happy Easter to you and your family Marian! He is Risen indeed . . . .
Much love from sunny Rhode Island . . . .
Happy Easter to you and your family. He is Risen and i am so very glad.
I sure want that scale! May I ask how much it is?
Happy Easter Marian! The counter turned out great!
Excellent looking counter! It will anchor your booth!
I love your new counter! Looks perfect for your needs!
He is risen indeed!
Hi, Marian! Great job on the counter. The paint color is very nice. I may try that combination on a little cupboard I’ve been wondering what color to paint. Tell Jeff he did a super job on it. Wish he’d come up to Michigan and build….oh, I don’t know, but I’ll think of something! Happy Easter. Hope you and your family enjoyed a lovely day together!
My dad gave me a scale almost exactly like that one!!! It’s from 1918! It’s brassy, bronzy color. It’s huge though!! I wonder how much they are worth???
Amen, Marian! He is risen, indeed!!
oh my goodness that looks amazing!
I love the design and the colors!
Awesome job !
Blessings,
Aimee L
He is risen, indeed! As a now-deceased friend of mine used to say, “Yay, God!”
Beautiful work on the counter and chalkboard. Thanks for the continuing inspiration. Every time I see a piece of old furniture or other item, I wonder to myself how it could be “Mustardized”;-)
The cash wrap turned to great> The scale is such icing on the cake.
That scale is killing me. I keep coming back to look at it. Is it for sale?
I love this table and would love something like this to sell my clothing on. Keep up the great work!
I absolutely LOVE this…I am needing to make a counter for a small retail store I am opening soon. THIS is exactly what I want it to look like ? . So is this just a front & sides..is there a frame ? Thanks so much ?
The top and shelves are what hold it together. We used it for two antique markets and it worked great!