
I had so many people send me e-mails and comments asking for a tutorial and fabric source for my dining room curtains. Come on, ladies! You’re my girls. Do you really think I would leave you all hanging like that? All you have to do is pay $50 for the e-tutorial and I’ll tell you everything!
Just kidding. Here’s the dish…for free. ‘Cause you’re my girls. Don’t be scared if you’re new to sewing. If you can cut, measure, and sew a (semi) straight line, you can make these. They are very forgiving.

First of all, these curtains are “dummy panels”, which means they are non-functioning drapes. My fabric is 58″ wide and that was ample for my windows. If you need the curtains for privacy, you’ll want to measure to make sure they will close and provide you full coverage.
Cut your fabric to the desired length. I wanted to hang my curtain rod at 88″ from the floor, so I cut the fabric to 94″ long in order to leave enough fabric for a hem, seam allowances, and a 2″ ruffle at the top. Lay your fabric out on the floor with the pattern facing up. Put your lining fabric on top of the curtain fabric with the right side facing down. I used a twin flat sheet that I purchased at Wal-Mart for $3.00. Smooth the fabrics out and line up the edges. I then cut the sheet/lining to match the curtain fabric. Pin the top and two side edges together, leaving the bottom open. Imagine you’re sewing a huge pillow case. Ok?

Sew along the two sides and top, again, leaving the bottom open. It’s ok if your sewing is not perfectly straight. Just do your best.

Now, turn your curtains right-side-out and press the seams. (Sorry for the blurry picture. Do you know how hard it is to take a picture with your left hand while you’re ironing with your right? Is that an Olympic sport yet?)

As a side note, have I ever shared my 1940’s ironing board cabinet?
It has the original glass knob and everything.

Once you have your edges pressed, lay your curtain panel on the floor (or work surface) with the right side down.

I used a piece of the sheet I trimmed off my lining to use as the sleeve for the curtain rod. I pinned it two inches from the top of the panel, turning the sides under to hide the raw edge.

I needed about a 2″ wide sleeve to fit my curtain rod, so I measured 2″ down from my pin line to sew a second line, which will complete the sleeve.

So, I’m going to sew along the pencil line and the stitch line (that was originally the edge of the sheet, so it was already sewn.)


Nobody is going to see this, so it’s ok to leave the edges raw. Simply slide the rod into the sleeve and…ta-da! A curtain panel in about 20 minutes. The first one may take you a little longer, but you’ll get quicker as you move along. So, what happened to the bottom edge of the curtains? Well, nothing yet. I like to let my curtains hang for a few days before I hem them. So, we’ll be hemming our curtains together when I can get to it.

As a disclaimer, this is the totally wrong, but totally easy way to make curtains. You don’t have to mess with fusible webbing, header tape, rings, and all of those little things that add time and money to a project.
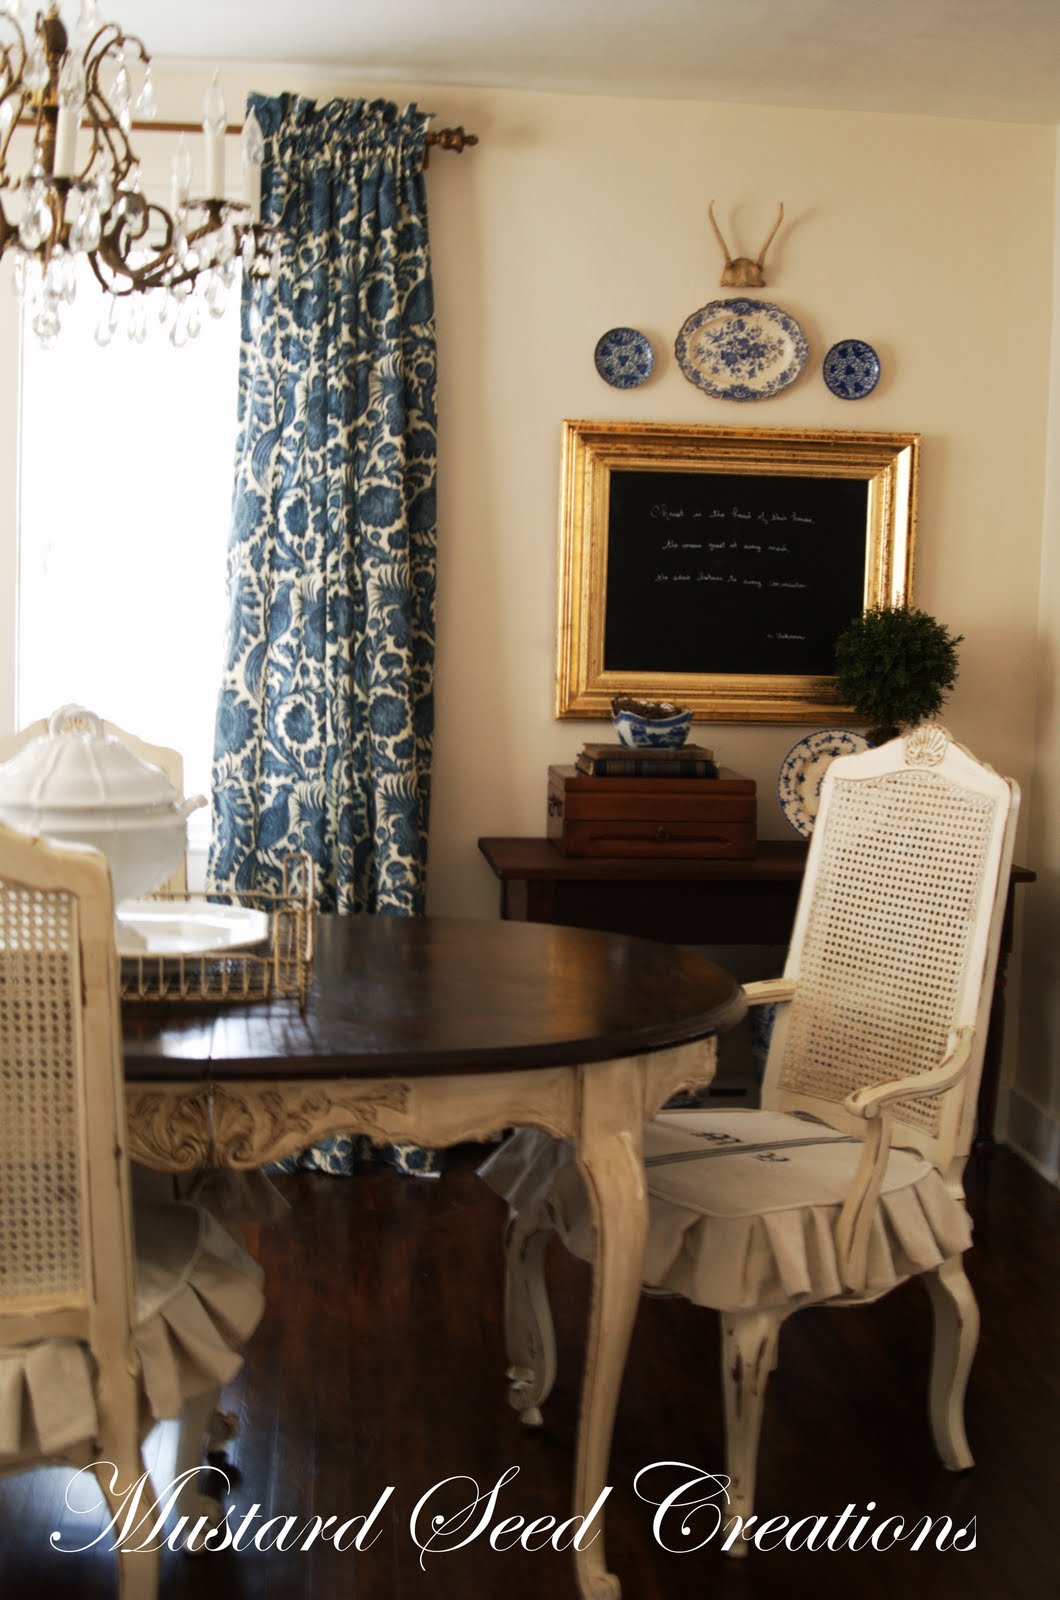
I purchased my fabric on sale from JoAnn Fabrics and online at Fabric.com using a coupon code. Here’s where the money-saving part came in. I loved this print, but it was $36/yard or something crazy like that in the decorator fabric section (linen and cotton blend.) There was no way I could afford that, even with a discount or coupon. Then, I spotted this same print in Waverly’s Sun-n-shade line (canvas fabric.) It was on sale for $10/yard AND I had a $55 gift card for my birthday. The fabric is called Tucker Resist Chambray by Waverly and it’s based on a block printed fabric found in Williamsburg. It’s a little less than $10/yard at fabric.com right now and is even less with a coupon code!
I also had a couple of questions about my floor and table stain color. Both are Dark Walnut by Minwax. You can read more about the antlers here and the chalkboard quote here. A tutorial for the cord cover will come shortly!


46 Responses
These look amazing!!! Great job and tutorial, Janell
Ha! I did a tutorial on making a chandelier cord cover today! Had already made the toile breakfast nook cushions and matching lampshades so that was all I needed to finish the room.
~~Nancy~~
I love your curtains and I'm glad they are blue, 'cause if Miss Mustard has blue curtains in her room then the blue paisley curtains I made for our family room are working 😉
You did a great job on your curtains and they look fabulous! I love the pattern and what a deal you got!
Be a sweetie,
Shelia 😉
I love this fabric and what an easy way to do panels! Enjoyed your tutorial too!
Beautiful fabric! I wish I wasn't such a pattern chicken because I fall in love with rooms that use beautiful fabrics like yours. Haven't decided what I'm doing yet for curtains in my pad but when I do & if I choose a heavy curtain (as opposed to voile & roman shades), I'm using your easy tutorial. Thanks for sharing.
Jami
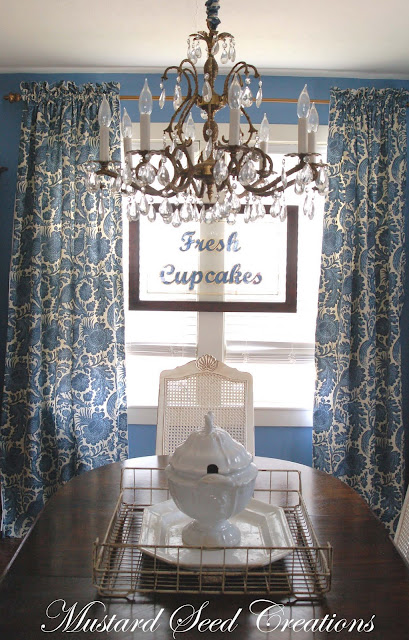
Great instructions! Those came out so great. I love that shade of blue. And that window looks so great in there. Makes me want a cupcake!
Beautiful! Making long panels is my least favorite thing. I just hung some little panels that I made for my son. Not my greatest effort, but we were looking at economical and he just wanted a little homier look at his place. The dining room is beautiful! Jackie
Handmade curtains always look so much more substantial then store bought. These look great…great tutorial to make it quick and easy.
Awesome! I love wrong so this works for me!
Your room threw me for a moment. You have two windows and this one is your blue feature wall, yes? I had to rub my eyes to see what the true wall colour was! 🙂
Donna
Looks gorgeous. Love your fabric and thanks so much for posting the links.
Your room is looking darling… I am in love with the whole look.
Hugs, Deb
Thank you for sharing this!! I have tons of great fabric and am stumped on how to make drapes. The other thing I desperately need to learn is to make roman shades.
Your fabric is just awesome. Blue isn't usually my thing, but this blue makes me want to redecorate all in blue! 🙂 You always do such an amazing job.
Great tute!!! Thanks so much! You have made it look so easy…I think I can do this one. Ha!
Hugs
SueAnn
Well, they look great! I never thought to use a white sheet as the lining before ~ I'll be keeping that little nugget in my mind for future reference! : ) I usually kind of wing my panels when I make my own. Everything has to be straight lines, no fancy curves or anything. I like a simple pole top panel, too.
What a wonderful tutorial! That's a really easy way to make drapes. Thank you for taking the time to make the tutorial (and for making it free!).
The curtains are wonderful and I love that you take the time to give us a tutorial. Thank you!
Excellent tutorial, thank you for sharing your talent with us, I've been putting off making curtains because it just looked all too complicated for me, but you have explained it so well it looks easy enough for even me to try! Such a gorgeous fabric too.
You did a great job! Nothing wrong with it all, IMO.
And we have one of those ironing boards. When I married my husband I told him I wanted a "real" ironing board so I could watch TV while I ironed. He looked at me like I had suddenly grown two heads. Now, I actually like my vintage ironing board and work station.
Great job! They are fabulous. Easy tutorial as well…I have sewn many in my day. Very easy to follow and your way of creating a header makes things much simpler.
So sweet of you to share – good karma!!
XO
Lenore
These are just amazing!! thank you for sharing your talents! They're just gorgeous!
~Terrell @ FrouFrouDecor~
Great tutorial I love it and the built in ironing board priceless!!!!
Thanks for the tutorial!
Very lovely! Thanks for the detailed tutorial. I wish to make my own curtains one day.
I think I can do this thank you!
Beautiful curtains- I have to say I am glad to see you included the header on the panels. For a while there they seemed to have disappeared, I am hoping they are coming back.
LOVE the fabric (and your humor!). When I make my curtains/panels, I use wide (depending, of course, on the size of the rod) double-fold cotton bias tape. Sew each side down and slide the rod through. Voila!
I love these! And now I want to paint a wall (or two) blue!
I just had to tell you thank you! I just finished placing my order for my own fabric. I have been searching for the right fabric at the right price for my 1802 dining room. AND this was just perfect. Hubs and I are history buffs so a design based on Williamsburg was perfect. I am giddy with excitement for the fabric to arrive quickly and to whip up my own pair of fab curtains.
Woo hoo! thank you again for the inspiration!
I commented on your other curtain post that I was able to score the same deal you did on the fabric (in moss green) & qualify for free shipping, also at fabric.com. I wanted to tell you though, in case you hadn't noticed in the fabric description- it says that it's coated in Teflon (because its an outdoor fabric). I work at a winery & we use all Teflon coated table cloths for wine tasting events, the wine just wipes right off & you never even see a mark. So we actually got a more durable fabric for less!Im not sure if you have kids, but that's just one more reason for me to love it.
Love, love, loving it!!! I am going to dive in, learn to sew (if I can ever figure out how to thread the dang thing) and make something for my bare widows!
I do love your dining room curtains!! Thanks for the info on how to do it. I've never made lined curtains before.
Thank you, thank you, thank you!!
Why just Dummy Panels? Could these function as proper curtains? I just love the gathers above the pole.
So glad I checked your FAQS. I was going to email you about that living room curtain fabric. I bought that same fabric 20 years ago at a neighborhood yard sale; 12 yards for $12. I wanted to do something different with it but knew I might need more. Now I know where to get it. Obviously not at the MY original price but…thanks so much.
Hey Sweetie,
Found your blog & Love it! BTW, my husband used to be a youth pastor, too. I digress…anyway. Quick question. I don’t want to pay current pricing of $12/yard for “greige” drop cloth nubby fabric. What if I stenciled a blue damask something or another onto them/lined with the sheets? I already have curtain rings.
Let me know what you think!
Cheers,
Melanie
How smart are you!! Thanks for the easy “header” tip!
Amazing really nice now can you make some for my Dinning Room.. I’m a huge lover Of Blue & White.. Great job with love Janice
Nice tutorial thanks for sharing… I recently bought few fabrics on discount from http://www.fabriccarolina.com and they really have great collection of fabrics.
Love this whole look! Where is the chandelier from?