
I’ve been under the weather for the past few days. I’m getting better, but hanging out in bed doesn’t make for very fun blog posts. I checked out my draft folder to look for posts I started, but never finished or posted, usually because something more exciting comes along to write about. As I was digging through the drafts folder, I found this one…
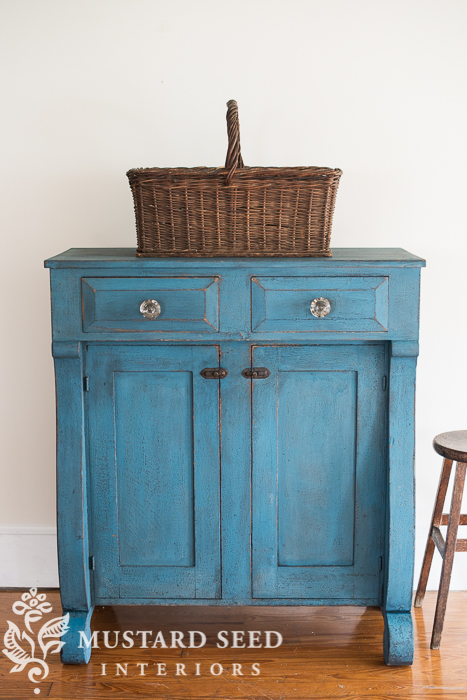
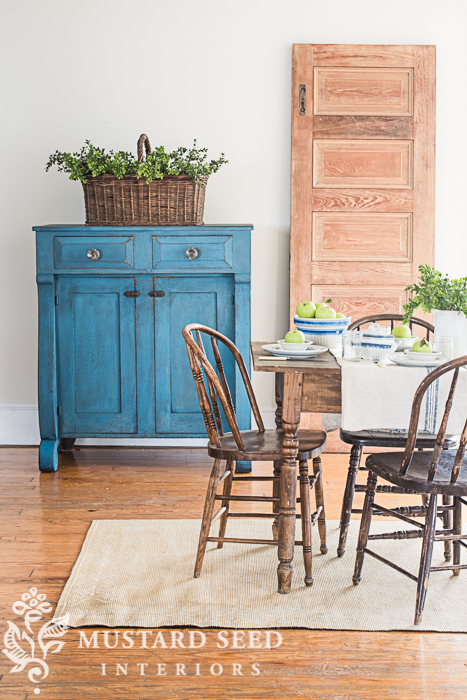
I have written about styling before and I thought I would share the process I went through styling this primitive jelly cupboard I sold at the Chapel Market last October.
I started out with a large market basket sitting on top. I’ve learned when it comes to styling that a lot of little things can get lost in a picture. It’s better to use pieces that make a bigger statement. I think this can also translate to styling a piece for your home. Imagine this jelly cupboard with a lot of little figurines on it. They would just get lost and the top would feel cluttered.
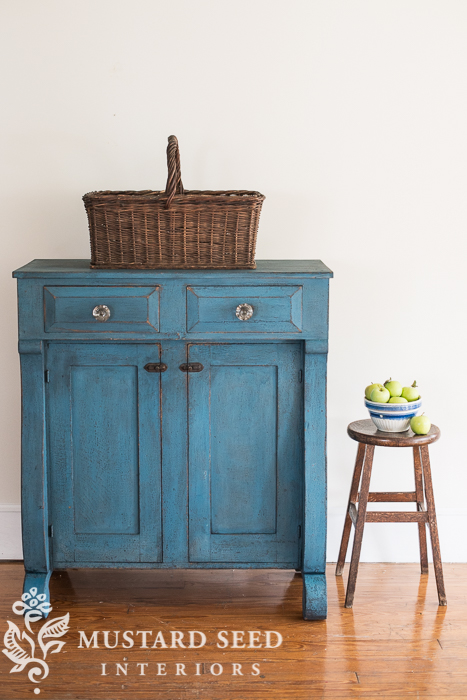
I set a stool to the right to give the cupboard some company and make it look like it’s in an actual room as opposed to what it is – a piece of furniture on a white studio wall. If you notice, I almost always style heavily to the right and crop most of my images to the right. There’s nothing behind that, but it’s just what I naturally do.
Obviously, with just the basket and the stool, it looks a little empty. It needs a little life, so I added a bowl with apples to the stool.
I left one apple out of the bowl to add a little bit of interest…so it’s not too perfect. Styling is a balance of being very intentional with where everything is positioned without it looking like everything is intentionally place; more like you captured a candid moment in time. I know I don’t always get it right, but that’s the goal.
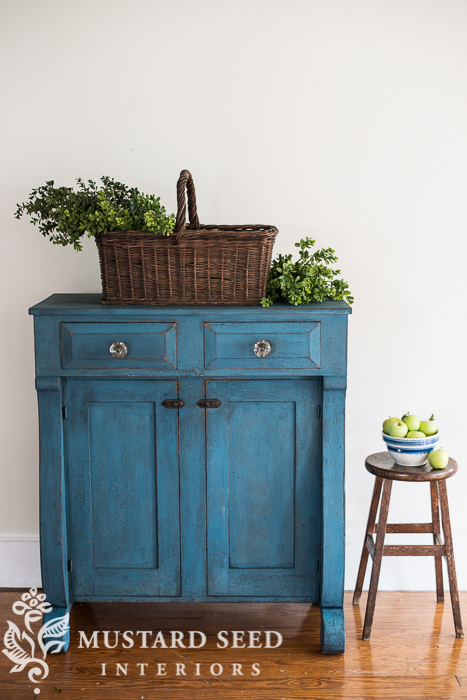
I didn’t have any fresh flowers on hand, so I added some faux boxwood branches to the basket. I initially tried to make it look like someone had been collecting them and rested them all to one side while carrying the basket on their arm…

It looked lopsided, so I tried removing some and tucking them next to the basket…
…still lopsided. I tried fluffing the branches in the basket to even things out…

Then, it just looked like too much. I removed the branches next to the basket, but left the ones in the basket fluffed.
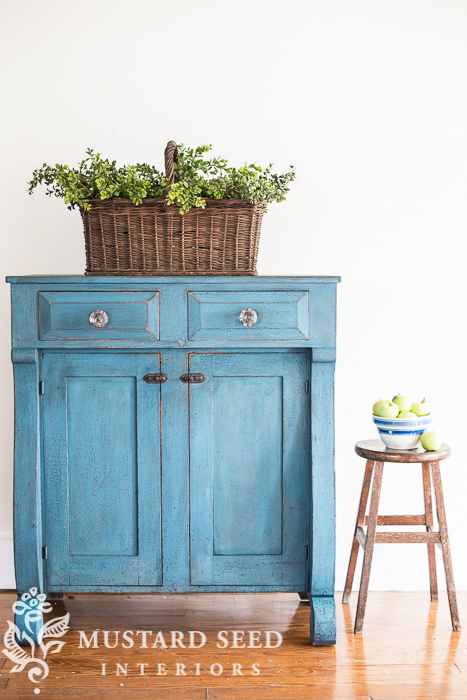
This, I liked, but I still wanted to play a bit.
I added a couple of canning jars and another apple…

…do you see what I mean about little things getting lost? I wanted it to look like someone may have been making apple butter or something, but it just looked like clutter.
A few days later, it dawned on me that I had a whole studio and I wasn’t limited to just a wall, as I was in my house. I brought out a table and staged it like a dining room or eating area and that brought a whole new dimension to the styling…
…and gave me more fun things to take pictures of.

I also took the piece outside to photograph it against the old mill across the road. I know I look like a crazy-lady hauling furniture out to take pictures, but that’s a risk I’ll take. I wouldn’t do this for all pieces, but it was a fitting backdrop for this one.

I hope that helps you think through your styling, whether it’s for your home, blog pictures or retail space.


24 Responses
One of my FAVORITE pieces.
You have no idea how much I needed this post today! A few years ago, my sweet mom-in-law gave me a cabinet similar to yours – two drawers, two doors, about the same size. She has already stripped the chippy white paint from the drawers, but neither of us have done anything more with it. Your post has reminded me that this cabinet deserves some attention at long last!
I really enjoyed this post. Your styling is always so attractive and natural looking…
Hope you feel better soon. It’s no fun to be stuck in bed!
Judy
Such a beautiful piece and thanks for walking us through the process. I’m always roaming through my house to find new pieces that can add that perfect touch to an area.
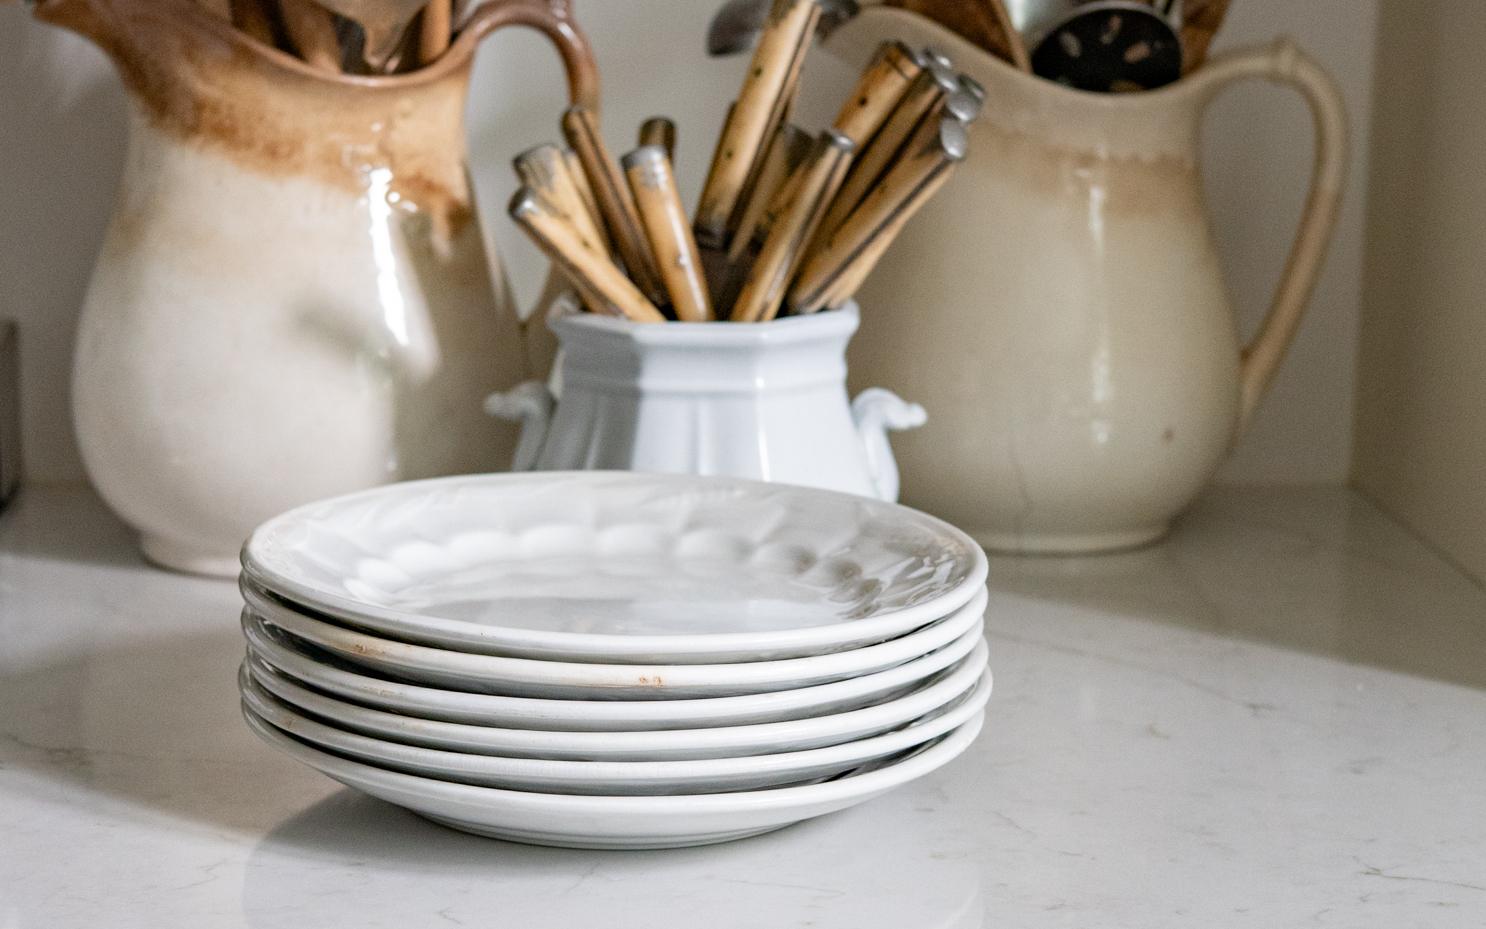
Great post, Marian because you shared your thought process with every picture, and we could see the progression. I don’t always notice things like the fact that your cropped pictures are usually offset to one side. Such a subtle nuance that makes the picture more interesting. On another note, is the shot of the place setting a hand held shot? I can’t seem to figure out how a camera could be attached to a tripod for that shot!
This jelly cupboard has always been one of my favorites of yours! I love the colors & the almost countryside/ farmhouse/ English aspect to it! The lovely styling just adds that much more charm to it! Love it!!
Paige.Rose
I still love this piece Marian so I am glad to see it again, I think it is my favourite piece you have done and something I would easily find a place for in my home. Thanks as always for sharing all your expertise! Hope you feel better soon.
Love the progression, thanks for sharing. Feel well soon
Those photos were so lovely. Get well soon.
This is a nice explanation of the process. Thanks! I have one question. What is it about designers and stylists adding a pair of shoes to a shot? Sometimes the scene that they are in make perfect sense (by a door or in a mudroom). But I saw two blogs yesterday where it was clear the shoes/boots were placed deliberately in a living area (one pair was next to a media stand that was the focus of the post). What is your take on the random pair of shoes?
LOL…I know just what you mean. I agree that shoes can be a good prop in the right place. A part of the art of styling is telling a story in a way that makes sense. For example, if you put food out on the counter, it should be food that makes sense together…fresh veggies, olive oil, lemon, etc. to make a salad or eggs, flour, sugar, blueberries for muffins. When you put artichokes and chocolate chips and peanuts out…it looks off and can be distracting. Shoes at the end of a bed, next to a closet or dresser, by a front door, maybe slippers in front of a comfy chair, all make sense and will usually enhance the picture. It sounds like the shoes in the cases you mentioned fit in the distracting category. 🙂
I enjoyed seeing your process in styling your jelly cupboard, and you nailed it when you added the table and chairs and the door! Perfect!
Love your Jelly Cupboard. Love the props. The color is really pretty too. You can also use a gourd if you have one laying around or a basket of them would be cool too.
I love this jelly cupboard . . . I forget . . . Did this sell at the market?
Hope you’re feeling better, Marian! XO
Oh, my! Thanks for walking us through those steps with pics to help visualize it all….the good and the bad. Sometimes I think my eye is….good enough…….but a few days later, I find myself second guessing it all. I had to laugh the other day, though, as I was styling the coffee table and I would take a step back to just look at it….our youngest grandson was here and by golly, there he was, standing right beside me, doing the same eye ball look.
I love this piece. Great post. I hope you’re feeling better.
My all time FAVORITE piece of furniture…and I’ve been following you for a long time! What is the color combination you used here again? I know you posted it before, but I don’t remember. I would love to give it a try!
Love your styling techniques. I received my first batch of miss mustard seed paint! I bought Ironstone and can’t wait to start / paint something. Does this paint require ventilation? I have a gas furnace in the basement where I’ll be painting. I’m in Michigan and “BABY ITS COLD OUTSIDE”!!
Thanks, and I love your posts.
The dining room pic is my favorite. The jelly cabinet makes a statement without being the center of attention! Picture Perfect
Marian, why is this called a “jelly cabinet”? It’s very much like an antique I purchased a few years ago except mine has a lift-up top. I’d love to know what it was 150 years ago!
Libbie
P.S. Today I painted my first piece of Miss Mustardseed’s furniture, after more than a year of reading your blog.
What a smile this brought to my face today! I am the proud owner of this jelly cupboard and I love it so much! It is gorgeous on the landing at the top of my stairs. Every morning, when I come out of the bedroom, it makes me happy! Thank you for all the happiness it brings me.
Thank you! I can’t tell you how much I enjoy and appreciate these behind-the-scenes posts you do. I always learn something when I read your blog but I’m extra-always in need of photography help and tips.
David
Great eye candy! Also, very useful info about the process of styling you went through. Hope you feel much better soon.
Sharing your thoughts as you go along is a great help to those of us who also stage photos. The sequence of photos is a great help also.
Thanks!