
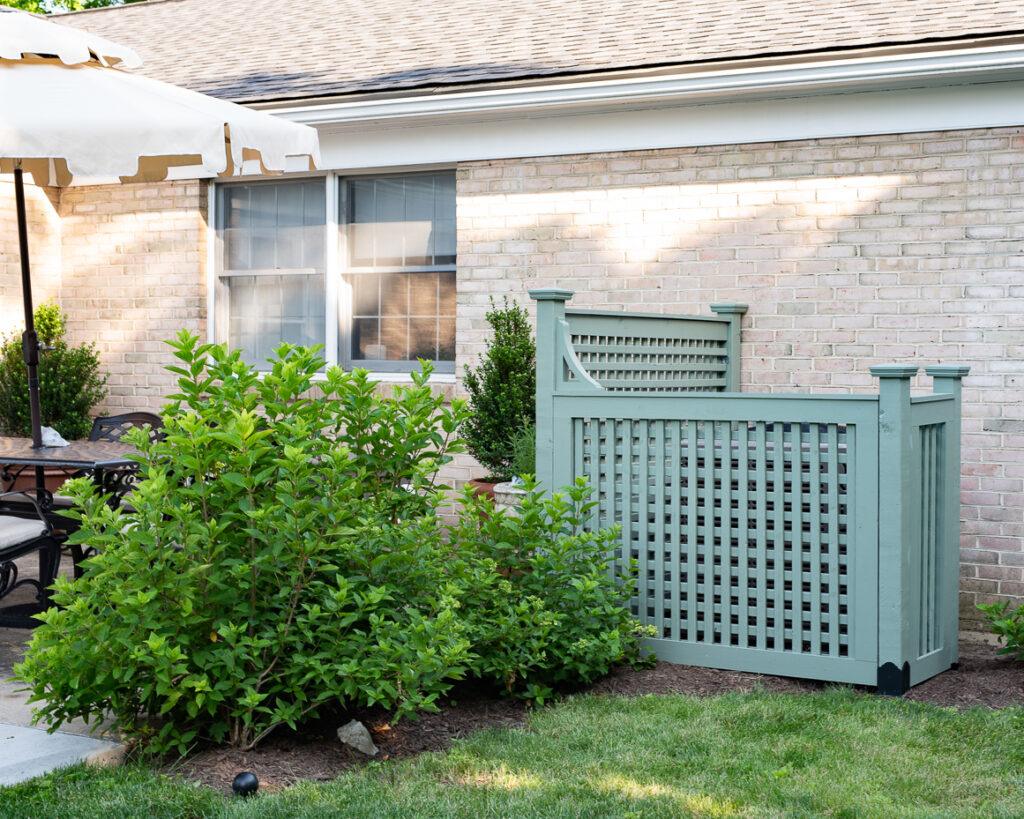
Jeff and I noticed a stretch of stifling days in the forecast, so that gave us the push we needed to get the DIY custom A/C surround installed and finished this weekend. I shared the progress we made on building the surround a couple of weeks ago HERE. Since I had all of the pieces painted and two of the panels of the A/C surround built, it was pretty quick and easy to install. We had a general plan of how to attach the pieces for stability and longevity, but we knew we might make some adjustments along the way since this is the first one we’ve built and installed. It’s all finished and I am so excited with how it turned out!
As a reminder, here is how the store-bought one we’ve been using for a couple of years looked…

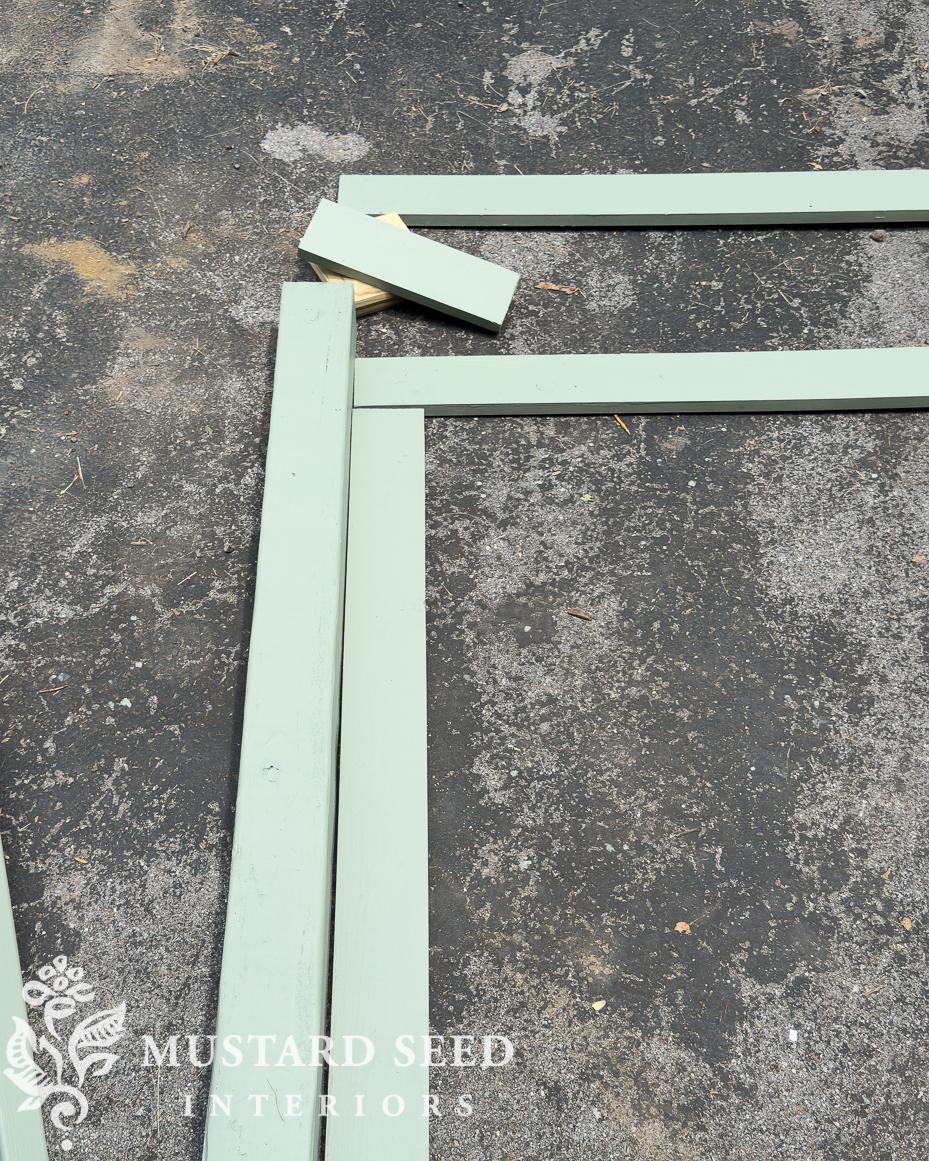
THIS is the one we had. It worked pretty well, but it was too small to completely hide our unit, and I felt like we could make something better. Because I decided to build custom lattice for our DIY A/C surround from 1 x 2s, it would be more efficient to paint all the pieces before we assembled them. It will also better protect the wood to have every surface primed and painted.

As I shared in more detail in THIS POST, my idea was to build the panels and attach them to the 4 x 4 support posts with L-brackets. It worked, but when we build a surround for our propane tank, we’re going to improve the design, and I’ll share a detailed tutorial for building a DIY custom A/C surround. In this post, I’ll share a flyover of how we built it, but after building one, we think the design can be improved.

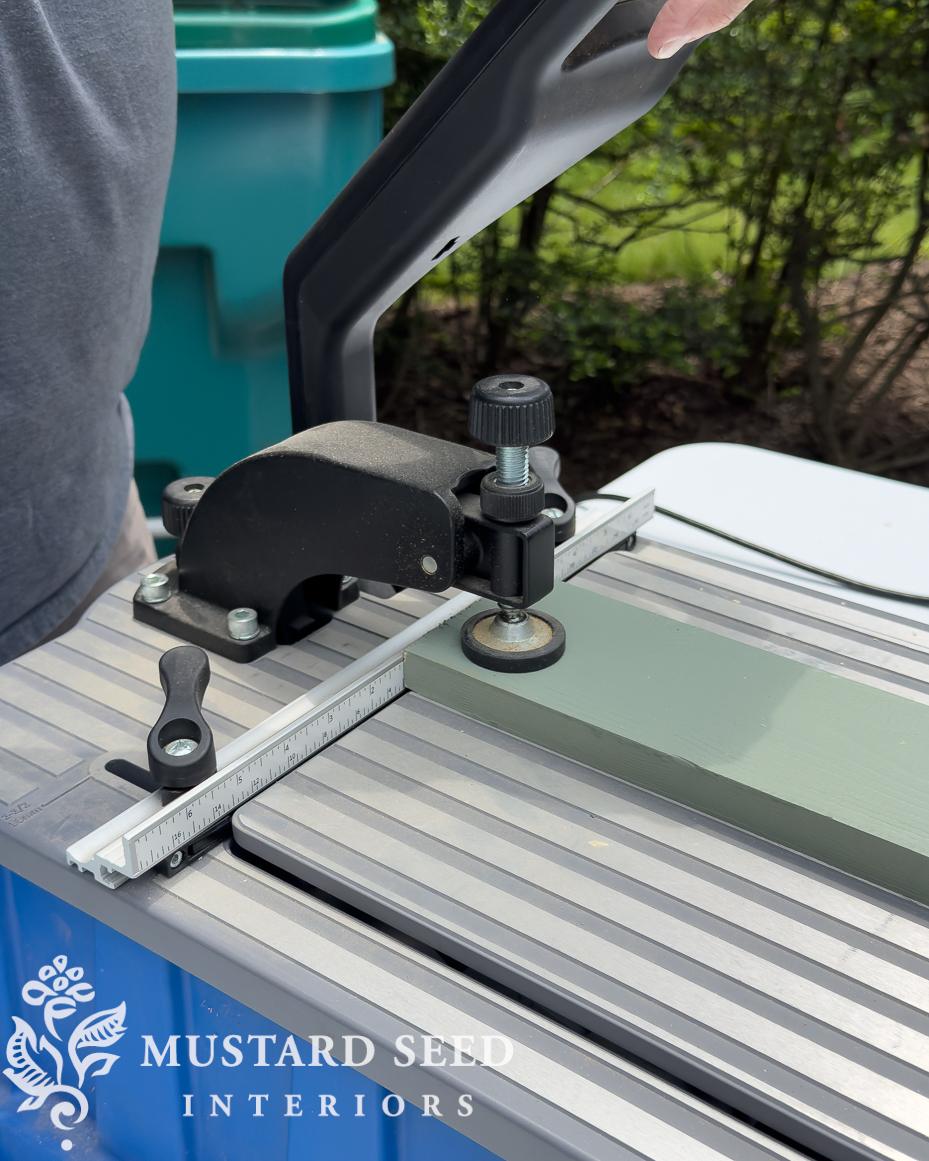
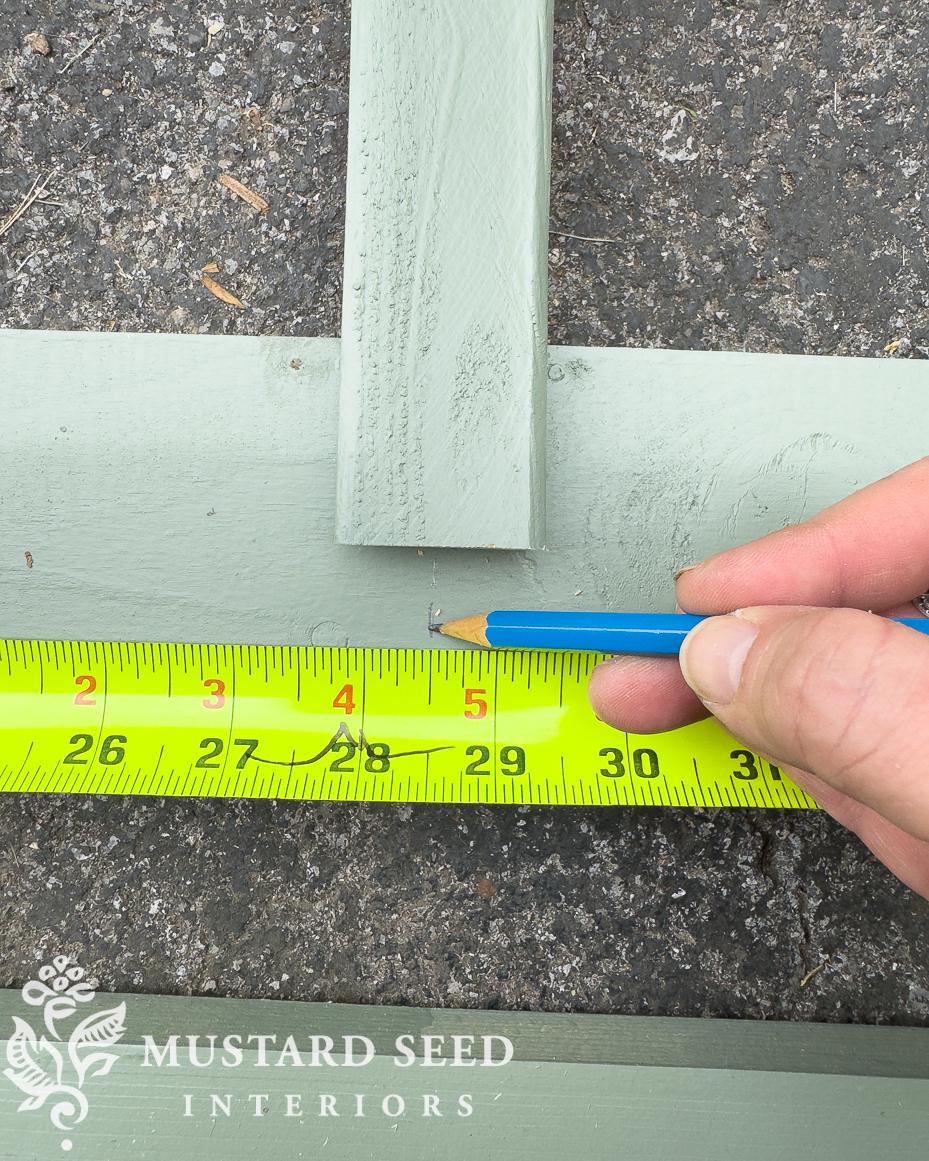
I started by laying out the 4 x 4 posts (which I had cut to size at the hardware store) and 1 x 4 frame pieces and cutting them to size on the mitre saw.
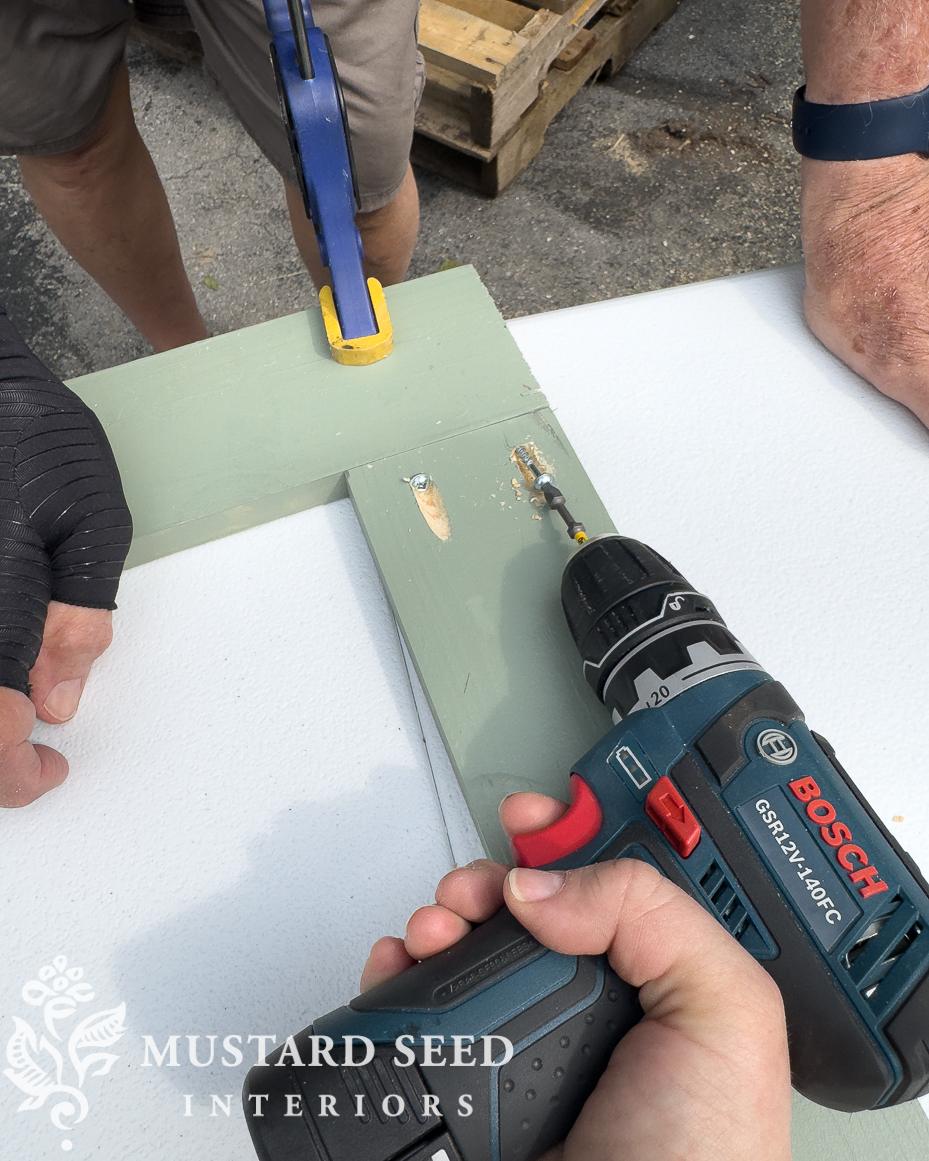
Dad and I use the Kreg Foreman pocket hole jig to join the frame pieces. (As a side note, the Kreg Foreman is about $400, but you can get simpler Kreg pockethole jig sets for $45-150 that will achieve the same result if you don’t do a lot of joinery.)
If you’re not familiar with a pockethole jig, it makes a hole in the wood that’s perfect for inserting a screw and joining two pieces of wood together.
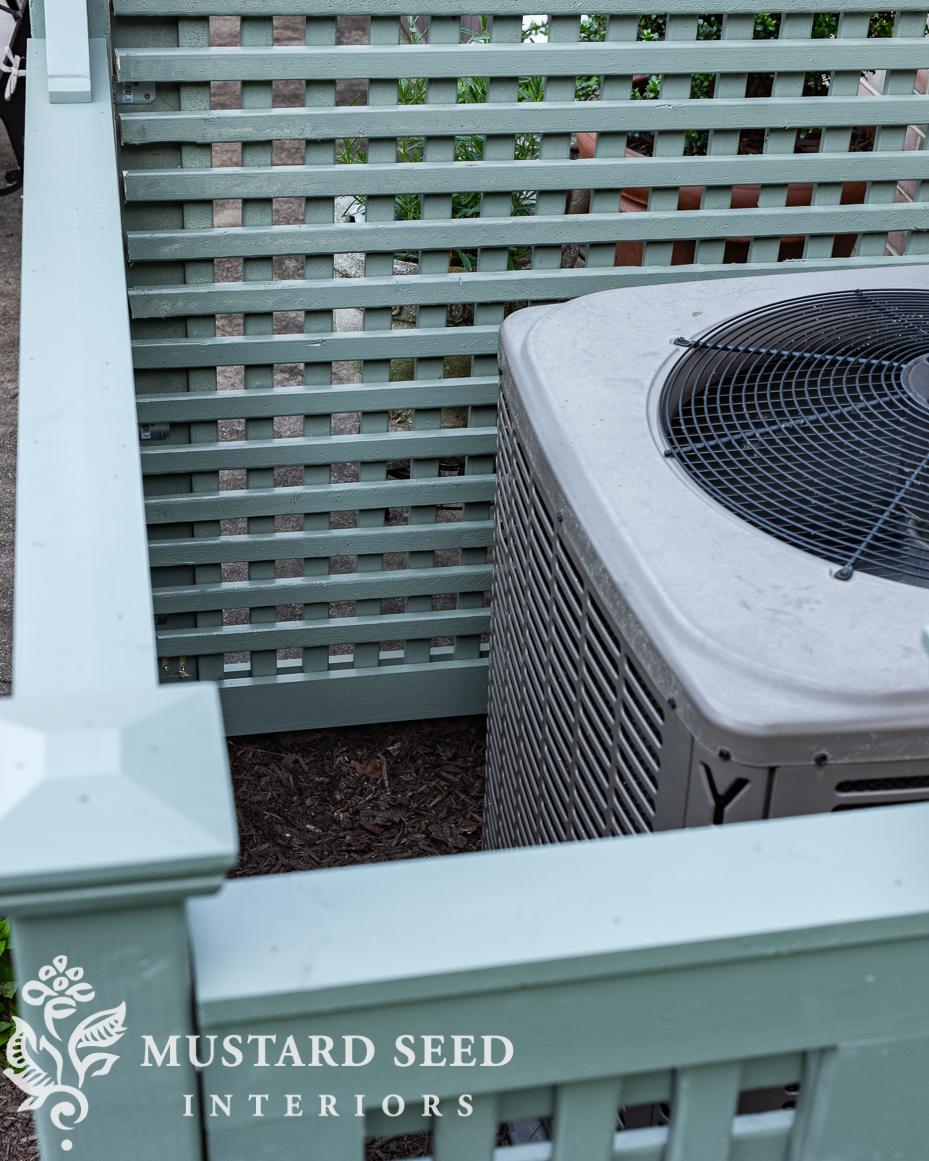
With the frame assembled, we added the 1 x 2s to create a grid-patterned lattice. I decided to build custom lattice so it would be more substantial and would also have the right balance of airflow for the A/C unit and screening. To make sure the spacing looked good, we started in the middle of the panel and worked out.
We secured the lattice pieces with 1 1/4″ finish nails. (We used THIS DeWalt finish nailer.) I used a 1 x 2 as a spacer to make sure the gaps were uniform.
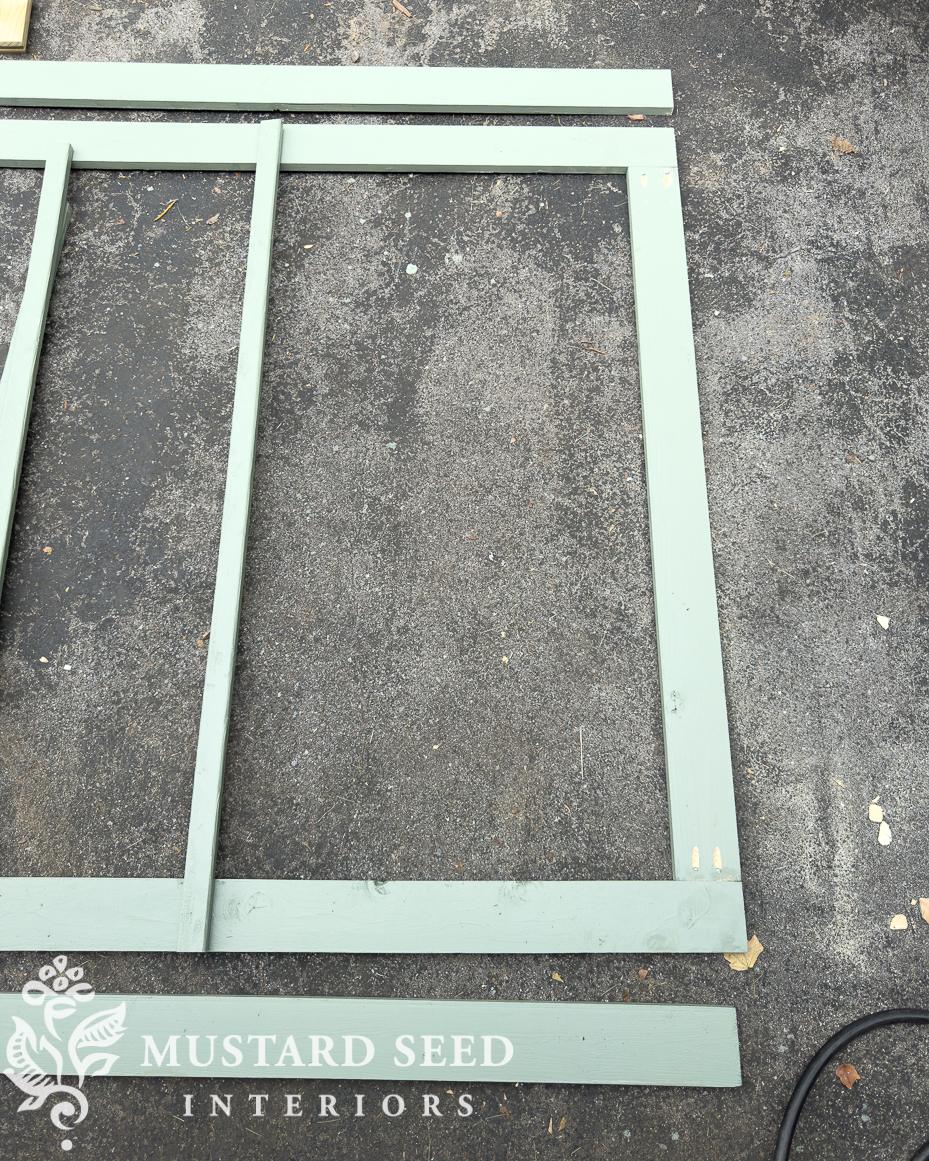
Once all of the vertical pieces were nailed in place, we added a 1 x 4 horizontally along the top and bottom to “sandwich” the lattice pieces.
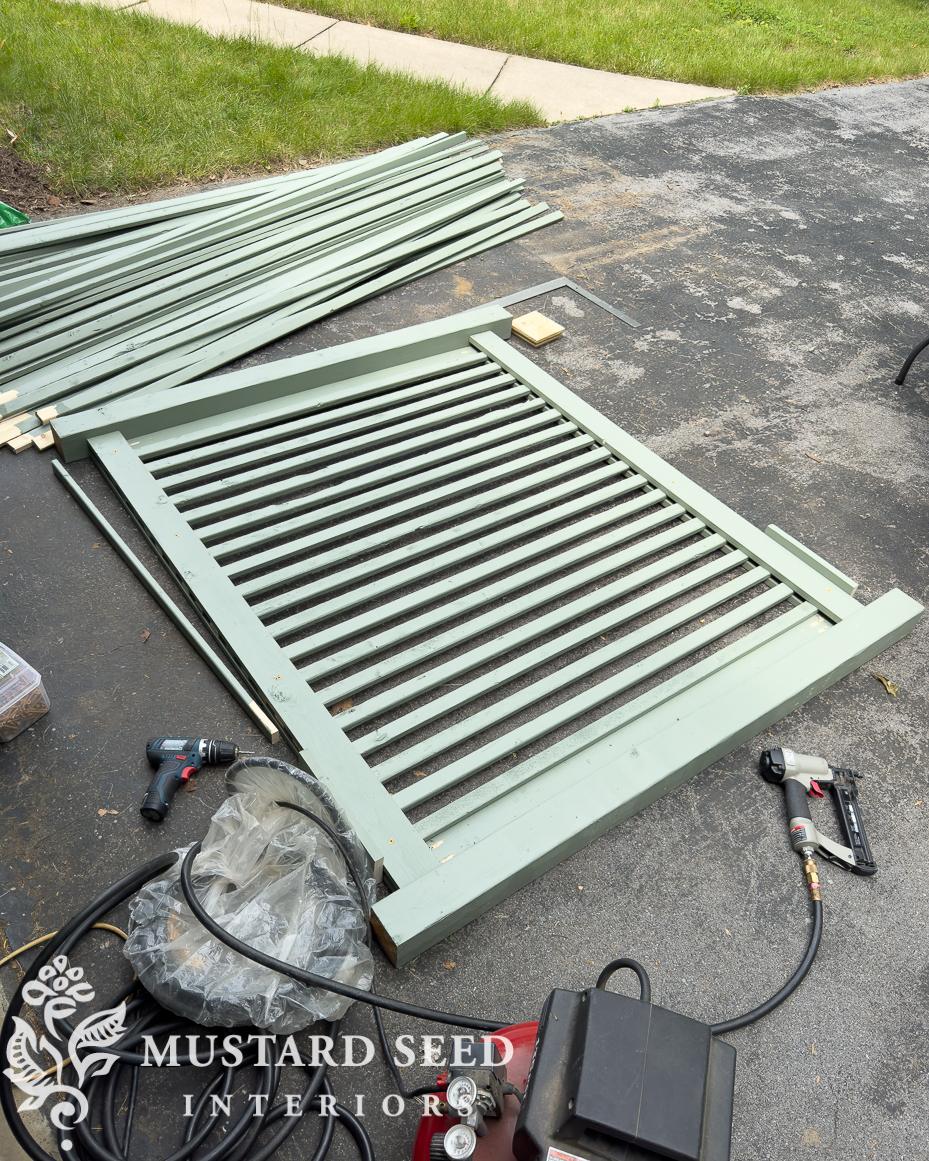
We then cut the horizontal lattice pieces to size and nailed them in place. Once the lattice panel was built, we affixed it to the 4 x 4 posts with L-brackets and wood screws. Since these panels are large and heavy, we used four for each side.

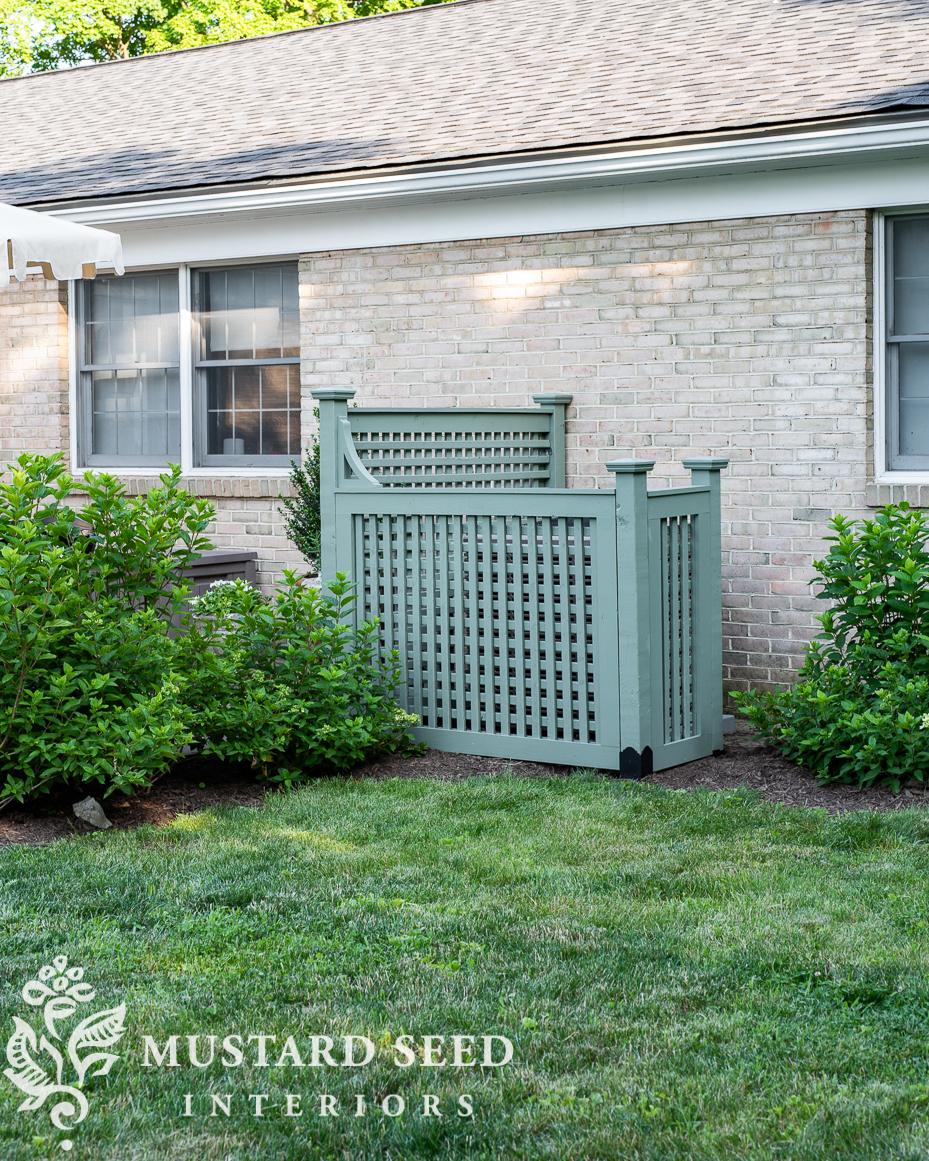
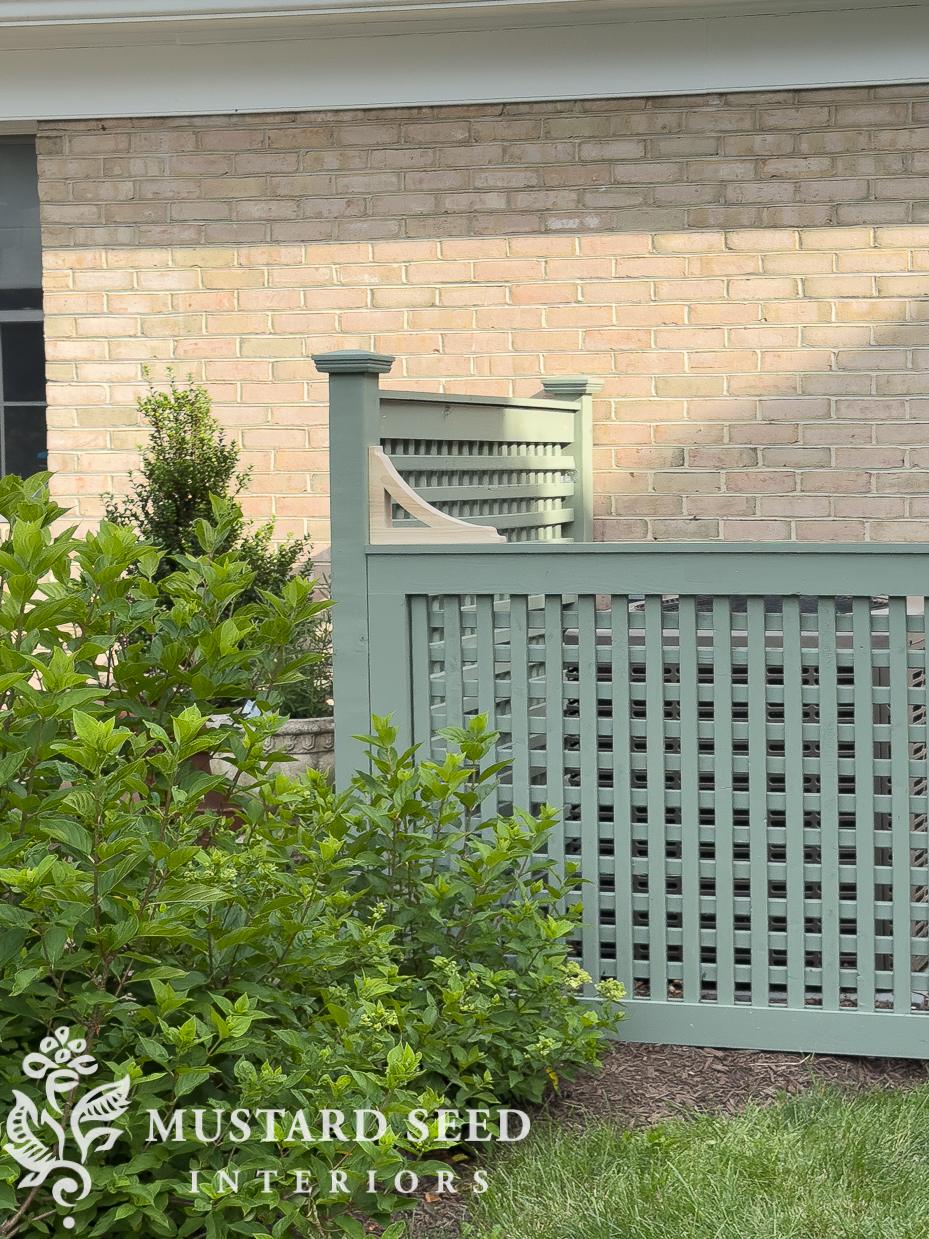
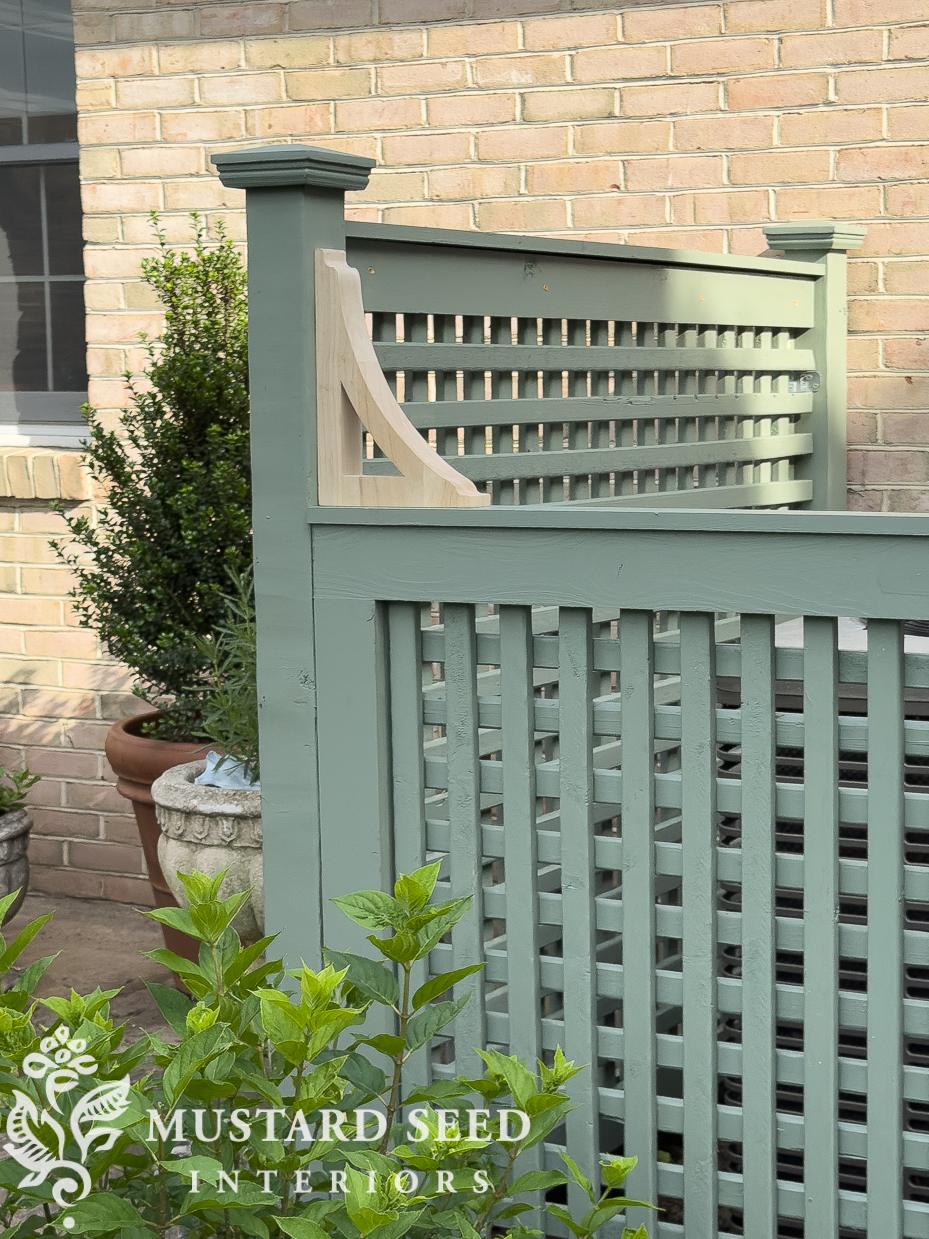
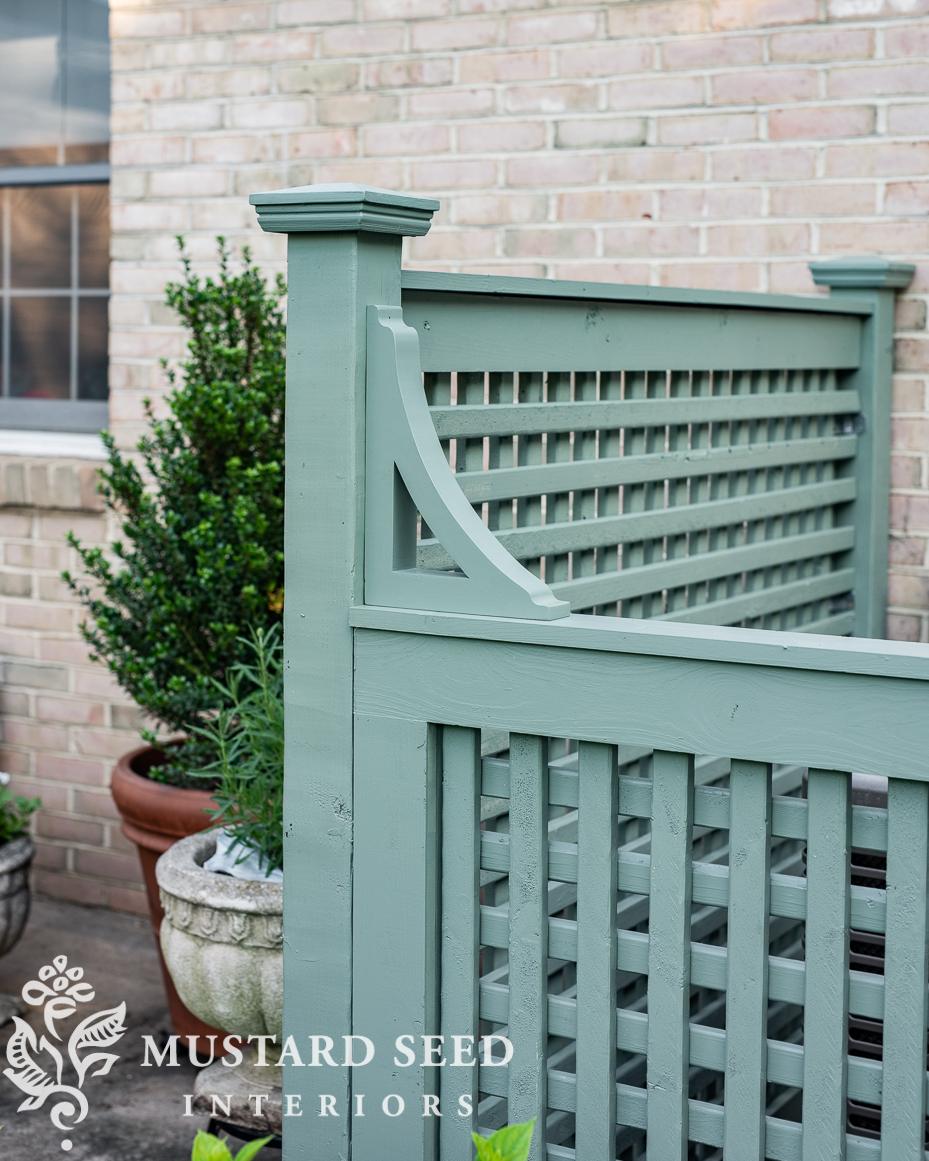
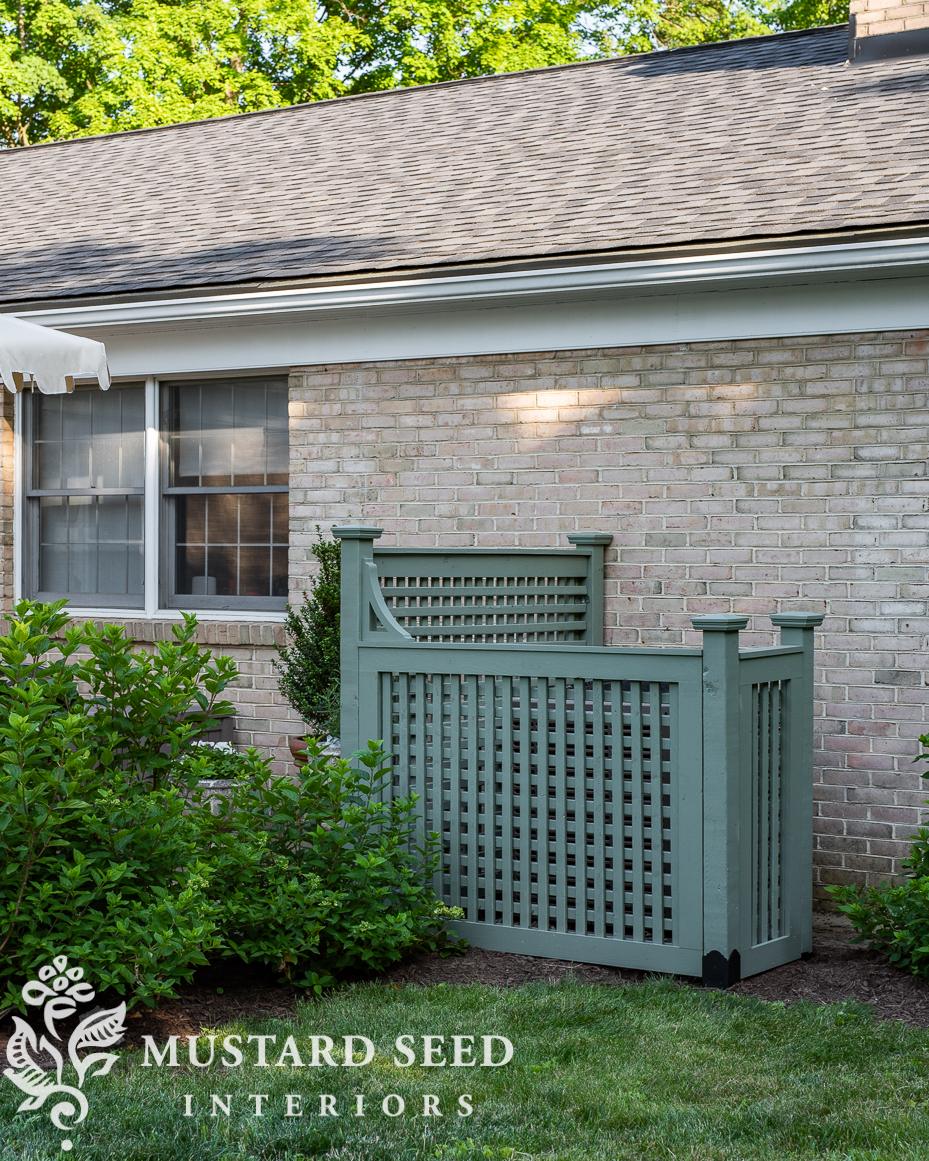
We moved the first panel, which is the largest one of this DIY custom A/C surround, into place to see how it looked. As soon as Jeff held it in place and I stepped back, I realized the height was overkill. I really wanted to screen the A/C unit so you couldn’t see it when standing on the patio, but a five-foot-tall surround was going to obscure one of the bedroom windows. I thought about it for a while and decided to alter my plan and make the second panel four feet tall. The taller panel looked great against the patio, so I didn’t want to adjust the height on that one. I figured with a bracket to act as a visual transition between the taller panel and the shorter one, it would look intentional. THIS is the bracket I ordered. I just needed to figure out how I wanted the bracket to be oriented…
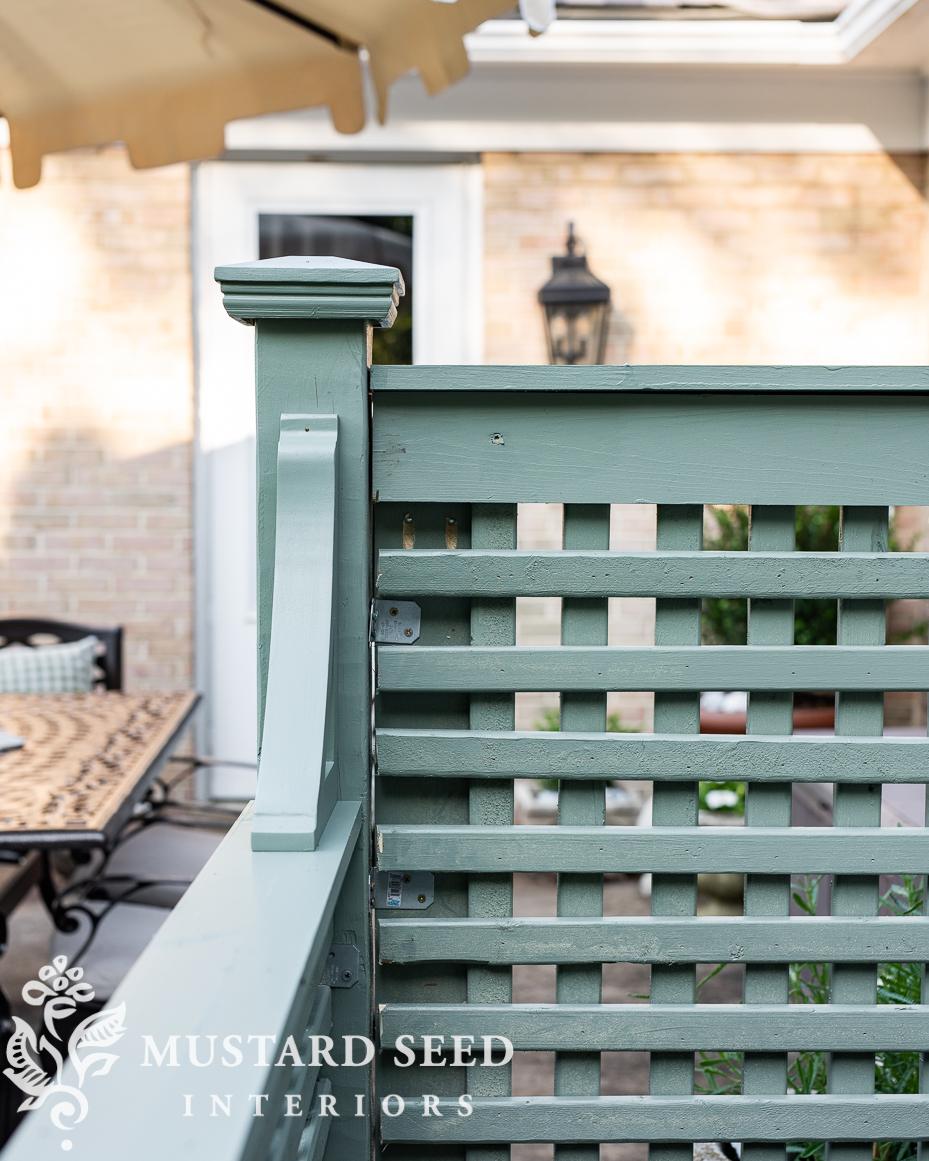
Before installing the panels, I put THIS PVC butyl tape over the bottom of each post. It’s a heavy plastic wrap that will protect the bottom of the posts from rot.
To install the sides of the A/C surround, we put the first panel in place and made sure it was plumb and level. We then attached it to the patio and wall of the house with L-brackets. We attached the second panel to the 4 x 4 post with L-brackets. For the third 4 x 4 post, we used a 16″ spike to secure it in place and support the right side of the panel. Once the panel was in place, we butted the 4 x 4 post against it and pounded it into place. THIS is the 4 x 4 post anchor we used.
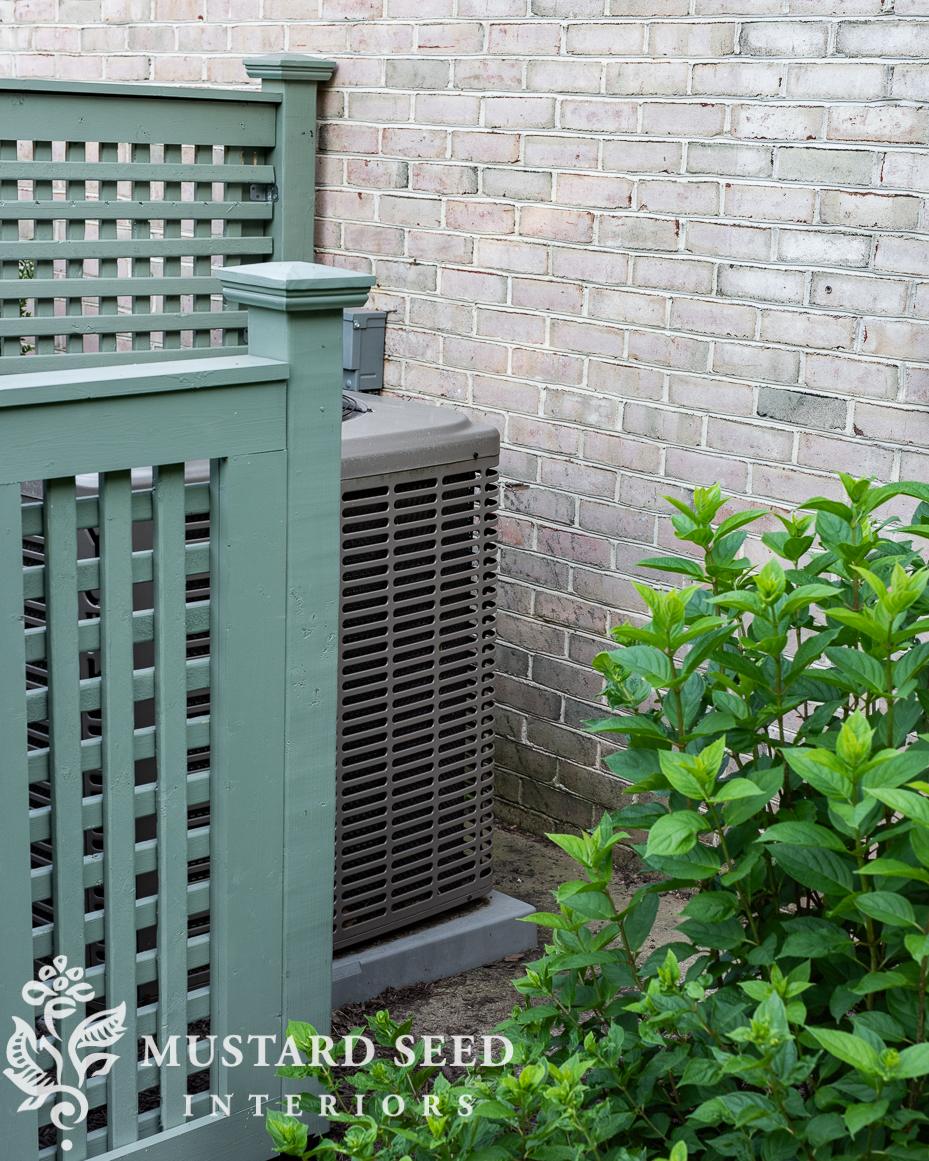
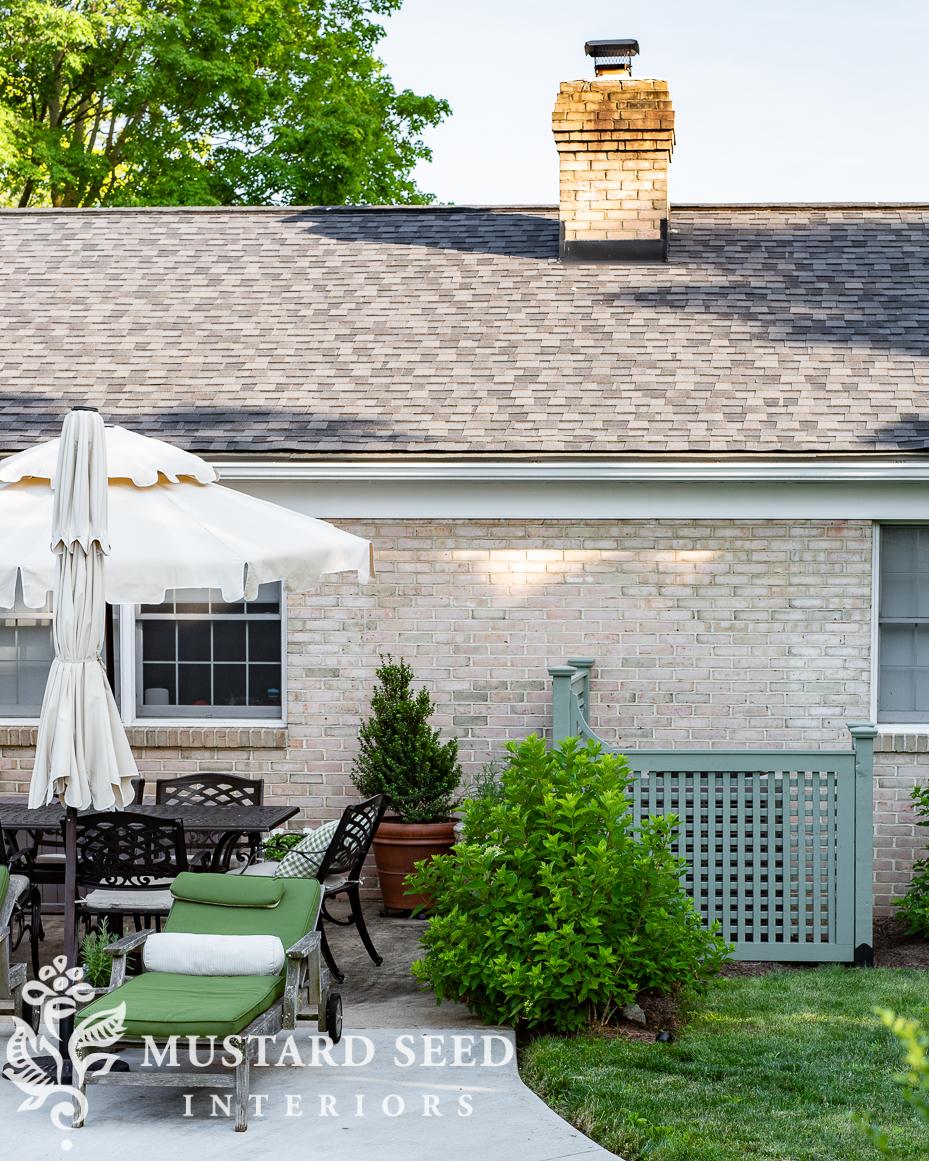
I waited until the first two panels were installed to decide if we needed to build a third. I want the A/C to be hidden, but I don’t want it to be inaccessible. Jeff and I decided we should build an 18″-wide panel to hide the last side of the A/C. As we did with the other two panels, we attached it to the posts using L-brackets. We also decided not to install the last 4 x 4 on a spike so it could be easily removed for even greater access to the A/C unit. The 4 x 4 post is just resting in place, but it works for this panel since it’s small. We could put it on a post anchor in the future if we feel like it’s necessary, but it felt secure without it.
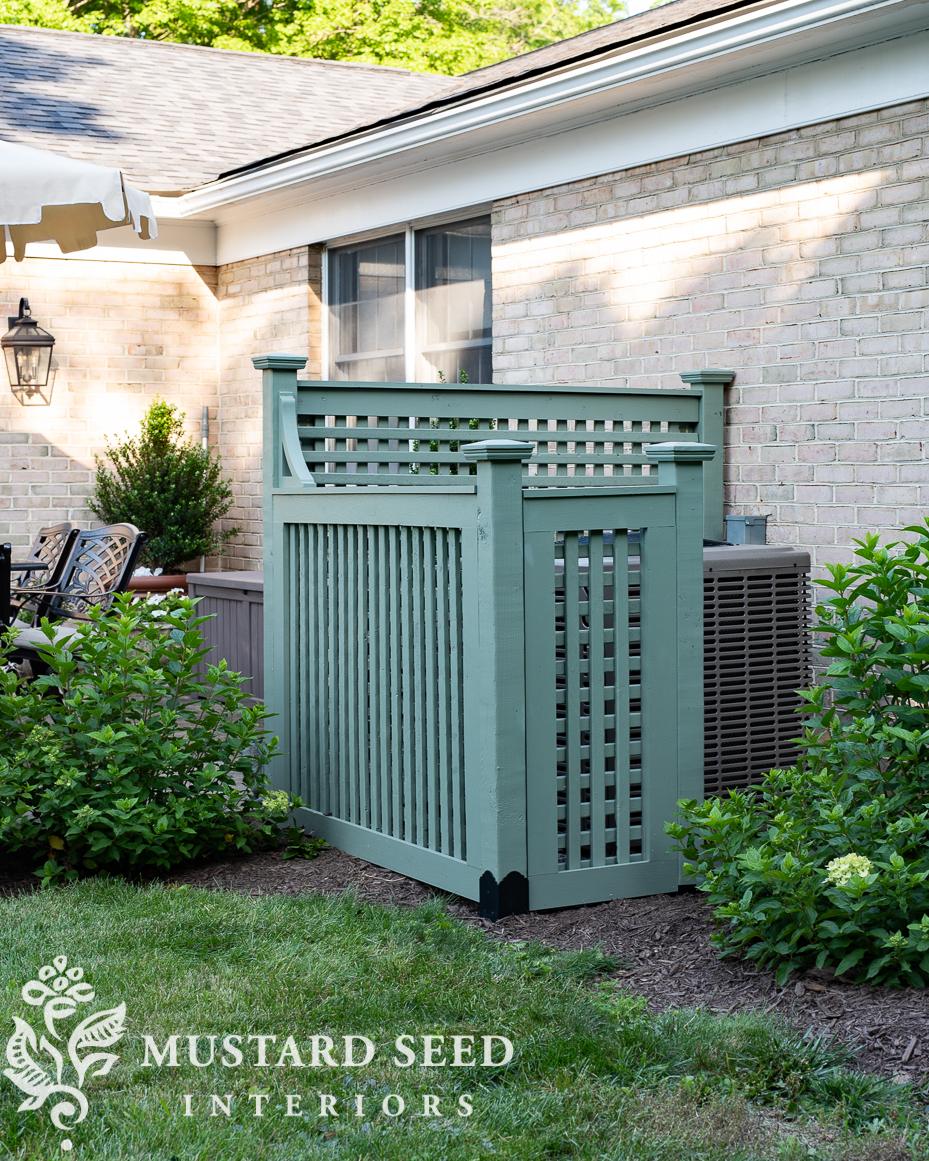
There is plenty of room around the A/C unit for maintenance, weeding, and airflow.
This Little Lime limelight bush will continue to grow as well and hide that last little bit of the A/C unit that’s visible from the right angles.
Jeff and I decided we liked the bracket with the taller side facing the taller panel. We secured it in place with a couple of 1 1/4″ finish nails. It’s purely decorative and isn’t supporting anything, so a couple of nails were all it needed.
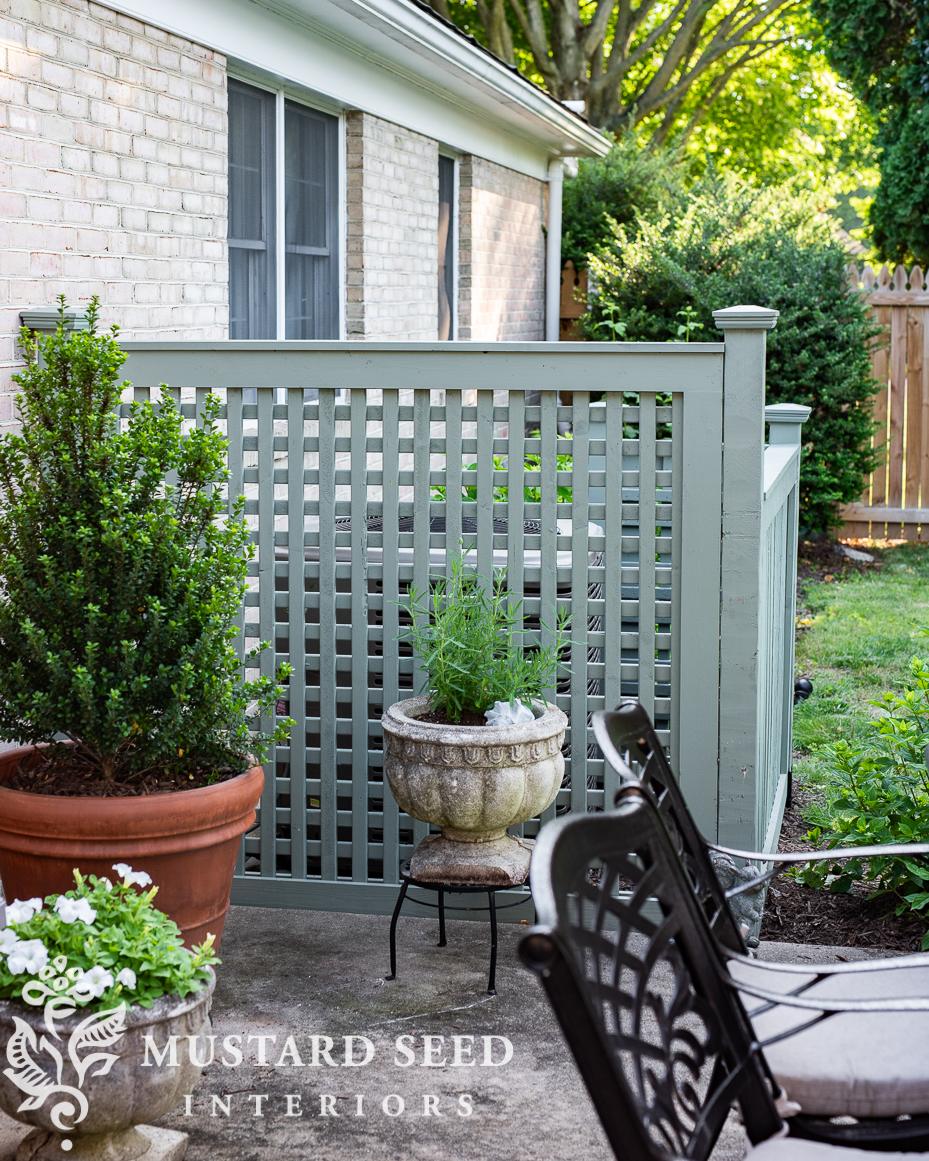
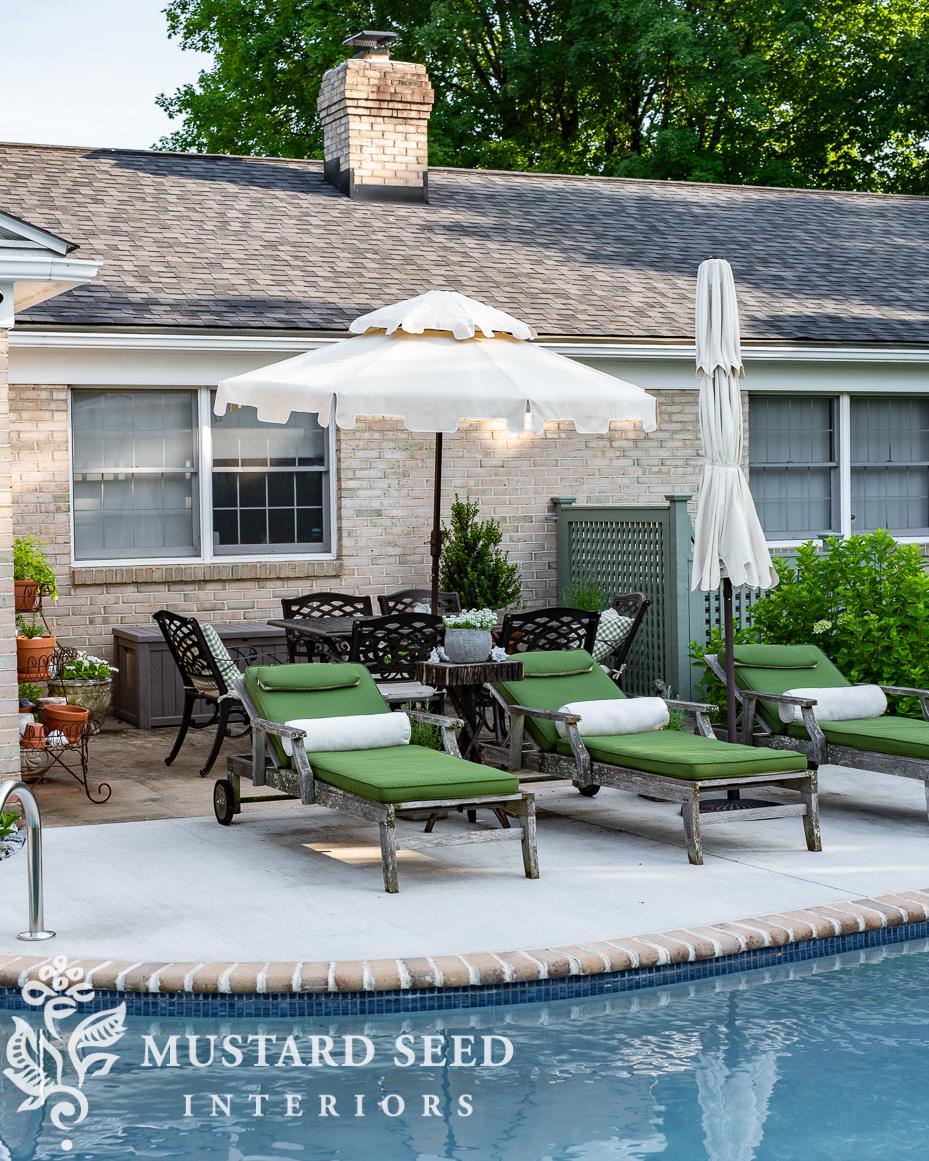
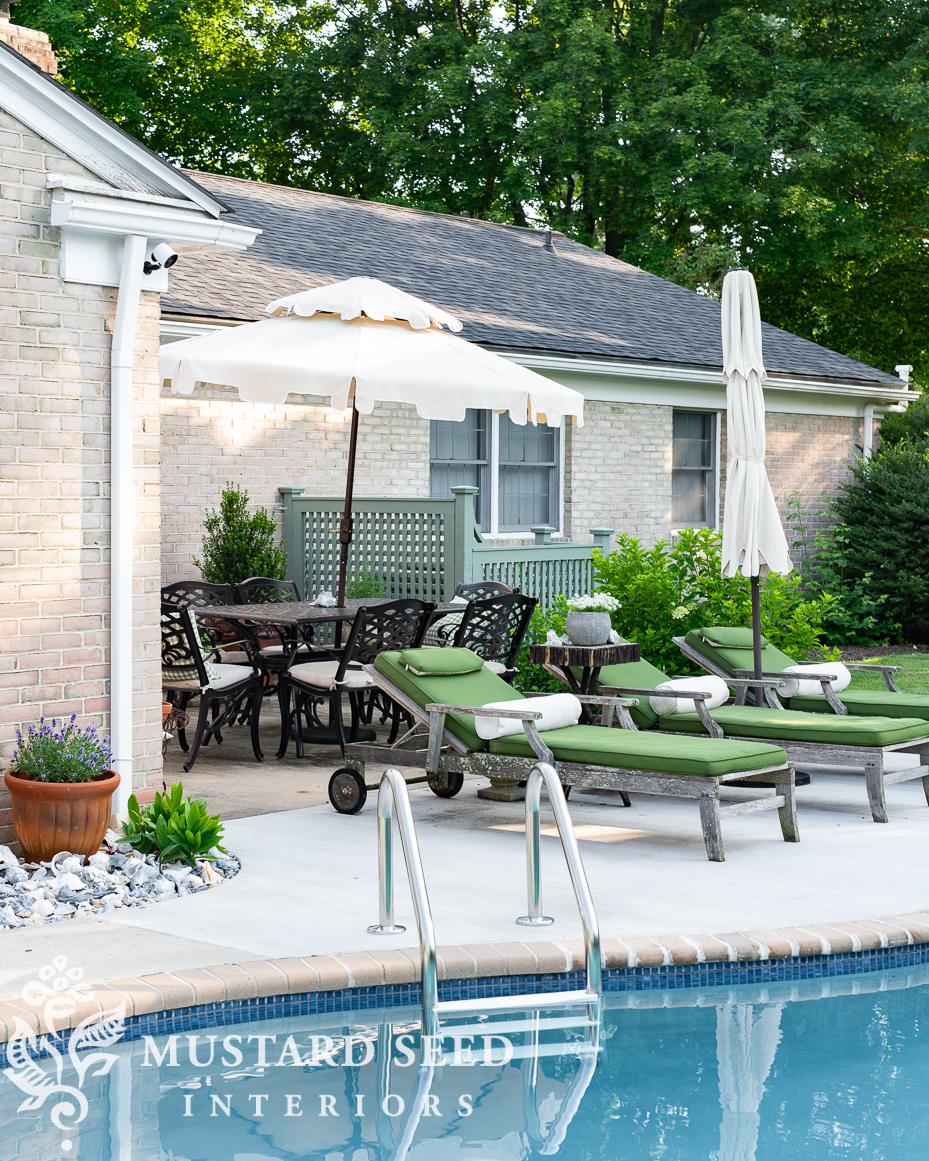
I love how the screen looks, especially from the patio. It makes the patio feel more like an intentional outdoor room.
It’s painted in my favorite green – Card Room Green from Farrow & Ball. (I order it from Dreamy Whites.)
Oh, and I need to point out that I cleaned, primed, and painted the trim! It’s a small thing, but it looks so much better. We still need to paint the gables, but I need to wait until the weather is a bit cooler for that.
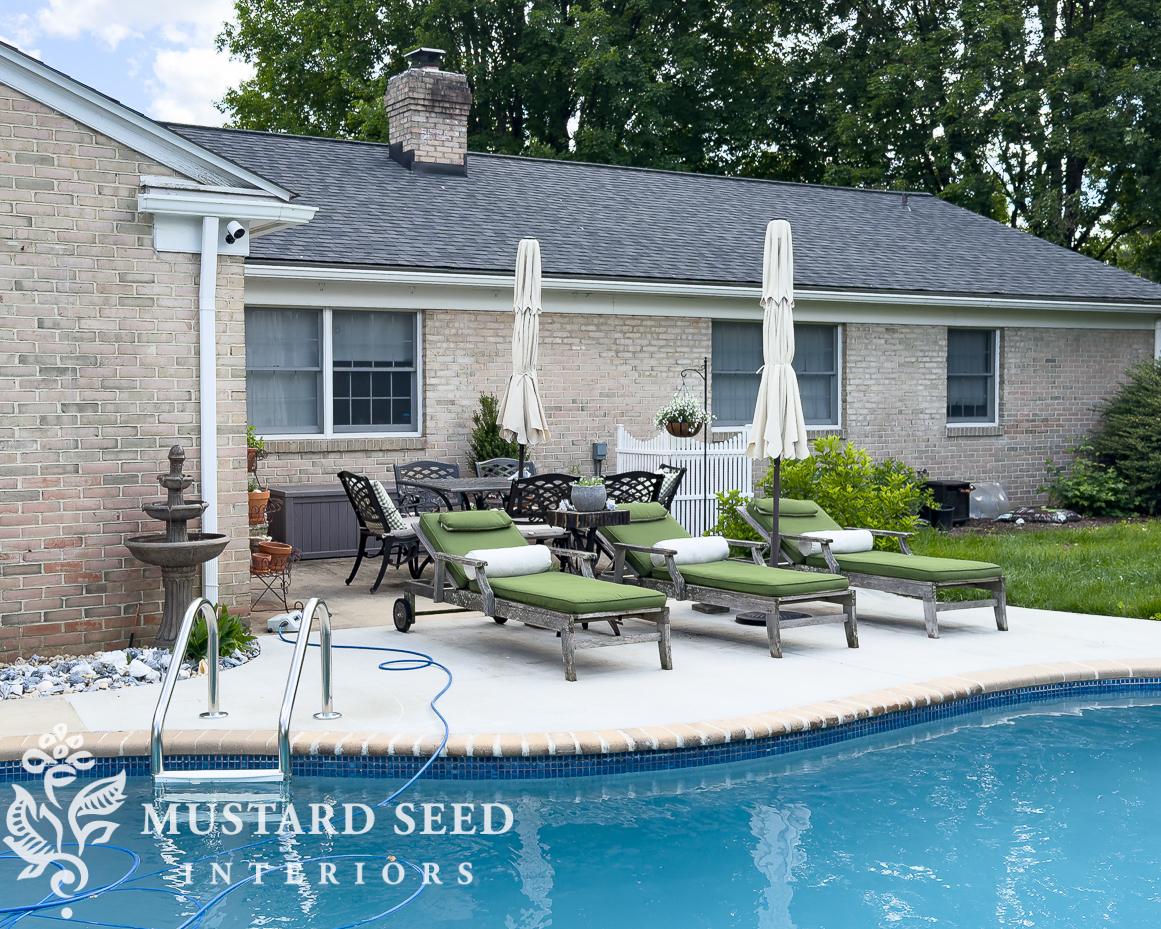
In the next few weeks, we’ll be getting new windows along the back of the house, and we’ll install shutters. Marshall is also going to power wash the patio and pool deck, but he’s been too busy to get to it yet.
patio umbrellas | patio table & chair set | teak pool loungers
I love our backyard. It’s required a massive amount of work, but it’s becoming a beautiful oasis, and I’ve always wanted that.
There may come a time when we have to replace the A/C unit, and we’ll see if we can have it moved to the left side of the house, but until then, the unit isn’t an eyesore right next to our patio. This DIY custom A/C surround is the perfect solution.
Here’s how the patio looked just a few weeks ago…
…and now…
patio umbrellas | patio table & chair set | teak pool loungers
As I shared at the beginning of the post, we’ll be building another surround for our propane tank (once I finish getting the ivy and weeds cleaned up), and we’ll make a proper tutorial with a plan, materials list, detailed instructions, and a video tutorial. Until then, the details I gave in this post might help you out if you want to build something similar.


12 Responses
This is another improvement to your gorgeous backyard! This house is just becoming more and more lovely, Marian.
Gorgeous!
Outstanding results! Well done! 💯
INCREDIBLE!
Diney on Mercer Island
It looks fabulous!!!!
I am so impressed by your ingenuity, skill, and your work ethic. You are way beyond “handy”! I just wish you were my neighbor and best friend!!!
Keep on inspiring us, and thank you for sharing.
This is great!! Thanks for sharing. I wish my husband and I were handy so we could construct something like this. Our screened-in porch is flanked by the air conditioner unit on the left and propane tank on the right. A screen like this would solve the eyesore completely! Hopefully, I can find a handyman that can build something like this. In the meantime, I have to get creative with plants that block them both!
This turned out very nice! I don’t know if it’s my computer or not but all the links after the DeWalt nailer lead to the DeWalt nailer rather than intended links. Your backyard is just beautiful.
Thank you! Some of the links were scrambled, so I fixed them.
I love how that soft green color looks against your home!
It looks so much better with the green screens. I am thinking of a heat pump, and they install those things in such visible places. This was such a good idea to hide it. Thanks!
The a/c surround is so pretty and looks great against your brick! Your backyard and pool area are beautiful! Lots of hard work reap great benefits!