
As I shared last week (in THIS POST), I decided I was overcomplicating the trellis idea for the garage wall. I thought building one large trellis would be the way to go, but I realized two would balance out the windows on the other “wing” of the house and two trellises would be much easier to build than one. They’d still be substantial (about 4 x 8′), but they would be smaller and lighter than the original idea and would be easy to install and remove for cleaning and painting over the years. It would require less lumber and wouldn’t need footings. I took measurements, sketched some ideas, and built two trellises last week. I am over the moon about these trellises and, of course, I wanted to share detailed plans and a tutorial so you can build your own vintage-style trellis if you have a similar blank wall to fill.
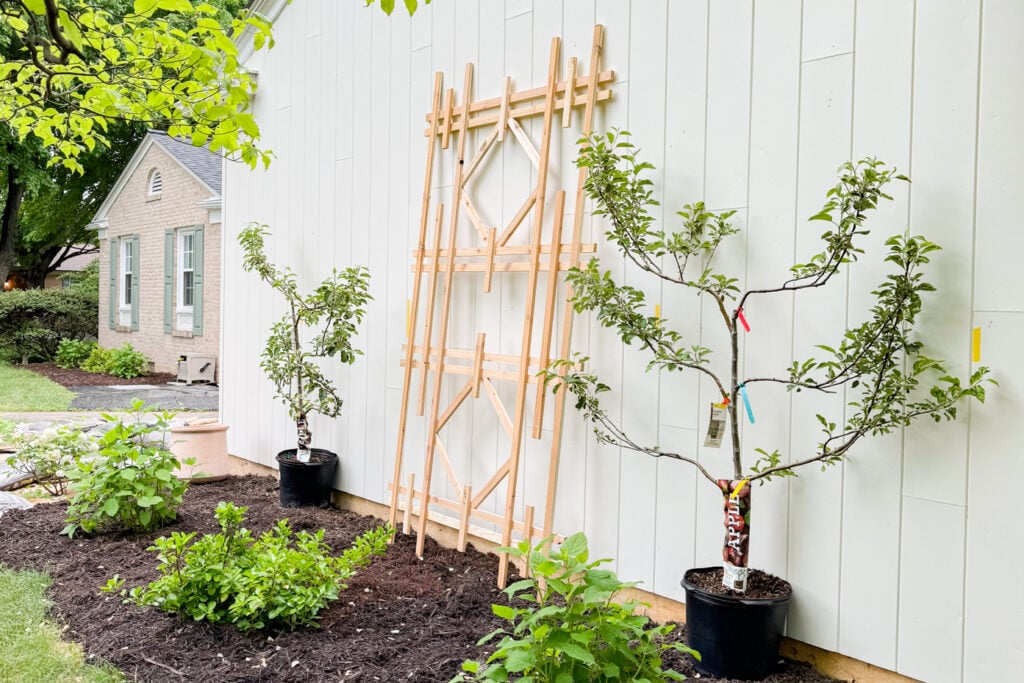
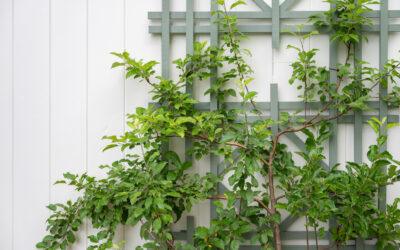
Here is how the vintage-style trellis turned out! I am going to paint them in Card Room Green by Farrow & Ball to match the shutters and front door and add some color to this wall, but they look very nice unfinished and would weather beautifully over the years if you preferred to leave it natural.
If you’re here for the plans and not all of the chit-chat and explanation of how I designed and built these, here are the links to all three free PDF printables including a supply list. step-by-step instructions, a cut list, and measurements…

Here is the vintage trellis that inspired my large trellises. I saw it on Facebook Marketplace a few weeks ago and it stuck with me. I loved the balance of simplicity and interest.

I had to play with the proportions since my trellises needed to be larger, but I think I captured the spirit of the vintage inspiration trellis while building it to the size I needed. Smaller trellises would just be too dinky on this wall. I want them to really make a statement. I was going to build the trellises and then think about what plant I wanted to grow on them, but I spotted some espaliered apple trees at Home Depot a few weeks ago and couldn’t get them out of my head. I researched them and decided they would be perfect for my wall and I was willing to learn to take care of them. Just sitting them in front of the wall got me all giddy. Anyway, I’ll share more about those in another post. This post is about the vintage-style trellis tutorial, so let’s get to that.

Vintage-Style Trellis Supply List
- For one trellis, you either need thirteen 1 x 2 x 8′ cedar boards or five 1 x 6 x 8′ cedar boards to rip down to 1 1/2″ wide boards. (Cedar is a good wood for this project because it resists rot and insects. 1 x 2s are more economical at under $60 and the 1 x 6s will cost about $90.)
- Table saw if ripping down wider boards. We have THIS job site table saw.
- Miter saw. We have THIS ONE and THIS STAND.
- 1 1/4″ brad nails
- brad nailer (We have THIS ONE and THIS compressor. You can use a battery-operated brad nailer or even use a hammer, brad nails, and a nail set)
- Titebond II Wood Glue
- measuring tape
- Square or combo square
- pencil
- Protective gear – eye, ear, leather gloves, and dust mask (if not using dust collection while using power saws)
(You can download the printable supply list and steps HERE.)

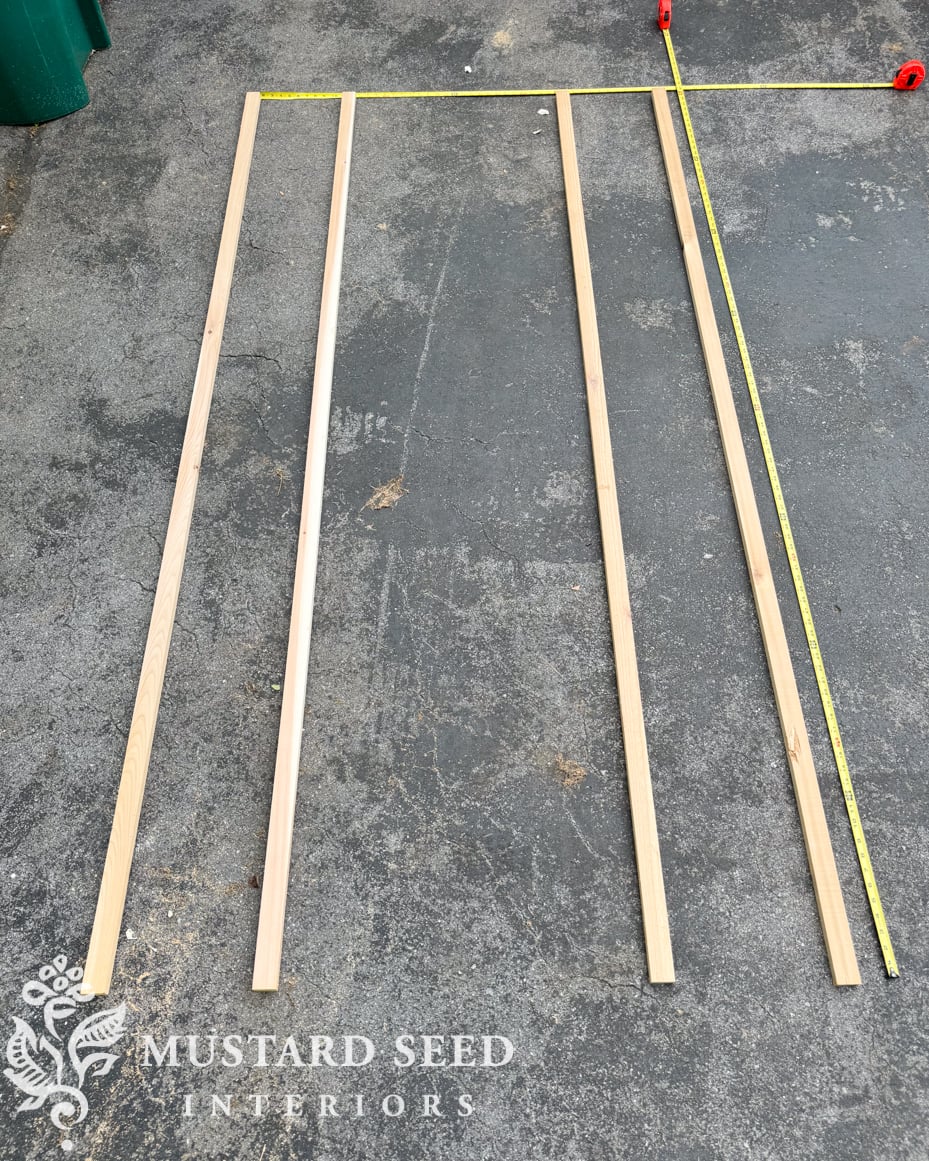
Our Lowe’s had a limited supply of cedar 1 x 2s and only a few were reasonably straight to use for this project. Many of them were severely corkscrewed, making them completely unusable, so I had to supplement with 1 x 6s that we ripped down into three 1 1/2″ wide boards, plus a little scrap that I can use for other garden projects. As a note, if you’re new to buying lumber, the actual dimensions of a board are different than the listed measurements. A 1 x 2 for example is 3/4″ thick x 1 1/2″ wide. If you have to use 1 x 6s and don’t have a table saw, you can ask Lowe’s to rip them for you (which might involve a small fee per cut) or take them to a cabinet maker/woodworking business to ask if they would rip them down for you.
Jeff and I were able to run 10 boards in about 15-20 minutes, so it wasn’t too bad, but we already had the table saw. If you’re able to buy cedar 1 x 2s in good condition, you can get straight to assembly.

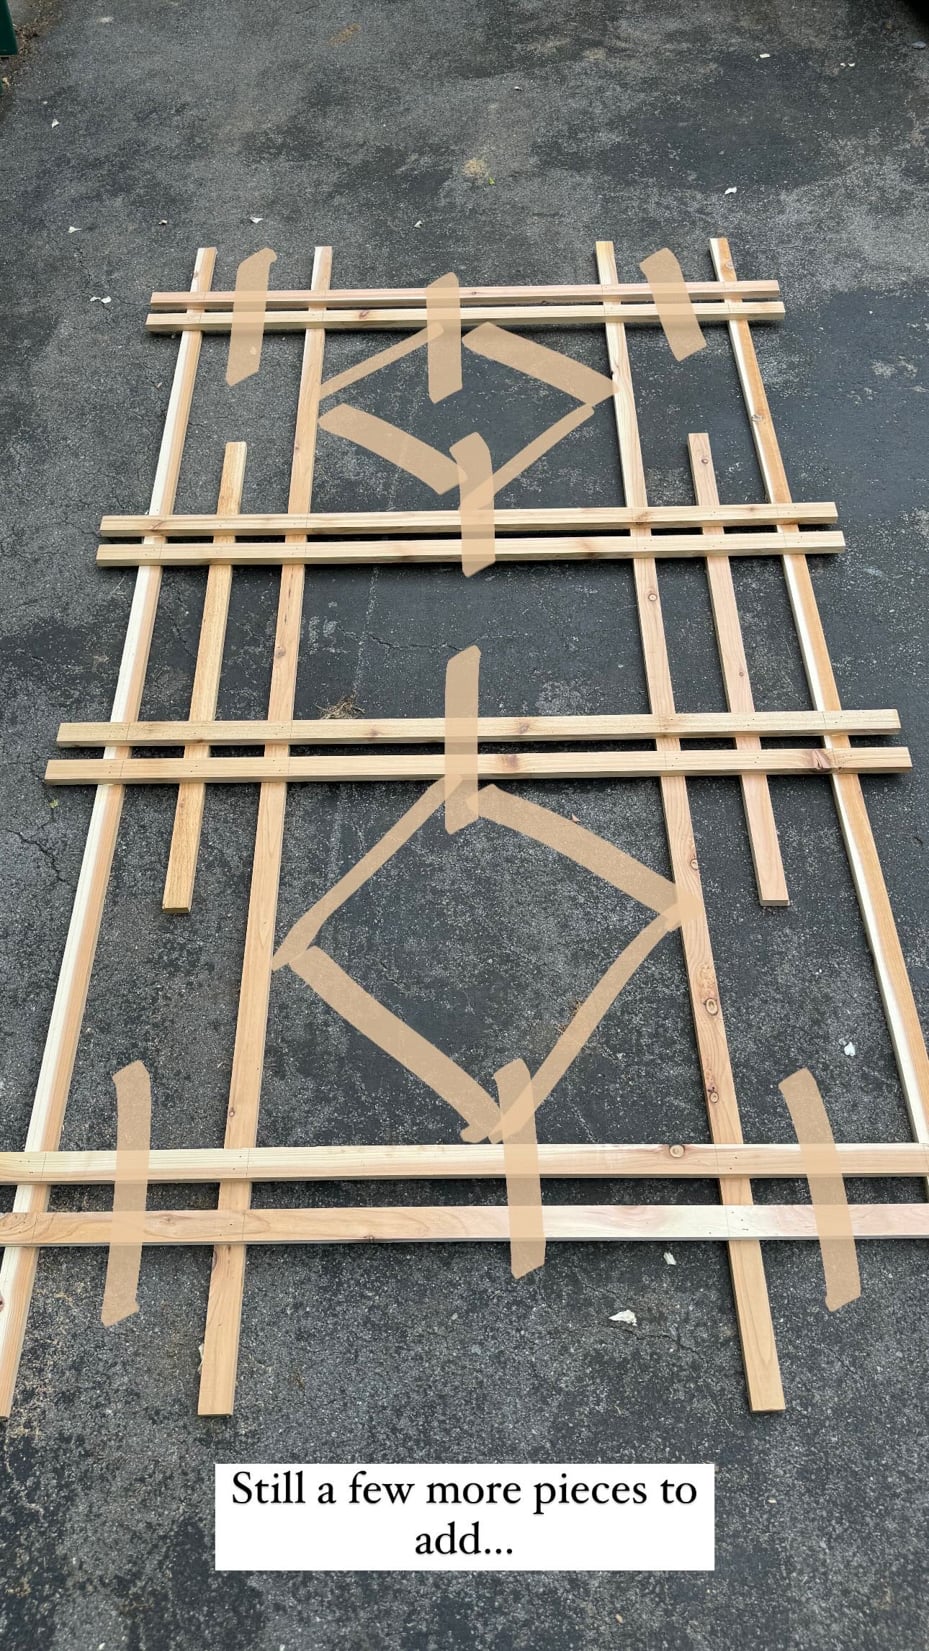
Once the pieces were cut, I started to assemble the trellis. I didn’t have a work surface large enough, so I just laid it out on the driveway. The nice thing about building a trellis is it’s very forgiving. You don’t want to build a trapezoid, but it’s okay if it’s not perfect. I laid out two measuring tapes (vertically and horizontally) so I had an idea of where to place the vertical and horizontal pieces.
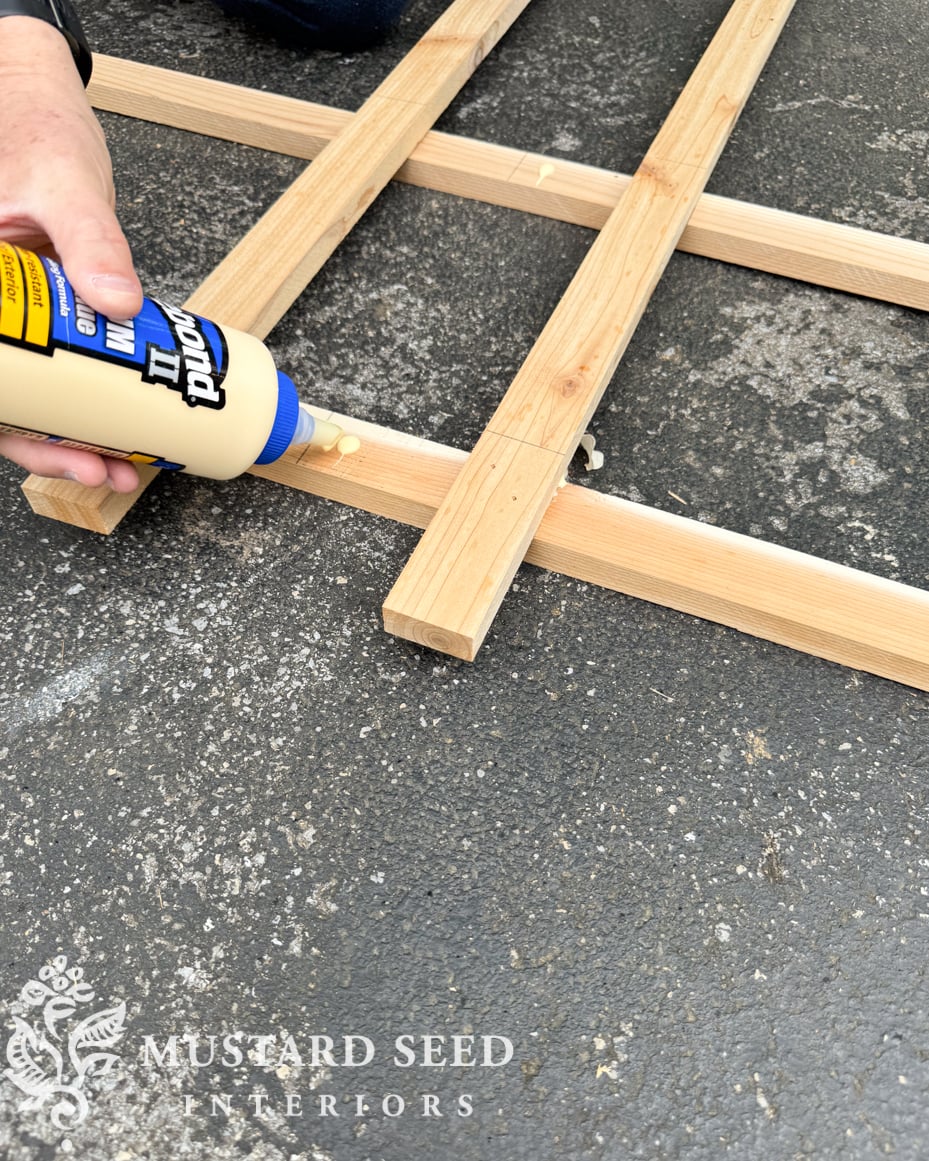
I cut the pieces to size on a miter saw and set them in place to “dry fit” the trellis to make sure I was happy with the proportions. If you’re building this vintage-style trellis exactly, you can follow the printable cut list and spacing plans below. If you want to tweak the design to suit the style of your home or perhaps a specific plant or tree, then you can play around with the design and proportions at this stage. Once I was happy with the basic vertical and horizontal pieces, Jeff helped me attach them with exterior wood glue and brad nails.


We considered using screws, but since the boards are on the thinner side and the cedar was a bit brittle, we decided to use glue and brand nails to avoid splitting the wood. Put a dab of glue where the pieces intersect and shoot in two to three 1 1/4″ brad nails.
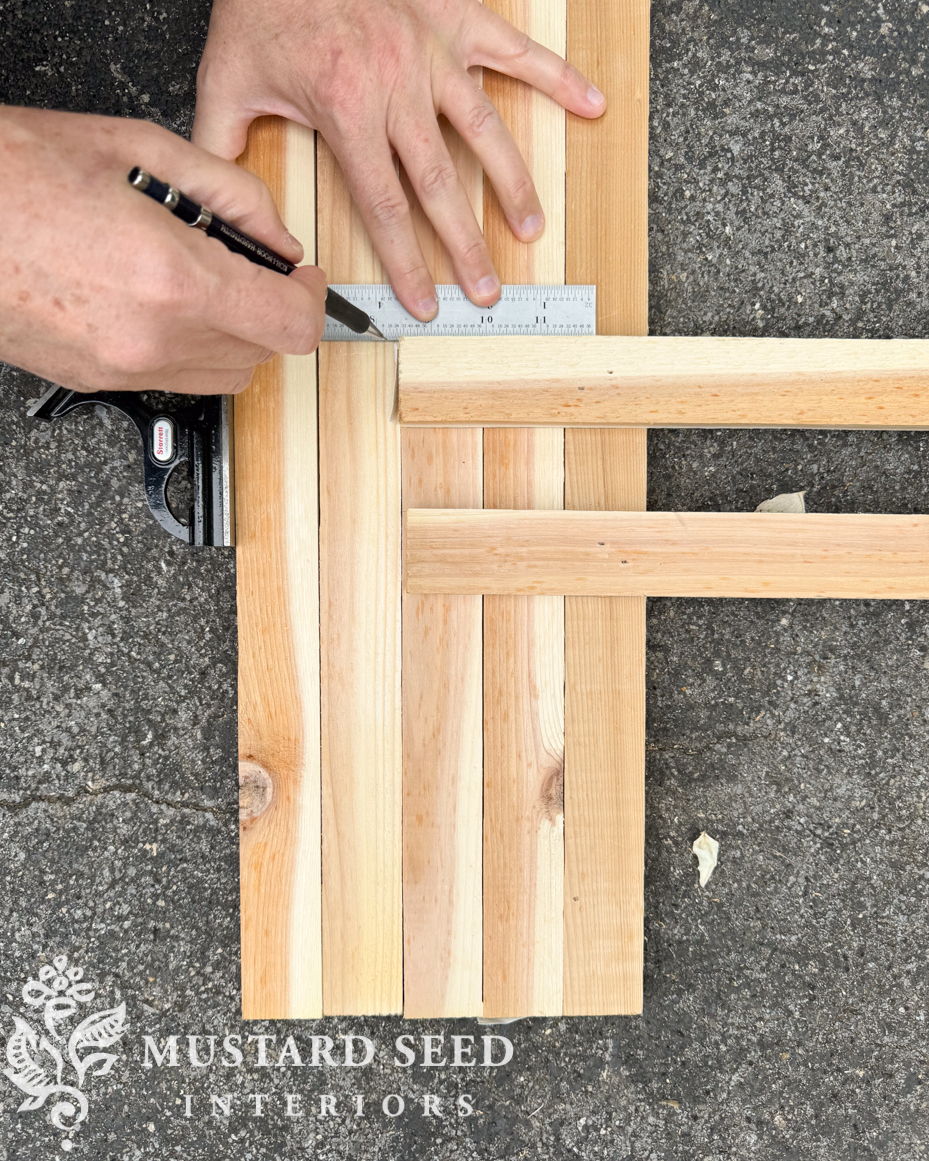
Once we had the spacing figured out on the first trellis, we were able to transfer the vertical and horizontal measurements to the boards for the second trellis. If you’re following the plans, you can cut your pieces, line all of the vertical 8′ pieces together, and mark where the vertical boards intersect with a combo square or straight edge. Repeat that with the largest horizontal pieces. It’ll make assembly quicker and easier.
I had to stop for the afternoon because of rain, but it gave me time to play around with ideas for the details and flourishes. If you’re playing around with the design, take a picture of the trellis and draw some additional “pieces” over the picture to see what you like.
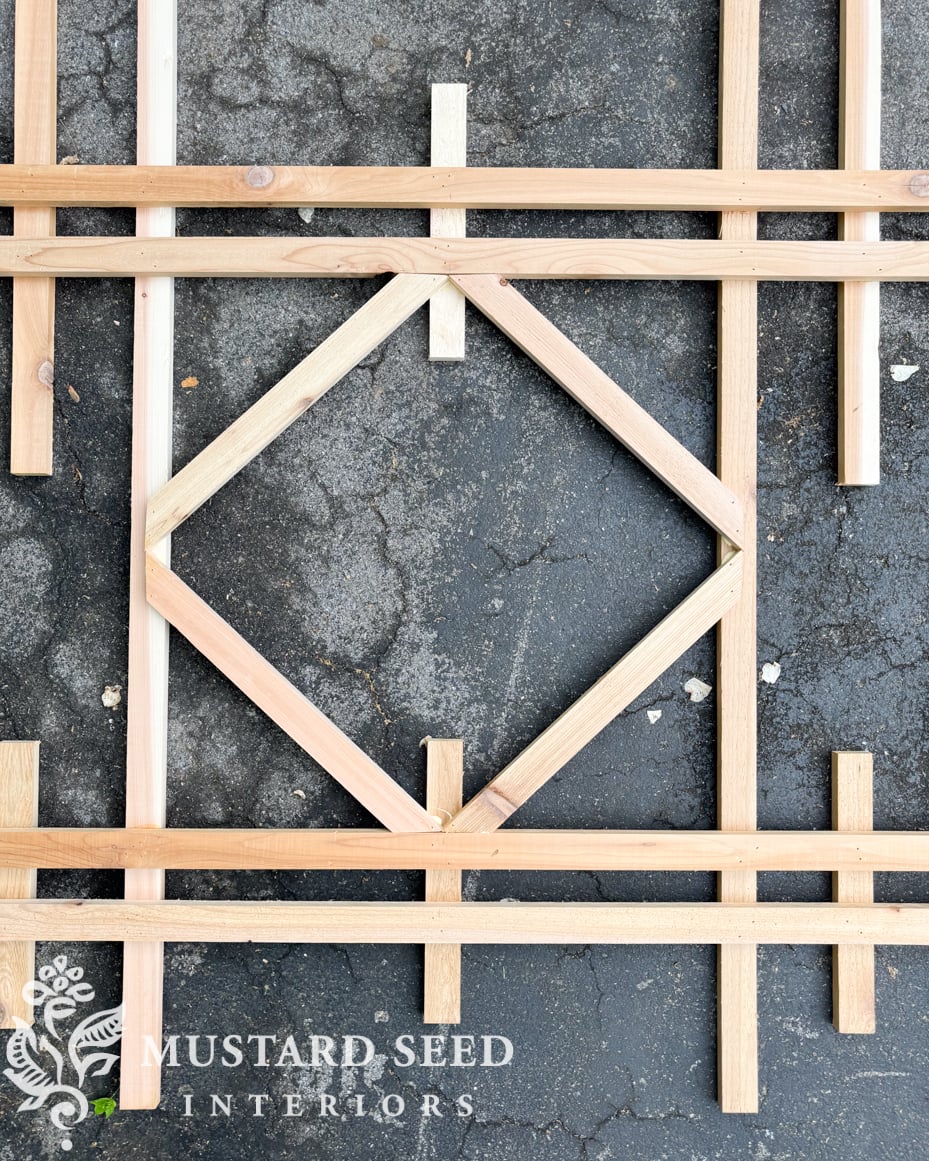
The next day, I was able to finish the trellises and I love how they came to life with the vintage-style details. The square look me a bit of experimenting, but I figured out a way to make it work so I got a (mostly) perfect square and could glue and nail all of the corners to the trellis frame.

Here is a close-up picture showing how the square was assembled. The boards are 17″ at the longest point and mitered at a 45° angle. I marked the center point of each side of the square so the square would be, well, square.
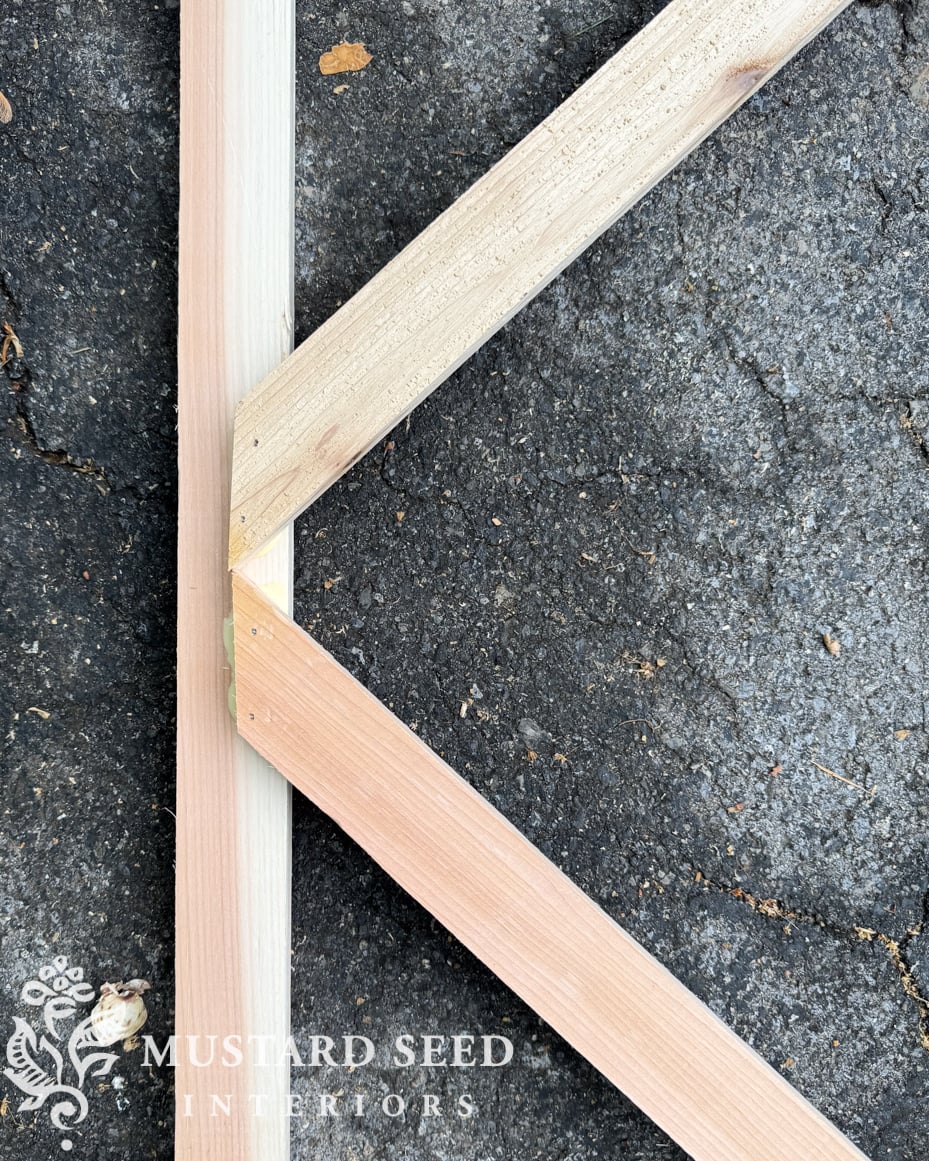
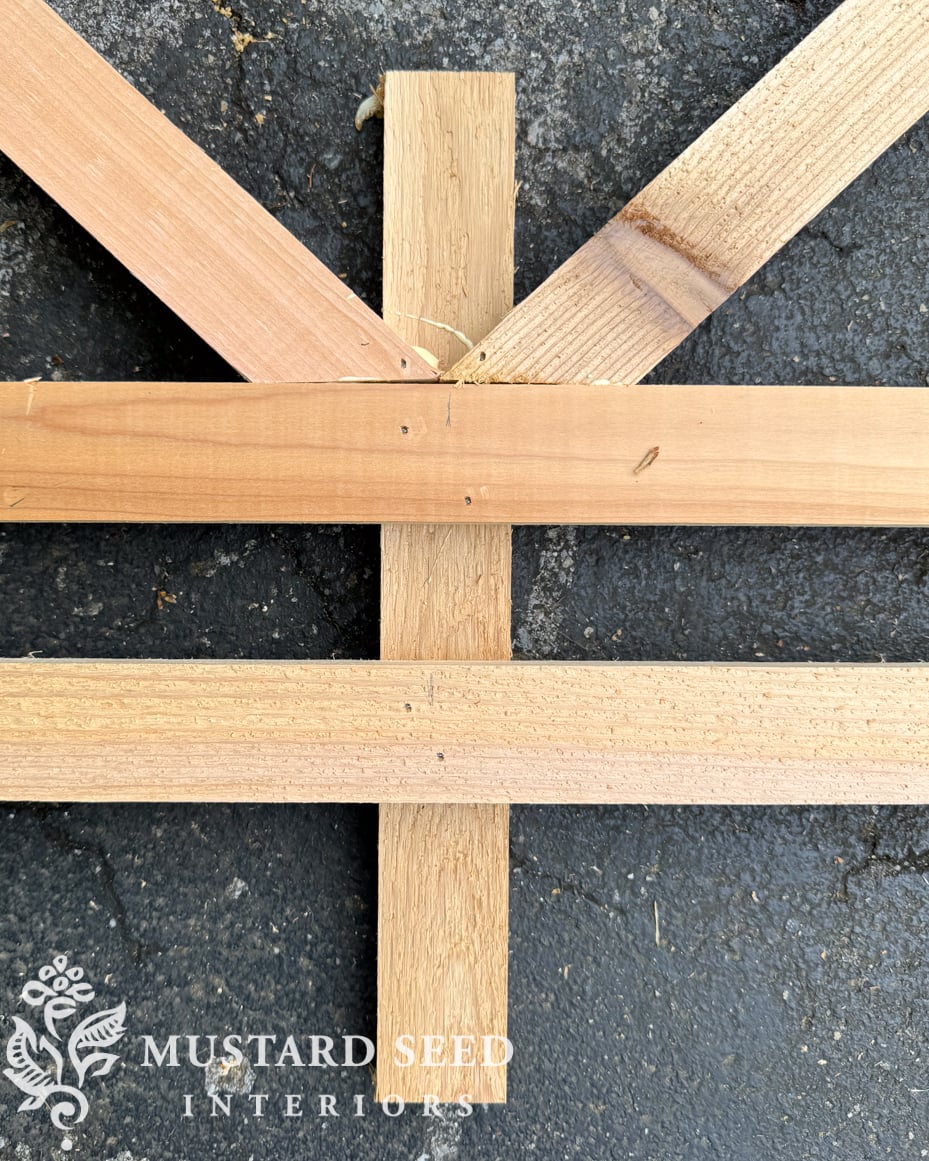
The 17″ measurement allowed the square to overhang the frame just enough to secure it with glue and brad nails. Here are two close-ups of the joints…
This was a relatively quick and easy project and I’m wondering why I ever bought a trellis. I am building them from now on! My mom and I are going to prime and paint them tomorrow and then Jeff will help me install them. I’ll share how we do that, but we’re going to use spacers so they sit out from the wall a bit and will be easy to remove when needed. I can’t wait to get the trellises installed and get my espalier apple trees tied on.

Vintage-Style Trellis Steps
- If using 1 x 6′ cedar boards, rip them down to 1 1/2″ wide on a table saw. If using 1 x 2s, start at step two.
- Cut all boards to length on a miter saw (see cut list.) Miter 17″ pieces for the squares to 45°
- Line up the four longest vertical pieces and the eight longest horizontal pieces and mark where they intersect using a combo square or straight edge. Mark with a pencil. This will make assembly quicker and easier.
- Assemble pieces on a large, flat surface to “dry fit.” I suggest putting the largest vertical and horizontal pieces together first and affix them with glue and brad nails and then adding the flourishes.
- Put a dab of exterior wood glue and a few 1 1/4″ brad nails at each joint.
- Sand if desired. Paint, finish, or leave wood raw to weather.
You can download the printable PDF vintage-style trellis supply list and steps HERE.
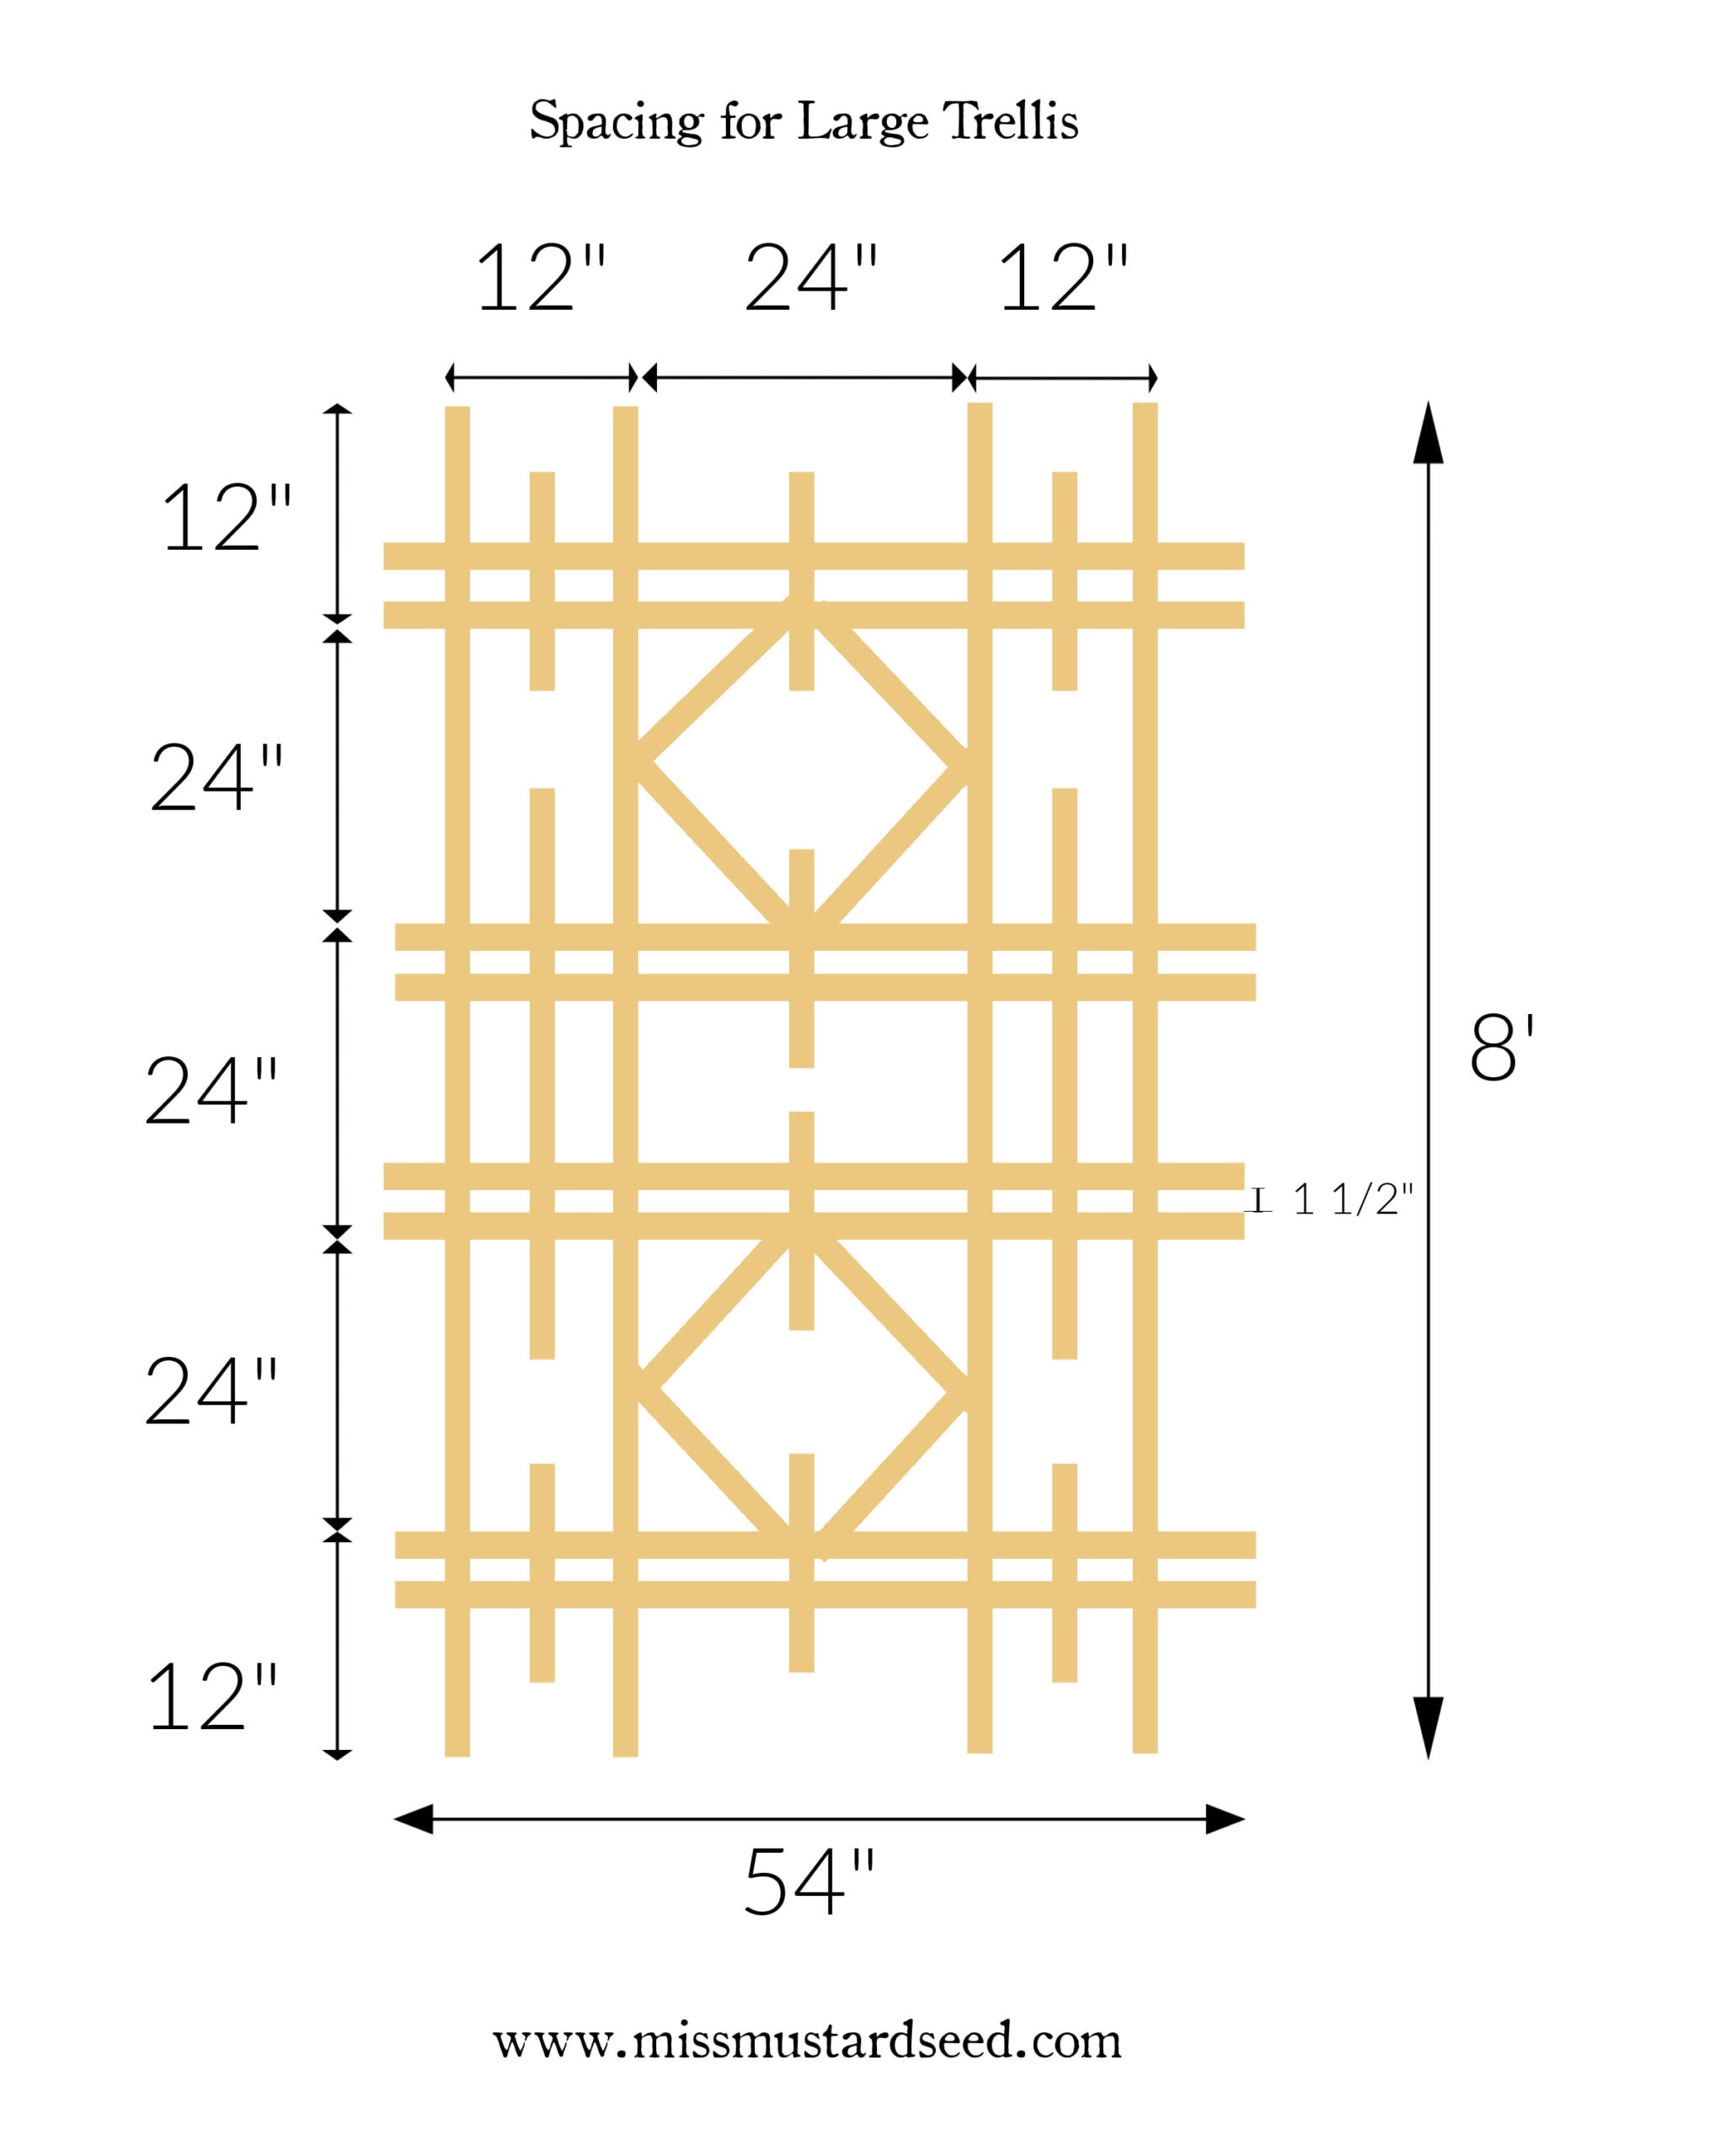
Vintage Style Trellis Cut List & Spacing

You can download the printable PDF for the cut list HERE and the spacing layout HERE.
Let me know if you end up making this trellis! It was such a fun project and I hope these free plans are helpful to those who want to add a custom, vintage-style trellis to their garden.


13 Responses
oh it’s just lovely…and so excited to see how it all turns out. Thank you for the pdfs. I was just thinking about doing a trellis on the wall and will be using yours as the inspiration.
I know a lot of time went into this tutorial and getting your ideas down in DIY files for all of us —for free! Thanks you!
These turned out great and thank you so much for including all the details and plans. Your website is one of the best. In addition to your great style, you are a very kind and generous person. Thank you for everything you post.
I was going to say the exact same thing! You said what I was thinking beautifully.
I also have to agree!!! You the best, Marian!!!
In the future think about going to Groff and Groff for your wood. Their selection is top notch, we’ve never seen a twisted piece there. They’ll cut whatever you need. My husband worked part time at a home improvement store and he feels most of the lumber is questionable.
They turned out fabulous!!!!!
Looking forward to the finished project. Thank you for the plans and step by step instructions.
So wonderful! I have been building tuteurs using various types of fasteners, and while the brad nails work the best, they are the scariest to do for me! I never want to hold that machine again! I have wanted to venture into trellises, and was wondering if even exterior super glue would work just as well as nails or screws.
And just like that… it’s beautiful and I can’t wait to see
the paint.. and install.
You inspire!
Marian,
incredibly creative! I saw something similar on a garden tour in Washington state. However, the trellis was the sides of a pergola. The diagonal openings had antique glass (wavy with bubbles?) inset into a channel to hold them in. The wood seemed thicker also. I spent so much time looking that the garden’s owner came over and chatted with me. He was newly retired and had taken up wood working. He was making a portable (on wheels) potting table with a trellis back. I find your blog to be one of my best places for ideas and the logic to create. You are also very generous to share the process and work know-how.
Apple Espaliers are ingenious! A two fer… fruit sculpture and edibles.
Lovely! Can you please share what bracket you’ll use to hold the trellis in place? Thank you.
I used four scrap pieces of cedar painted the same color as the trellis for each one. We screwed the scrap pieces into the house and then screwed the trellis into the scrap pieces. They act as spacers and make it easy to remove the trellises.