
Before the rain came over the weekend, Jeff, my mom, and I worked last Thursday and Friday to make a sizeable dent in painting the exterior trim and siding on our house. The weather truly was perfect for it and, while we were all tired and sore by the end of Friday, we got a tremendous amount done.
We started on Thursday with the trim. I had already primed the porch and trim I could reach along the front of the house and over the garage (as I shared in THIS POST) and it took almost all day for me to just get a coat of primer on. With the help of Jeff and my mom, I was hoping we’d get all of the trim primed and painted along the front of the house and on the porch, but it was a tall order. I didn’t know how many coats it would need and the gabels and attic vents still needed to be primed. Jeff set to work on the trim that would require an extension ladder and my mom and I put a second coat of paint on the porch ceiling and then started painting the trim.
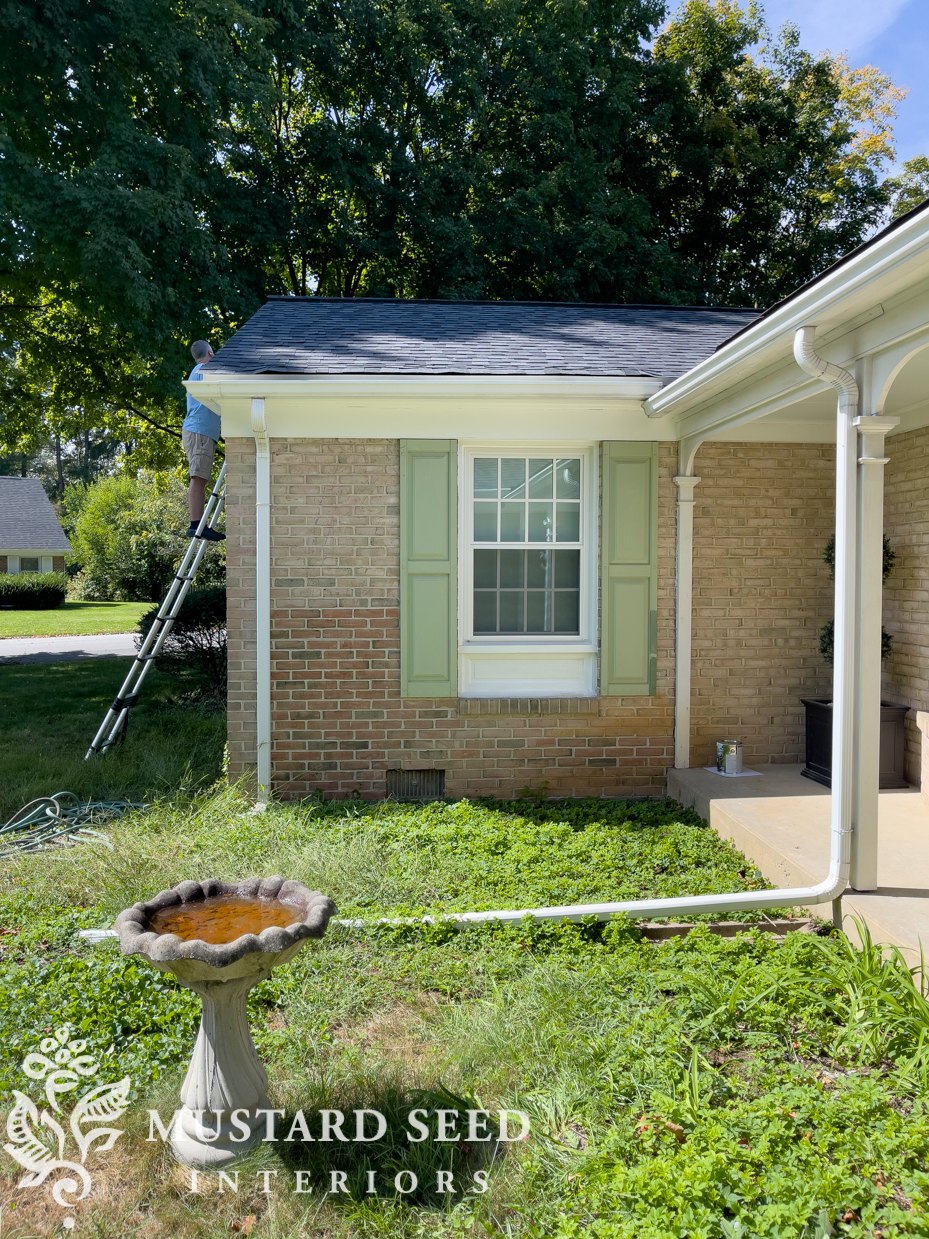
Thankfully, the trim (except for the interior trim along the ceiling on the porch) just needed one coat of paint, so we were able to get a lot finished. You can see what a difference a fresh coat of paint makes by comparing the trim over the window to the trim along the porch in the photo below…
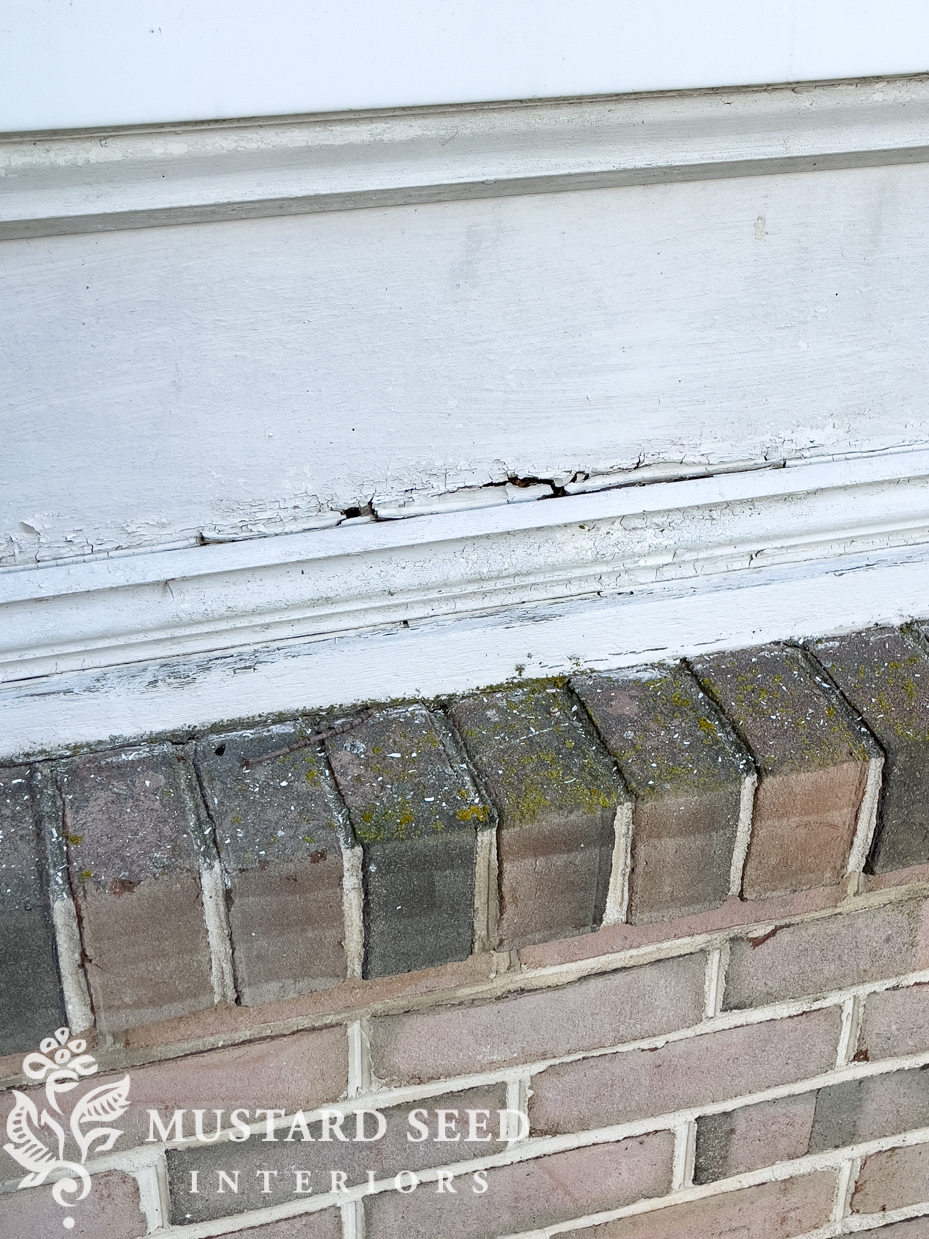
A note about the brick along this wall. It had ivy growing on it at one point which left root stains on the brick and shutters. Jeff got a little overzealous with the power washer this spring and ended up removing some of the light wash on these bricks. He was pretty stressed about it at the time, but I’m not too bothered by it. He’s going to finish power-washing that wall to even things out a bit and landscaping will definitely distract from any inconsistencies in the brick.
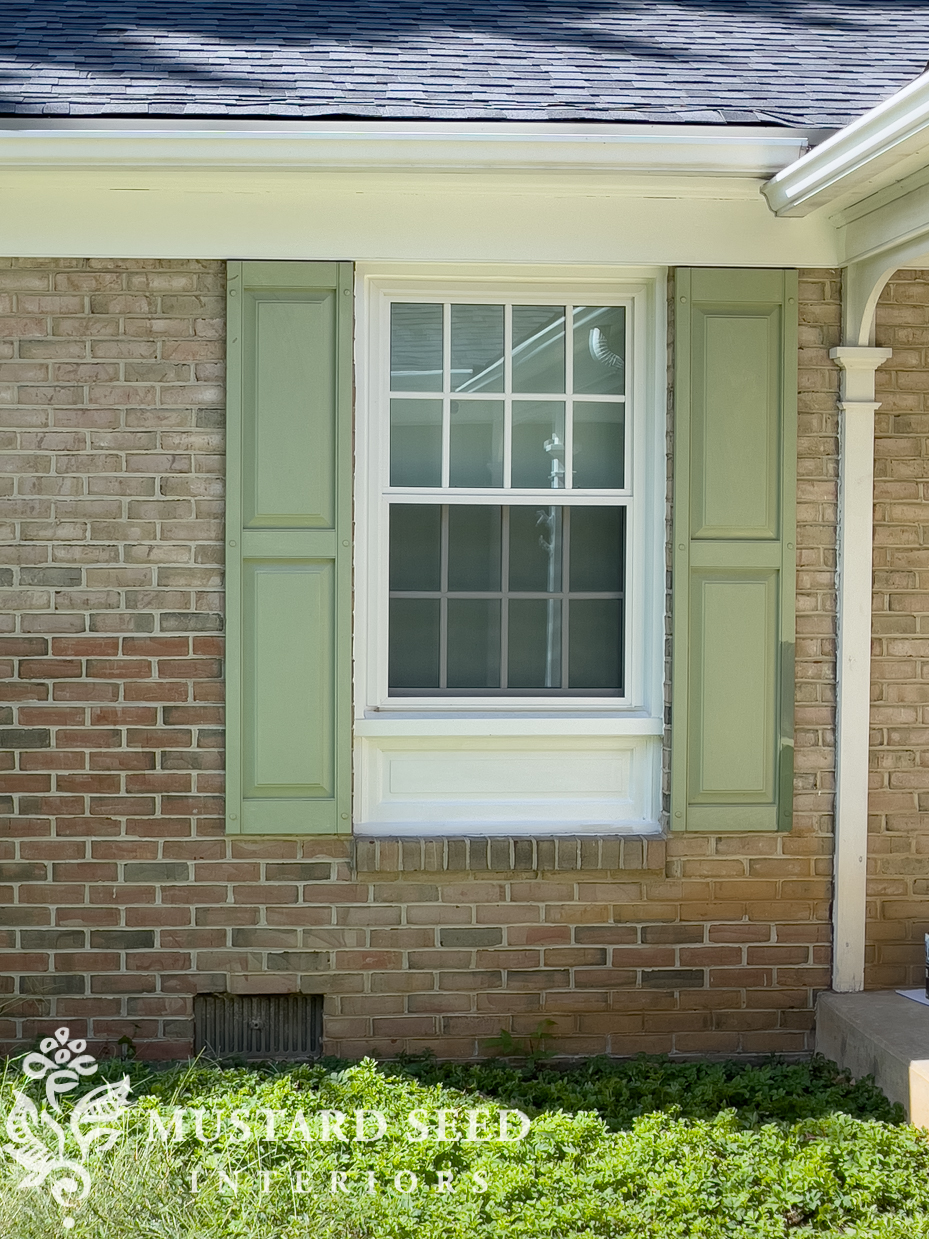
It was a lot of hard work for Jeff, but getting primer and fresh paint along the roofline looks so sharp!
The wood trim under the windows is rotting in one place and missing trim in another, so we are going to rebuild those soon. The new windows sit out a little further, so it will be a good opportunity to make the panel and windows line up better. A few people have asked if the windows were once larger, but these panels are original to the house. I see other similar designs in our neighborhood, so I’m guessing it was a popular architectural element during the late 60s and early 70s.
We ended up getting all of the trim primed and painted along the front of the house as well as some above the garage door. I still need to do a second coat along the ceiling inside the porch, though. For some reason, that area needed two coats while the rest just needed one. I still need to paint around the door and window, so I’ll hit all of those this week when the weather clears.

Before we called it a day on Thursday, my mom and I washed the siding to prep it for priming and painting the next day. We tried a few different techniques but felt that spraying it with cleaner and then washing it off was all that was required. The siding didn’t need to be scrubbed, but we just wanted to make sure there wasn’t any residue, dirt, or grime hanging out on the surface that might prevent the paint from adhering. We used and rinsed it with the jet setting on the hose.
On Friday, my mom and I worked on the siding, which I was so excited about. I have wanted to paint the siding on all of our previous homes. I just have not been able to get away from beige siding! But, I never worked up the courage and, since all of our homes have had two stories, I never felt like I could physically do it as a DIY project. When we looked at this house, I was genuinely excited at the idea that I could paint the exterior of our house for the first time ever. I could pick my colors and get just the look I wanted.
We only have siding on two sides of the garage, so it was going to be a reasonable project for one day with two people working together. As usual, I would cut in and my mom would roll. “Just give me a big wall and a roller.” That’s what she says when I ask her to help me paint, so that’s what I did!
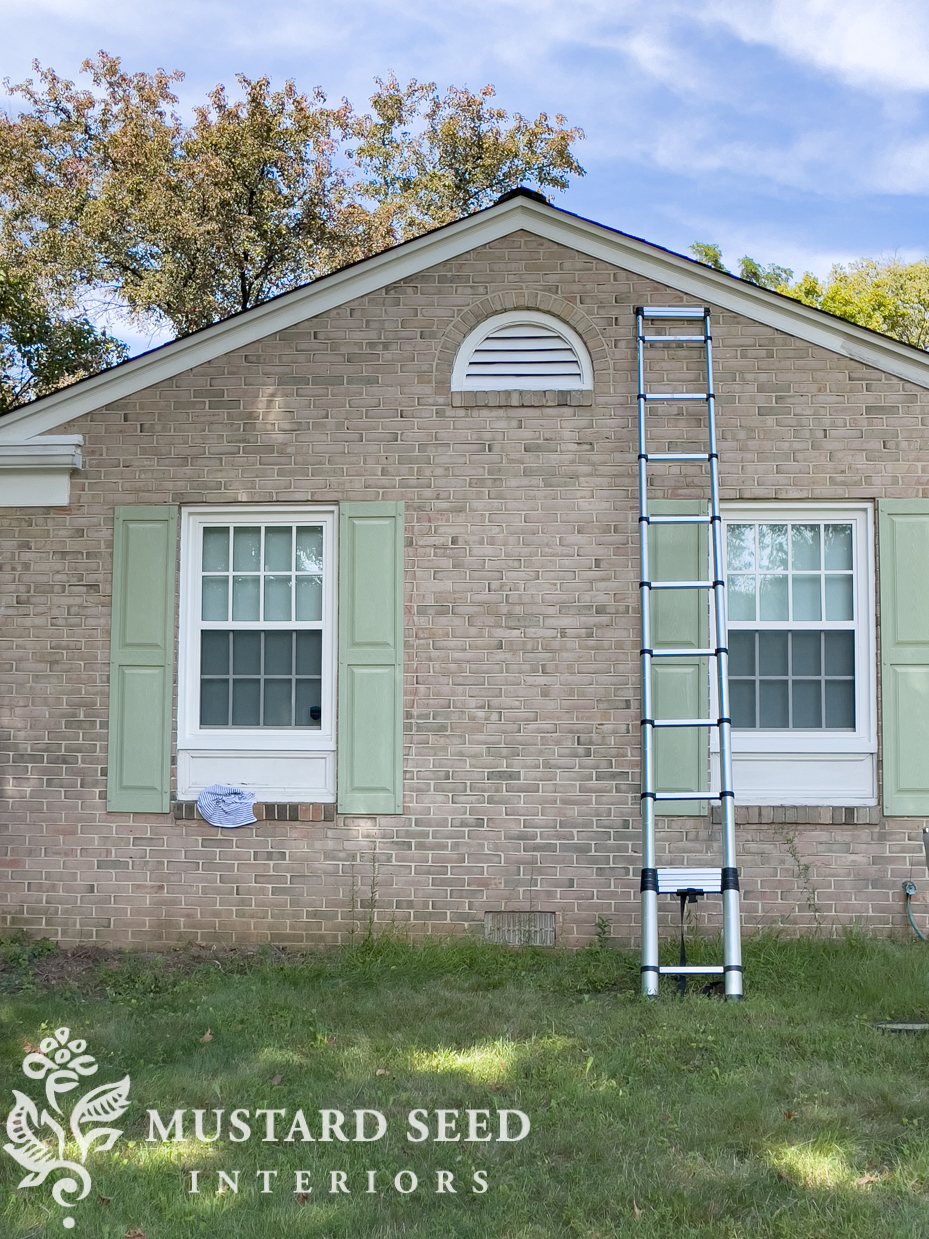
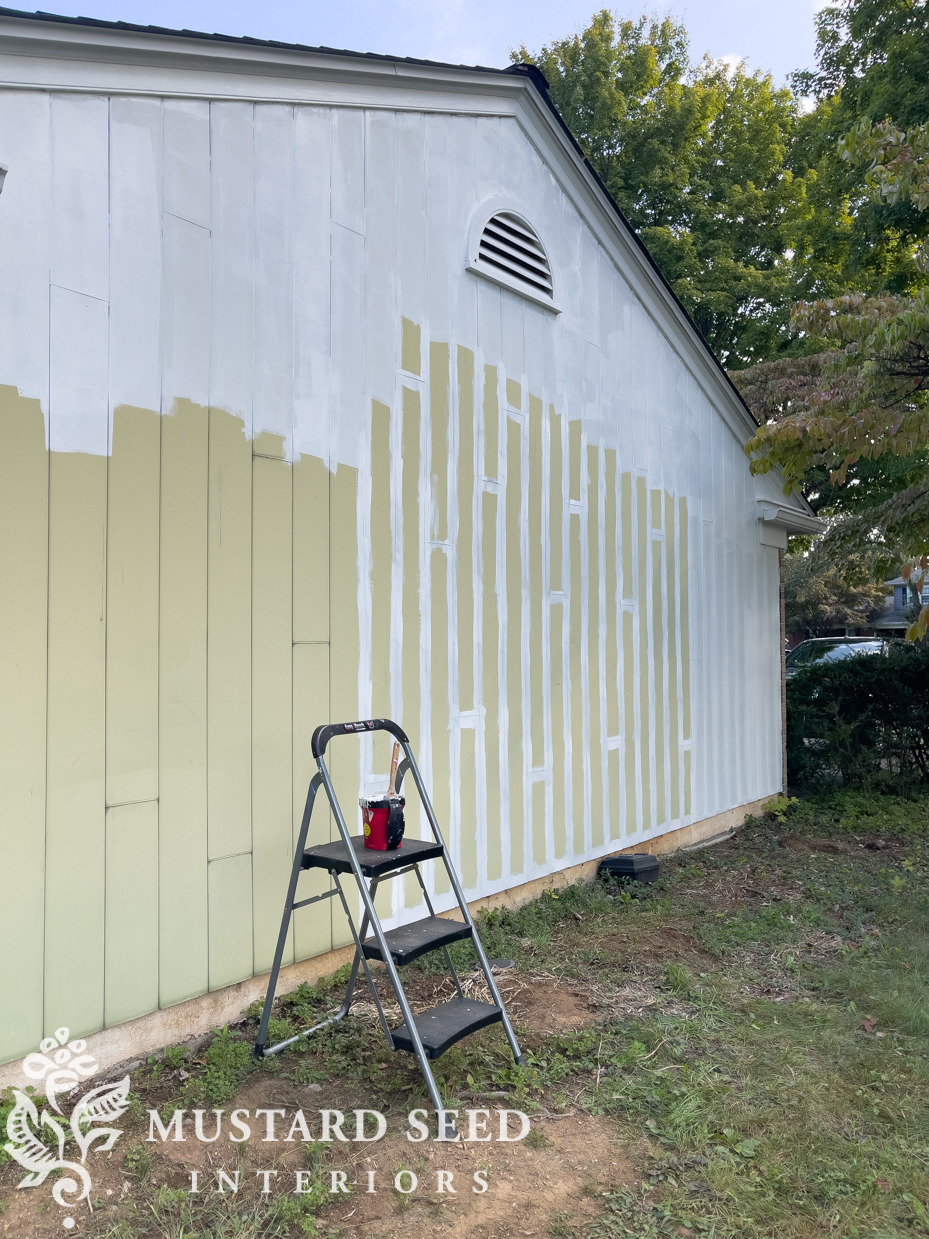
I actually liked the original color of the siding (you can see it next to the window where shutters once were), but it has faded to a yellowish-green along the front of the house which wasn’t very appealing. I considered painting it green again, but I liked the idea of going with a gentle cream, bright white trim, and Card Room Green doors and shutters. I felt like that would all be very harmonious with the brick. (I’ve mentioned it before but I’ll say it again. We are not planning on painting the brick at this point. I might change my mind down the road, but I like the brick and am sticking with it for now.)

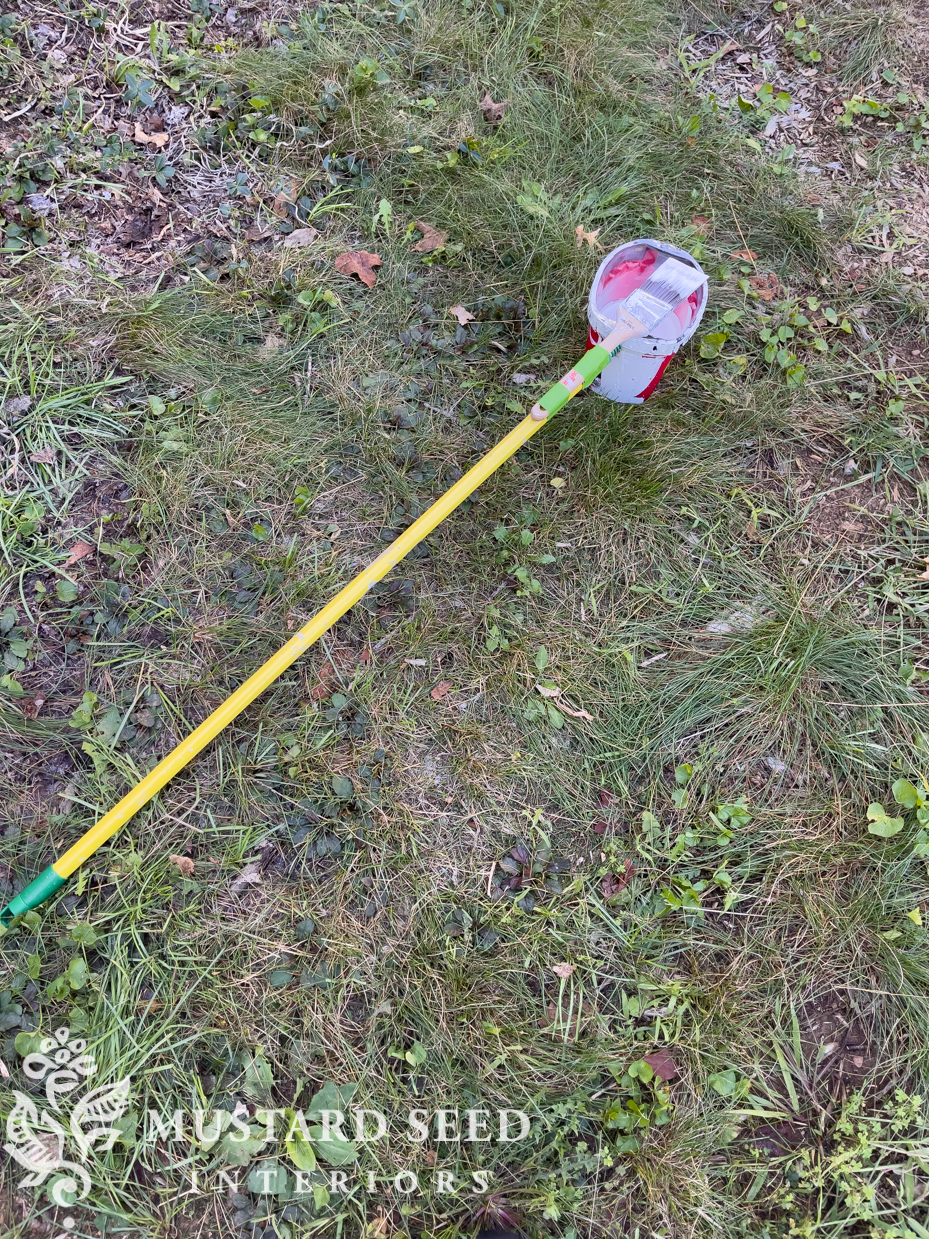
Jeff wasn’t available that morning to lend his ladder-climbing skills, so I had to be brave and climb the 8′ ladder to reach the top of the gable. I used an extension pole on the roller and taped my brush to the end of another pole to cut in. It was tedious and I was a little shaky at times, but it worked and I got it done. And I didn’t fall or break any bones!
Even just seeing the primer go on was exciting!
Speaking of primer, we used Sherwin Williams Extreme Bonding Primer and I would highly recommend it for projects like these. (our siding is aluminum as an FYI.) It provided great coverage and adhesion.
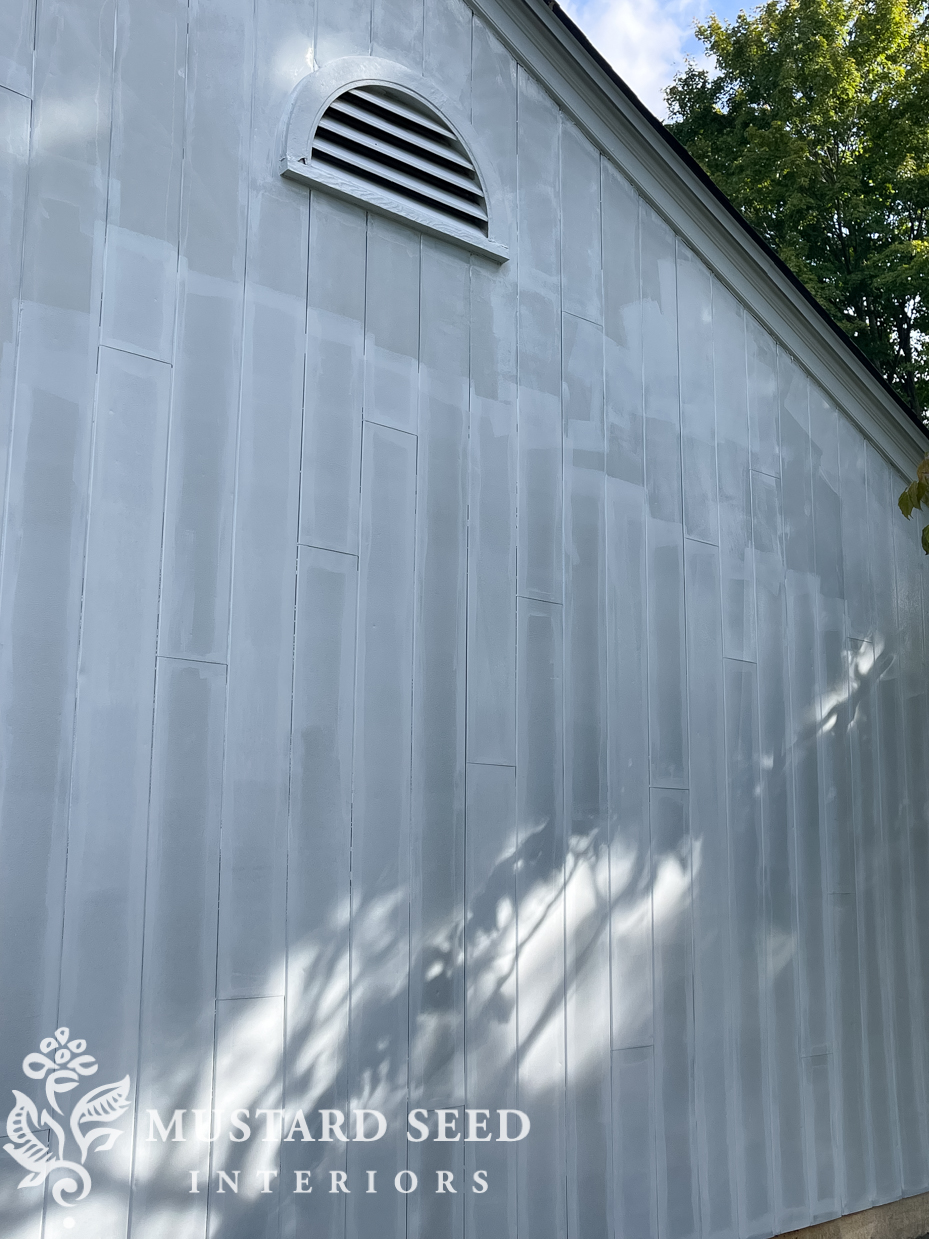
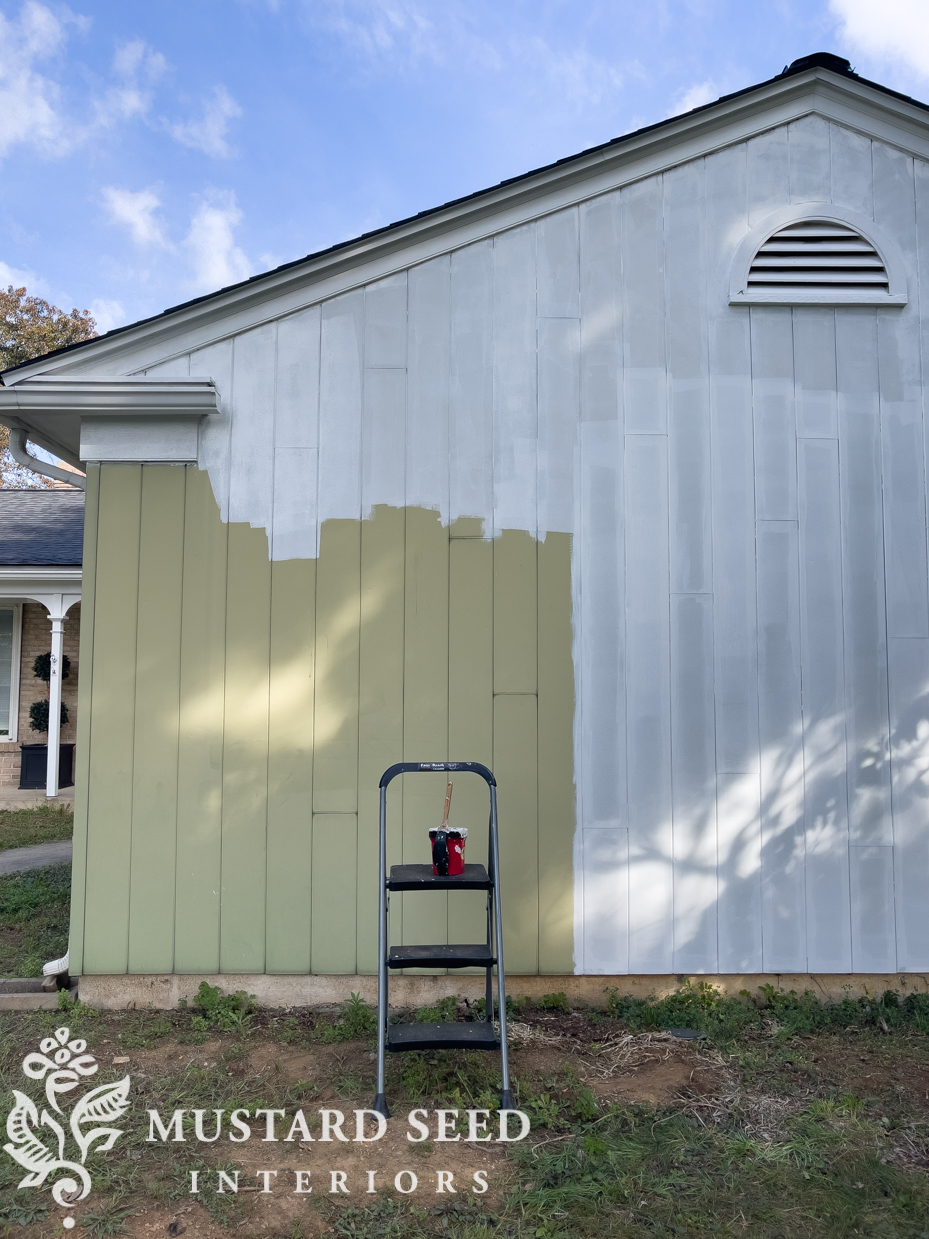
I kept trying to wait to step back and look at the result so it would be a surprise and a reward for the work, but it was hard not to see the change as I was refilling my paint bucket. Here is how the siding looks primed…

And then we applied two coats of Creamy by Sherwin Williams. It’s a lovely warm, off-white without being too yellow. It provides some contrast with the bright white trim while still reading as white. I just love it! The replacement shutters for the garage window are arriving today and I can’t wait to get those painted and installed to add some color.
Again, the door will be painted in Card Room Green as well and we’ll be removing the storm door to show off that beautiful old wood door. I even ordered a new solid brass handle.

I received a flood of comments and questions about the change when I shared on my Instagram Stories, so I’ll answer a few of those here before we take a look at the then-and-now comparison.
First of all, it’s not finished yet. We removed all of the overgrown landscaping so the house looks a bit naked at the moment and can’t really be compared in that sense. Of course, mature bushes look better than mowed weeds, but we had to get the painting done before we could start planting. Many people have suggested adding windows to the blank wall of siding, but that would be expensive and impractical since behind it is a wall of garage storage shelving. We are planning to use that wall as a backdrop for landscaping, perhaps even a trellis or something. In addition to that, I don’t mind the fact that the house isn’t symmetrical. That just isn’t the style of the house and I am a big fan of improving things aesthetically but not making a house something it isn’t. I don’t think we need to make brick ranchers look like farmhouses or farmhouses look like New England salt boxes, etc. I bought this house because it’s charming, I like the architecture of it, and I don’t have any plans to fight or reinvent that.
I write about working with the architecture of style of a home in my book Feels Like Home and it’s something I feel pretty passionate about. Passionate might be too strong of a word, but as a lover of homes, I like to see houses, especially older ones, treated with some care and sensitivity. So, I prefer to relax into the process and try to meld the style of the house with my own preferences. I think the result usually ends up celebrating both styles instead of looking like a wrestling match of opposing aesthetics. It’s also a lot cheaper!
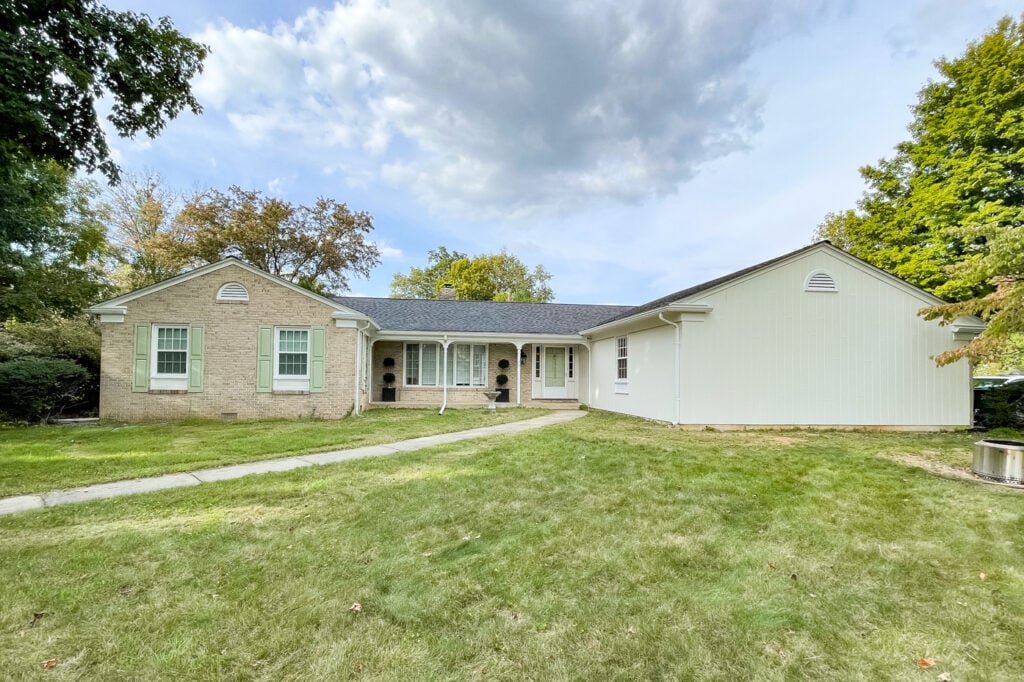
So, here is where we were and where we are now…

You can see we replaced the roof and windows, and removed the overgrown landscaping. We’ve now painted the trim and siding and will be working on the shutters, front door, and some other things over the next couple of weeks. Our neighbor lent us his edger, so we’re going to edge and clean the sidewalk to make that look a little sharper.
This spring, we’ll start adding some new landscaping and I’d like to look into hiring a landscape designer to put together a plan we can implement. The front of the house is so big that I think it could benefit from a professional’s touch. I will probably put some cardboard over the beds to start to kill off weeds and grass over the winter, but we’ll see. We’ll also need to bring in some topsoil to even the ground and take care of some grading issues around the porch, anyway. We’d also like to look into moving or burying the gutter that is emptying right in front of the porch. I cannot wait to start planting, but I will have to be patient and focus on other projects until the spring…


33 Responses
Looking good. I love the idea of a trellis on the garage wall. Im sure landscaping will make a huge difference. Looking forward to seeing the painted shutters…love card room green!
Thank you….enjoying the transformations of your new home.
Love the SW creamy paint! It’s so soothing and charming. You are making a beautiful home!
Thank you for validating how, I also blend my choices and style, to the design aspects of my house, to make it home.
A landscape designer sounds like a practical idea, and could assist in getting the look right initially,and avoiding expense if changes are needed.
Kim
Thank you for respecting this beautiful Ranch! It’s my favorite style of home.
This is a lot of work, but is turning out so clean and fresh looking. I love every change you’ve made to this home and loving it for what it is, a lovely ranch that has nothing but potential!!
Your work on the front of your house so far looks great, looking forward to seeing the card green accents! I can see your style coming through.
Looking great!! I love the creamy white change, it looks appropriate and fresh. That paint job must have been SO much easier without all the shrubs to work around!
I do have a question about those strange grate-looking things here and there at the base of your house, what are those? Vents into the basement? They look like they could take on water in a heavy rain.
The card room green is amazing! A perfect color that adds to the charm of the house.
Is there a college close by with a landscape architect course? There are students that love to take on these projects for little to no expense for the experience. Our state college does this and it’s a fun endeavor.
I am completely with you on retaining architecture that is true and honest. I feel that redoing a house to make it appear to be what it is not is just “tarting it up.” It makes me cringe. I appreciate the fact that you understand the vintage of this house and are working within the parameters of that. You’re not trying to make it something it’s not. Thank you! And btw, it looks great!
How do you get into ypur garage with you care is your driveway on the far right of your house ? Do uou come off the street or does your driveway wind around your back yard which I am guessing it does not ? And when are you going to till and lay top soil on your.lawn and plant grass seed next Spring ? Looks Good so far but it does need some bushes closer to the house !
The last paragraph she says that in the spring they will start the landscaping. It takes time to do all the things that need to be done. Be patient.
A friend of mine had a similar style garage, she added false or fake windows with shutters and window boxes to the large blank garage wall for balance.
I was wondering about the downspout in the middle of the front porch. I, of course, understand the reasoning of it’s job, but could it be moved to a more discreet area? The garage and trim look 100% better with the new paint!
Where I live in Texas there are many painted brick homes and they turned out really well. Having said that, I’d never paint my brick because I really like – but my whole house is brick with the exception of trim and fascia.
Look into a French drain for the downspout. Possible solution.
Truly amazing what you DIY!
Gardener’s Supply Co has some really classy oversized trellises for large walls
Like your interior renovations, your exterior renovations are spot on! Your color choices are your style and perfectly fit the style of your home. I do believe landscaping will make a HUGE difference. Have you considered approaching Carmen Johnston with @bespokegardenplans? With your family’s DIY spirit and Carmen’s landscaping expertise, I believe your home could be as beautiful outside as it is inside.
Absolutely love the paint colors! Beautiful! I have one question…..is it my imagination or is the shutter with the green paint samples upside down? Typically, the widest horizontal rail on shutters and doors is on the bottom and the narrowest at the top. Or maybe I just need a new prescription for my eyeglasses!
Yes, it’s upside down.
Good eye!
It is really looking great. Love that creamy color you chose!
Our last house we lived in for 5 years- new construction- had the gutter thing going on- – we extended the flowerbed and since we use pine bark nuggets/dark pine mulch we spray painted the gutter extension dark brown- with the mulch heaped around and plants planted gutter became non issue plus we still had all the rain water going out to lawn and trees
Looks great, Marian! The old gal looks like she’s been to an expensive spa! I love your color choices. Maybe instead of power washing the rest of the brick on that one wall, you could just do a light lime wash on the darker bricks? The brick is really pretty. In this case, painting brick would be a shame. Can’t wait to see the landscape plans!
Your home is looking so good! I love the paints you have selected and, once you are ready for it, new landscaping will make an enormous difference on the facade. I grew up in a 1950 ranch home and it is one of my favorite home designs (even though I also love old 2 & 3 story homes). There is something special about everyone living on the same “level” not to mention no stairs for the aging inlaws or for yourselves in later years:-)
If you can’t move the gutter, consider if a copper rain chain could work! The patina is so lovely!
I think you should paint a mural on that big blank wall.
I love the fresh paint! And your color choices are timeless, as usual.
When we bought our 70’s home, the little entry roof was held up with 4×4’s, and it appears that the porch columns at your entry are something similar. We had a carpenter enclose those posts with wider boards and added baseboard and molding at the bottom. It made them look bigger, of course, and more solid and imposing. Even if you had to keep the gutter where it is, it would be less obtrusive if the columns behind it were larger. And I also second Joy’s suggestion of painting the extension brown to match the soil you’ll be putting in for the landscape planting.
As always, you are doing an excellent job on your house and should be commended.
It appears that I am the ONLY one who is not in love with your choice/shade of green for the shutters – etc. They just don’t “Pop” for me – and needs more contrast. But, it is not my house and you live in in it. And, being the incredible artist that you are, I know you have a great eye for color.
I do see a bigger front porch on your house though and removing the one pillar on your front porch. It’s scale just does not work with the overall framework of your house. It is an example of a 1960’s architecture – that being said, just because it falls in that realm of when your house was built, does not mean that the aesthetic works.
But here is the bottom line, you have a great eye and will make this all work. I encourage you to hire a landscaper to create a plan and most likely you will be able to execute the plan. Being in that business, they can take in the full value of the lay of the land and can make your house “pop” with plants, enhancing all of your hard work. Keep it up – and thanks so much for sharing. I really enjoy watching this progress.
I hope you are able to move that gutter that comes down the middle of the front porch. My eye goes right to it and it screams move me, I’m in the wrong place.
The paint is awesome, really changes the look of the house.
Your idea of a landscape designer is an excellent one. A professional design will give you direction and you can buy and plant at your pace and size of your pocketbook.
Remember to install your foundation plantings far enough away from the house so when they are at full growth size they won’t be touching/rubbing on the house.
Oh, one more thing, go ahead and put the cardboard down now, nice and thick. You can put leaves, pine needles, grass clippings, on top of the cardboard. It should be decomposed by Spring.
Happy painting and gardening.
It’s looking so charming & quaint with the creamy white. I have to say by Jeff over power washing was a good thing, loving the brick darker especially with the new paint.
I love what you’ve done so far! The thing that amazes me most is how the right side of your house looks like it doubled in size just from removing the plants and painting it. Can’t wait to see what you do next.
Looks amazing!!