
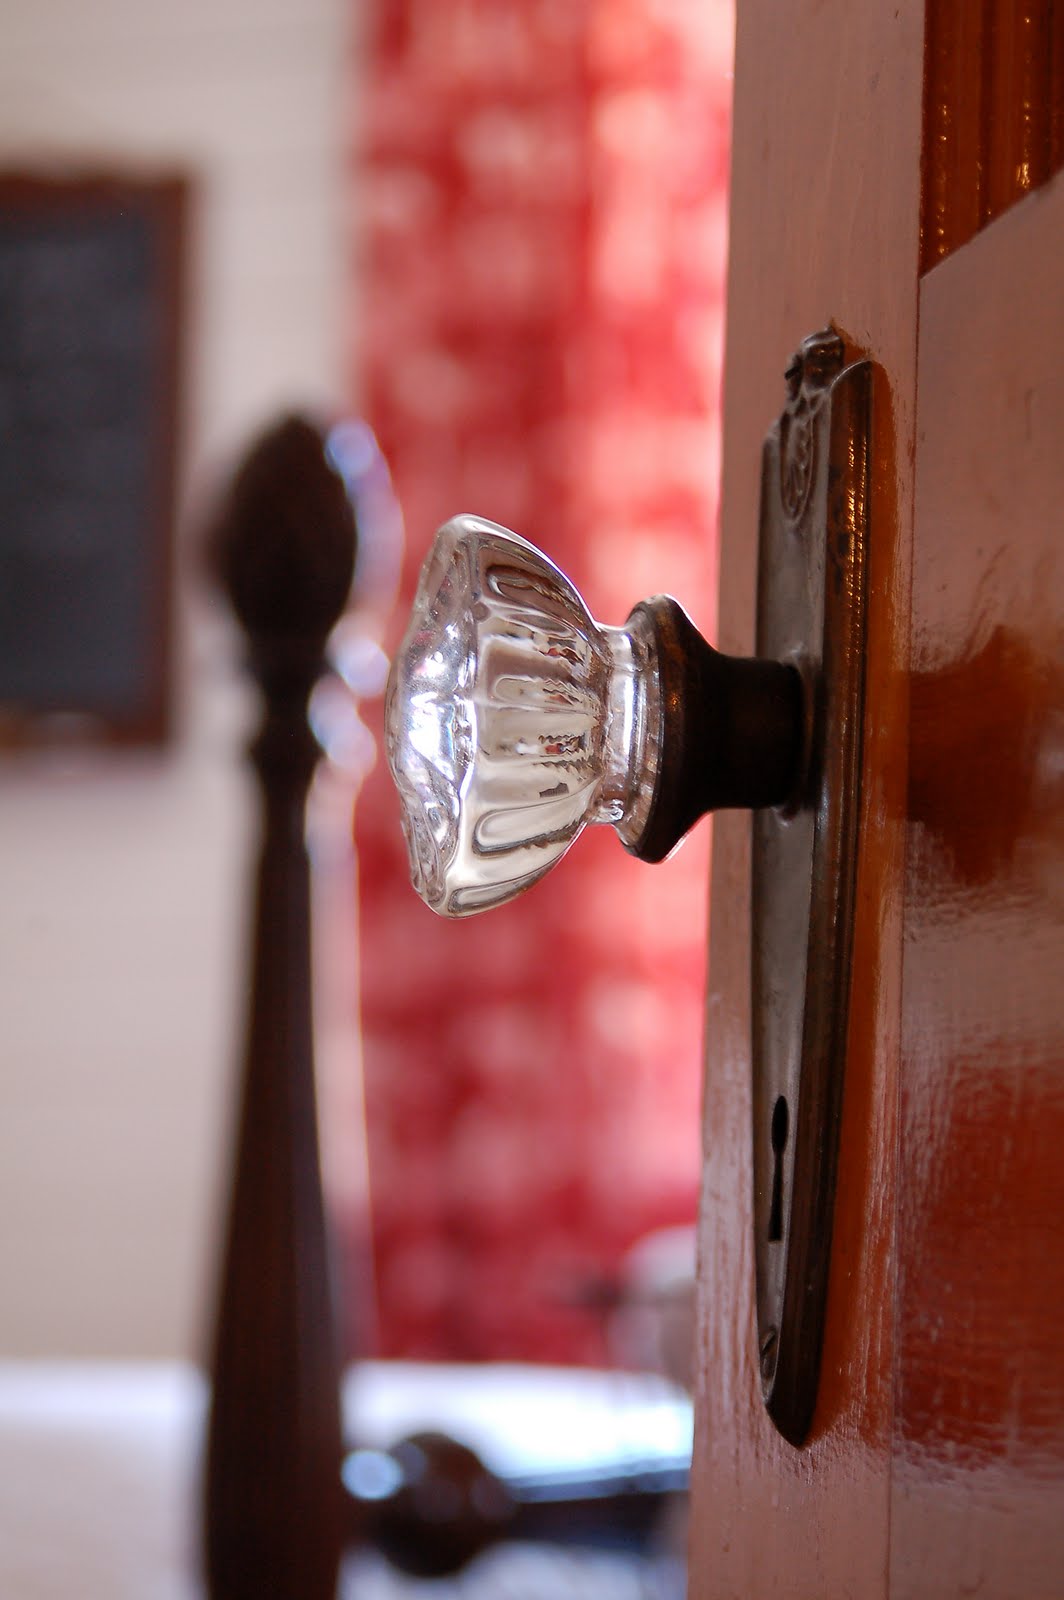
This week has been a flurry of DIY activity in the Mustard Seed household and my guest room is almost completed. This was a totally unexpected makeover that grew out of one idea, but aren’t those the best? Here’s a little sneak peak for you…
Such a tease, I know. A makeover that started out with painting and construction soon called on my sewing skills. I made these curtains with upholstery webbing trim…

…and I made a coordinating ruffled pillow for the bed. This is the tutorial I’m going to share with you today.

First of all, measure the pillow you want to cover. In my case, it was a standard bed pillow that measured 19×24″. Measure and cut your fabric, making sure you leave about an inch seam allowance. For my pillow I cut two 20×25″ pieces of fabric, one for the front and one for the back.
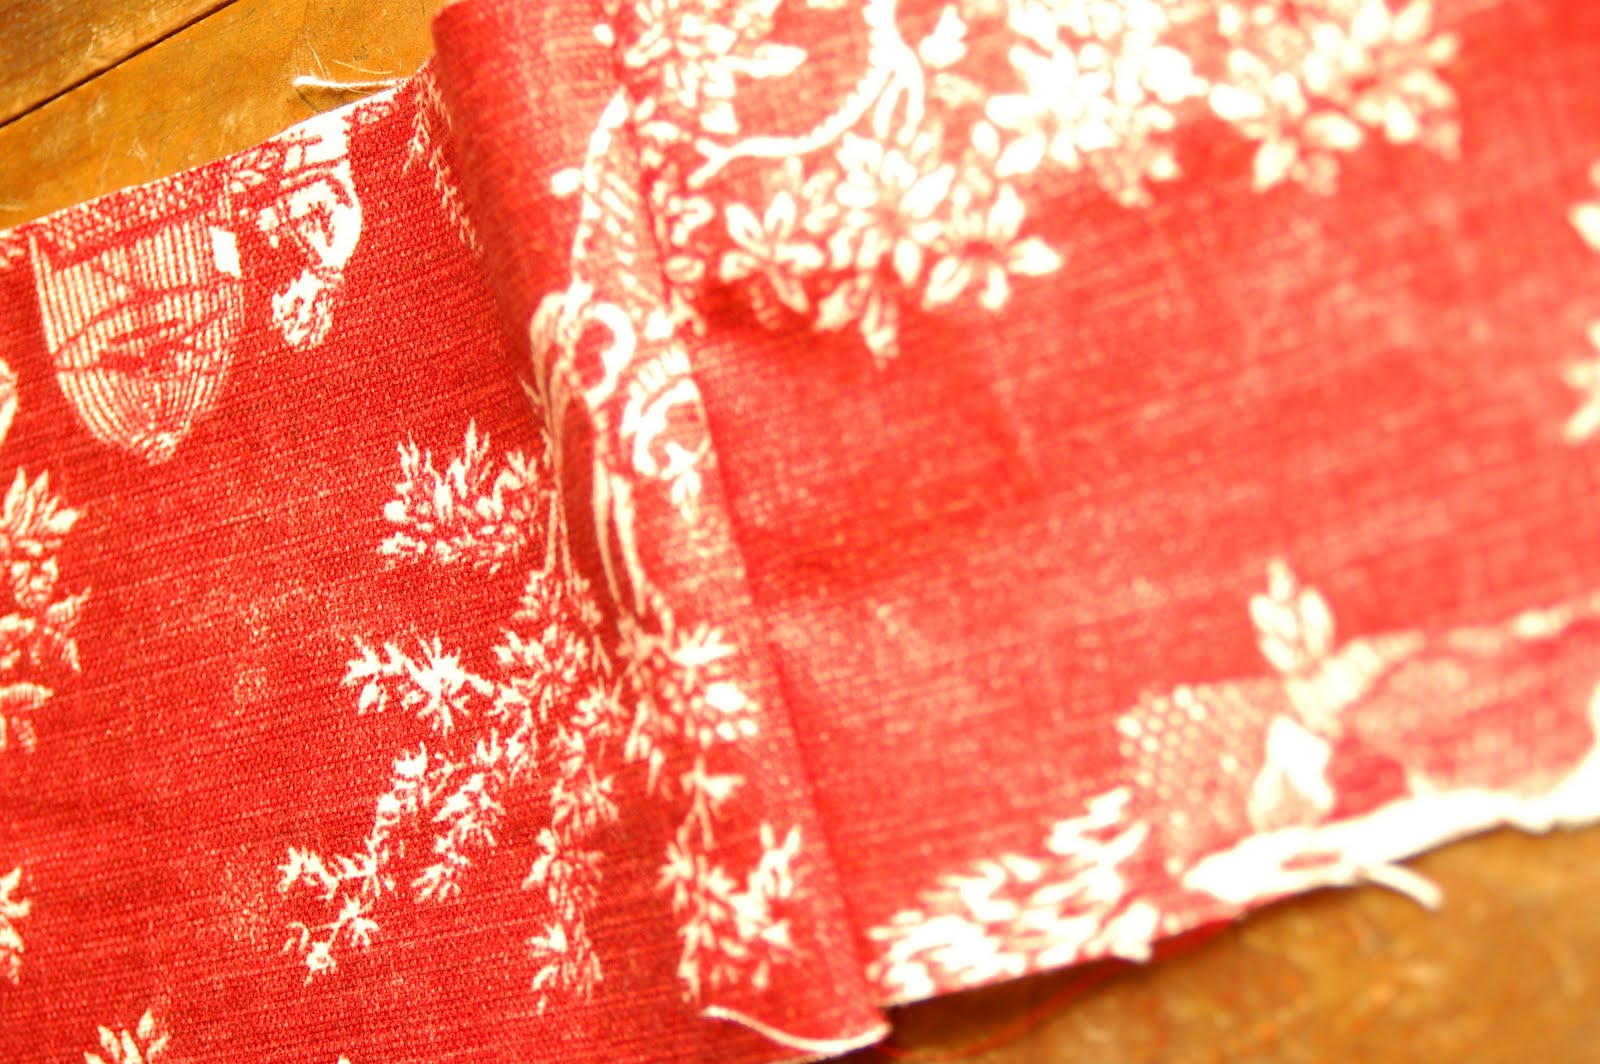
For a 2″ ruffle cut out 5″ wide strips, long enough to go around the pillow at least three times. The fuller your ruffle is the better it will look. Skimpy ruffles can make your pillow look cheap. Sew all of your strips together to make one long strip of fabric. Make sure you sew the rights sides together and the pattern is facing the same direction.
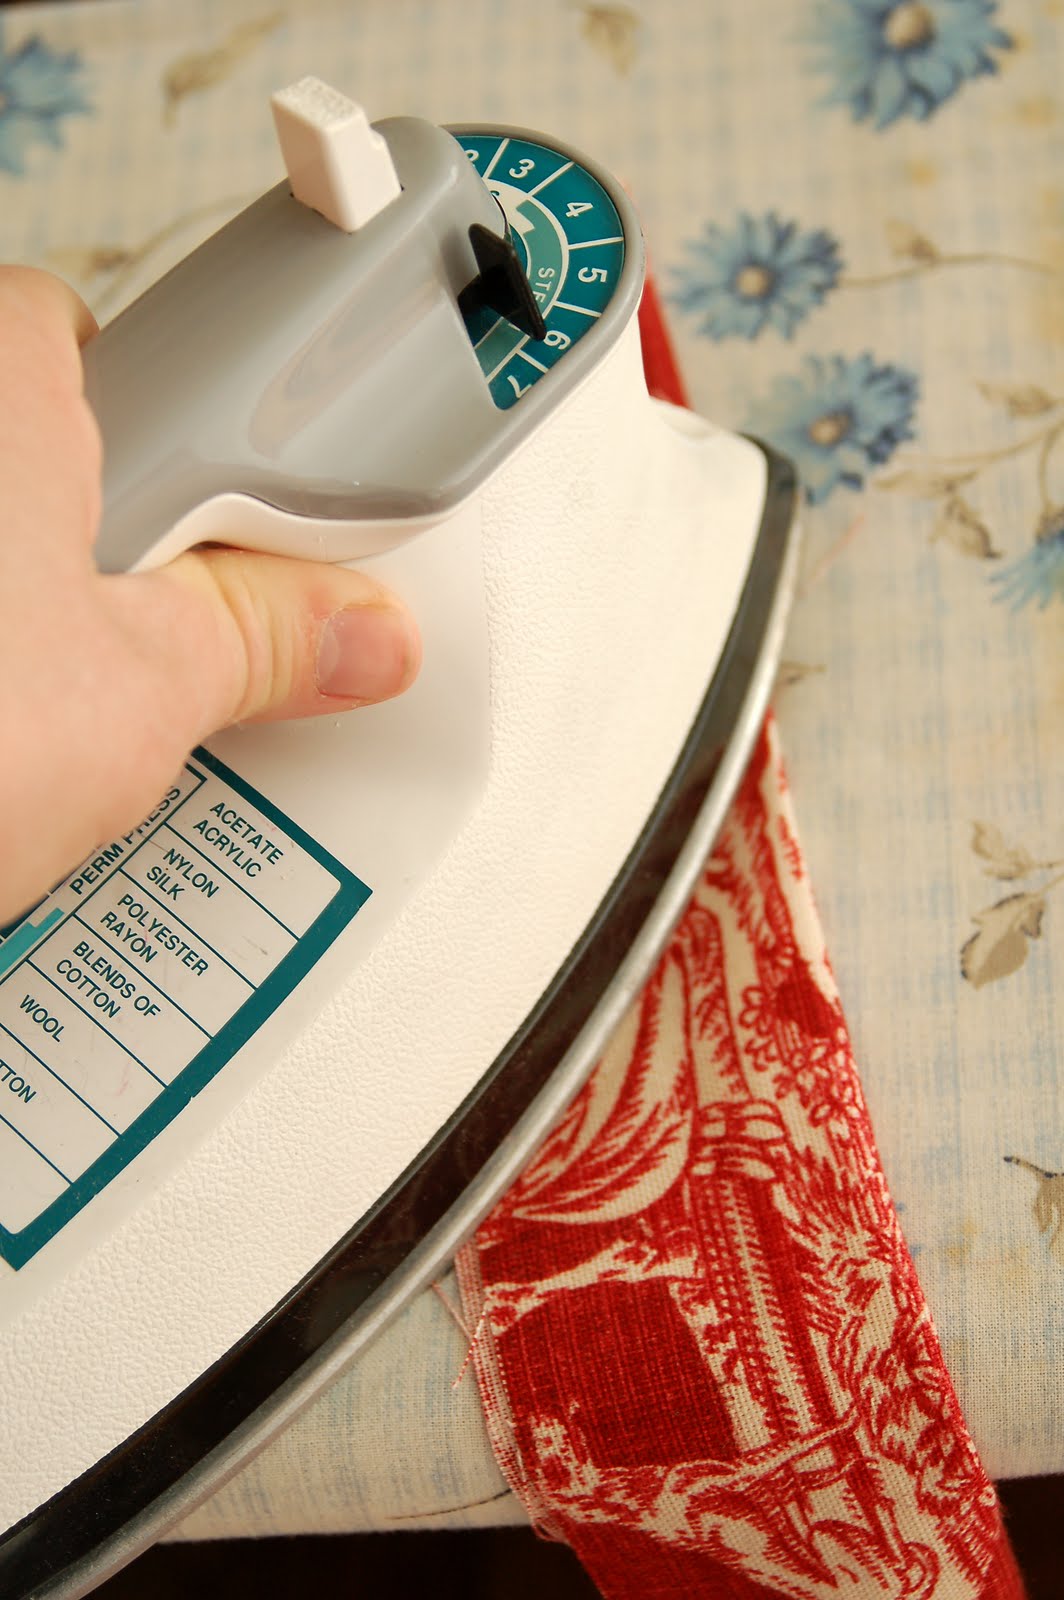

Fold the fabric strips length-wise, right sides together and press them. I know ironing is not a favorite chore for most people, but this step is important. It holds your fabric in a nice fold and makes it so much easier to work with. Also press your seams open, so they lay flat.

Line up the pieces of your fabric for the body of the pillow right sides together. Put one end of your long strip of fabric inside the pillow with the raw edges lined up with the raw edges of the pillow fabric. Pinch the fabric strip to gather it together and create a ruffle. Pin it in place. Work your way around the pillow until it’s all pinned, leaving an opening at the bottom of the pillow that’s large enough for inserting your pillow form. Sew it all together and turn it right-side-out. Are you still with me?

Insert your pillow form and close up the opening using the remaining strip fabric.

Pin it closed and then hand sew it shut. Use a thread that closely matches your fabric and you’ll hardly see the stitches.

Where the two ends of the fabric strip meet, put one piece inside the other and fold in the raw edges. Pin it and hand sew the ends together.
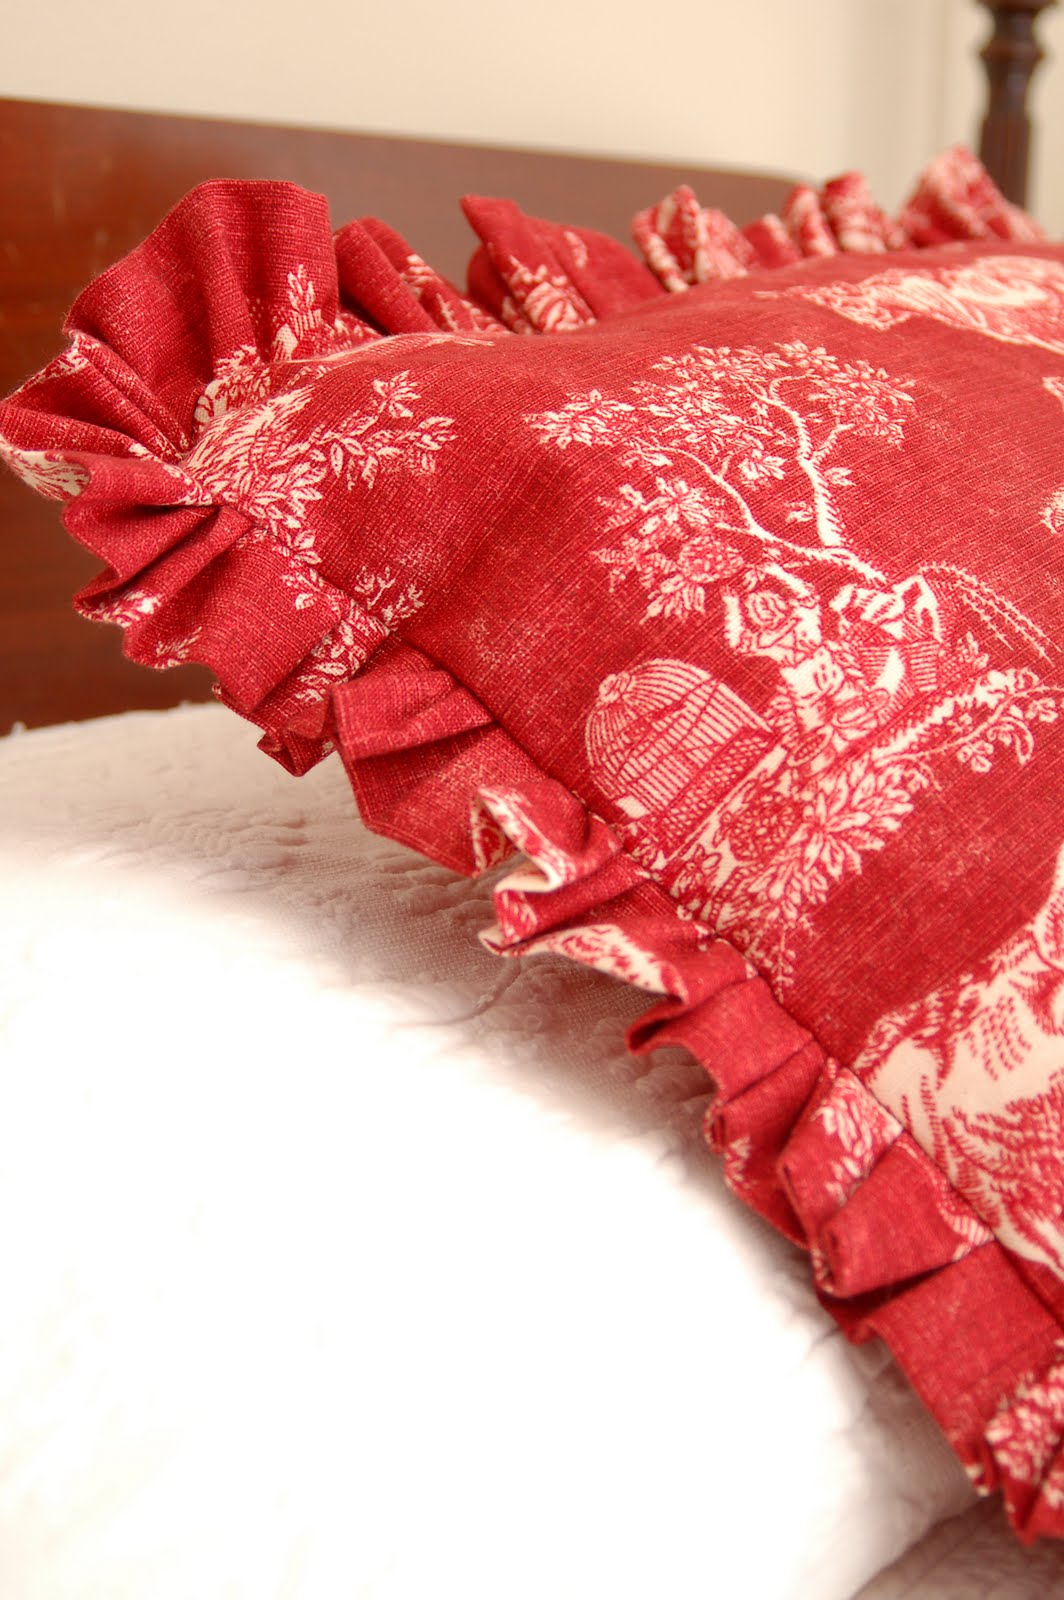
I know there are loads of ways to do a ruffle, but this is the way I do it and it doesn’t involve any hand stitching and pulling threads and all of that stuff. This pillow style looks fancy, but it only takes about 45 minutes to an hour to make.


43 Responses
I love this!
So… you didn't make the ruffle first, and THEN put it on the pillow… you just gathered as you went?
I def. needed this tutorial!
Thanks.
Shelley
Oh I love it! That peek from the door knob is very nice and the window treatments are gorgeous!
Have a great weekend!
Rene
So pretty! I love the fabulous ruffles!
Beautiful fabric…I love the trim!
It's fabulous and great tutorial! I love sewing ruffles and have been dying to make some for a lampshade…just no time.
Happy weekend to you.
T
Looks like we are going to love this one! Thanks for the peek! I love the glass knobs…my childhood home had all glass knobs and I do miss them! beautiful!
Have a great weekend 🙂
Wendy
Ay yay yay, the wheels are turning!!! This looks wonderful=0)
xo,
Carol
Can't wait to see the guest bedroom…and the pillow is fabulous. The color is wonderful!
Hugs
SueAnn
MMM-that particular toile is fabulous, mouth is watering.
those glass doorknobs…, oh yes!
can't wait to read more! just became a follower…
-kelley
I love that red toile and the webbing trim is really a wonderful touch. Love your pillow covers. Great job. Can't wait to see the finished room.
Love & blessings from NC!
Oh I can't wait to see the room! I love that fabric, I have something similar for my tablecloth.
I am to much of a perfectionist to just pin my ruffles. I like to gather them first. sometimes I wish I could just let it go but it seems to be impossible in this area. You make it look and sound so easy. 🙂
Gorgeous! How I would love to sew like that. Love that photo of the door knob too!
Great pillow, what is the brand of fabric and the pattern..I need it!!
Love the webbing on the drapes and the pillow tutorial is super. I love ruffle pillows. Great job. I can't wait to see the room. Hugs, Marty
Love the fabric! Cannot wait to see the finished project. Everything you do is gorgious.
hmmm.love the trim on the curtains…ya' got me thinkin'!
The pillow looks great! I love that fabric, too! I never did the pulling thing either. I remember trying it for my first ruffle pillow and the thread broke. I haven't done one in awhile, but I just feed the fabric for the ruffle through as I'm sewing and it usually came out looking just fine.
Whoa! I L.O.V.E, love the curtains! What a fabulous idea.
I love the fabric of that pillow and I can't wait to see the reveal. I have voted for you every week. You have really shown some great stuff.
The sneak peak at your room looks like beautiful things beyond. I can't wait to see it. The colors are pretty and the way you designed the panels is a great idea and pretty too.
I like your ruffled pillow and you did a great tutorial.
hugs
Sissie
I heart red toile. Seriously. I am just so excited – when's the big reveal ?
Cuuute…oh, so pretty! Love the material! (and your door knob too!)
: )
Julie M.
Luv the fabric and the ruffles!
Blessings,
Linda
I love the red fabric. I'm always on the lookout for red toile fabric with a dark background. Where did you find this one? It is wonderful. Sally
I love the upholstery webbing. Genius idea.
Cute pillow! I can't wait to see the guest room!!
That fabric is right up my alley! Love the pillow!
Sarah
Et bas! This is so gorgeous!!
Hmmm Toile 🙂 LOVE IT!
I made a button that links directly to the post you are featured. It's on the post where you are featured. You can grab it if you can. You are so awesome and talented!
Gros bisous
Frenchy
Your photo of the door is absolutely awesome. I don't know what I love more the red door or the glass door knob.
I wish I could sew! This is beutiful and I love the colors!
I can't wait to see the reveal of the room. I really like the curtains and pillow. I am inspired to make some for my room!
The pillow is fabulous! I can't wait to see the room! I love it when one little idea turns into a complete unexpected makeover, those are the best 🙂
The pillow is fabulous! I can't wait to see the room! I love it when one little idea turns into a complete unexpected makeover, those are the best 🙂
LOVE the fabric and the curtains with the webbing and the pillow with the ruffle. fabulous.
That is beautiful. Your ruffles are perfect. Thank you for sharing the tutortial.
everything you do is fantastic…not always my style but i most definitely appreciate the beauty in your designs and decorating! thank you so much for the kind words on my sunroom redo, and for hosting the weekly party!
Just another "swoon" over your jute trim. How wide is it? Did you cut the 3 1/2" webbing in half before you sewed it on the curtains? So glad I have found your blog. Now I just have to catch up with all of your great posted ideas!
Again, really helpful! Yay, I'm learning how to make better pillows!
That first pic…the door hardware…tips? Thanks!
Good day! Would you mind if I share your blog with my zynga group? There’s a lot of folks that I thi