

I thought I would take a break from the projects and share a bit of behind the scenes stuff. For the first several months of my blog, I didn’t edit my photos. Not at all. I finally picked up on the fact that photos were important for the growth of a blog, so started adjusting the brightness and contrast and basic stuff in Windows Live Photo Gallery. I still didn’t do it on most of my photos. It was so tedious and time consuming. Well, welcome to blogging, Marian. Anyway, my father-in-law sent me an extra disk he had hanging around – Abode Photoshop Elements. So, my mom bought me a PSE for Dummies book and I started to muddle my way through the digital darkroom. I never got very far with PSE. I liked it, but when I upgraded to a more recent version, I felt lost again. I then started using actions, which can develop photos with one click. That worked really well for me, but I found I was always tweaking the photos after I used the actions and felt like my pictures could be better.
When I upgraded my camera a couple of years ago, I received a free copy of Adobe LightRoom with it. I was intimidated by it, so I ignored it for a long time. Probably almost a year. I finally sat down one day and decided to work with it. This decision was also paired with the move to shoot entirely in RAW format.
Here’s how it works (don’t let your eyes glaze over too much.) When I shoot in RAW format, the picture is a higher quality and it allows me to digitally develop the photo without deteriorating it. So, I shoot in RAW, import it into LightRoom, develop it and then export it as a JPG “print”. I have the original RAW version, which is like my negative. Make sense? Maybe? Crickets?
This is what the development process looks like.
Here is the original photo straight of the camera…

It’s not bad, but it’s a little crooked and not popping as much as I want.
I first straighten it out…

…then I take the yellow saturation down a few notches. I struggled with yellow photos for a long time, so I want bright, white photos.
Then I lighten and brighten…

…and ad some contrast and clarity…

It’s not this huge, WOW transformation, but I love how I can easily adjust the lighting and white balance of the photo. I can also ad my watermark in batches, so I don’t have to add it to each one, which I used to do.
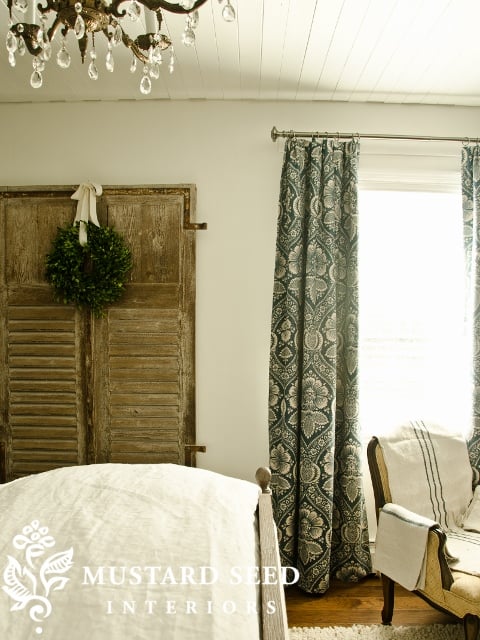
Here’s another before and after that was a little tricky because I was shooting towards the only window in the room…

…and after…
I feel like I still have soooo much to learn when it comes to photography, but I know I’m getting better and better as I learn more and I thought I would share some of what I’ve learned with you.
![]()
School has already been canceled for tomorrow, since we’re right in the bulls eye of the winter storm. Instead of finishing my counters, I’m looking at a day of Lego’s, Play-doh and lots of boy humor and wrestling. Fun stuff!
![]()
Disclosure: The link for Adobe LightRoom is an Amazon Affiliate link, but this is not a sponsored post.


