
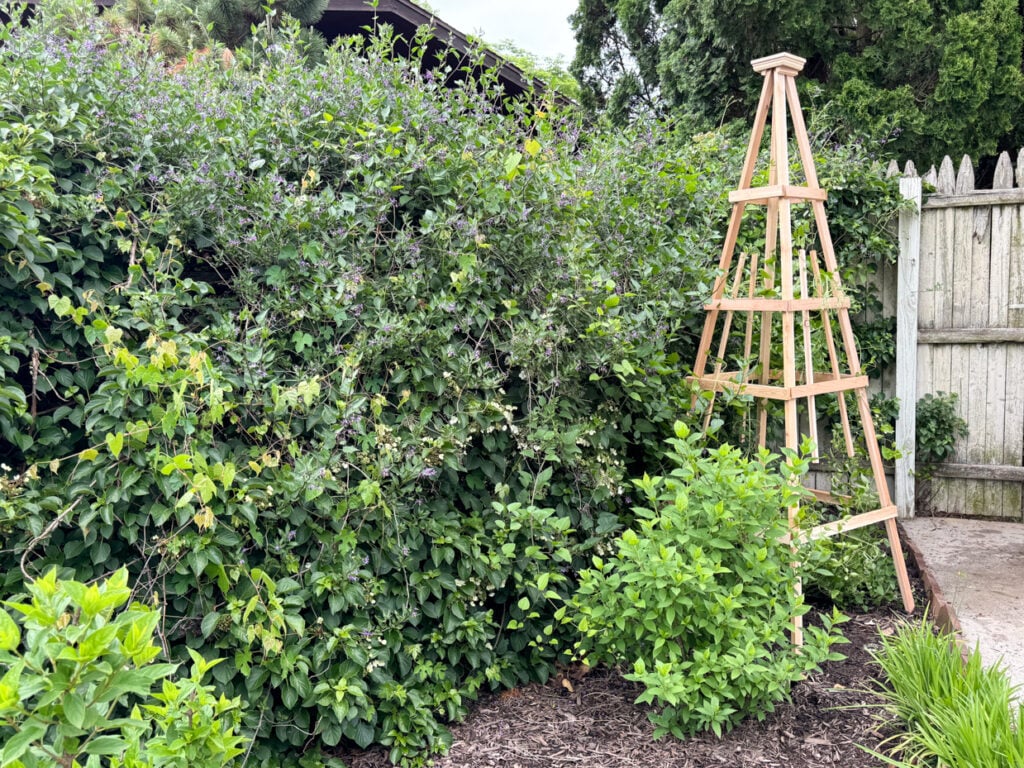
I was on a high from building the vintage-style trellises for the front of the house, so I decided to do more math and make a DIY cedar garden obelisk. I bought enough wood to make three trellises (two large and one small), but I decided to do something different on the wall where the small trellis was going to hang. So, I had extra cedar that we cut down to 1 x 2s as well as some scraps from the trellis project and I wanted to use every bit I could. You can find the plans for the vintage-style trellis HERE if you missed it and are interested in building one.

I didn’t take pictures as I built the obelisk for two reasons. One, it was sprinkling on and off so I was fitting in work on the project as weather would allow. Two, I was completely winging it and figuring it out as I went along. I knew this one would be a test and learning experience, not the best obelisk ever built. I was going for simple and done, not perfect. I watched and read a few different tutorials and decided not to worry about mitering corners, which would look more professional, but it would also involve more math and more time. Again, simple and done. As I did with the trellises, I drew up a rough plan and then tweaked things as I laid it out on the driveway. I ended up building two sides of the A-frame and then attached them together with horizontal supports. Some of the spacing looked a little off to me, so I added some more vertical pieces to make the spacing look intentional. I topped it off with a wooden deck rail cap, which fit but didn’t go exactly as planned!
The end result of my DIY cedar obelisk experiment is pretty satisfactory, I must say!

While I hope to build garden obelisks for a potager garden one of these days, I built this one to support a sweet autumn clematis that has started growing on my neighbor’s fence. The fence is covered in a beautiful climbing hydrangea, but other vines have joined the party including a sweet autumn clematis that was creeping all over the ground and onto the climbing hydrange. I figured both would be happier if there was a place for the clematis to climb. Fortunately, it was pretty sizeable, so it covered the obelisk nicely and will fill out even more as we get further into the summer.

I attached the supports with brad nails and exterior wood glue as I did for the trellis. Screws might be better in the long run, but I’ll give these a shot and add screws down the road if any joints are coming undone.
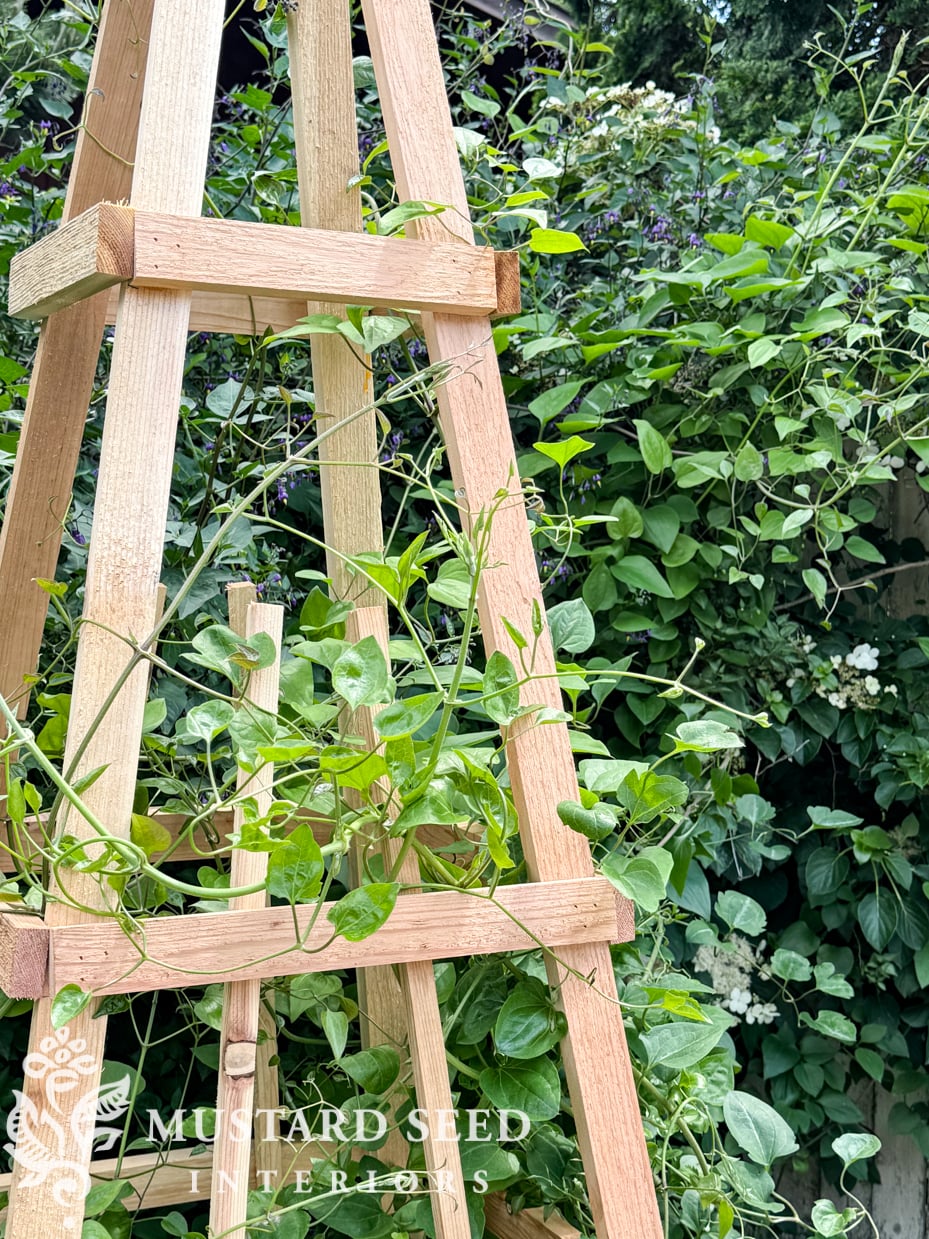
I also decided to keep the cedar garden obelisk raw wood. Cedar resists rot, insects, and ages very well outside. It’ll look muted and lovely in a few years. I also knew it would be a nightmare trying to paint this unless I wanted to get my sprayer and spray tent out! Done and simple does not involve pulling out a spray tent and spray gun.

I think the raw wood obelisk will also look nice against the new fence we’ll install soon. They’ll “speak” to one another well, especially when I add more trellis details to the fence so plants can climb it and soften the hard edges.
When I’m ready to build more, I’ll refine the technique and share plans and a tutorial as I did with the trellis.
Until then, I figured I didn’t have enough hobbies and I bought some willow from Facebook Marketplace to make some garden supports and cloches. This is about playing and experimenting and I’m looking forward to it! Structures and accessories add so much to a garden when it’s tastefully done.

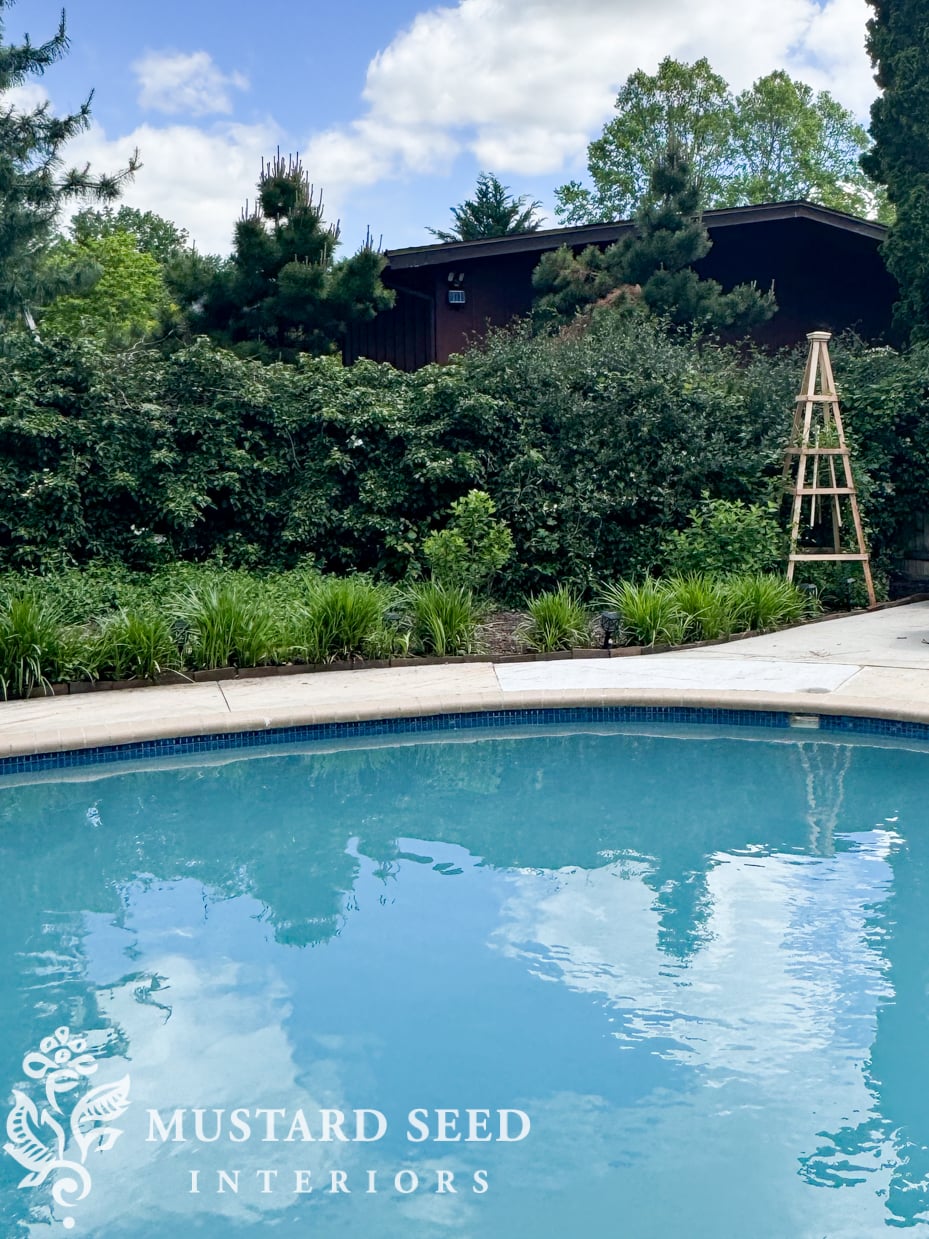
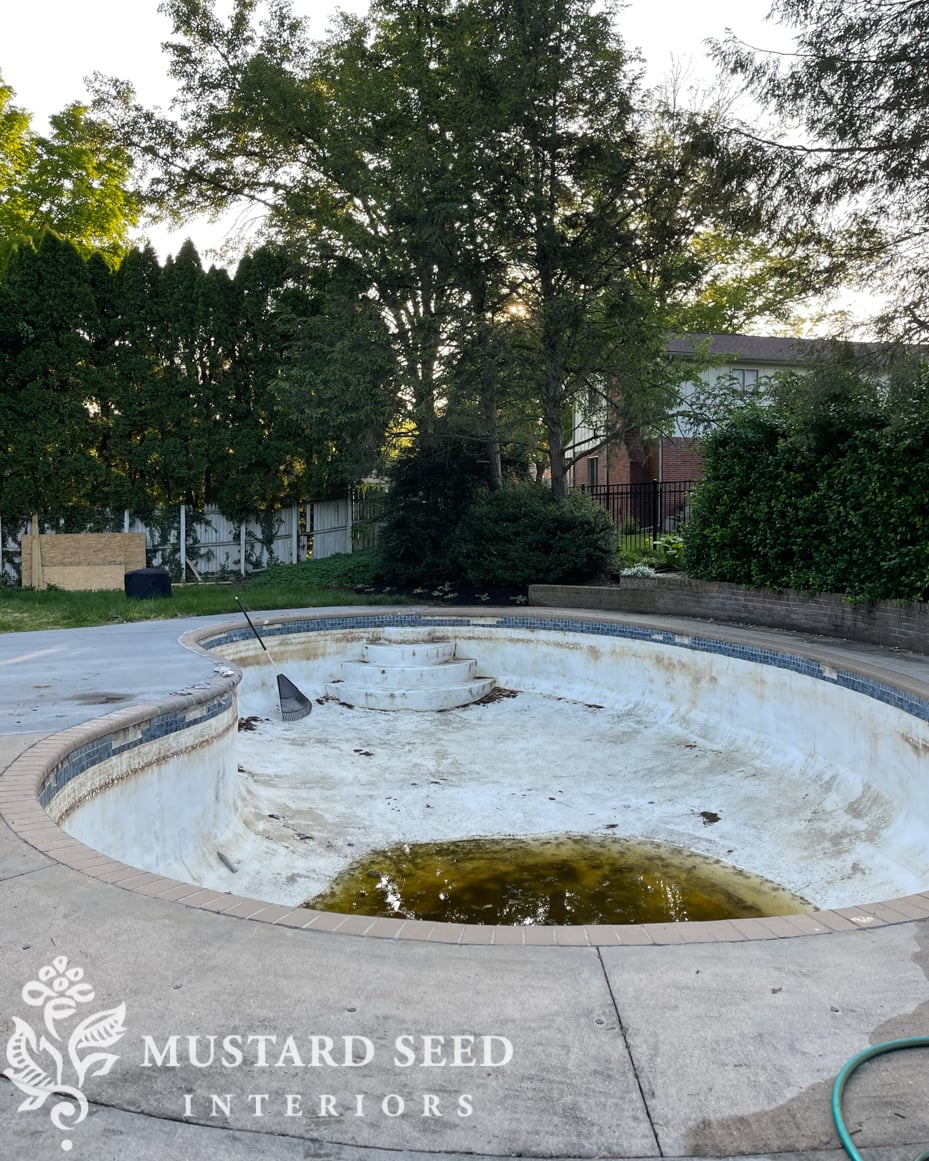
In other yard news, the pool was opened a few days ago! It was a horrible, mucky green, but we finally have a working skimmer line and our contractor shocked it and is getting it all ready for swimming. For now, I’m enjoying the reflections and getting the patio area cleaned up…
Just for fun, here is how the pool looked last year around this time…
…and how it looks now…
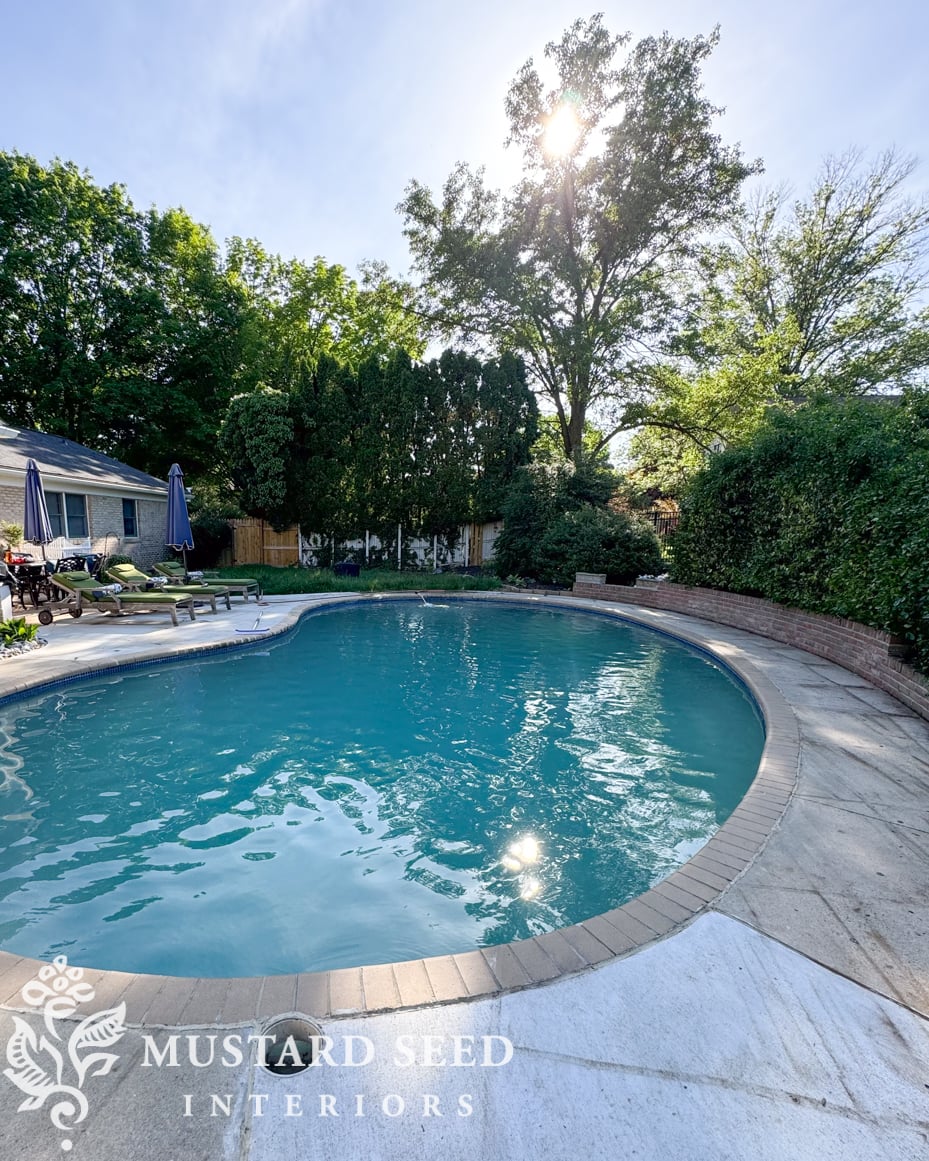
More work to do, but it’s coming along…


13 Responses
Gosh – that looks just fabulous!! Nice job.
Knowing everything about plants and whether or not a plant is invasive is impossible. Google and gardening groups are my go to for help. Sweet Autumn Clamatis is beautiful but invasive and requires help from all gardeners to combat its spread. To keep it from spreading, remove flowers after blooming and before seed heads set.
“Perfection”
I’m an obelisk nut, so couldn’t wait to see how your’s was made! It will be good for your Sweet Autumn Clematis to climb on. We have a vine at our home that was planted by my husband’s grandmother , so it has sentimental value . We hack on it constantly to keep it under control and it seldom has a bloom and hasn’t spread. I look forward to your posts! Thank you
I love how your pretty obelisk “speaks” to the design of the trellises you built! The front beds are looking great already; imagine how lovely they will be in 2-3 years!
This looks fantastic in that part of your yard. I’ll look forward to how you make one of these.
I’m anxious to see what you do with the willow.
You are a force to be reckoned with! Makes me wish I had a quarter of your ambition. Good job you.
Gosh, I hope you feel very satisfied!!
🙂
Wow, I did this exact same project last year! I made my “prototype” garden obelisk and sold it at my garage sale since it was my “learning curve” model and I didn’t want to keep it. I learned so much designing and building it myself.
I then changed a few things and made the second one, which turned out better. On the first model I used wood screws, and on the second one I used a brad nail gun. I can say that I prefer the wood screws, but it is harder to do because you have to be more precise, and of course they then “show” when you are done, but I’m sure that could be wood filled easily enough. I also found that even with drilled pilot holes, the wood screws split the wood more than the brad nails. Using the brad nail gun was pretty terrifying and I really would rather have someone else do that part of the job!
I also painted mine BEFORE assembling. I painted them with primer and 2 coats of exterior semigloss paint. The painting part takes a LONG time because of course all the pieces have 4 sides. You then have to do a little touch up after the assembly. It would be a lot more challenging to paint these things after assembly. Maybe if you are using some sort of paint sprayer it would not be as bad, but I used brushes.
Letting cedar weather to its natural gray is a wonderful and easy option if that is the look you are going for!
I really want to perfect this obelisk making because they are not only outrageously expensive to buy, but seldom if ever available in our area. Making them from scratch is not very expensive at all, but you need a good plan and tools. I wanted to prove that it could be done with virtually zero tools and zero woodworking skills, and I definitely achieved that with my first one.
This year the project will be using all the tuteur leftovers to make some little picket fences and trellises for garden decor!
Looks AMAZING!! You are so incredibly creative and TALENTED!! Thanks for sharing your gift with us!!
There is this English garden book, A Year in the Garden, with all the critical advice, and things mentioned to avoid planting. In it are the warning of invasive plants to a garden Obelix and plant table to warm boxes for seeds. After all those years it is still my go-to book if I want to check something. I am up North, so English landscaping is a different zone. I read that planning is not always doable. I planned my garden white-green. My tulips, from Nijssen Bulbs, a well-known brand, turned out orange, yellow, and soft pink. Only six were white. Hilarious. My Deutzia’s the same, three were white, but the fourth is exploding pink. (may the fourth be with you) My roses turned out a different colour. So I embrace it now. I buy blues, but it turned out pink most of the time. So be it. It is still my oasis of 1o years, and I plan to grow old here. I don’t know if you like ponds, I have four, and it is little work with loads of satisfaction. Fish are easy going and the toads eat my snails, it gives birds, wildlife, and an occasional stork my cats try to eat. Nothing is more soothing than sitting under a tree with a book near a murmuring fountain and fish splattering.
Your house is coming along nicely, especially the landscaping.