
I’ve been wanting to make cinnamon ornaments for our tree for a couple of weeks and there just never seemed to be a good time to take over the kitchen counters with the endeavor. We had a dusting of snow this morning and I had a relatively open day, so I decided to dive on in.

There are a lot of different variations on this recipe, but this is the one I settled on…
Start with two cups of ground cinnamon…

Dump it in a large bowl and add 1/2 cup of smooth applesauce.

Mix the two ingredients with a spoon (or spoonula). I thought maybe I did something wrong, because it looked “mealy”, but I pressed onward…

…and added one cup of all-purpose white glue. The “dough” started to come together more, but it was pretty thick and sticky. I pressed it into a ball with my hands and dumped it out on a piece of parchment paper.

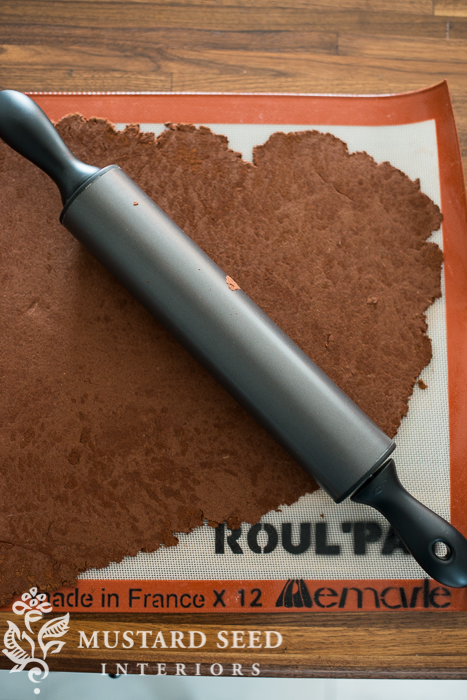
Let the dough sit for an hour. This really did bring the dough together and made it workable. Dust a smooth work surface with cinnamon…

…and roll it out to about 1/4″ thickness. I made some that were thin and some that were thick and they all turned out fine. I used a non-stick rolling pin and a Roul’Pat, which is my go-to tool when rolling out anything. I got one for Christmas years ago when I used to cook just about everything from scratch.
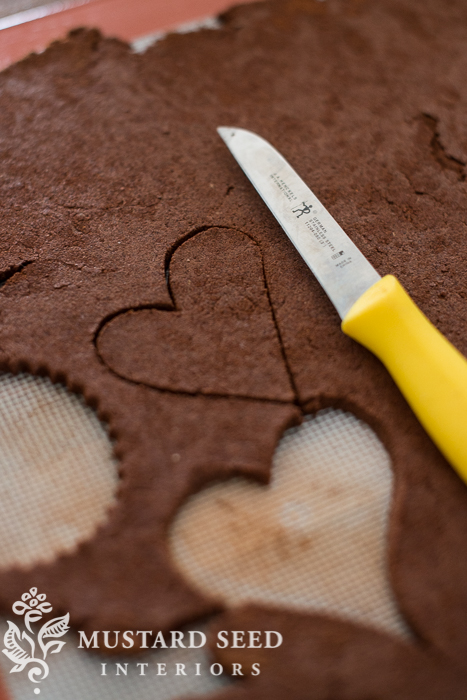
You can cut or sculpt the dough however you like. I used cookie cutters…

…a knife to cut irregular shapes…
…and I sculpted some by hand. To make a twisted candy cane, I rolled out a long “snake” and shaped it into a U…

…and twisted the two ends together.
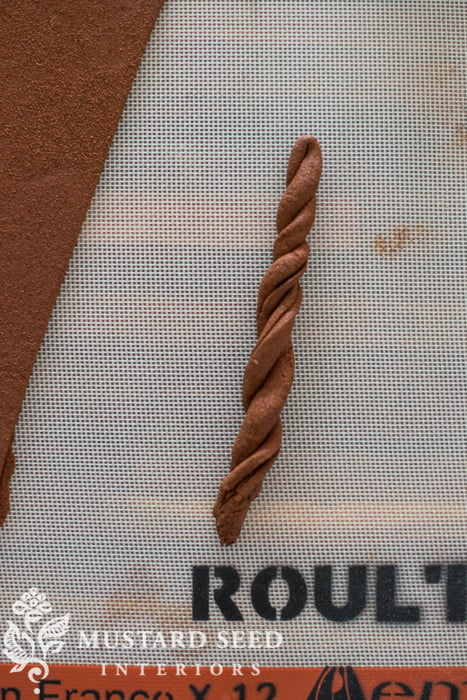
…then shaped it into a candy cane.
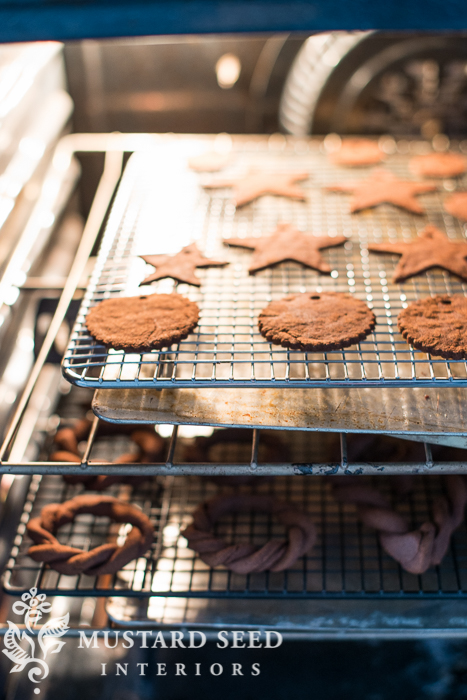
I poked holes in all of the ornaments with a straw.

…and transferred them to a wire cooling rack.
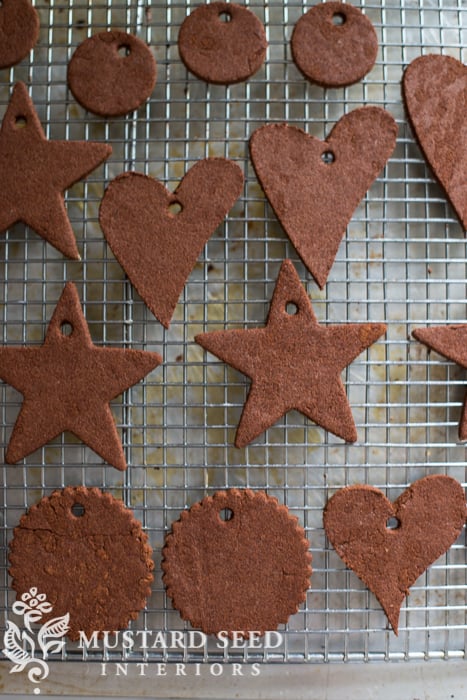
I kept rolling and re-rolling the dough until I used every scrap. I was able to get two full trays of ornaments by the time it was exhausted.
Pop the ornaments in a 200 degree oven for 2 hours. If you have them on a drying rack, where both sides are exposed the air, there is no need to flip them. If you have them directly on a cookie sheet, flip them a couple of times while they are in the oven to make sure both sides dry.
I tied some onto felted wool yarn…


…and I tied some onto gray & white twine. I also added some sparkle to a few with Tiara (silver) MMS glass glitter…

…and Fallen Snow glass glitter, which looks a lot like a dusting of sugar.

These smell amazing and bring that sweet quality that comes from putting homemade ornaments on the tree. Apparently, these ornaments keep for years, but I’ll definitely be making some more in the future.


6 Responses
They are the ideal homemade touch for the Christmas tree!
The pictures are gorgeous…it’s hard to take pics during the process of creating a project, and you did it perfectly. I’ll have to try some of these.
judypimperl.blogspot.com
Your ornaments look so sweet! I can’t believe I’ve never made cinnamon ornaments… they are on my Christmas to-do list one of these days! Yours look beautiful 🙂
I made these with my girls in 2005 and they still look perfect and still have a (faint) cinnamon smell. I store them in Ziploc bags from year to year and we love them!
I love the smell of cinnamon and baked apples this time of year. Definitely saving this recipe, thanks.
I just made them after this recipe and made some changes. I added some apple sauce until it got a smoother consistency. I let the dough sit like you said but our Colorado dry air made it even drier and harder to roll. So I mixed some more apple sauce in again and rolled it, cut it, baked it and it was perfect! Conclusion: one cup of applesauce instead of 1/2.
Cinnamon ornaments