


Your brush should only be lightly touching the surface at the “tail” of the stroke. As you can see, it looks like a comma.

(Do you have any idea how hard it is to film yourself painting?) Anyway, now that you’ve practiced the comma stroke and are a master of it, what do you do with it?

You could paint a border like I did on my chalkboard side table. This was done with the #1 liner.


Can you spot them in this painted border on a two tiered table? The scroll work is just lengthened comma strokes with a #4 filbert.

This dresser design has a few straight lines and “s” strokes, but it is mostly made of comma strokes. See them?
Me: So, Donna, do you think this stroke is doable for you?
Donna: “Totally doable, MMS! In fact, I ran out and grabbed some paint today from Walmart to give it a whirl. Here are my first two practice sheets done on black construction paper.

I used a #2 I had on hand, and I was totally stunned how thick the stroke became with such a small brush! I’ll be purchasing some smaller ones next time I’m in town.”
Me: Yeah, I prefer a really tiny brush unless I need to cover a larger area. I feel like I have more control and it looks sharper.
Donna: “I’m not brand new to hand brushing. I’ve done some hand typography when going to graphic design college and we practiced on sheet after sheet of newspaper. I’ve also taken some tole painting courses waaaay back. But honestly, it’s about learning how much to load the brush, the right consistency for a smooth flow, and then from there it’s allowing the brush to do the work. I need a ton of practice to ‘get it back’ but after awhile it becomes a little addictive. 🙂
I didn’t pick up any floating medium which I wish I had. The paint got thick on me from the get go and I diluted the paint with water constantly. With the right sized brush, a nice fluid consistency and possibly a smoother surface, what you see here would probably be greatly improved.”
Me: The construction paper probably soaked up the paint as well and made it so the brush didn’t “flow” as well.
Donna: “When I was ready to get abit fancier, what helped me was to ink sketch the general shape I was after, knowing the thick strokes were on the outsides of the pen lines. I looked at these pics of MMS’s for the general shapes.

Great first lesson MMS! I’m off to practice for the week before you get fancier on us. :)”
Can you believe this girl? Great job, Donna.

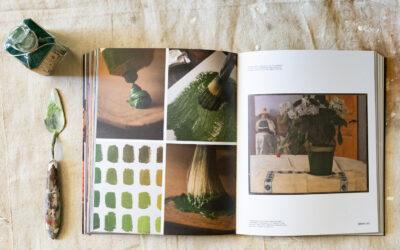
I’m also going to share a paint mixing tip with you. I’ve shared this before, but it was when I had about 20 followers, so I thought it was worth repeating. If you like a soft, antique look to your work, mix your colors with a dab of burnt umber. I do this with almost every color I work with. You can see the difference in the pictures below.


17 Responses
Wow….
Now to get my supplies ready and put this into action. I have a small dresser screaming for decorative painting!
Your video was great! I am going to try this as soon as I get the use of my hand back. (a sling and stitches don't make for easy painting)
Thanks for giving me so much to look forward to:)
Lovin' the video – makes it so much easier to see what you are talking about. I am excited to get practicing!
Danielle
Okay, sorry to leave another comment, but I tried it! At first it wasn't good, then I realized I didn't have enough paint on the brush. Now, it looks much better! Thanks so much – I'm gonna play with it now…
Danielle
Sugggggar!!!! I cannot tell you how many times I've practiced that stroke in the hope of painting a rose. Squeeeeeeal….my goal in life. But I've always been told by my eBay group to use an angled brush. I'm truly pathetic. BUT a filbert for a brush stroke makes a lot more sense to me. I'm going to practice it tomorrow and see if I can at least mater that one. Oooooh, be still my heart, I may be a rose painter yet…before I die, I mean!!! Nice to meet you, chickee.
xoxo,
Connie
This is so fun! I haven't actually started yet, but I know I can do this! I'll be coming back when I have a little time to practice – just you, me and my laptop!
Thanks!
Ok, make a comma, keep the brush straight and use the smallest one. Check got that, gotta go now and practice! Thanks for the lessons, I need them!
I have my brush and paint…so I am ready to go. Now on to practice!! Loved your video. It really broke it down well! Thanks
Hugs
SueAnn
Oh I just love this, it is like one on one tutoring 🙂 I am just new to theses two blogs, so am going to get my supplies and practice. I have yet to share a DIY or craft on my blog, do to the fear of looking dumb. I think this series my help me with this, YIPPEEE!!!!
I just love, love, love these two blogs.
Thanks a bunch!
great post, thanks so much!
I'm definitely going to have to go through this post a few times to absorb, but it's awesome information! Thanks so much for taking the time to put all of this together.
Great job and loved the video. Went shopping this morning and brought some new brushes. Will practice later this evening.
P.S. Donna's video is so funny!
The video really helped! I'm looking forward to the rest of this series. I'd love to be able to paint some really cute roses, rose buds, and daisies.
(I would imagine that daisies could be done with straight comma strokes. One lesson and my brain is trying to what you taught!)
I'm lovin' your workshops… thanks!
Great tips! Thanks for the workshop.
Jane