
Catchy title for a post, isn’t it? You’ll see why once you get to the bottom…
I have done a lot of painting over the years…every wall, ceiling, piece of trim and cabinetry in my current house AND previous house. Some rooms have been painted multiple times. And I’ve helped a lot of friends and family paint their rooms.
Not to mention all of the furniture…
I know how to give a brush a workout.
I’ve shared all kinds of painting tips on this blog, but I figured I’d share a few more.
Megan and I were painting her office last week and, although she’s a proficient painter, she asked me to do the cutting in where the chalkboard wall met the Gray Owl (Benjamin Moore) wall.
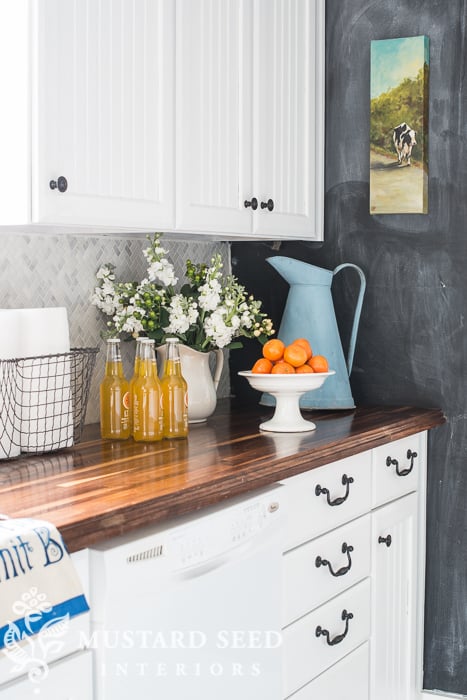
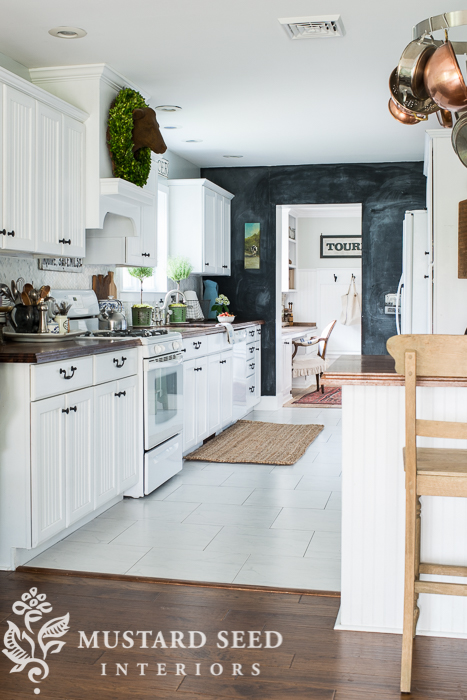
It’s definitely more pressure when there is a high contrast between two paint colors meeting at a corner, like in Megan’s office and my kitchen…
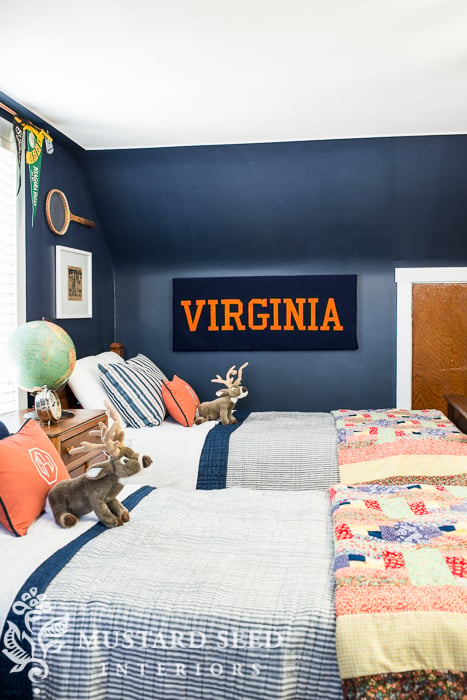
…or when there is a high contrast between the wall color and the trim, like in the boy’s room…
This is the time when most people would break out the painter’s tape.
There is definitely a place for painter’s tape. I use it if I’m painting stripes or protecting something from overspray or to hold carpet back from baseboards and sometimes if I’m painting trim.
I rarely ever use it to tape off walls or ceilings.
It’s not because tape doesn’t work, but there are so many variables that can make taping ineffective. There is often texture from previous painting jobs, like drips and brush strokes. There may be messy caulk or crinkled drywall tape. Or you may not apply the tape properly, to get a nice, tight seal along the entire strip. All of these things can allow paint to seep under the tape. That’s when we all get bummed out.
You really will get better results and a much cleaner edge if you learn how to paint a straight line without the tape. I made a quick video when working on Megan’s office to show how I do it…
As I show in the video, I start the brush a couple of inches from the corner and then slide the bristles over slowly, until they find the edge. Once it’s in the right spot, I just let the brush glide down in a long, smooth motion.
Here are some additional tips…
Paint with your arm, not with your wrist.
I see if a lot. People flick their wrists when they are painting and the result is short, choppy strokes. Think of the brush as an extension of your shoulder and elbow instead of just your hand and your painting will immediately be steadier.

Work in long, smooth strokes.
It makes a big difference if you spread the paint out in one long stroke as opposed to short, choppy strokes. That’s when you end up with a lot of brush strokes that look messy and you can even start pulling up the paint from over-brushing. Those long strokes only work well if you have enough paint, so you want to have the brush loaded, but not dripping.
Use a quality brush.
I know there’s an assumption that all brushes are alike, but there is a reason for the price difference. And using a quality brush can actually yield better results. It holds the paint better, slides across the surface you’re painting better and the bristles keep a nice shape and don’t splay. Spend about $15-20 on a nice brush, take good care of it and you’ll use it for years.

Use a quality paint
Again, a quality paint is your friend and will make you look like a better painter. A quality paint means better coverage, better texture, fewer coats and smoother flow off the brush. I suggest Sherwin Williams or Benjamin Moore paints for walls, ceilings or trim and it’s worth it to splurge on one of the higher end paints like Duration (SW) or Aura (BM).
Practice
It does take a bit of practice to get the hang of cutting a nice, straight line. Practice the next time you’re painting a room and, if you mess up, it’s okay! It’s just paint! I always keep a damp “oops rag” handy, so I can wipe away mistakes. You can also always paint over the mistakes, so don’t stress about it if it’s not perfect.
You’ll get there!
![]()
I know a lot of people hire painting out and, I don’t blame them. I like painting, but it can be a big job and sometimes it’s nice to just pay a pro and have it done.
BUT, most rooms can be completed in a day and it can save you a ton of money to do it yourself.
Megan told me she got an estimate to have her small office painted and was quoted $1000 for it. That sounded crazy to me! The two of us were able to paint the room (2 coats and 2 different colors) in about 3 hours and now we are able to put that $1000 towards fabric, furniture and accessories that will totally transform the look of the room.
That is why DIY (do it yourself) is worth it.
![]()
I’ll be back in the studio on Wednesday, finishing the slipcovers for Megan, making the curtains, finishing up a few other projects AND I really need to start getting ready for the Market on Chapel Hill (formerly called the Chapel Market), which is on Saturday, Oct 3, 2015, in Pike Road, Alabama.
More to come…
![]()
A few more of my posts on painting…


24 Responses
I was watching your painting video tonight and it suddenly occurred to me that there is one video we ALL want to see and you’ve never posted. You’ve mentioned you have a degree in musical theater. So, how about belting out a song for your readers? If that doesn’t align with your mission as a painter / designer / writer / entrepreneur then how about you sing your next painting tutorial? We’re waiting on pins and needles!
I may be mistaken, but I believe Miss Mustardseed posted such a video several years ago. Yes! I’ve been following her fantastic blog since the early days and am a devoted fan.
If you go waaaay back on my Instagram feed, there is a video of me singing. You can also see Jeff and I singing (and me playing guitar) a Christmas song here… https://missmustardseed.com/2013/12/gift-christmas-song/
Hi Marian, these posts from the last few weeks have all the makings of your next book. I’ve been printing out all your recent posts, but it would sure be nice to have them all in a book. Hey editors out there please take note! Thanks again.
Thank you! I needed this. I’m want to paint my daughter’s room while she’s away at college, but I’m kind of dreading it. I’ve painted rooms before, but I don’t like all the prep work of masking off (and I hate painting ceilings). The only thing that would have made the video better is if you had shown that cut in maneuver a few more times for us slow learners.
Great tips! I’m always the cutter when my husband and I paint, so I can’t wait to try these out.
Oh, and I love all the kids in the background and someone shhhhh’ing them. #reallife
I must make my hubby watch the video on how to paint a straight line without using painters tape. He does a great job but is very slow mainly because it takes him hours to “prep” the room and tape everything off. He swears that only “old school professionals” can paint a “crisp” straight line without using painters tape.
I do have a question on how to avoid roller marks when painting. How do you paint a ceiling in particular without seeing roller marks? Is it in the technique or does it have to do with the type of roller you use? Thanks for your feedback.
These are great tips. I learned the hard way about painters tape and quality of brushes. I wish I would have had someone give me these tips years ago. Also, when I was new to painting I’d always start in the closet, it’s a great practice spot!
Thanks, Marian. Twelve years ago I decided to paint our diningroom a clay color and I knew that my husband wouldn’t “get it” from a paint chip. So as soon as he left for work I painted the dinging room clay color very very carefully for perfection. lol. Wish you could see the look on his
face when he came home from work. Made a deep valence (long windows) from a black/man eating flowers from a Ralph Laruen sheet. Beautiful! Still up there and no complaints.
Hi Marian,
I sell your lovely milk paint in my store and I couldn’t help but notice you were using chalk board paint on the walls – did you know that you can use your very own milk paint to create a chalk board wall? I did it very successfully in my own store in Artissimo and it looks amazing and lots of my customers buy your paint to do the same thing!
LOL…yep, I know! 🙂 We’ve actually used it as chalkboard walls before, but we just went with the chalkboard paint in this case. We’re still using a lot of milk paint in the space, though!
Laurie, I would like to know how to make a chalk board with milk paint! I have been looking for a light-colored chalk board paint, but it would be great if I can use the milk paint I already have.
Terri,
You don’t need to do anything! Just mix it and paint it as usual and don’t apply a finish to it. 🙂
This is amazing! Thank you. I never knew! I found a brownish-gray chalk and wanted to do reverse of the usual.
Great! Very helpful! Now, what about outside corners? Thanks.
I love cutting in and do a good job at it too, I do just as you explained! Only I could never explain it or teach someone how to do it! A good angled brush is key! Can’t wait to see the finished room.
This was a great post. Thanks for the video. I need to paint my bedroom and have been procrastinating because of the cutting in part. Are you selling brushes at your shop?
Great video, love the little voices in the back ground!
Great tips Marian … will be painting a bathroom soon.
Audrey Z. @ Timeless Treasures
I was painting an old armoire today and I totally agree having enough paint on your good brush is a big factor. thanks for the video!
Wonderful tips! I absolutely hate painting (as I just finished my apartment) but it definitely does save you a ton if you do it yourself and recruit friends (with a bribe of food & drinks of course).
Thanks for sharing!!
Lauren Baxter | Lovely Decor
xx
Your painting tips are really helpful. I believe that the most important step to be a good painter is to pratice. As the saying goes, “Practice makes perfect.”
Another tip: use cheap baby wipes instead of a damp rag to wipe up drips. Use one and toss, you won’t ever accidently wipe wet paint where it doesnt belong from your rag!
Wow! These are some amazing and essential tips you have given. Will be following your video next time I try my hand at painting my room. Thanks for sharing!