Sorry for the suspense, but I didn’t show the reveal of the wardrobe in yesterday’s post about working with Milk Paint because it wasn’t finished, yet. I worked on it more today and I’ll take reveal pictures tomorrow before I haul it down to Lucketts. Since you last saw it, I applied a second coat of Shutter Gray Milk Paint and painted the door panels and side panels in Grain Sack. It doesn’t look a lot like Grain Sack, though, because some yellow from the original wood seep through That doesn’t have anything to do with the Milk Paint, but the piece of furniture.
")
If it really bothered me, I could seal it with poly and paint it over again, but it doesn’t bother me in this case. I then sanded the finish with a fine grit sanding sponge…
")
…then a medium. With a fine sanding sponge, I was able to wear away some of the paint to reveal the layers underneath. It’s very subtle, but looks great.
")
I used the medium grit sanding sponge to scrape away some of the paint. I did get some chipping, but that’s because the finish underneath chipped and took the Milk Paint along with it. Again, I just went with it.
")
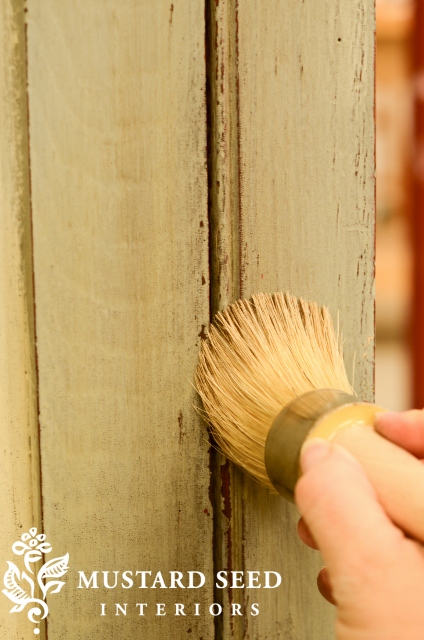
Distressing really brought out the character in the old wood. I then waxed the piece in Furniture Wax followed by the Antiquing Wax, which settles in the nooks and crannies, but isn’t too heavy.
")
I especially worked it into little holes and grooves….
")
…and wiped away the excess, leaving the Antiquing Wax just in the recesses.
")
I can’t wait to take some photos of it tomorrow to show you how it turns out. Hopefully giving you a glimpse into the process will take some of the fear out of using Milk Paint. I also worked on a wash technique today – gorgeous! More on that another day…
![]()
I have a little bit of housekeeping to take care of. The winner of the True Value $100 gift card giveaway is…
Nanette Hill!
And the winner of my book, Inspired You, and a few other MMS goodies is…
Heidi from All that Brings Joy!
Congratulations to you both!