
I was assigned the project of painting a door and I thought, “Hmmm…I have the perfect candidate – my front door.” It was original to the house, which sounds nice except for the fact that you could see daylight through parts of it and it was caked with layer upon layer of paint. So, I decided it would be much simpler to replace it than to strip and repaint the existing door.
I went with a door style similar to what we had, but one that I felt looked a bit more custom and unique with the six small windows and two panels.
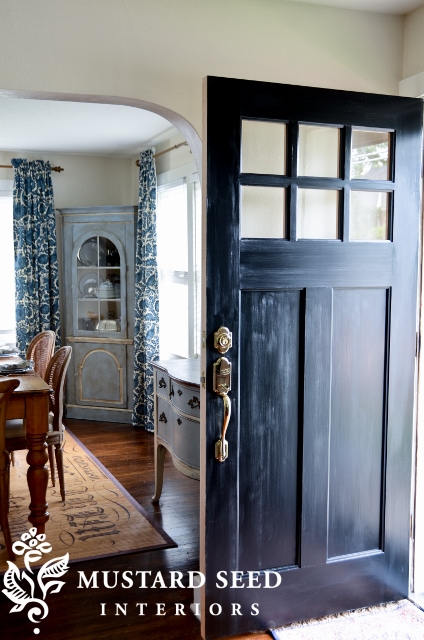
(It was hard to photograph it without it looking streaky from the reflection. It really doesn’t look like that in real life,)
I’m going to share how I painted the door and installed the hardware in a future post, by the way. This is just a snippet.
I decided to just paint the outside of the door and wanted to leave the sides and back unpainted, so I could stain them. In order to keep the line nice and crisp I used…you guessed it…Frog Tape!

I stuck it along the edges, making sure it was pressed down tight against the wood, without any folds or bubbles. If there ever is bleeding, that’s probably the culprit. I refer to it as “operator error” meaning I goofed!
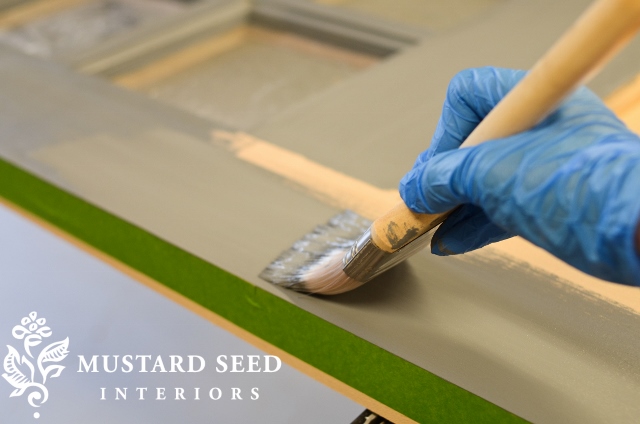
I left the tape on for the primer and paint coats and then peeled it away. Pulling the Frog Tape in away from the paint helps prevent any paint pulling up with the tape. As always, of course, it did exactly what it was designed to do and left a perfect line. Now my raw wood is waiting to be stained. When I have a spare minute.
Speaking of spare minutes, if you have one, you should check out the winners of the 2013 Earn Your Stripes contest. Holy smokes. There are some amazing entries and ideas.
![]()
Before I sign off for the night, I want to share that we have some new products available with my milk paint line and I haven’t talked about them, yet! I’ve just honestly been so busy that it got away from me. The first one is the Wax Pucks…

First of all, I’m so thrilled with how beautiful my logo looks on them! My friend, Laura, designed that logo for me almost 5 years ago and it was just perfect for me and meant to be. I had no idea it would be on a product line that was sold around the world. Crazy.
Anyway, the wax puck can be used as a resist between coats of pain. Rub it over the corners and surface of the piece of furniture and wherever the wax comes off on the surface, the paint will not adhere. When you first apply the paint, it doesn’t look like anything is happening, but then sand or rub it with a damp cloth and the paint will easily wipe away. It’s especially fun to use on a piece with lots of texture that can be highlighted through this resist technique. A tutorial will be coming soon…

The other new product is our White Wax. We’ve been playing around with this one for a long time and I am so excited that it’s finally available! It’s like the Antiquing Wax, but it’s white.

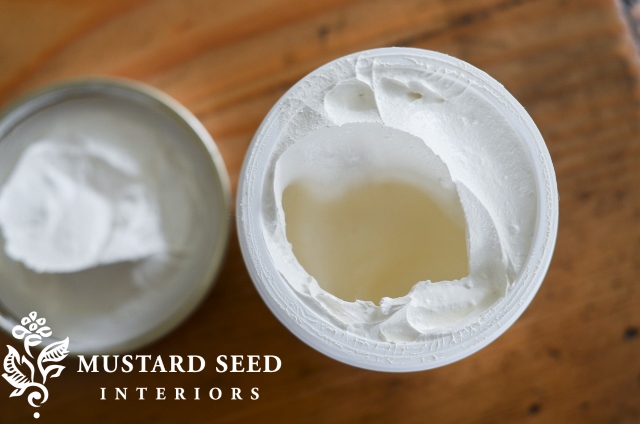
Again, I need to do tutorials and show examples, but here is a trim piece I painted in the Haven workshop this past weekend. The paint finish is the same, but the left side is finished with Antiquing Wax and the right is finished with White Wax. It’s pretty amazing what a difference the wax can make.

White Wax is great for softening a finish and giving it a faded, chalky look. I’m so excited to play with it even more. It may be my favorite wax in our line. These products, plus our three newest colors, are available at retailers now.
![]()
Disclosure: This is a sponsored post brought to you by Frog Tape. The opinions are completely my own based on my experience.
![]()


27 Responses
I can’t wait to try the white wax. I am already a devotee of Briwax Liming Wax, but truth be told…it smells pretty bad. I can never use it in the winter.
Again with the inspiration! I have a front door original to the 1930’s house we live in that I’ve been itching to paint..yes, since we moved in 23 years ago. Ok, maybe too late for the summer project list, but definitely on for the fall!! The white wax looks very exciting and I’m going to order some today, just love that look!! Wax pucks?? amazeballs!!
Wow, these new products look amazing. Are they available in the UK? If not do you plan to make them available in the future?
Sam
Simply said…LOVE…you continue to amaze me.
I love the door! Will you be sharing where you purchased the door? I love that the windows allow light to filter in–yet you are not on display with the round oval we have (and can’t wait to get rid of!) Can’t wait to see your new products in future posts!
The door looks great! And I LOVED the white wax when I tried it at Haven! I will be stocking that and using it in classes for sure! I loved how it just softened the color and made it look weathered but not darker! I am a big fan of the Gustavian look and can’t wait to try it with some grays! It was wonderful to spend (just a little) time with you at Haven and I’m looking forward to some retailer workshops on the East coast!
Love your front door & can’t wait to try the white wax!
Wax pucks! I thought they were soaps when I saw them at the top of your post. Wax makes a lot more sense. 🙂
holy smokes. that white wax looks awesome. can’t wait to test that sucker out. your door looks great, like a cohesive welcoming to your home!
Just when I thought you’re done with every nook and cranny of your house, there’s still the front door….love the idea of letting light through! When will that white wax ever come over to this side of the world?
The windows on the door are really lovely! And your little wax pucks are too cute. 🙂
Can’t wait to try the white wax and wax pucks!
Ohhh, your little pucks are so cute! and the front door looks great. I love the little window panes, adds so much character to the door.
Cindy
I would love for you to do a series of close-up photos of finishes with multiple steps and a close up photo with the wax puck in it! Just like the photo you have of the blue finish. Then list what you used for each layer. I think this would help sell your products. And the puck would be a good reference point for color.
I wish you had the white wax a few years ago. I dried brushed over Chelsea gray by Benjamin Moore w a white and made most of my moldings look chalky. It’s. beautiful and I can only imagine how great your product would make moldings look in an older home.
I love your logo on the wax pucks! It’s the simple things in life that make us the happiest!
Awww Marian the white wax is so cool! I am sure it would be my favorite too.
Carolina
Your wax pucks are almost too pretty to use! I would certainly put these on a decorative tray until I’m ready to use.
Your logo is so beautiful. Can you share your talanted designer’s contact info?
I loved spending those two hours with you at Haven, and can’t wait to put your paint and suggestions into practice. I wish I could remember all the products, and in what order, so I’m looking forward to the “supply list” we used at Haven. I want to make sure I order everything that I need!
Love the new door Marian and so glad to see you at Haven…your class was awesome!!
Marian, I love the white wax. It was so much fun to play with at Haven and I also really loved meeting you.
I just ordered some white wax and a wax puck today – along with several colors of Paint! I’m friends with Laura from The Ironstone Nest so I ordered from here 🙂 Can’t wait to try out that white wax 🙂
Love the door! Can you tell us where u got it? What color paint did you use? Thanks . Wax sounds ideal.
I’m so excited to try your white wax (I’ve got some projects in mind right now). I have been searching everywhere for wax in this color, I’ve even mixed my own clear wax with white paint, but haven’t been pleased with the results. I read to try white shoe polish for this effect, but never had the nerve to try it, so again, can’t wait to get my hands on some of your new product!
Holy Moly…..love what that white wax does! It’s great to have different looks with the same paint color! You Rock!!
the door is beautiful! can you provide more details about it? brand, purchase location
Hi Marian,
Can you please tell me the name of this door you installed and where you purchased it from?
Thanks!