Preorder Move Slow & Make Things, and enjoy a collection of thoughtful bonus content created just for you!

home improvement

All Things Home

Laundry Room Makeover | Part 3 | Tools & Tips

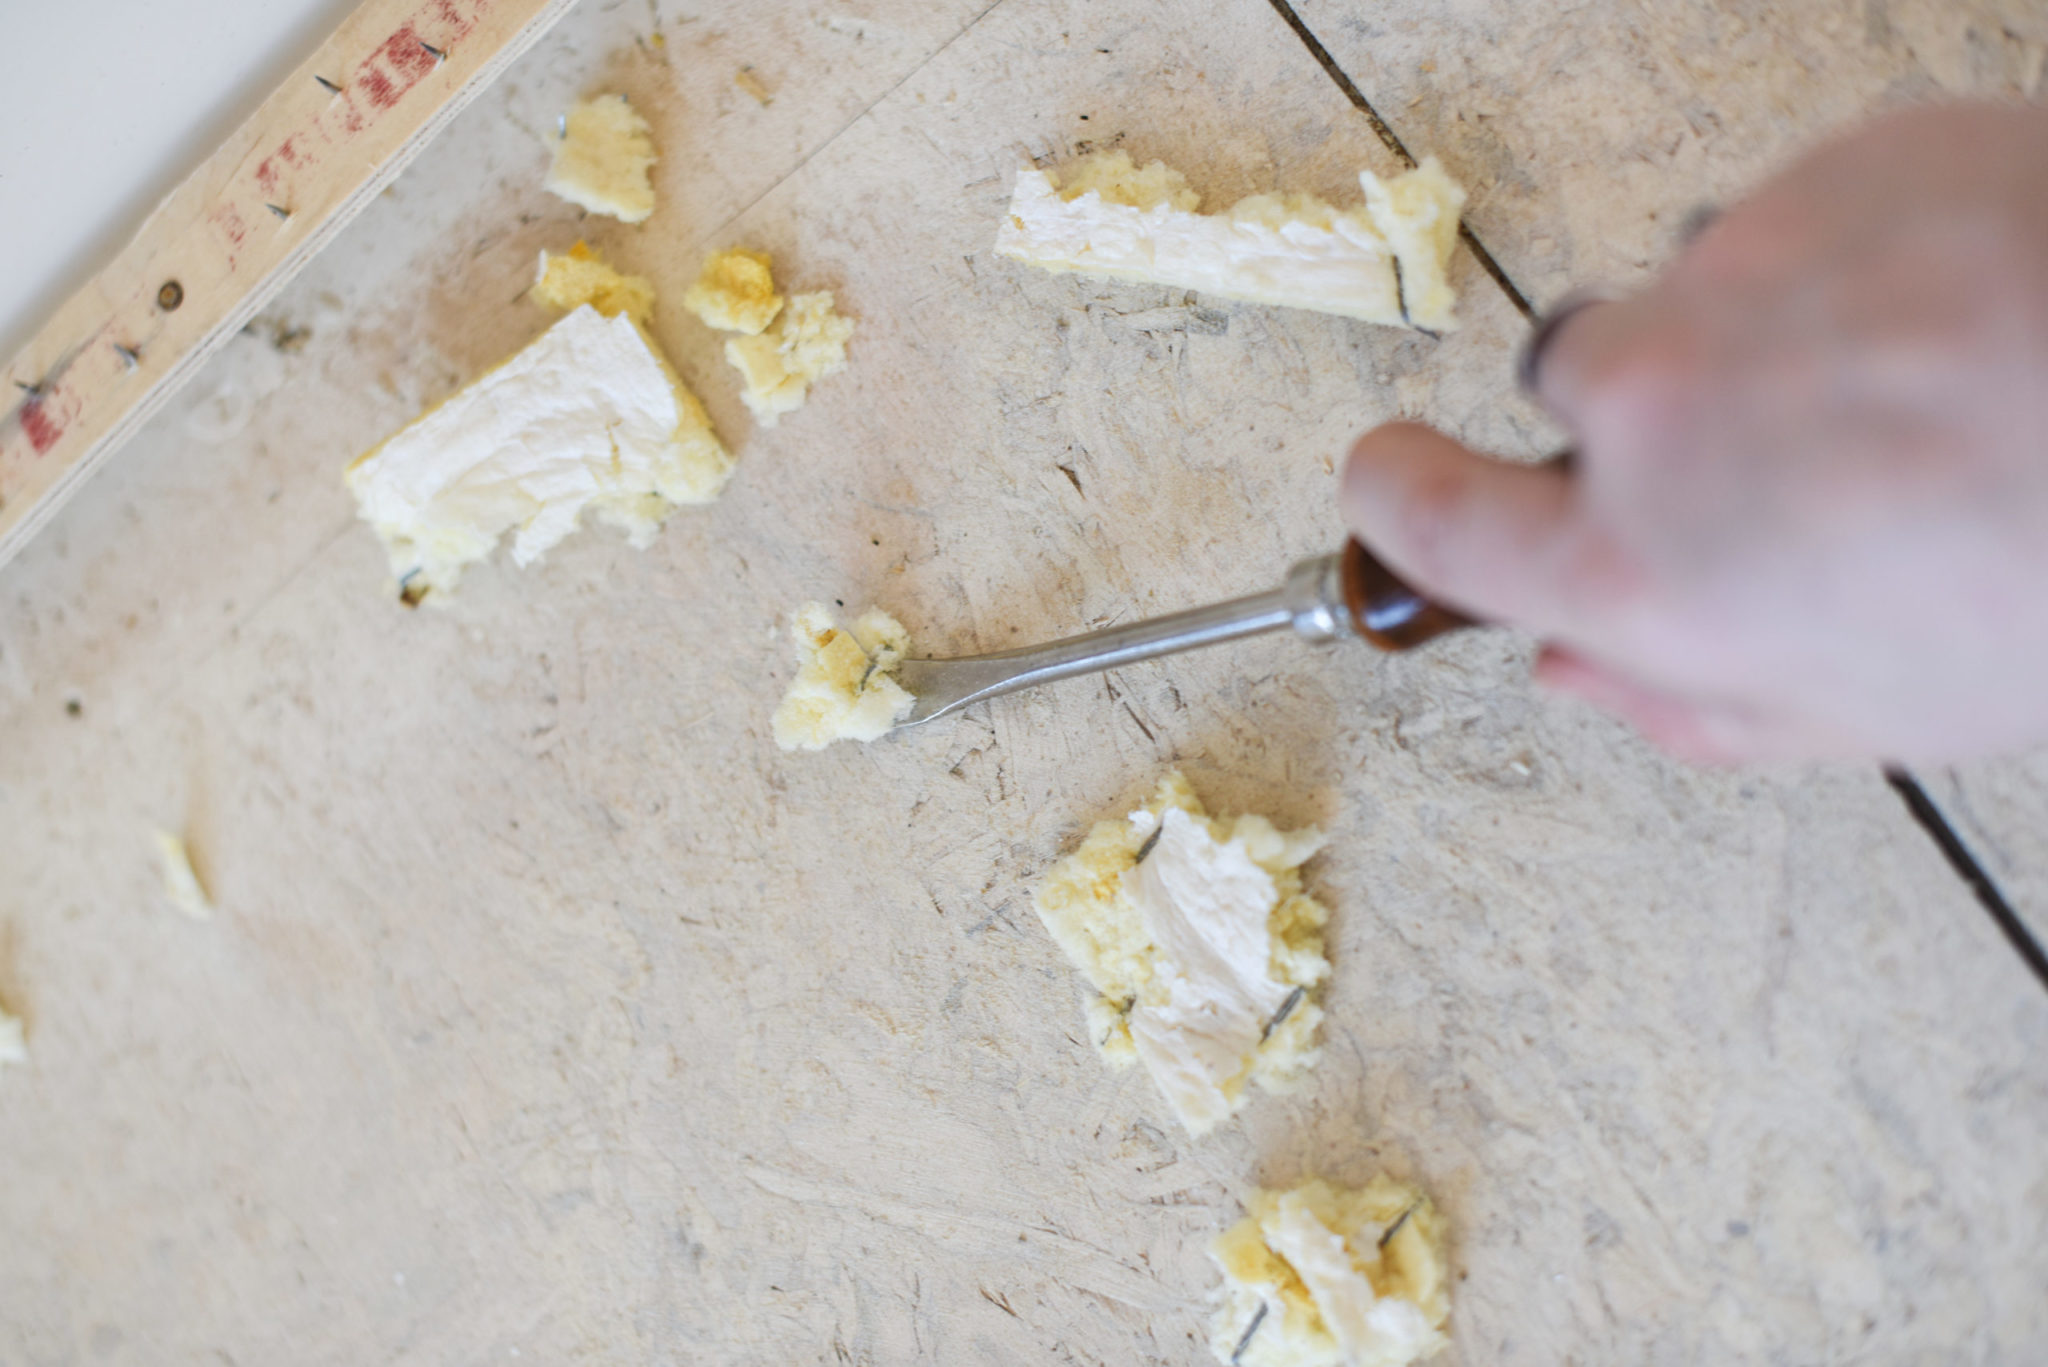
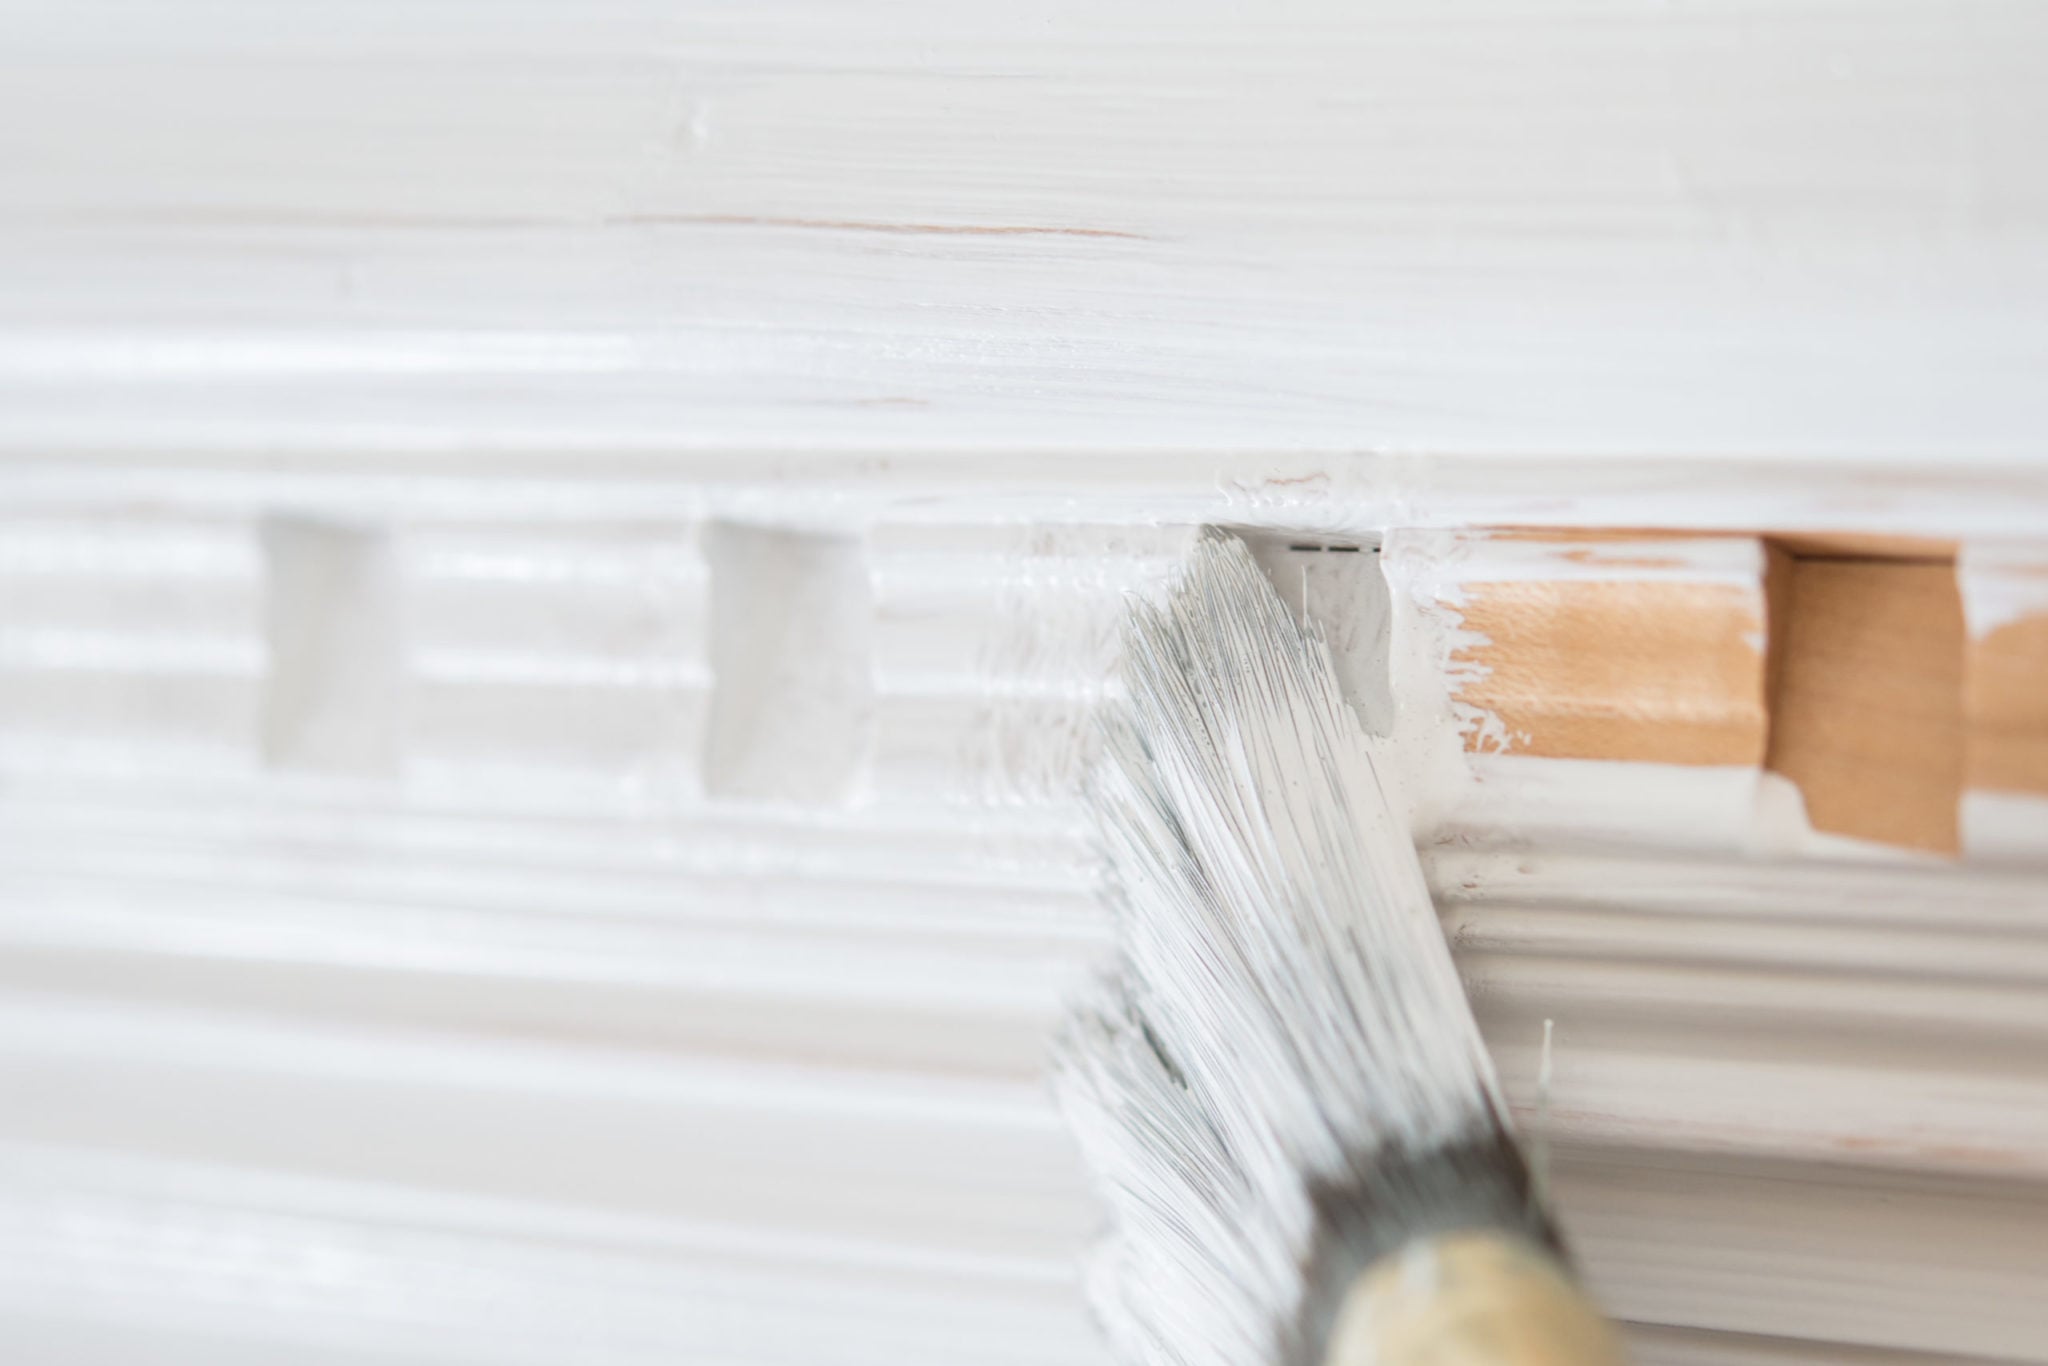
In part one, you saw the inspiration and progress for the laundry room makeover.  In part two, you saw the reveal.  Now, it’s time to get into the nitty gritty details of the tools and products I used. First of all, the kind of bead board I used was a thin, tongue and groove plank bead board from Home Depot.  It’s double-beaded, solid wood bead board by Pine Ridge.  I wasn’t able to find it on the Home Depot website, but I found it in the wood paneling section.  It comes in 8′ lengths and a shorter length for chair-rail height installation. As you can see, it has grooves on the back, which makes it easier to do “rip cuts” (cuts lengthwise), when needed.  Because it’s thin, I found it easy to work with (cut, fit around light switches, etc.) and I was able to sit it right on top

Read More
All Things Home

making an “antique” hook rail

I think one of the hardest areas in a house to keep clean and tidy, aside from the kitchen and bathrooms, is the foyer.  It’s natural to walk in and dump everything that your carrying, kick off your shoes, and then go about your business.  Our foyer, even though it’s two stories, is relatively small as far as square footage on the floor is concerned.  There is just a small space by the door and, of course, a pile of shoes quickly collects there and it gets even more out of control over the winter with all of the wet and salty boots! There also wasn’t a place to hang purses, coats, hats, and Sebastian’s leash, so the doorknobs in the foyer (to my office and the coat closet) were always engaged as hangers for those items.  I’ve been looking around for an antique-style hook rail that would fit next

Read More
All Things Home

milk paint landscape mural

A few weeks ago, I shared my plan to paint a soft landscape mural in my dining room.   The dining room is one of the smallest non-bathroom rooms in the house and it’s square with a large window and two large doorways, making it a little awkward.  I feel like it needs something that is a show-stopper in order to make it a special room and I think a mural can be that show-stopper. When I shared my idea, I also shared my inspiration – Susan Harter Mural Papers.  Every mural that I found on Pinterest and Google image searches seemed to be by her.  I just love the soft colors and traditional style of her murals, so that was the direction I wanted to go. Well, one of her clients alerted her to my post and she reached out to me directly.  We got along like two peas in

Read More
All Things Home

painted studio floor update

I’ve been asked quite a bit for an update on how the painted floors in my studio are holding up, so I thought I would share! Here is a reminder of what the room looked like when we first moved in.  It was perfect for a sunroom, but I wanted a studio more than a sunroom and all of that orangish wood wasn’t going to work. It’s so hard for me to remember the space like that!  It was so dark. The flooring is just deck boards.  We had insulation installed under the floor, but decided to paint the deck boards instead of installing a “proper floor” on top.  We may do that down the road, but since this is a studio for painting, I wasn’t too concerned with upgrading the floor.  It is certainly going to get splattered over the years. The floor has gotten chipped and gouged in

Read More
All Things Home

making way for hardwoods | ripping up carpet

I’m sharing everything in reverse when it comes to the office makeover, but that’s just how it goes sometimes!  I usually write about what is most “at my fingertips” and sharing progress on the room was a lot more fun than talking about ripping out carpet.  But, it’s an important bit that some of you might want to know more about, so I’m circling back to share the details on removing carpet. Here is a before picture of the room, so you can appreciate how far it’s come… …and how it’s looking today… (Yes, I’ll work on the cord situation, but curtains will help a lot with hiding those!) Obviously, the first step is to take out the carpet and padding, which is surprisingly easy, although it does take some muscle!  Just pull up a corner and, in most cases, it comes right up.  Jeff did this before I even

Read More
All Things Home

hang your head in shame, faucet

The kitchen has come a long way since we moved in and, while it looks like a big overhaul, it’s really just involved paint, changing out the lights over the island, and hanging the pot rack.  The one big change we made was converting the electric stove to gas and replacing it with a beefy commercial-style range, which has been on my kitchen wishlist for over 15 years! One thing that’s a pretty easy fix, but we hadn’t changed, was the faucet.  I have seen worse, but this one was pretty sad.  It’s not that it looked terrible, but it was not functional!  Well, water ran out of it, I can say that.  The pull-out sprayer, though, was loose and it flopped around most of the time.  On top of that, the faucet was difficult to swivel.  So, you’d grab the neck to move the faucet from one sink to

Read More
All Things Home

painting cabinets | applying the paint

I know this series is called “painting cabinets”, but painting is just the final and probably the easiest step!  Before you break out the paint, make sure you check out the first two posts in this series… painting cabinets | prep painting cabinets | priming Now, let’s talk about the paint. For the cabinets and trim in my house, I’m using Benjamin Moore’s Advanced paint in the Satin finish. It’s a waterborne paint that behaves a bit more like an oil.  It has a long open time, which means you can brush over it, fix drips, etc. without pulling off the drying paint.  I think the reason I like using this paint so much, though, is that it is thinner, like milk paint.  The advantage to thinner paint is that it’s self-leveling.  Brush and roller marks disappear, making for a beautiful finish.  The disadvantage is it doesn’t cover quite as

Read More
All Things Home

painting cabinets | priming

If you missed part one of my series on painting kitchen cabinets and you’re following this as a tutorial, you need to read that post first.  I know we want to get right to the good stuff, but your painted cabinets will look crappy if they aren’t prepped properly.  Take the time to put in the elbow grease before you crack open a can of paint. You will be happy you heeded my warning. So, now let’s talk about priming.  Using a quality primer is every bit as important as using a quality paint.  It may be ever more important, because it is the foundation that will help the paint grip the pre-finished surface of the cabinets. For this project, I used Zinsser’s Smart Prime.   For the doors (since they were removed), I applied the primer with a paint sprayer.  I have a Graco HVLP Finish Sprayer 7.0 that

Read More

I’m Marian, a painter, writer, and lover of all things creative. From art and antiques to home projects and everyday life, I share my journey in hopes of inspiring you to embrace your own creativity and make beauty in the spaces you live.

next art sale

May 20th, 2026 at 1pm EST

Now Available for Preorder

Move Slow & Make Things

A book about creativity, intention, and making things with care. Sign up to receive updates, preorder details, and exclusive bonus content.

From the Studio

Artful pieces for your home and everyday life.

From original paintings and art prints to Pup Club releases and curated goods, each piece is created or chosen to bring warmth, creativity, and character into your home.

From the Studio and Home

Shop the Feed

A handpicked collection of items styled and shared throughout posts, projects, and social feeds. Every product is thoughtfully chosen to reflect a timeless, collected aesthetic.

Recent Video

Spring Posts

Explore the Shop

Explore the Blog

Categories
error: Content is protected.

Pin It on Pinterest