Preorder Move Slow & Make Things, and enjoy a collection of thoughtful bonus content created just for you!

Before and Afters

All Things Home

french twins reveal

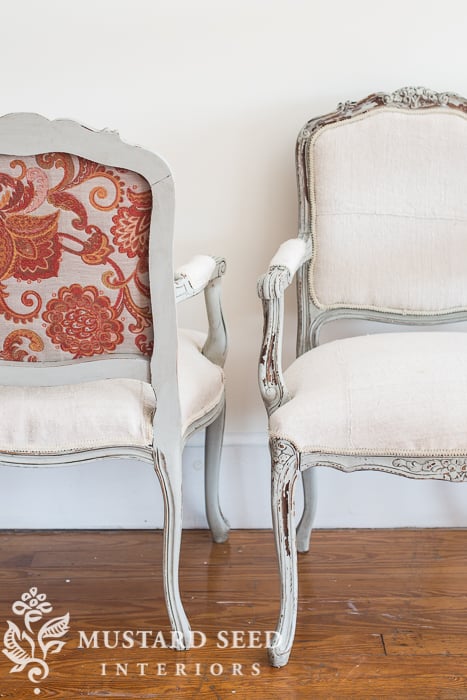
This reveal is a little anticlimactic, since you’ve already seen what one finished chair looks like and they are twins, so the other one looks pretty much the same.  As with all identical twins, though, there are some subtle differences, so I thought it was worth giving them both a proper introduction. I’m going to totally brag on my student Kriste and say that she did 99% of the upholstery work on one of these.  Can you tell which one? She did an amazing job and you can’t tell which one was done by the experienced upholsterer and which one was done by the rookie.  She did the one of the left, if you’re curious. We have a lot of chairs in the hopper to work on for Lucketts, so I’m glad to have her on my team!   Here is how the chairs started.  They weren’t bad at all,

Read More
All Things Home

reupholstering a French chair | part 6 | applying the trim

We are finally at our final installment of this video tutorial series on reupholstering a French style chair.  It’s time to frame out those upholstered panels and cover the staples with some gimp trim. In case you missed the first five parts, or need to reference them, here are the links… Part 1 – stripping the chair Part 2 – painting the frames Part 3 – distressing & waxing the frames Part 4 – selecting & cutting the fabric Part 5 – reupholstering the chair I often get asked what the “trick” is to applying trim.  Honestly, there is no trick.  It’s just hot-glued on!  Really.  At first I thought I might be taking a short cut, but I’ve taken apart dozens and dozens of chairs and settees and almost all of them have been glued.  One or two of them were just tacked into place, but I’ve seen enough

Read More
All Things Home

reupholstering a French chair | part 5 | upholstering the chair

We are finally here…get your staple guns out and let’s start upholstering!!  I know it’s hard to believe that it takes four parts to get to the point when you can actually upholster, but that’s often how DIY projects are – you have to do several steps to get to the fun part (or at least the part when it starts looking like an improvement and not an epic fail.) This episode is the longest, because I wanted to show each step in detail, especially the tricky places.  I know it also helps visual learners to actually see what I’m doing as opposed to just hearing me describe it.  I also wanted to do a bit of hand-holding for people who are brand new to upholstery. I talk about the staple gun I use in the video, but I thought I would link to it here as well.  It’s a

Read More
Before and Afters

paint brush on a stick

I was all set to meet Kriste at the studio this morning, but as I was getting up and about for the day, I realized I really wanted to paint my walls and trim and get the tedious painting project that’s been hanging over my head for years, finished.  When the mood strikes to do something like that, you do it.  So I did. I shared last week about some of the painting on my to-do list… Yesterday, I painted the walls (Gray Owl) and the trim (bright white out of the can) in the hallway through the arch.  It just looks fresher and brighter than it did with the off-white trim and creamy-beige walls. Here the hallway is from the bathroom view before it was painted… …and after. The stairway was the same color and really dingy and scuffed.  You can see I have touched it up over the

Read More
Before and Afters

Furniture Makeovers Galore…

If you like furniture makeovers, you’re going to have an overflowing cup after perusing this post.  This weekend, the Mustard Seed Studio hosted our first BYOF (bring your own furniture) workshop.  This is less instruction than the milk paint 101 workshop and is more about finishing a piece and learning along the way.  We had seven ladies attend, plus Kriste and my mom. The furniture (and their owners) started showing up about 15 minutes before the start of the workshop. Of course, I loved this French-back cane chair, a find from Craig’s List, instantly.  I got a little anxious, though, when Nancy, the owner, said she was going to paint the upholstery as well. The frame painted up really well, as I expected.   Nancy added the Bonding Agent to the paint, so it would adhere to the slick yellow-ish finish. I nervously checked in on her as she was painting the

Read More
Before and Afters

say hello to “mora” | hand painted dresser

It’s now time for me to introduce the final color in the MMSMP European Colour line.  I have to say that it’s been so much fun developing these colors, painting pieces in them and then revealing them here.  It’s been a true creative journey for me. The last color I’m introducing is perhaps one of my favorites.  Say hello to Mora… Mora is a pale blue/gray/green color that can look entirely different depending on what it’s next to.  It was named for the Swedish town of Mora, which is famous for those gorgeous curvy standing clocks.  (I hope to have a “mora clock savings fund” going one of these days.)  Anyway, it’s a soft, beautiful color. Believe it or not, I found TWO empire dressers on Craig’s List a couple of days after Christmas and they were both very well priced.  I have been on an empire streak lately!  I decided

Read More
Before and Afters

painted oak hutch

Over the past few days work days, I’ve been getting the studio ready for our first workshops (happening later this week.)  It’s been good to have an imposed deadline to get things spruced up.  Otherwise, I just work on whatever I’m most interested in and leave other things hanging.  Kriste is always a huge help, but in this case, she was really good at keeping me on track.  I’ll meander around the studio, working on this and that and she’ll say, “Okay, what are the priorities?  Should we get this finished before the workshops?  I’ll work on this while you take care of that.”  It’s so helpful. So, a few weeks ago, I painted the oak hutch that’s behind the shirt counter…  I painted the outside in one coat of Shutter Gray and then got busy with other things, so I never applied a finish.  After living with it that way for a

Read More
All Things Home

say hello to “schloss” | sofa makeover

 This really could be two posts, but I decided to fit it all into one.  The truth is, after a week of hard work, I have a lot of things to share and I’m getting antsy to get them posted! First of all, here is another one of our new European colours in the MMS Milk Paint line…  It’s a rich greige that many of our customers have been requesting and it seemed fitting for the new line of subtle colors.  It’s definitely a chameleon color, as you can see in the collage above.  It looks more beige on the raw wood sample, warm gray on the side table (by Allison of The Golden Sycamore) and a richer gray on the settee frame. For those who don’t know, Schloss means castle in German. This color reminded me of the gray and beige variations in the stonework.  (This is the Marienburg

Read More

I’m Marian, a painter, writer, and lover of all things creative. From art and antiques to home projects and everyday life, I share my journey in hopes of inspiring you to embrace your own creativity and make beauty in the spaces you live.

next art sale

May 20th, 2026 at 1pm EST

Now Available for Preorder

Move Slow & Make Things

A book about creativity, intention, and making things with care. Sign up to receive updates, preorder details, and exclusive bonus content.

From the Studio

Artful pieces for your home and everyday life.

From original paintings and art prints to Pup Club releases and curated goods, each piece is created or chosen to bring warmth, creativity, and character into your home.

From the Studio and Home

Shop the Feed

A handpicked collection of items styled and shared throughout posts, projects, and social feeds. Every product is thoughtfully chosen to reflect a timeless, collected aesthetic.

Recent Video

Spring Posts

Explore the Shop

Explore the Blog

Categories
error: Content is protected.

Pin It on Pinterest