Preorder Move Slow & Make Things, and enjoy a collection of thoughtful bonus content created just for you!

home improvement

Dining Room

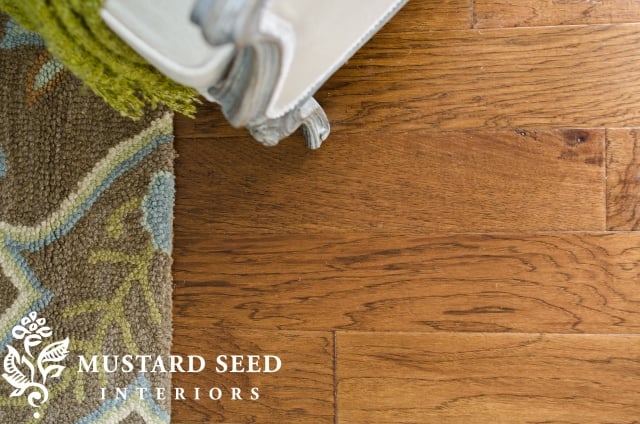
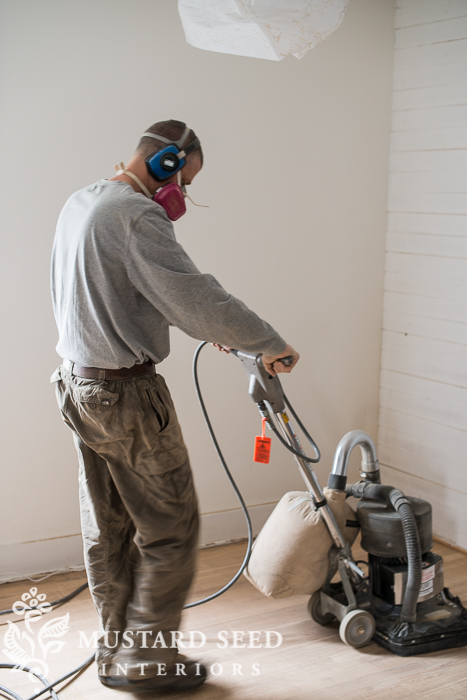
tips for sanding floors

This is my second time refinishing floors and I learned a lot through my errors the first go-around.   Since scooting around on diaper boxes to wipe up excess stain (you can read about those antics HERE), I have learned a lot about finishing wood and have done a lot of reading on sanding and finishing floors specifically.  There are so many ways to approach it…everything from sanding an entire room with a palm sander (yes, some people do that), to spending hours getting each piece of wood back to the way it looked the day it was milled.  Our approach?  We wanted the floors to look nice, but weren’t concerned with perfection.  There are already tack marks from carpeting, large holes from old radiators and gas pipes, gouges, scratches, knots, chips and dents, so I didn’t freak out at sanding marks or inconstancies in the wood.   So, take

Read More
Decorating

time-saving tips for painting a room

I shared the other day that I painted three ceilings and one room in just a few hours…while the boys were at home…in my jammies.  Truth be told, I could’ve painted the living room and the hallway, too, but I was getting a little sick of looking at a roller!  So, several readers asked how I get things done so fast and I thought I would share my tricks. These tips will help you get a room painted faster, but before you plan a painting marathon, remember that I paint a lot!  When you do something a lot, you get better and quicker at it.  So, be patient with yourself if you’re a novice or a once-in-a-while painter. Here are my time-saving tips… 1.) Do as much prep work the day before as you can.  Take down the pictures, remove switch plates, curtain hardware, etc. and fill in the holes

Read More
home improvement

French Style & a fabric wall

I received an e-mail a few months ago, asking if I would contribute to a new magazine, French Style.  Well, that sounds right up my alley!  Yesterday, I found the magazine in Target and snapped it up. First of all, it really is a beautiful magazine.  I loved looking through it and I felt so proud that I was a small part of it and I was very pleased with how my article and photographs turned out.  I always felt like my pictures in print looked yellowish and not as sharp as the other pictures in the magazine.  I felt like these were my best and that’s a great feeling. You can find the magazine on newsstands now. One of the rooms featured in the article is my master bedroom and the fabric wall behind the headboard.  Most people assume it’s wall paper, but it’s actually fabric!  I used an old Army

Read More
home improvement

Installing the tile back splash

I woke up today, ready to get to work on the tile.  I had the tile saw (borrowed from a friend), the tile, the supplies and my dad lined up to help.  The morning was cold, but sunny.  So, I started to get everything set up and it started to sleet.  Okay.  No biggie.  We have to use the saw outside, but I’ll just set up a canopy tent.  By the time I gathered the saw horses and brought the canopy to the deck, it was like a blizzard outside.  Uh-uh.  I am tiling my back splash today and that is that.     My dad and I got a nice cozy setup on the deck and got started.  (Yes, that’s a kiddie pool on the deck that has one big ice cube in it.)  I got about 2/3 of the way through the project and realized I was woefully

Read More
home improvement

Some things about a planked ceiling…

I did the plank ceiling A.) because we had some sloppy drywall and a strange textured ceiling, B.) because I was hired to write a tutorial on how to install a planked ceiling and C.) because I love the look.  I know a lot of you have questions about the installation, but you’ll have to wait for the tutorial to get most of those answered.  I will definitely link to it when it’s live.  I did want to share some things now, though, that I won’t be sharing in the tutorial.  These are some things that are good to know when deciding if a planked ceiling is right for you.     1.) This is the kind of project that looks bad when only the first few rows are done.  All of the imperfections are really obvious.  By imperfections, I mean gaps, boards that are warped, knots in the wood

Read More
home improvement

DSC_6068 (640×424)

You can read part one of laying a floating floor HERE.  It shows how we stripped the carpet and installed the underlayment.  Today, I’m going to talk through how we installed the actual floor.  As I said in part one, we’re not professionals at this, so this isn’t meant to be a comprehensive tutorial, but more of a testimony of our experience.   I was a very good blogger and took lots of pictures as we ripped out the carpet and installed the underlayment and then I got tired and the sun set (so my natural lighting went away) and I just wanted to finish, so this was the last picture I took.  When we lay the floors in the bedroom, I’ll take more. As I said in part one, laying the floor was the easiest part of the project.  Since it is a floating floor, there is no gluing,

Read More
home improvement

laying a floating floor

You can read part one of laying a floating floor HERE.  It shows how we stripped the carpet and installed the underlayment.  Today, I’m going to talk through how we installed the actual floor.  As I said in part one, we’re not professionals at this, so this isn’t meant to be a comprehensive tutorial, but more of a testimony of our experience.   I was a very good blogger and took lots of pictures as we ripped out the carpet and installed the underlayment and then I got tired and the sun set (so my natural lighting went away) and I just wanted to finish, so this was the last picture I took.  When we lay the floors in the bedroom, I’ll take more. As I said in part one, laying the floor was the easiest part of the project.  Since it is a floating floor, there is no gluing,

Read More
Decorating

how to hang a curtain rod | made simple

When I realized I was going to have to hang four curtain rods in the family room, I came up with a solution on how to hang curtain a curtain rod to make sure they are all hung at the same height and the same distance from the window. This process in the past has involved measuring up, measuring out, using a level, repeat. Sometimes it would involve drilling multiple holes when something didn’t work out.  So, I took some time to figure out where I wanted the holes and I made a template.  I used a piece of raw chipboard, but cardboard or stiff card stock would do the job.  I hung my curtains seven inches higher than the top of the window frame and nine inches wider.  Hanging curtains high and wide (when ceiling height and space permit) make the window feel larger and it keeps the drapes from blocking too much of

Read More

I’m Marian, a painter, writer, and lover of all things creative. From art and antiques to home projects and everyday life, I share my journey in hopes of inspiring you to embrace your own creativity and make beauty in the spaces you live.

next art sale

May 20th, 2026 at 1pm EST

Now Available for Preorder

Move Slow & Make Things

A book about creativity, intention, and making things with care. Sign up to receive updates, preorder details, and exclusive bonus content.

From the Studio

Artful pieces for your home and everyday life.

From original paintings and art prints to Pup Club releases and curated goods, each piece is created or chosen to bring warmth, creativity, and character into your home.

From the Studio and Home

Shop the Feed

A handpicked collection of items styled and shared throughout posts, projects, and social feeds. Every product is thoughtfully chosen to reflect a timeless, collected aesthetic.

Recent Video

Spring Posts

Explore the Shop

Explore the Blog

Categories
error: Content is protected.

Pin It on Pinterest